#edit; added screentones
Text


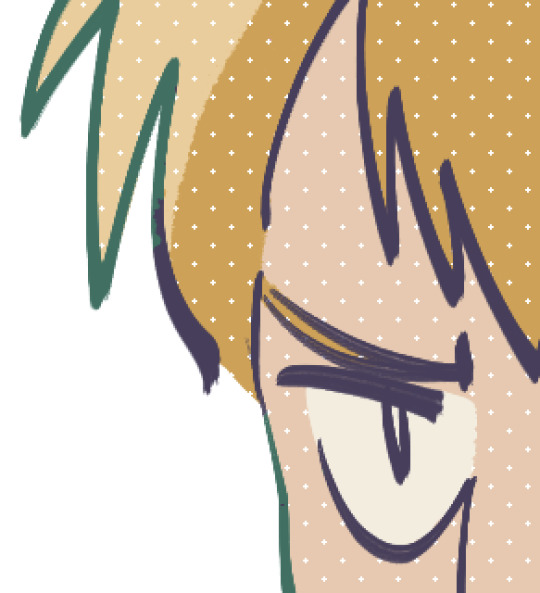
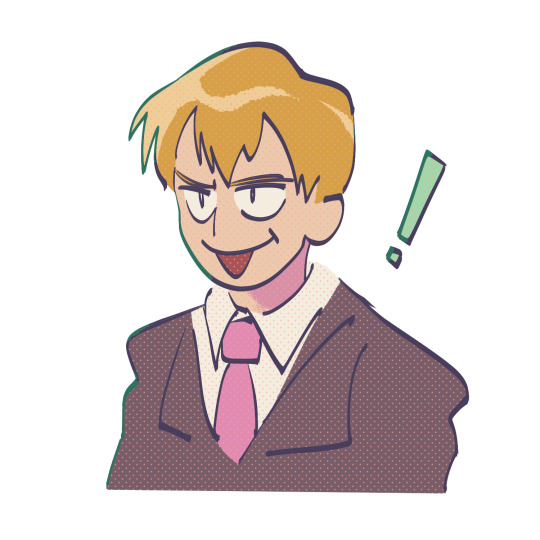
Obsessed w Doffy’s sunglasses/googles combo so I had to draw somethin with it but then wani too <3
#Would he wear the sunglasses under em? His shades are such a weird shape I dont think itd be possible! Hrmmm….#He woudlnt take em off around just anyone tho ofc ofc hehe#Dofladile#Dofuwani#donquixote doflamingo#Sir crocodile#One piece#Also obsessed w the idea of them being childhood friends somehow….. so thats kind what this is too. Meeting after years… its so cute T_T#Eye strain#Maybe!? These colors are kinda fucked sorry lol#Digital#procreate#fanart#my art#edit; added screentones
3K notes
·
View notes
Note
hello! i'm not sure if you remember me, a while ago i asked about digital art and if it's possible to do on an ipad or something similar. i was really grateful for your response and i got an ipad over christmas! i didn't realize how expensive the pencils were though and was only able to get one recently. now that i have all of that, i download the first art program i saw (ibispaint x, i don't know how good that is) and feel super overwhelmed by everything, all the tools and brushes and i have no idea where to begin. i know this is a super broad topic, but i don't know if you have any advice for a beginner hoping to become a digital artist? or know of any resources? thank you so much in advance and no worries if this topic is too broad to really get into properly!
Oh hey!! Congrats on getting an iPad! And yeah, shopping for the pens is a big pain in the butt, but I'm glad you finally got it all setup!
So most of the advice I'm gonna give you is very basic, starter advice that can apply to virtually any digital art software, as the vast majority of them are built with the exact same base tools, they just vary in their intended purposes which means they may differ in more advanced settings and what they offer beyond the basics (ex. Photoshop has more colors than Clip Studio because it's built for editing high quality photos whereas Clip Studio is meant to emulate comic art, but Clip Studio offers more in the way of comic-creating tools such as specialized rulers, 3D material support, built-in screentoning, etc. and all of the software available will tend to have different brush engines, meaning it doesn't always 'feel' the same to draw in one software as it does in another).
Your bestest friends:
Layers! This is the biggest pro to going digital, because now you can work with layers! So anything you draw on each layer is preserved and can't touch or affect whatever's on the other ones :3 You can find the layers tab in Ibis Paint X in the bottom right, don't be afraid to make a bunch of them and mess around with what you can do. Play around with the different blending mode settings (in Ibis Paint it's the menu that's labelled 'Normal' in the layers popup) especially Multiply, Color Dodge, and Overlay, as those three are the most commonly used to make coloring more efficient and give your art some extra pop.
Lasso/marquee/magic wand tools! These are basic selection tools that allow you to select an area within the layer you're working on, so that whatever you paint won't travel outside of that area. The Lasso is a free draw tool, the marquee tool is typically 4 sides by default (so squares/rectangles) and the magic wand detects and selects a closed area with one click! (just note that by default it's only on the layer you're on, so if you use it on a layer that has nothing, it will typically select the entire canvas).
Alpha locking! This is a simple button setting you can click to 'lock' the layer you're working on, which basically means that whatever you've drawn on that layer, anything you add can't travel outside of that drawing. So if you want to quickly shade something without going outside the lines, alpha locking is your solution!
Clipping groups/layers! This is a bit more advanced but is basically an even better version of alpha locking that you can use in conjunction with it. Clipping layers are basically additional layers that , when you click the 'clipping group' button, 'attaches' that new layer to the layer that's below it. It performs the same function as the alpha lock by preventing whatever you draw on that layer from travelling outside of it, HOWEVER it comes with the added benefit that it's on an entirely different layer, meaning you can erase and mess with whatever's on that new layer as much as you like and it won't hurt the base layer. It kinda follows the same logic as animation cels !
Masking! Y'know when you're doing a traditional painting, and you put down tape to cover the area so you can paint over it and later remove the tape and everything underneath is untouched? That's basically what masking is! Once you put down a layer mask, using the erase tool on it will 'erase' whatever the mask is applied to, and using the brush will make it magically return! This may sound silly at first, but I find masking is especially helpful if you want to erase something on the layer you're working on without it disappearing forever! It's also really helpful for comic work because you can mask whatever's outside of the panels and voila, nothing you draw will travel outside of those panels!
Stabilization! I don't know how extensive Ibis Paint X is with offering stabilization tools, but many digital art software comes with it and it's a LIFE SAVER for new digital artists adjusting to the feel of digital art. It essentially 'slows down' the output of the ink on the canvas which helps a lot with getting cleaner lines in fewer tries. It's not quite as big of a deal when drawing on iPads because obviously you have more control by default by drawing directly on the screen, but it can still be really helpful when you need to pace your hand ahead of the actual drawing tool to pull cleaner lines!
That's pretty much all I can think of for now! But here are some other commonly asked questions:
1.) There are so many brushes to choose from, which one do I use?
The round brush is small but mighty. Virtually anything can be painted with it, it's simple, but malleable, especially when you start messing around with the hardness and opacity settings. Don't get too lost in the sauce with the brushes that are available to you, it can be very easy to get overwhelmed by all the options and variety. Some artists still work purely with just round brushes, some artists have custom brushes they like to use to speed up their drawing process or achieve certain textures. Play around with them, but don't get too stressed about which one you use because there's no wrong answer, the right brush to use is the one that gets the job done ! <3
2.) What canvas size should I use?
It depends on a variety of factors such as whether or not you're planning to print, where you're going to be posting it, etc. By default I like to work on 8.5 x 11 inch canvases (standard printer paper size) at 350 dpi, which if you want to make that canvas in Ibis Paint X, means you just have to make a canvas with a pixel ratio of 2975 x 3850 pixels! Just note that the lower you go in either pixel count or dpi, the lower the resolution, so it's typically encouraged you work at a minimum of 300 dpi (but you usually don't have to go any higher than 600) to ensure you don't wind up with any blurry low res JPG's/PNG's.
3.) Should I export my final drawing as JPG or PNG?
This is usually just up to personal preference, but like the canvas size, it depends on what you're using the image for. You can always export as both, the biggest difference between them is that PNG is lossless meaning you won't experience image compression like you will with JPG, BUT you're also going to have much larger image sizes. JPG is often fine for any standard posting, PNG is typically recommended if you want to have a drawing with a transparent background for printing (as JPG can't do transparent backgrounds) or if you just want to have a really high res image file for sharing outside of social media sites (as social media sites like FB/IG/etc. will typically compress the hell out of your images anyways)
Here are some other super helpful resources as well if you need some visual and/or audio guides:
Sinix Design - How to Learn Digital Painting (Beginners)
Marc Brunet - The Beginner's Guide to Digital Art
Skynix Art - 50 Digital Art Tips in 5 Minutes
One thing I also like to do is watch speedpaints of digital artists as it can really help pull back the curtain on what they're doing (or at least, it can help you see what they start with which can help you better picture the process of turning a blank canvas into a finished work of art!) And though I don't do it as often, if there's an artist whose work I REALLY like, I'll try and find their actual work files (many bigger artists sell them on their crowdfunding sites/Gumroad/etc.) so that I can actually break the drawings apart layer by layer for the purpose of analysis. Of course, all that is something that you'll grasp better over time as you learn the tools and learn to recognize what artists are doing in their own workflow, so don't worry if you don't glean a whole lot of info from the "big guys" right away, you should always be referencing artists who are higher along the skill ceiling from you but not too high that they're using techniques and tools that are outside of your realm of understanding.
Other than that, just try to have fun, don't stress too much about it, and save often!!! Part of creating art is learning to be at peace with the process, so don't stress too much if it takes you a while to get adjusted to the layouts and tools - at the end of the day, digital art is another medium entirely, so it's not uncommon at all for traditional artists to need a lot of practice to 'switch' to digital, because they both utilize different tools and techniques. Be patient with yourself, always be on the hunt for new resources and guides and references, and don't be afraid to experiment and make mistakes (the best part about digital art? Mistakes don't cost you any paint or materials!)
Good luck!! And congrats again! 🥰
57 notes
·
View notes
Text
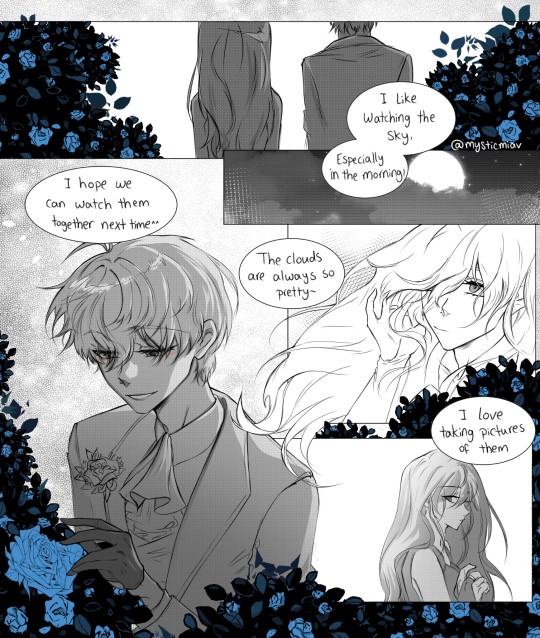
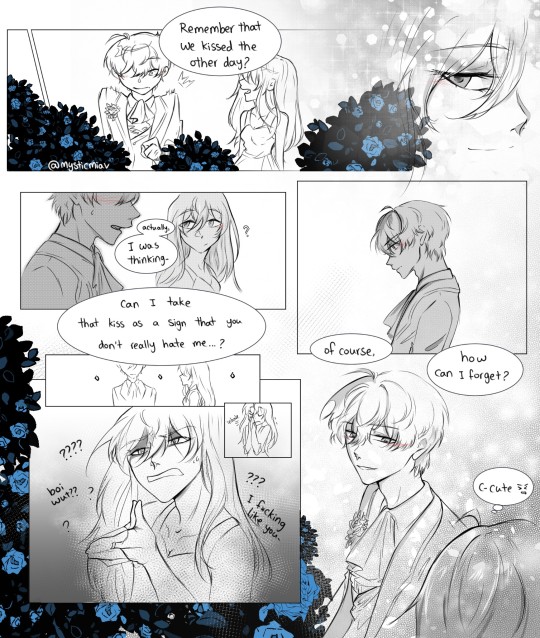
Melody of Blue Roses~💠🍃
Having a mystic messenger brainrot and just wanted to try my hand at manga screentones and boi it's so hard omg
Couldn't resist adding some colours while editing the effect so we have a bit of blue and red now~
This is based off a convo in a chatroom with Ray after a certain kiss takes place >_0
#ray #mysticmessenger #manga #fanart #mysmes #mm #saeran
254 notes
·
View notes
Text
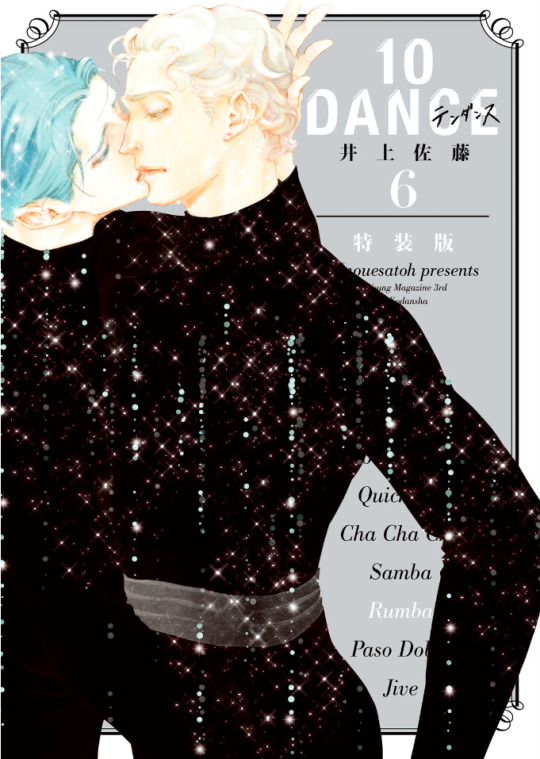
10 Dance Vol. 7 Special Edition overview
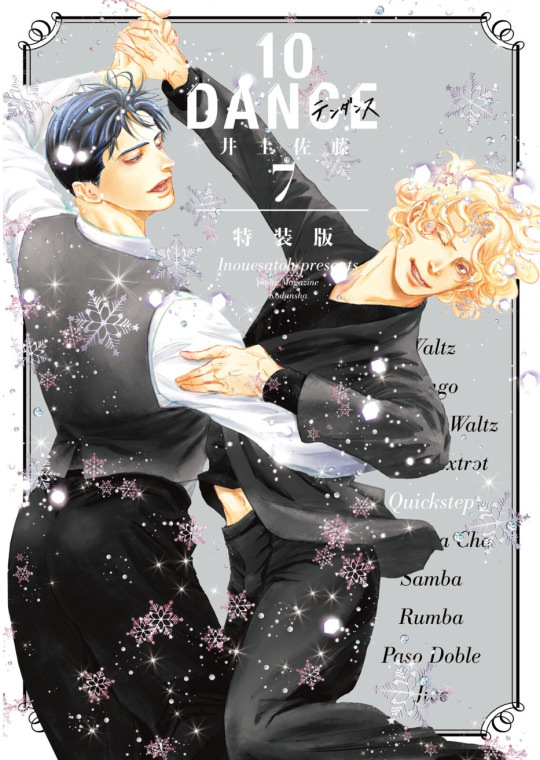
Volume 7 of 10 Dance released in Japan on January 19th, 2023. As with each volume since 4, there are both regular and special editions available. As I did with volume 6 in 2021, below I'll share an overview of the volume as a whole, plus information on the special edition exclusive content, which for this volume includes a booklet and a calendar.
In volume 6, I noticed quite a few changes in the visual content compared to how they had initially been printed in the magazine, such as many cases of additional screentone or background details being added. This time around, though, the changes seemed much more minimal. Here are a few that I found:
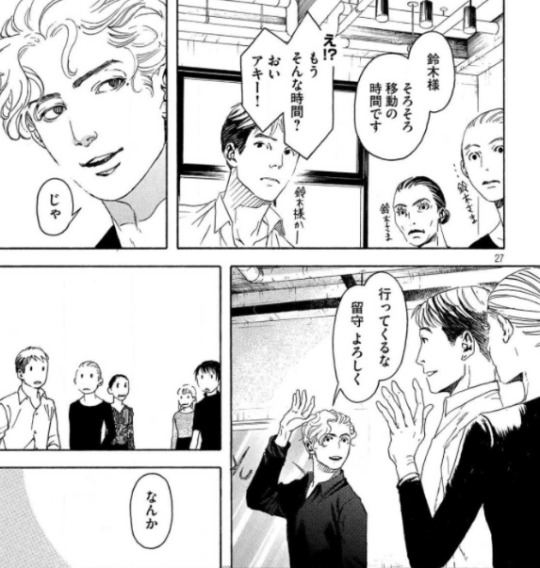
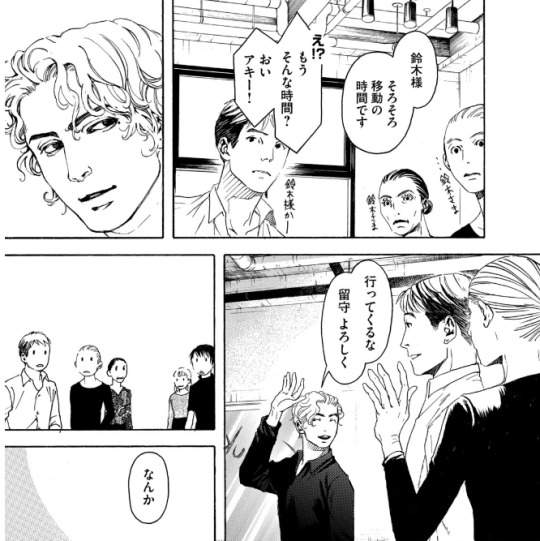
Added nail polish for Fusako and changes to Suzuki's screentone in 35:

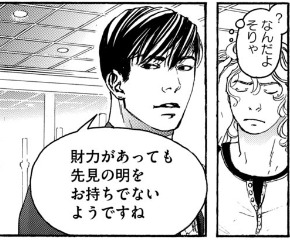
Added screentone to Shun's eyes in 36:

Suzuki's face redrawn in 35:


Sugiki's face redrawn in 37:


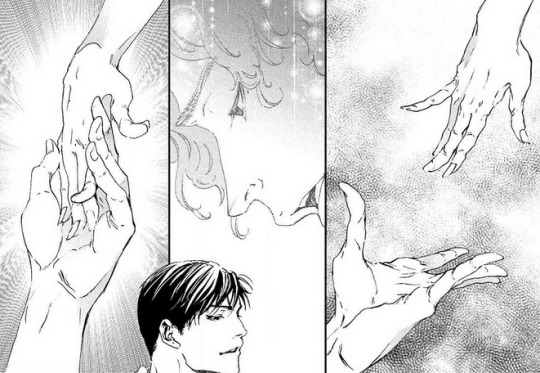
The only visual changes I spotted in the last two chapters of the volume were a couple of additions to the very last scene, with small panels showing Suzuki's feet starting to run and Sugiki's hand reaching out being added. Dialogue-wise, there was a minor consistency correction where Norman flashing back to a line Suzuki had said in an earlier chapter was originally slightly different and was changed to being the same in both instances (basically the difference of saying "those" versus "these"). There was also a slight addition to Suzuki's line on the last page of 38, with the part where he was saying he may have been able to accept things had a bit put in about "like Sugiki wanted"; it was mentioned at the Real 10 Dance event that this line carried the implication that this even meant he would have allowed Sugiki to be the top in their relationship if he'd thought things would work out, so maybe that part was added to make that aspect clearer.
I would guess these last couple of chapters stayed almost the same because they were published online on Inouesatoh's own schedule rather than being rushed to meet a strict magazine publication deadline. Even though I did see a couple of possible errors that I thought might be fixed, they stayed the same in the volume:
Suzuki's speech bubble here looks more vertically shaped (used for when characters are speaking Japanese), but the text is oriented horizontally (used for foreign languages). I assume he should have been using Japanese here, but if it were meant to be English, there should have been hearts added.

Another case where Suzuki would presumably be speaking Japanese, but his bubbles indicate otherwise (one possible explanation I can offer is maybe he's randomly muttering in Spanish to himself, which explains the lack of hearts, but most likely was not intended).
One interesting thing to note is that the volume ends at 39 part 5, and does not include part 6, which will now be at the start of volume 8 (which is given a vague release date of sometime in 2024. The last two volume prediction dates have been wrong, with vol 6 predicted for 2020 and 7 predicted for 2022, but hopefully this time the date will hold). An interesting choice to leave off at quite a cliffhanger!
The volume includes notes at the end for each chapter as usual, which give the specific song title origins for each (this time around, only 37 was altered from the original, with Lullaby of Neverland being from Lullaby of Birdland), along with explanations and insights into each chapter. Though some are more about tangents related to the chapter (36's mostly talks about the liquors Suzuki and Norman are drinking), below I'll share a couple of the more plot-related ones that I found interesting.
On chapter 38, she knew that the Suzuki and Norman plot would be controversial, and there were a lot of discussions with her team. She wondered if readers would be able to sympathize with this frankly written portrayal of two men who both felt they were in hopeless situations. Their sex scene was originally a bit longer, but she intentionally chose to cut it down (I'm quite thankful for that, though also morbidly curious to see what she'd originally planned. I also found out at the event that it wasn't her personally but her editor who didn't think the audience could handle seeing a longer scene of them.)
The notes for 39 say that this chapter is the start of a major turning point in the story, and from chapter 40 onward things will progress noticeably. From the breakup at the end of vol 5 and the painful times that followed for the two Shinyas, as the author she also felt physically and mentally drained, like she was going through tough times right along with them. She wonders if the readers felt the same pain, but says that starting from chapter 40 they'll be taking their first step toward happiness (though also says that every chapter in the story is building to their future happiness step-by-step).
The cover flap comic this time involves Fusako (with Aki helping, though not nearly as into it) planning to mess with the Shinyas by testing their Japanese skills...but only after they've had a whole lot to drink. Suzuki just starts happily chugging things down since Fusako is treating them, while Sugiki is a bit suspicious and wonders what she's plotting (but still starts drinking regardless). Then while completely wasted, the Shinyas confidently (and wrongly) write down the words she asks for. Aki also makes a funny comment about the deep darkness she sees in Fusako's eyes while she enjoys watching these men struggle.

Special Edition Booklet
The special edition booklet cover features the two Shinyas posed together on a bed with very little clothing on (none at all for Suzuki!). I'd like to share it here, but also would like to avoid getting flagged with a mature content label, so here's a snippet that will hopefully be safe enough:

The booklet is divided into sections called "heats".
Heat 1 is a newly drawn bonus comic called A Spoonful of Sugar, which takes place in the few weeks of time that passed between chapters 22 and 23. Somehow, in between regional events and training and everything else, the four training partners miraculously get their schedules to line up in a way that allows them to all take a little break together. They're visiting Fukuoka, and while the ladies and Kei go out to eat ramen, the two Shinyas head off to receive treatment from Dr. Itsuki, a famous chiropractor/osteopath (and character from Inouesatoh's earlier work Endorphin Machine). They've heard that his touch can make anyone relax in an instant, and he can heal and restore any body.
The two enter the clinic and Itsuki asks them to please change their clothes and wait (Suzuki's first impression is that he looks like a total quack). Clinic staff member/Itsuki's lover Togawa (who's now dyed his hair since the earlier story) hands them clothes to change into. When Sugiki is about to head behind the curtain to get treated, Togawa hands him a call bell. He explains that if at some point during the treatment he feels overcome with lust and feels like he's going to something problematic, or if he feels like he's questioning himself as a human being, then he can ring that bell and Itsuki will reset everything. Suzuki hears this while he's still getting changed and thinks it sounds suspicious, but Sugiki heads in to see the doctor anyway, where he's asked to lie face down on the treatment bed.
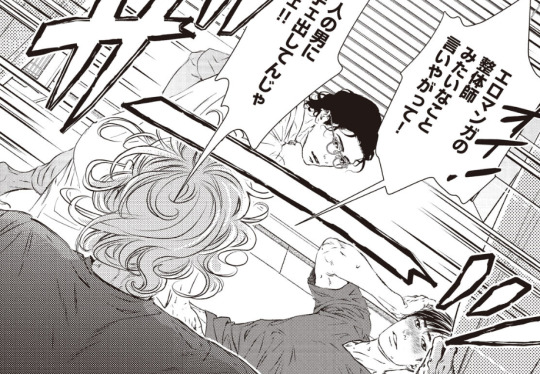
Suzuki waits anxiously, looking toward the treatment room while Togawa gives him moxibustion treatment. He can hear Sugiki's strained voice and heavy breathing coming from behind the curtain, as Itsuki tells him he can be as loud as he likes. Suzuki is convinced something fishy must be going on in there, since he's never heard Sugiki make sounds like that, but Togawa insists that it happens to everyone. They hear the bell go off, and inside Itsuki tells a heavily panting Sugiki that his lower half seems quite tense, and asks him to roll onto his back so he can help him relax. Sugiki has an erection, and Itsuki begins pulling Sugiki's pants down, saying that he'll hit his reset button. Suzuki bursts in and yells at him for talking like a sexy chiropractor from a porno manga, and says to keep his hands off his man.
Sugiki, happily blushing, says that Suzuki is welcome to finish him off with his mouth, but Suzuki isn't listening and insists that the two of them switch places. He tells the "porno manga chiropractor" to bring it on, as Sugiki repeats from outside the treatment room that Suzuki could use his mouth on him (Sugiki instead ends up getting moxibustion from Togawa). Meanwhile, Suzuki continuously rings the bell and lets out lustful screams while receiving his own treatment from Itsuki.
Later that night, the two Shinyas are in a hotel room, where Suzuki cheerfully comments that he's never felt so relaxed before. Sugiki is a bit miffed as he recalls that when he gave Suzuki permission to blow him he didn't do it. Suzuki says there was no way he could suck him off for the first time just because he "permitted" it, especially with other people there watching. Sugiki asks what was up with all the indecent moaning he heard while Suzuki was getting treated, but Suzuki counters that Sugiki was making faces he's never seen before, too. Suzuki says that doctor really pisses him off (even though his technique is incredible). Both are silent and angry looking for a moment, then Sugiki asks if the doctor performed any anal stimulation on him. Suzuki is confused, and Sugiki states that previously when he fingered him a bit (in vol 4's bonus chapter Taboo) Suzuki ejaculated very quickly, so he wonders if he's sensitive back there. Suzuki asks in return if a woman has ever teased him like that, and talks about how it can feel really good if they can stimulate the prostate. Sugiki says that he's never felt that before, as he wonders if it's possible for a woman's fingers to reach that far. He takes his pants off, climbs up on Suzuki's lap, and says he could try teasing his prostate.

Suzuki wonders how things ended up like this, but also isn't going to let this opportunity pass, so he puts a condom on his fingers and slips them into Sugiki. Sugiki complains that it hurts a bit, but Suzuki says he needs to use a little force to get in there, then will relax once he gets inside. He feels around and finds Sugiki's prostate gland, saying that his is quite deep inside and positioned towards the front, so that's why a woman's fingers wouldn't have been enough to reach it. He thinks to himself that this means the missionary position would probably be most effective for Sugiki. As Sugiki asks questions about the positioning of his prostate with a completely blank expression, Suzuki gets upset and pushes him back, insisting that getting fingered by his boyfriend should have him making the same expressions he was showing to that sexy chiropractor. Sugiki says that since this is his first time he doesn't quite know what to make of this sensation. Suzuki gets heart eyes at the word "first", thinking of how he's the only one who's gotten to enter into this unexplored territory for Sugiki. Then devil horns and a crown appear on Sugiki's head as he declares that he's erect now (using the English word "erect", seeming to continue the joke that he doesn't remember the Japanese word), and once again invites Suzuki to take care of him using his hands or mouth.
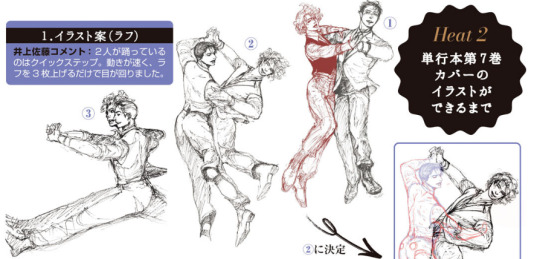
Heat 2 is a single page that shows the process Inoue had for selecting and refining volume 7's cover. This includes three different concept sketches of the Shinyas doing the quickstep, then showing how the chosen cover looked while redrawing and inking, then an initial coloring with notes for alterations, then the finished version.
Heat 3 includes 6 pages of the pro dancers who consult for the series talking about scenes and panels that stand out for them, and giving insight into what makes them so striking.
Finally, there's a gorgeous colored version of chapter 35's cover, along with a thank you message from Inouesatoh. She explains that she chose to feature Itsuki from Endorphin Machine because back when she was taking requests for sexy story ideas (in September 2020, several months before volume 6) there had been several people who asked for Itsuki to return. She says that she enjoyed drawing him again after so long, and hopes that readers enjoyed the story, as well.

Calendar

The other bonus item is a calendar that goes from April 2023 to March 2024, with 13 illustrations total (one being a view at the full year). Rather than listing any holidays, the days we can anticipate celebrating looking at this calendar are the birthdays of many of the characters! I'll list below the ones that are revealed, as well as their blood types (and, in the case of some of them, their full names for the first time).
February 14th: Ernest William Sergio Bernstein, O
February 20th: Aki Tajima, A
March 30th: Nino Zolche, B
May 6th: Gabriel Wilkins, A
May 12th: Fusako Yagami, O
June 4th: Daisuke Mukai, B
July 10th: Satoru Urashima, O
July 28th: Maximilian Edward Muldaur, AB
August 19th: Alberto Boemer, O
October 15th: Takashi Saichi, AB
November 22nd: Shinya Sugiki, B
November 23rd: Shinya Suzuki, O
December 26th: Norman Edward Owen, O
If you are interested in purchasing this volume, information is available from Kodansha about shops that sell the regular or special editions (sites in Japanese). As the special edition is a limited print and not all retailers have physical stock at this time, it may be a good idea to look at the digital (電子版) options and try one of those; you still get the booklet and even the calendar in the digital edition (though would be difficult to use it unless you print it out). Note that not all of the sites will take a foreign credit card directly, but may offer options such as Paypal that will allow you to get around that (I personally made my purchase on Bookwalker and had no issues).
I'm thankful that we once again received a beautiful looking volume with really great extras. Looking forward to what Inouesatoh's plans are for the future releases of this series!
26 notes
·
View notes
Note
oh god the difference between coustas and coustas is huge... had not realized that. also im officially requesting you keep going on about this because i find it very interesting
(in response to my post about the evolution of the wha art style and how i don't like it)
First of all - accidentally buried this ask, my bad!
I forgot since then what I wanted to continue to rant about exactly but something you might find interesting are the differences between the magazine publication WHA, and the manga volumes. This isn't about the art style itself but the presentation. Talk about Coustas VS Coustas...

Some fans haven't noticed but there's been more and more instances of these diffferences! let's spot a few...As for what they are, it's typically one of the three
Added detail
Added content
More significant edits
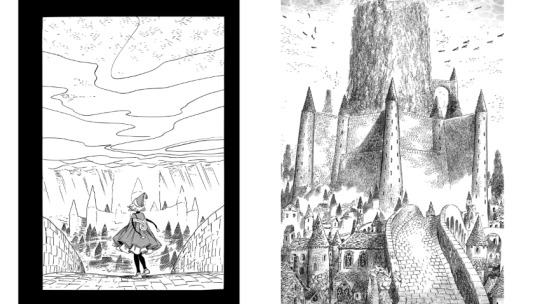
Added detail represents most of these and I've started noticing it at the chapter where Coco first enters the Great Hall. We are greeted with a full page reveal of the fortress...Who was significantly changed for the volume release. (left mag, right vol)(ch30)
This is the most extreme example as most edits just add detail instead of changing the full page. It's often panel margins or added screentones. (ch46. Notice the added hatching on the rose)

(ch45)

More content: in chapter 49, the magazine release was short of an entire flashback scene where Lulucy and her friend go testify in court against their master.
This is the only part of WHA that I know of that outright added pages in the volume! It might have been an idea the author had to cut out to meet schedule and took the time to detail after.
More significant edits are like the pictures I posted of the Hall, or Coustas' face in response to Tartah. These I truly have no clue about. Why change whole pannels? Maybe we'll get more examples to study in the future or an explanation from Shirahama herself!
68 notes
·
View notes
Text
anyways heres my love note to art program ibispaint as someone whos used the app for around two years on their phone:
FREE. most of the tools/features are free (if anything requiring one ad per 18 hrs) which is so nice bc there are
so many featuressss!! (copy tool, liquify, noise, lasso + transform tools, clip + alpha lock, screentones, resizable reference window, etc etc.) theres so much!!!!!
importable/editable brushes!! ok the brush selection by itself is huge but honestly. i dont like most of them. and the brush editor isnt the best (you cant upload your own shapes), but it's a good amount of customization imo. and its not like all the default brushes are unusable!! (im personally partial to the pencil tools and fade watercolor opaque 2)
autosave <3 godd saves me every time. as long as youre not using a bunch of layers on really big canvases, and not like. deleting your app w/o saving. you most likely won't lose your progress!!
timelapses!! unfortunately you can't rewind/fastforward on them but yknow. still sm!
has the work time!!
STABILIZATION. literally my favorite part. it helps my lines so much esp since im mostly working w my finger
if you have ios you can literally airdrop your files and retain all the information (like the timelapse and creation/update date)
if you're on mobile and hate cluttered screens: ibis has a really simple and clean format compared to other programs on mobile like medibang or csp
like there are ofc, big cons to ittt (the ad at the top of the canvas unless you pay, some features are paywalled like the gradation map, not having a dark mode, etc) but woooo! its such a good free option <33. you just can't get it on pc (if you are looking for free programs on pc though i heavily rec krita! its the other program i use!! i do think it works best if you have a tablet but like. i used to use a laptop trackpad on it so kjhgf do you yknow?
#i was gonna do a program recc post bc i#1. really like talking abt art programs i think theyre fun#2. have that vv common experience of not having an ipad to draw on/not willing to spend money on programs#3. like testing out a bunch of art programs#but i feel like no one's gonna need that yknow. the informations already out there n its easy to find#so heres this instead <3#art stuff tag#personal
9 notes
·
View notes
Photo

Inktober 2019!! I only had the motivation to draw yoosung L O L
※Please do not delete caption or repost without my permission and a source※
#yoosung kim#mystic messenger#mysme#mine#i still love yoosung TwT#idc if mysme is dead i love He#drew this traditionally then added screentones and edits digitally!
746 notes
·
View notes
Text

The “Secret” Clues: Opening Acts
There are entirely too many clues to point out all of them, but here are the earliest signs of the correct pairs being drawn to each other (and away from their original partner) 👀
THIS IS TECHNICALLY AN EXTRA SO FEEL FREE TO IGNORE THIS TAG IF YOU’RE NOT ABOUT IT! 😝 @crescenttooru @marissaraeblr @roselleviennesstuff @ash-levi @ntimacy @tmtau @ysatrap @nerdynstoned @fucktheworlddude @tabipleats @afire24 @internethome @kac-chowsballs @putmeinyourdeathnote @xfangirl-trashx @kodzuklutz @madsumu @kotarousproperty @blkladyelle @itoshibaby @ego-risu-ad-sidera @renhold-nightspear @lilith412426 @kiyokisses @wrongbitch24 @moonlitevibes @honeypirate @rain-kissed-clouds @luckyminhibou @rinnieroulette @scentedflower @kunimisgf (and also dedicated to @ixwrites bc I see you rereading and I love you)
[ return to masterlist ]
The two main themes of Aperture were “love isn’t found, it’s built” and “what matters is the relationship you want to make work.” The Cardinal Set’s rebuttal to this is “maybe you were meant to meet but not to be” and “sometimes you simply can’t hit all the right points w someone”
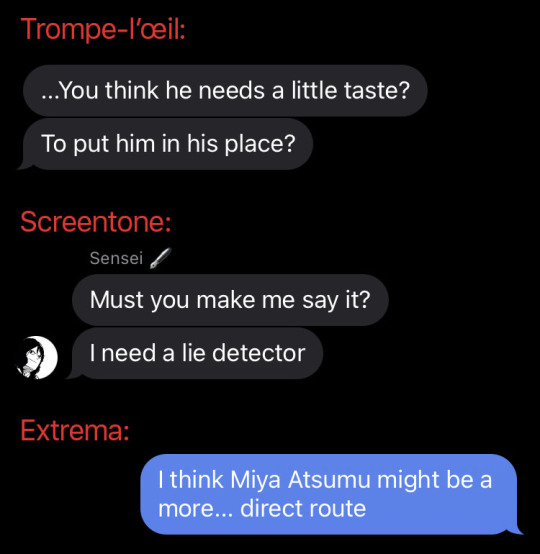
The three original pairs met with the entirely wrong mindset and circumstances. Trompe-l’œil Y/N trying to “put Semi in his place,” Screentone Y/N having to “get a read on” Akaashi, and Extrema Y/N seeing Atsumu as a “more direct route” to her own goals
The context of their meetings and the Y/N’s abilities were designed to bring out the setters’ worst traits and/or exploit their good ones: Semi’s pride, Akaashi’s attachment, Atsumu’s ambition
All three Y/Ns also already have a “better choice” of a partner, who can hit two out of the three points in the cardinal set w them: Terushima is intimate and companionate, Udai is (or at least was) romantic and intimate, and Sakusa is companionate and romantic—any viable partner would have to surpass them
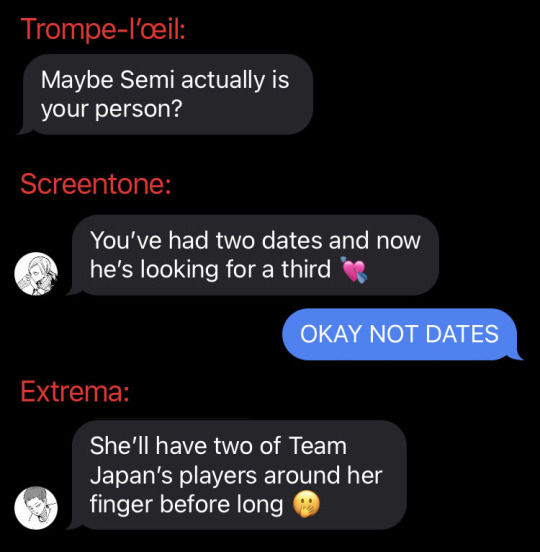
Right away the interest is fully one-sided. None of the Y/Ns see their original partners as actual partners until their friends literally tell them to, and even then it’s still shaky. Which brings us to one of the biggest clues of the series:

“Striking twice” relates to a different clue later but the key here is that love is built but it can’t be forced. And this includes me as the author forcing them together the way they were.
Now onto the specifics:

Trompe-l’œil Y/N and Semi: Semi right away is fighting a losing battle, and his was the most heart-wrenching for me. His insincerity and lack of trust in Aperture stems from seeing himself as second-best, so thinking like that, (a) the “someone’s heart” that he’s going to end up breaking is his own, and (b) Y/N forcing him to take a hard look at himself will only make him edit out even more of his heart and soul 💔 Seeing all the early analyses of this pair lowkey broke my heart, she’s actually v toxic for him
…And I’m sorry but there’s no way the love of Semi’s life would hate his love songs, that should’ve been a giveaway 😶

Screentone Y/N and Akaashi: On Akaashi’s side, the second-year slump is actually meant to refer to him. Udai’s struggles getting Meteor Attack off the ground parallel Akaashi getting easily attached, trying to course-correct his previous mistakes, and having to “force lightning to strike twice,” right up until the manga is soft-canceled. Y/N then echoes the “striking twice” sentiment applied to koi no yokan, and that’s your biggest hint
…Also Screentone Y/N’s mess of a Twitter head cannot at all be helped by Akaashi’s mess of an actual head, that was another giveaway 😝
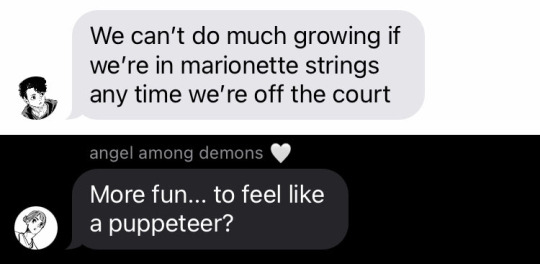
Extrema Y/N and Atsumu: Sakusa tells the MSBY crew that they can’t grow while they’re on marionette strings, and Mika calls Extrema Y/N a puppeteer… simple as that. This one is the most straightforward—a lot of the more flat-out stated hints come from Extrema
Now onto the real pairs:
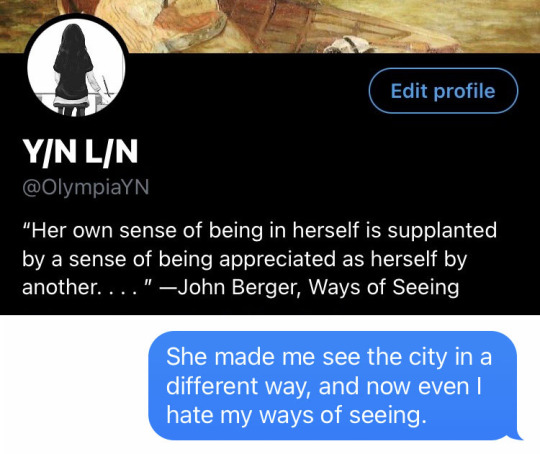
Trompe-l’œil Y/N and Akaashi: Ways of Seeing. A trick of the eye, trompe-l’œil—that’s all it is. While he hates the idea of it initially, Akaashi’s ways of seeing were changed by Aperture Y/N. And besides literally calling out Ways of Seeing by John Berger, this Y/N is looking for a different way of being seen. She has lost track of herself and needs to be rediscovered through being appreciated as herself by another. This particular quote from Berger is also about the female gaze vs. male gaze, relating back to Olympia
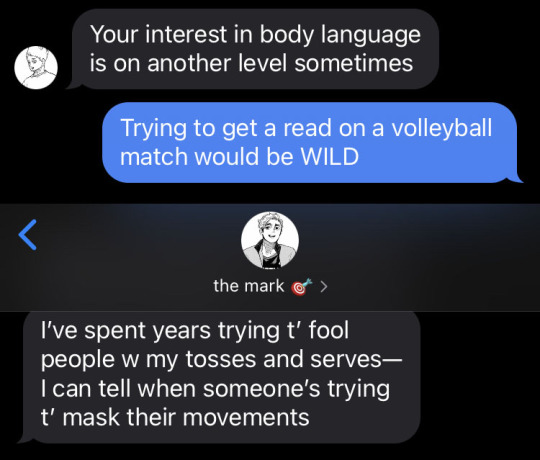
Screentone Y/N and Atsumu: Besides her newfound love of volleyball that can only be satisfied by 💕 a professional, 💕 her ambition right from the beginning is to see a real setter in action. I even tried to tone down her obsession / desire for a “real match” just bc Atsumu is the only “real setter” out of the three. He also shows his resistance to body language tells VERY early on—I was worried this one was too obvious 🤭
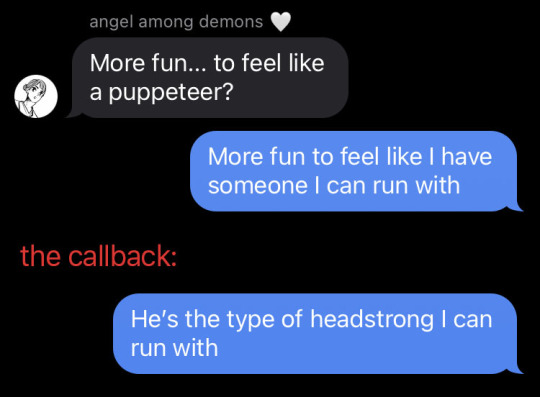
Extrema Y/N and Semi: Right after Mika calls her a puppeteer, Extrema Y/N corrects her and says she just wants someone to run with. This was around the time I was encouraging a look back at Aperture, bc Aperture Y/N’s one-sentence description of Semi was “The type of headstrong I can run with.” If anyone had found the combination of “puppeteer” + “someone to run with” specifically, you would’ve been able to predict the endings only a quarter of the way through the story 😝
22 notes
·
View notes
Link
4 notes
·
View notes
Text
NPR: rendering manga panels in MMD
Welcome to the manga stylization tutorial! Here, I’ll cover the core of this style for MMD as well as its usage.
Content index:
Introduction
Effects
Manga Resources
Rendering panels
Building Your Manga Panel
Credits
1. INTRODUCTION
It isn’t any news that many people underestimate MMD’s capabilities and power, not to mention how unexplored the stylization areas are. 3D rendering isn’t only about realistic and semi-realistic rendering! MMD excels in stylization because we have many cel shaders, coloring and screen texture effects in our arsenal.
With manga it isn’t any different! We all know all mangakas have their own styles and this applies to us, MMDers. I’ve been experimenting with manga stylization on and off, trying to find good effect combos.
“But ryuu, why would I want to make manga in MMD??”, you may be asking yourself. And I’ll present you some advantages of doing so:
A viable option for anyone who doesn’t know how to draw, like me.
Unique visuals! A 3D manga looks beautiful, creative and unique when done right.
Think out of the box and add fan panels of your favorite characters to your portfolio!
Since MMD models are very anime-ish, it’s so much easier to make “legit” manga looking panels! Comic theory and post editing are required, but worry not! I’ve got you covered.
2. EFFECTS
If I was to compile some of my manga renders, I’d have an extensive list of effects that produced pleasing results. I’m going to write down every one I can remember, render by render.

Effects: a-toon, excellent shadow, ik hatching, o color halftone 3p, o monochrome, croquis 改, draw style, o selfoverlay, o dlaa, o disalphablend.
Effects: a-toon, drawstyle, o monochrome, o dlaa, o disalphablend, o selfoverlay, croquis 改.
Effects: ray toon, lightbloom, ik hatching, croquis 改, powerdof, o selfoverlay, o color halftone 3p, postrimlighting, o monochrome, snapshot, fxaa.

Effects: ray toon, o monochrome, croquis 改, ik hatching, powerdof, o color halftone 3p, ik watercolor, o selfoverlay, snapshot, o tonemap の改変, fxaa.
Effects: ray toon, croquis 改, o selfoverlay, ik hatching, fxaa, snapshot.

Effects: adult shader, croquis 改 v2, o monochrome, ik hatching, hg sao, o bleach-bypass, o full alphatest, air, clarity.
Did you see how diverse the manga style can be? It’s all up to you how you want to stylize them! The key is making it black and white and adding a toon shader or a very basic one like adult. Don’t forget the contrast work!
If going for Raycast, make sure to use no more than two additional lights. I always add a directional light and go for it. NPR isn’t heavily shaded. If you stack lights, you’ll have double toon shading, which can look weird. I only advise using Raycast if you know what you’re doing.
I know there’s a manga shader, but I personally dislike it, since it doesn’t work well with the models I use.
Also, if you decide to use any bloom effect, make it subtle! We don’t want to give away every 3D aspect of your render, do we?
3. MANGA RESOURCES
So let’s say you want to make a manga panel in MMD. First of all, we need to look for the right resources, so you can post edit the renders for a reliable look. If you aren’t familiar with post editing, I recommend training it and looking at 2D manga scans for reference. The software I use is GIMP, a free and open source one that does as much as Photoshop. It opens Photoshop brushes, so no need to worry about that.
I’ll link a handful of manga resources for post editing!
Speech Bubbles
Manga speech bubbles 3 (image pack)
Manga speech bubbles 3 (GIMP brush)
Tails for speech bubbles
Shaky speech bubbles (GIMP brush)
Shaky speech bubbles (image pack)
Action bubbles (GIMP brush)
Screentones
Digital screentones
Action lines
Action lines 2
Various resources
Shoujo effects (brush)
Tone stars and shapes redux
Manga onomatopee for MMD
Regular fonts
Fonts for editing manga
Manga Temple
Augie
Felt
Wild Words
SFX fonts
Another
Big Fish Ensemble
TrashHand
Vnhltfap
4. RENDERING PANELS
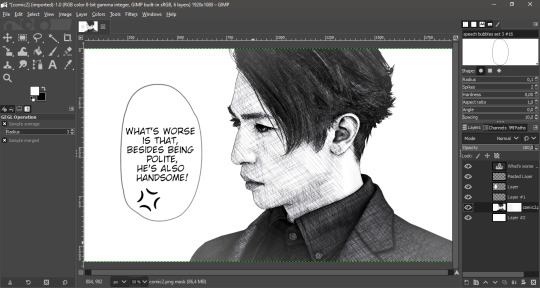
First, we need to find our resolution! A panel can be 1700 x 2400, then you can copy the premade layouts for positioning. In my “oh, you handsome devil!” panel, I rendered each image as the default 1920 x 1080 and resized them later to 1570 x 883 for good margins. Thin or thick margins, that’s up to you.
Important note: when composing your scene, think of the final layout as well! Use the rule of thirds and try picturing where the speech bubbles and other effects will go. Planning is vital when making comics and it’s ok to render many tries before the final image.
Pick a nice set of effects that match your manga style and render! Dynamic shots look awesome with higher perspective. Textures like color halftone greatly improve your manga aesthetic and contrast, but careful not to exaggerate.
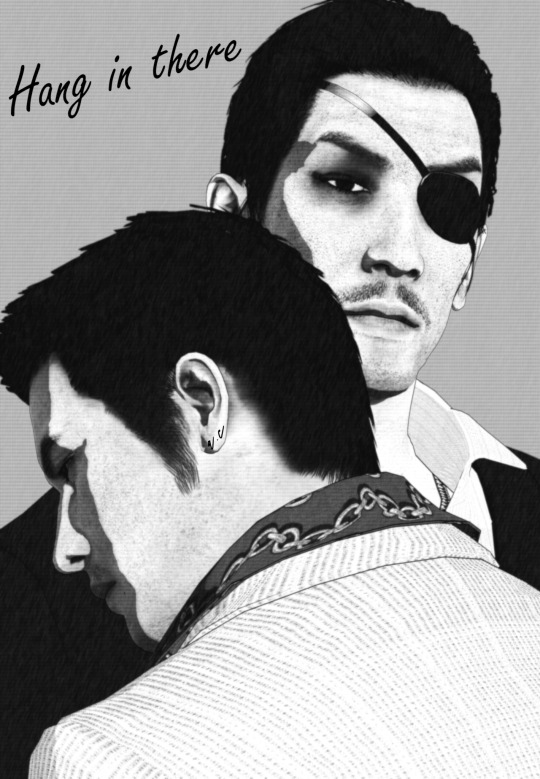
For “oh, you handsome devil!” I rendered two panels: one with Soma, one with Yagami and Kaito. The hatching there gives some shading to the models, since I loaded Adult Shader and Hg SAO to emphasize Yagami’s face.


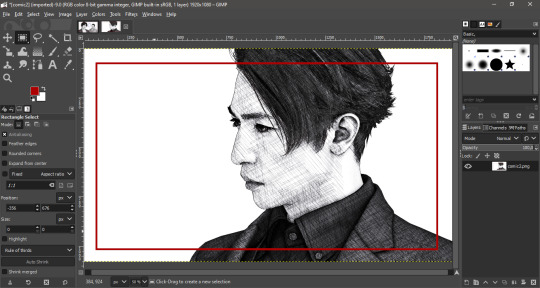
5. BUILDING YOUR MANGA PANEL
Now in GIMP, I loaded the finished image to show you the rule of thirds guides. Notice how Yagami’s face is the focus, while Kaito isn’t left behind, as he’s close to the intersections. Also, there’s enough empty space to place a speech bubble between them.

Now let’s talk about basic comic theory! When placing text and speech bubbles, the general rule is to avoid doing so near the edges. This makes reading much easier and focused, unless a difficult reading is intentional. Always imagine an area that limits the edges of your focus so you know where to write your text.

Since you use MMD, I believe you’ve already read at least a manga panel in your entire life. A manga is read from right to left, not from left to right like in western comics.


This panel was built using the basic theory. In order to make the text readable, I made it white, added black edges and a slight blur under it. Contrast between text and image is very important in manga for straight forward reading, especially if your render is complex and has many distracting elements.
Back to Yagami and Kaito, the blue marks show where I placed the speech in the finished panel. Can you see how they fit within the red area? The reader can easily pay attention to both models and text. Kaito’s “sure” was placed near the red edges for it was a minor commentary rather than speech.

All you have to do now is to place the speech bubble and write within it! Make sure your text is big enough for the readers. This guide about manga editing has useful tips and free resources for everyone. Feel free to add any other manga effect you’d like, go wild!
Now with Soma, these are the guidelines. It was rendered with enough empty space for background customization. I later added shoujo effects and faded edges with vignette to show he’s in Yagami’s imagination. A daydream if you will! Everything is subtle as not to stray from our objective.

Now when putting everything together in a panel, fit the image within the margins and add a somewhat thick black edge on each. You can position them first, press CTRL + A to select the entire layer and stroke the selection. The line width I used was 15 px.
6. CREDITS
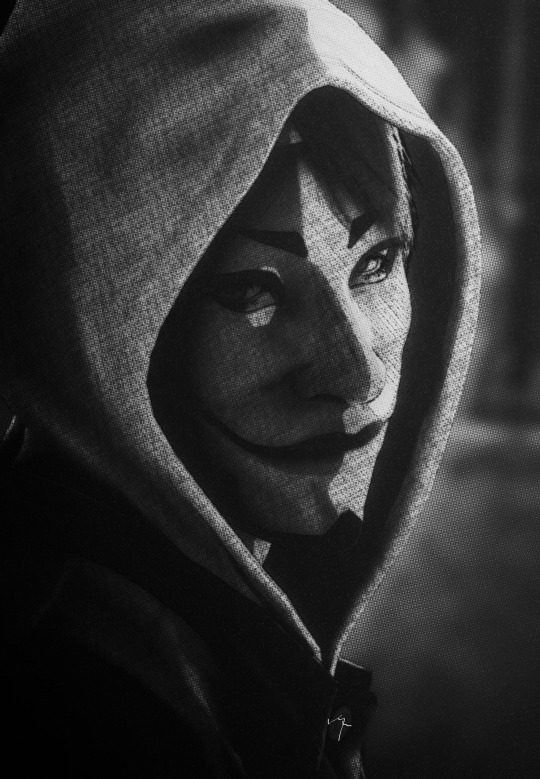
Valentine’s Day Kiryu
Yakuza 0 Kiryu and Majima
Masked Sugiura
Urban Yagami
Half-dragon Kiryu
Oh, you handsome devil!
2 notes
·
View notes
Photo
Péguy
Hi everybody!
In this news feed I've told you a few times about a project I named Péguy. Well today I dedicate a complete article to it to present it to you in more detail but also to show you the new features I brought to it at the beginning of the winter.
It's not the priority project (right now it's TGCM Comics) but I needed a little break during the holidays and coding vector graphics and 3D, it's a little bit addictive like playing Lego. x)
Let's go then!
Péguy, what is it?
It is a procedural generator of patterns, graphic effects and other scenery elements to speed up the realization of my drawings for my comics.
Basically, I enter a few parameters, click on a button, and my program generates a more or less regular pattern on its own.
The first lines of code were written in 2018 and since then, this tool has been constantly being enriched and helping me to work faster on my comics. :D
This project is coded with web languages and generates vector patterns in the format SVG.
In the beginning it was just small scripts that had to be modified directly to change the parameters and run individually for each effect or pattern generated.

Not very user friendly, is it? :’D
This first version was used on episode 2 of Dragon Cat's Galaxia 1/2.
During 2019 I thought it would be more practical to gather all these scripts and integrate them into a graphical user interface. Since then, I have enriched it with new features and improved its ergonomics to save more and more time.
Here is a small sample of what can be produced with Péguy currently.
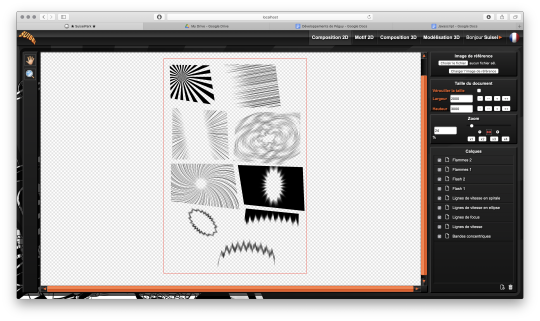
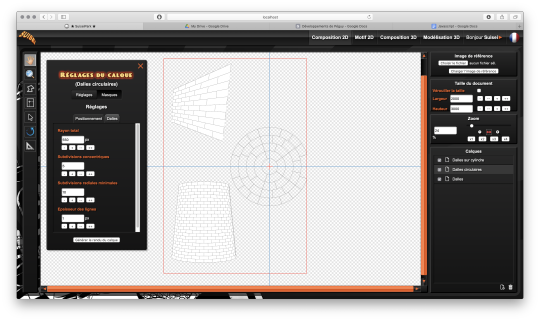
Graphic effects typical of manga and paving patterns in perspective or plated on a cylinder.
All these features were used on Tarkhan and Gonakin.
I plan to put this project online, but in order for it to be usable by others than me, I still need to fix a few ergonomy issues.
For the moment, to recover the rendering, you still need to open the browser debugger to find and copy the HTML node that contains the SVG.
In other words, if you don't know the HTML structure by heart, it's not practical. 8D
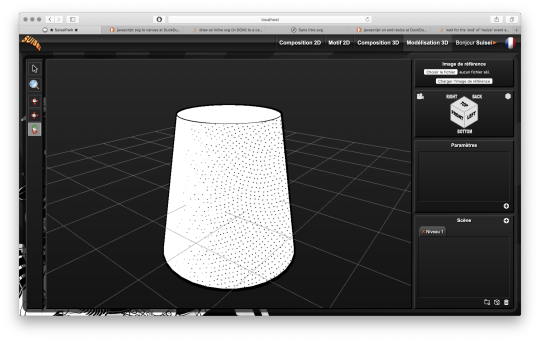
A 3D module!
The 2020 new feature is that I started to develop a 3D module. The idea, in the long run, is to be able to build my comics backgrounds, at least the architectural ones, a bit like a Lego game.
The interface is really still under development, a lot of things are missing, but basically it's going to look like this.
So there's no shortage of 3D modeling software, so why am I making one? What will make my project stand out from what already exists?
First, navigation around the 3D workspace. In short, the movement of the camera.
Well please excuse me, but in Blender, Maya, Sketchup and so on, to be able to frame according to your needs to get a rendering, it's just a pain in the ass!
So I developed a more practical camera navigation system depending on whether you're modeling an object or placing it in a map. The idea is to take inspiration from the map editors in some video games (like Age of Empire).
Secondly, I'm going to propose a small innovation. When you model an object in Blender or something else, it will always be frozen and if you use it several times in an environment, it will be strictly identical, which can be annoying for natural elements like trees for example. So I'm going to develop a kind of little "language" that will allow you to make an object customizable and incorporate random components. Thus, with a single definition for an object, we can obtain an infinite number of different instances, with random components for natural elements and variables such as the number of floors for a building.
I had already developed a prototype of this system many years ago in Java. I'm going to retrieve it and adapt it to Javascript.
And the last peculiarity will be in the proposed renderings. As this is about making comics (especially in black and white in my case), I'm developing a whole bunch of shaders to generate lines, screentones and other hatchings automatically with the possibility to use patterns generated in the existing vector module as textures! :D

What are shaders?
Well, you see the principle of post-production in cinema... (Editing, sound effects, various corrections, special effects... all the finishing work after shooting).
Well, shaders are about the same principle. They are programs executed just after the calculation of the 3D object as it should appear on the screen. They allow to apply patches, deformations, effects, filters... As long as you are not angry with mathematics, there is only limit to your imagination! :D
When you enter a normal vector in a color variable it gives funny results.

Yes! It's really with math that you can display all these things. :D
Now when you hear a smart guy tell you that math is cold, it's the opposite of art or incompatible with art... it's dry toast, you'll know it's ignorance. :p
Math is a tool just like the brush, it's all about knowing how to use it. :D
In truth, science is a representation of reality in the same way as a painting. It is photorealistic in the extreme, but it is nevertheless a human construction used to describe nature.
It remains an approximation of reality that continually escapes us and we try to fill in the margins of error over the centuries... Just like classical painting did.
But by the way? Aren't there a bunch of great painters who were also scholars, mathematicians? Yes, there are! Look hard! The Renaissance is a good breeding ground. x)
In short! Physics is a painting and mathematics is its brush.
But in painting, we don't only do figurative, not only realism, we can give free rein to our inspiration to stylize our representation of the world or make it abstract.
Well like any good brush, mathematics allows the same fantasy! All it takes is a little imagination for that.
Hold, for example, the good old Spirograph from our childhood. We all had one! Well, these pretty patterns drawn with the bic are nothing else than... parametric equations that make the students of math sup/math spe suffer. 8D
Even the famous celtic triskelion can be calculated from parametric equations.
Well, I digress, I digress, but let's get back to our shaders.
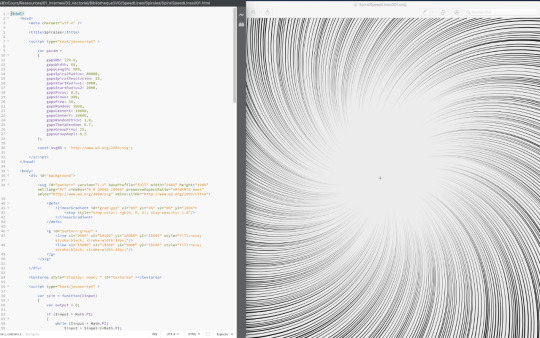
Since you can do whatever you want with it, I worked on typical manga effects. By combining the Dot Pattern Generator and the Hatch Generator but display them in white, I was able to simulate a scratch effect on screentones.

In the traditional way it is an effect that is obtained by scraping the screentones with a cutter or similar tool.
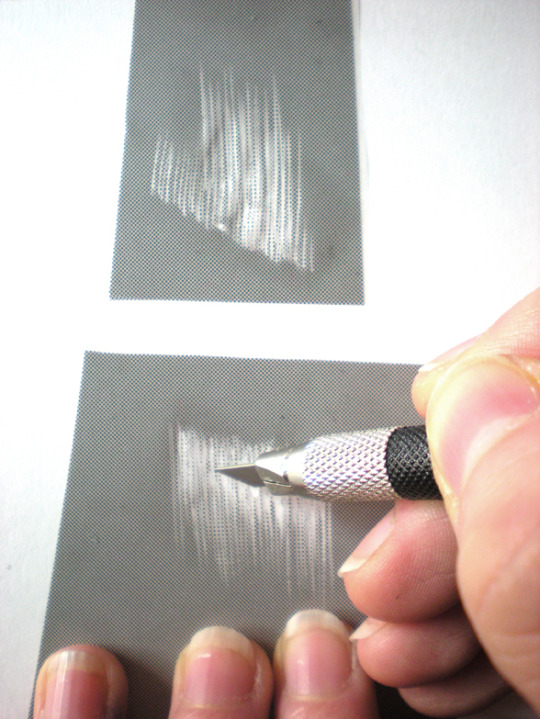
Péguy will therefore be able to calculate this effect alone on a 3D scene. :D
I extended this effect with a pattern calculated in SVG. So it will be possible to use the patterns created in the vector module as textures for the 3D module!
Here it is a pattern of dots distributed according to a Fibonacci spiral (I used a similar pattern in Tarkhan to make stone textures, very commonly used in manga).
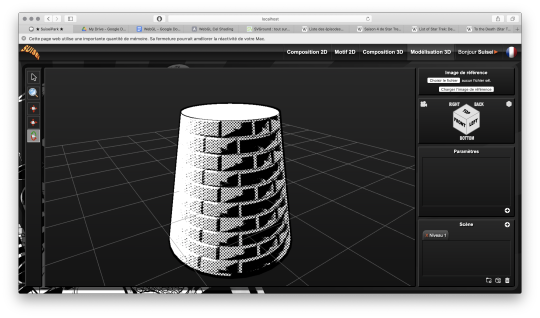
Bump mapping
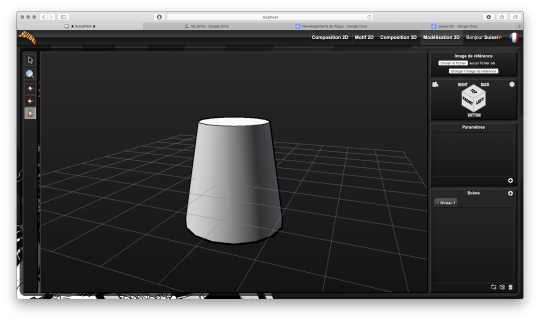
So this is where things get really interesting. We stay in the shaders but we're going to give an extra dimension to our rendering.
Basically, bump mapping consists in creating a bas-relief effect from a high map. And it gives this kind of result.
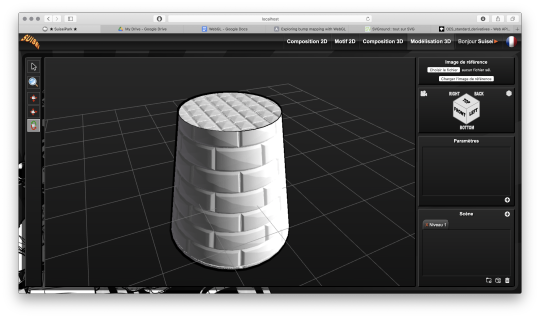
The defined object is always a simple cylinder (with 2 radii). It is the shaders that apply the pixel shift and recalculate the lighting thanks to the high map that looks like this.

This texture has also been calculated automatically in SVG. Thus we can dynamically set the number of bricks.
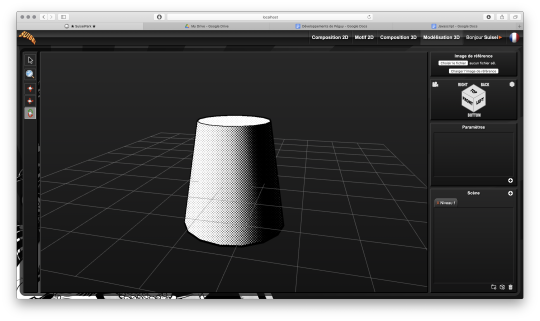
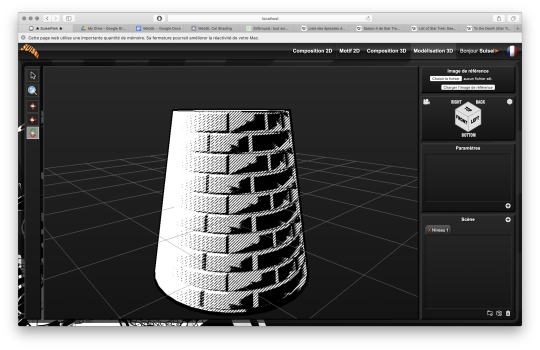
Well, this bas-relief story is very nice, but here we have a relatively realistic lighting, and we would like it to look like a drawing.
So by applying a threshold to have an area lit in white, a second threshold to have shadow areas in black, by applying the screentone pattern to the rest and by adding the hatching that simulates the scraped screentone, here is the result!
It's like a manga from the 80's! :D
I tested this rendering with other screentone patterns: Fibonnacci spiral dots, parallel lines or lines that follow the shape of the object.

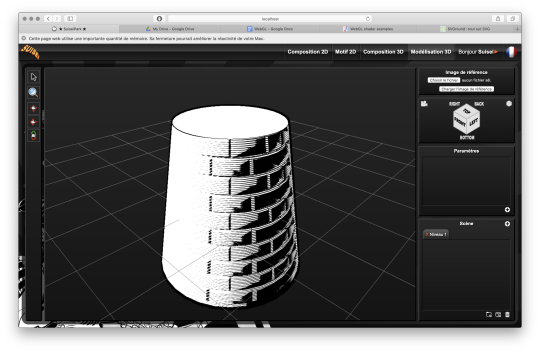
Now we know what Péguy can do.
I think I can enrich this rendering a bit more with the shaders but the next time I work on this project the biggest part of the job will be to create what we call primitives, basic geometric objects.
After that I can start assembling them.
The concept of drawing while coding is so much fun that I'm starting to think about trying to make complete illustrations like this or making the backgrounds for some comic book projects only with Péguy just for the artistic process.
Finding tricks to generate organic objects, especially plants should be fun too.
That's all for today.
Next time we'll talk about drawing!
Have a nice week-end and see you soon! :D
Suisei
P.S. If you want miss no news and if you haven't already done so, you can subscribe to the newsletter here : https://www.suiseipark.com/User/SubscribeNewsletter/language/english/
Source : https://www.suiseipark.com/News/Entry/id/302/
1 note
·
View note
Text
Alina’s Swimsuit Story Translation
Welp, I wanted to do AliKari for today’s Magia Rapport prompt, but I didn’t have a fanfic I could finish in time. Nor do I have anything Valentines-related at the moment…
But you know what I could get ready in time? A translation of Alina’s swimsuit costume story, which NA probably won’t have for quite a while. (Don’t worry, though, this doesn’t have any plot spoilers.)
It’s one of the more overtly shippy stories featuring Alina and Karin, so that’s still kind of related... maybe? ^^;
Edit: Fixed several parts thanks to corrections from the Discord. :)

Title: For a Masterpiece, Sacrifice Is Essential
Alina: I, Alina want to see a swimsuit in a <shop.>[1] Finish your own shopping right away.

(Music: Postmeridie) [2]
Karin: There are tons of rare screentones and millimeter pens! As expected from the big mall’s art supply store!
Alina: Your skill would spoil such treasures, though.
Karin: It’s important to look the part first! So let’s hurry and get back to school...
(Alina disappears.)
Karin: A-Alina-senpai!? That’s not the exit, you know!

Alina: ……….
(Karin enters)
Karin: A-Alina-senpai, what are you doing!?
Alina: …I, Alina didn’t come to do your <shopping.>
Karin: Right, now that you mention it, you said you wanted to see a swimsuit!
Alina: …<Fool girl.>
(Music: One Day She Meets)
Karin: In that case, I’ll also go with you to find your swimsuit!
Alina: <What!?>
Karin: Quick, into the store!
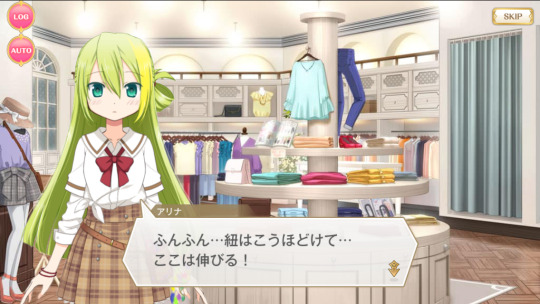
Alina: Hmhm… the string comes untied… and this part stretches!
Uh-huh, <amazing>!
(Karin runs up)
Karin: Alina-senpai, I was able to find lots of swimsuits that would fit you!
Ah, that one looks good too! Uh-oh, I can’t decide~!
Alina: Hey, hold on…
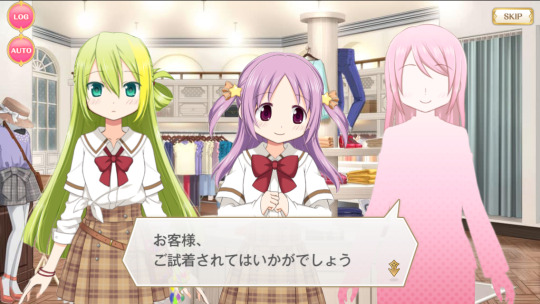
Shopkeeper: Young lady, why don’t you try it on?
Karin: Try it on?! Yes please, certainly!
Shopkeeper: Very well! Right this way, please.
Alina: Huh…
(Cut to black overlays as Alina changes)
Karin: Alina-senpa~i! How’s the swimsuit~? If you’ve changed clothes, come on out~!
Alina: Coming…
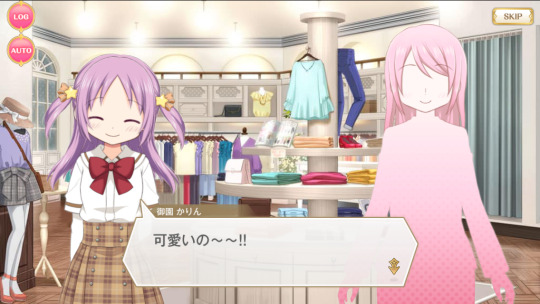
Karin: Cute~~!!
Shopkeeper: Indeed! It’s a very good fit!
Karin: I want to see the next one too!
Alina: Nn
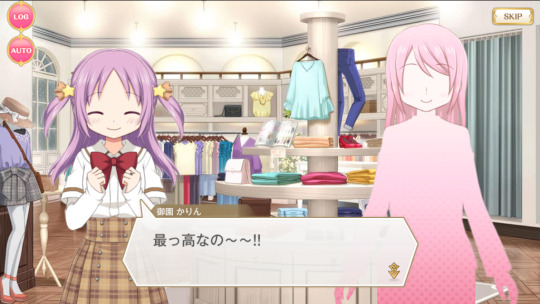
Karin: Stupendous~~! [3]
Shopkeeper: It’s very sexy!
Karin: Let try this next!
Alina: This then.

Karin: Love it~~!
Shopkeeper: Yes! I love it too!
Narration: Three hours later
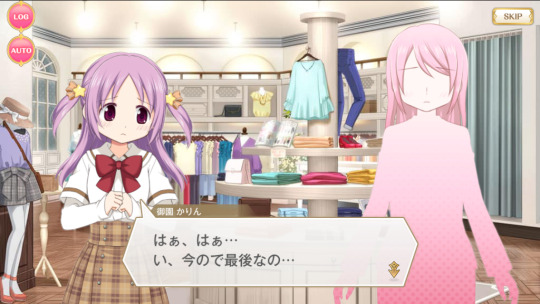
(Music: Postmeridie)
Karin: Haa, haa… T-this one’s the last…
I’m, pretty tired….
Shopkeeper: In the end, she asked for every swimsuit in the shop, huh.
Well, then… which one would you like to buy?
Karin: Errr, it’s really up to Alina-senpai to give us her decision.
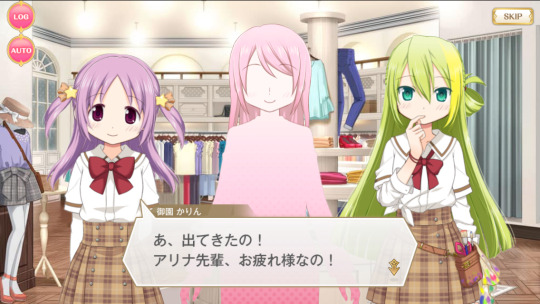
Karin: Ah, she came out! Alina-senpai, good work!
Did you decide which swimsuit to buy?
My recommendation is this simple one! It’s cute, and the price is very reasonable!
Shopkeeper: If I may, my recommendation is this gorgeous swimsuit here. The price is a bit high as it’s top quality, but without a doubt, it suits you perfectly.
Karin: This simple one is fine!
Shopkeeper: The gorgeous one is better!

Alina: …Errr, what are you two talking about?
Karin: We’re talking about the swimsuit you’ll buy, of course!
Alina: Huh? Did Alina say such a thing? I wanted to “see” a swimsuit, I said…
Karin: Huhh
Alina: I, Alina, haven’t any intention of buying a swimsuit.

Karin: ………. Ehhh!?
(Music: Lost Tension)
Alina: I, Alina will create a swimsuit myself.
If possible, I’m thinking I’d like the challenge of accessories as well.
Karin: Eh… ah… b-but, then why’d you want to see a swimsuit…
Alina: Look, Alina can do <design>. But I didn’t know what materials the latest swimsuits used, or what kind of structure they had. So I wanted to check.

Alina: And now I’ve tested a variety of swimsuits, so I think I’ll go prototype immediately.
<Bye-bye.>
(Alina leaves)
Shopkeeper: Ah…, ah….
Karin: S-sorry….
(Fade to black)

Alina: It has been completed.
Karin: Amazingly original~! What on earth was the theme~?
Alina: It’s a reflection on paradise and original sin.
Karin: …??? H-heh…??

Translation Notes:
[1] As I know zero Italian, I’m not even going to try changing Alina’s random bits of English into it. Instead, I’m taking a page out of the Umineko translation’s book, and marking Alina’s use of English with <>.
[2] Music titles now correspond to the titles in the Madoka Magica or Magia Record soundtracks.
[3] Oh boy, this is hard to translate. Karin is mimicking an Alina-like word here, then adding her usual cutesy verbal tic at the end of it.
#madoka magica#magia record#alina gray#misono karin#alikari#madoka magica translations#my translations#credit to discord#magia record jp#read more#what I really like about this story#is that it implies both girls are growing closer#karin now mimics alina's speech#and knows to ask about her theme#alina is willing to show off swimsuits to humor karin#even though she originally just came to do research
35 notes
·
View notes
Photo
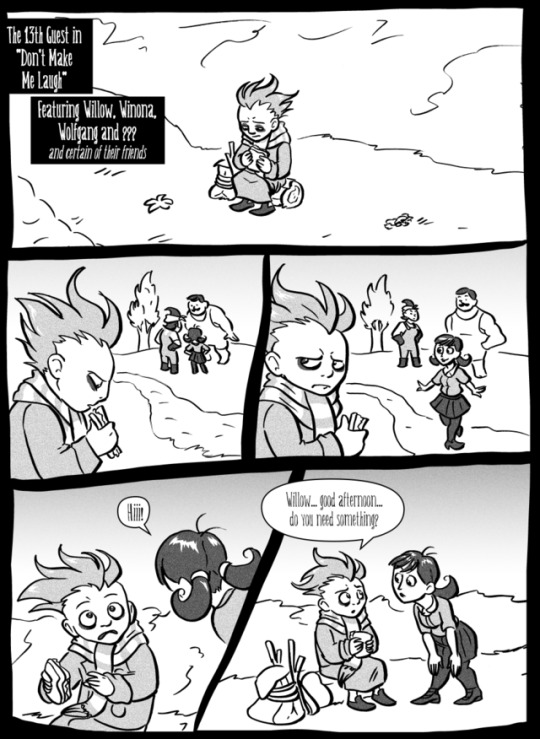


PART 2
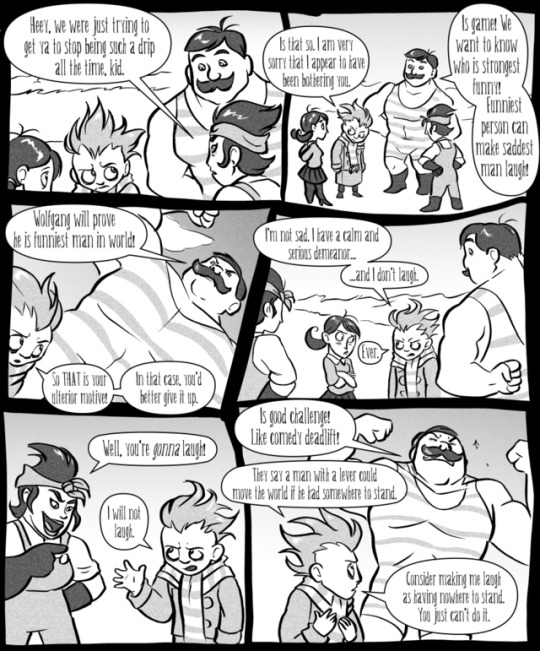
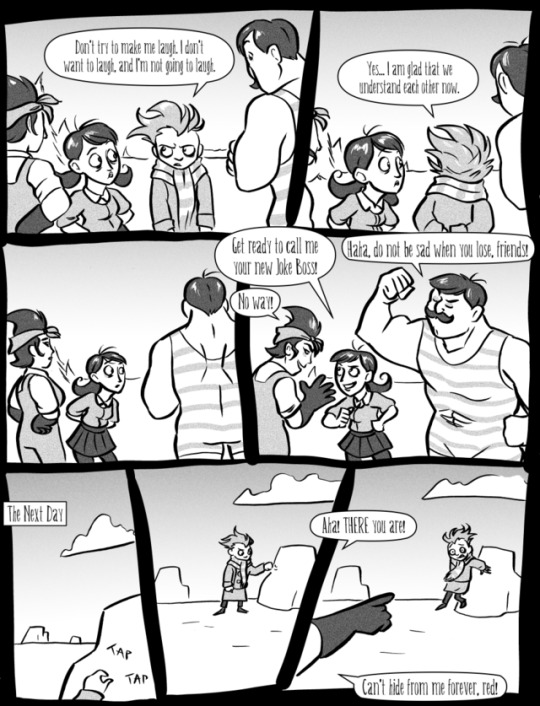
i miss this comic when i’m not working on it so while the storyline is on hiatus i decided to do some little quick side stories! i need to get better with process for self-contained comic stories anyway. it’ll be about 24 pages when finished, in three posts, i think
and i decided to do screentones because i thought this would be fun/appropriate to start posting on april fools day and that was the only way i could get it done on time. it’s fun to play with screentones anyway
my one regret is that i scripted and sketched this before wortox was released. although i don’t think he would feel the need to prove his comedy prowess to a bunch of mortals anyway
edit: added midtones
172 notes
·
View notes
Text
10 Dance Vol. 6 Special Edition overview
Volume 6 of the 10 Dance manga was released in Japan on March 18th, 2021. As with volumes 4 and 5, there are both regular and special editions available. In this post, I will provide an overview of the release, including observations on changes that were made to the chapters compared to how they were printed in the magazine, plus summaries and select scans of content from the special edition booklet.
It is often the case that when chapters come out in the manga magazines, they aren't always fully polished, and since I became highly familiar with this run of chapters from the summaries I made, several things immediately jumped out at me as I went through the book. First of all, though chapter 29 was split into two parts and released in subsequent months in the magazine, these two halves were combined into one chapter, with no indication they had ever been separate. I assume that they were always intended to be one chapter, but since the full chapter was not completed before the deadline (and it was a month when 10 Dance was being given the cover image, so not possible to delay its release), it was simply split over two months instead.
For visual changes, the most common alteration was scenes that originally had little or no screentone having it added in:

There were also some instances of either slight panel redraws, or complete replacements with new panels. None of these were from particularly important scenes, so it could just be Inouesatoh or someone on her team didn't like the look of the original panels and wanted to change them. The following example has a bit of both, with Suzuki in the upper left corner being replaced, and his eyes being redrawn in the lower panel:
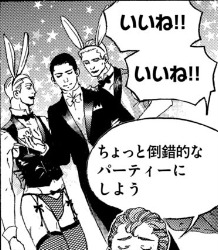
Personally, the most amusing addition I noticed was when Max was thinking about throwing a party. Originally, we didn't see what he was envisioning, but in the volume, an addition has been made in the background: the New Year's piece Inouesatoh drew with sexy men dressed as cows, except now they're bunnies!

As for dialogue, it appeared to be almost the same in both versions throughout. Some minor exceptions include a spot I found where the dialogue was put in a different order, swapping Sugiki’s lines between this panel and his first line on the following page (in addition to another altered panel example):

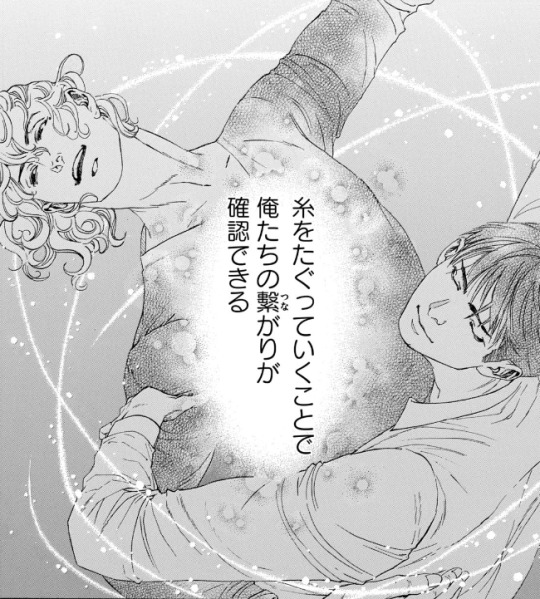
As well as in this shot of Suzuki describing how they tug at the thread that connects them through their dance. Whereas before it put the word “dance” next to the part about tugging on the thread to specify what was meant by that, it was deleted in the volume. And while it was originally described as “affirming that we’re connected”, this was also tweaked a bit to be, “affirming our connection”.

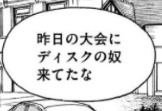
There were a couple instances of character names being different from when they appeared earlier in the story. In this volume, two characters who were last mentioned back in volume 2 (Lucas Calvo, one of the champions at the table in Blackpool, and Deeks, who Ernie said hated Sugiki because he "stole" his girlfriend), either from typos or intentional changes, weren't the same as before. Lucas' last name was written with a 'g' sound (ガルボ) instead of a 'c' (カルボ), and this change carried over to the volume. On the other hand, Deeks' (ディクス) name got transposed as Disc (ディスク) in the magazine, but was fixed in the volume.

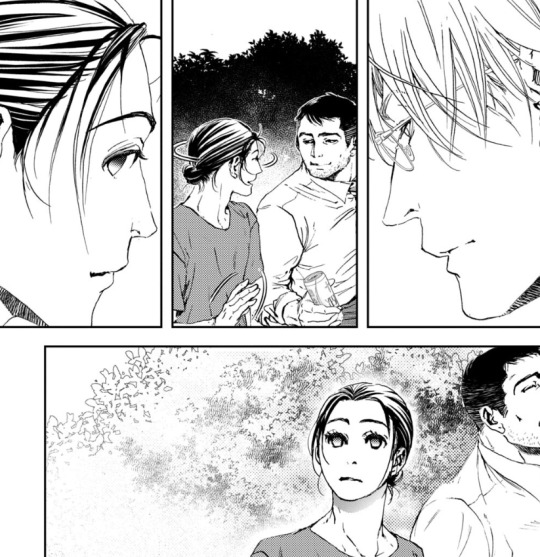
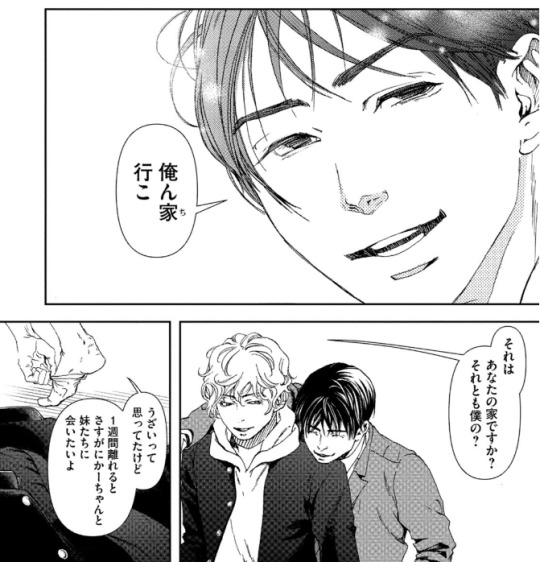
There was a typo that unfortunately made it through to the volume (but could perhaps be fixed in future printings). In chapter 34, when Norman is testing Suzuki's skills, he flashes back to Sugiki taking the national title from him several years earlier. The text in this scene, written in English, incorrectly states that Suzuki won the championship, rather than Sugiki.

The volume also includes the usual additions that are not present in the magazine, such as the under the cover flap comic, and Inouesatoh’s notes about each chapter.
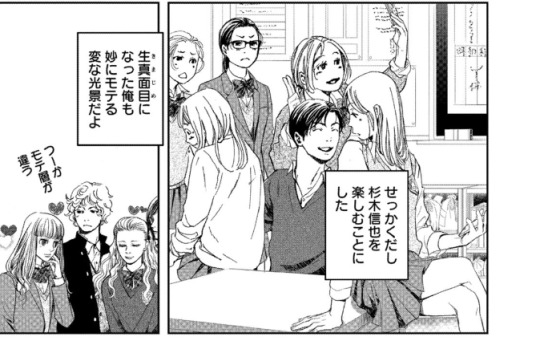
The cover flap comic (which looks very much like a sketch, compared to previous ones that have had more complete art), features the Shinyas during a practice session earlier on in the series in December, where Suzuki complains that Sugiki’s Latin just isn’t sexy. Sugiki suggests that he can practice being sexy by wiggling his butt around to write a message in the air. Suzuki worries that if he starts writing out “love” or something, he’ll have to run away and escape. Sugiki gets started, and Suzuki calls out each letter that he can make out from his elegant butt bouncing. After figuring out he’s written “M-E-R-R-Y”, Suzuki guesses that he’s writing “Merry Christmas”. Sugiki gets mad that he said it aloud before he finished writing his message, and says he’s going to leave. Suzuki says, “Wait, I love you,” as narrative text says that this somehow turned into a love story in one panel.
And here are some tidbits I found interesting/amusing from the chapter notes:
She thinks readers who are fans of pecs will like Saichi.
She’s not sure if readers will love Max or hate him, but she personally likes him (sorry Sensei, I kinda hate him lol)
As of chapter 32, a portion of the art is now done digitally.
The epic “last dance” scene from 33 was something that she had planned since the beginning of the series, and it ended up being 8 times the cost for a typical chapter.
Special edition booklet:

The special edition comes with a 48 page hardcover booklet that includes a variety of different extras, divided into 8 sections called “heats”.
Heat 1 is a newly drawn, 12 page parody manga. Back in September 2020, Inouesatoh put out a request on Twitter for fans to send in their suggestions for an erotic side story. Putting the characters in a high school setting was the most requested scenario, so she chose this idea as the basis for the story. The title is “And All That Jazz” (the premise makes this somewhat confusing to summarize, so keep in mind that I’ll mostly be describing their actions based on the soul rather than the body, but will use quotation marks if it’s about other characters and who they think they’re addressing. It’ll all make sense, I promise...I think :P)
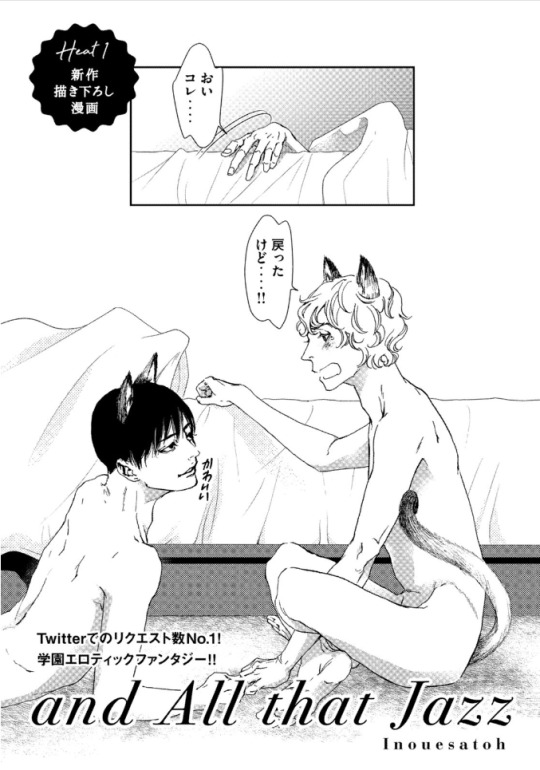
(The title page actually depicts the ending of the story, so I’ll come back to it later). It starts with Suzuki narrating his introduction, saying that he’s a transfer student to the Standard Academy. He really doesn’t get along with a guy named Sugiki, but for some reason, the two have now switched bodies with each other. Sugiki opens his shirt and inspects his new physique in front of other students, as Suzuki yells out asking what the hell he’s doing to his body. They look at themselves wearing each other’s expressions, Sugiki seeming surprised his mouth can gape open like that, and Suzuki wondering what happened to his body’s facial expression muscles. The bell rings and Sugiki heads off to class, as Suzuki is baffled that he can act so calm about this.

Sugiki perfectly reads a passage aloud in English class, something everyone (including the teacher, who looks like Norman) find unusual coming from “Suzuki”, as they wonder where his usual hearts are. Suzuki makes the decision to enjoy living as Sugiki for a bit, and is shown getting flirty with several girls. He notes that the more serious personality in his regular body is also strangely popular, though with a very different crowd.
A student named Alberko (Alberto in a girl’s uniform) shows up and says that “Sugiki” was supposed to have lunch with her(?) today. Suzuki says that he thought Alberko was going out with Dorou (a masculine alteration to Dolores’ name). Ernie and Suzuki watch as his harem falls apart with Alberko running amok. Ernie comments that both “Sugiki” and that transfer student have been acting weird all week, and he asks if something happened. Suzuki internally reflects back to one week earlier, when he was relaxing in bed in the infirmary. Sugiki comes in and accuses him of skipping class, and Suzuki tells him to mind his own business. He thought this would turn into one of their usual fights, but he can’t believe that actually happened instead...

After school, Sugiki asks Suzuki if they can go home together today. As they’re walking, Suzuki asks if Sugiki realizes what it was that made them switch places, and Sugiki says he does. Suzuki says that in that case, they know how they need to fix it, and they should go over to his house. Sugiki asks for clarification of whose house exactly he means by that.
As they start to get undressed, Suzuki says that he always thought his mom and sisters were annoying, but after a week apart he really misses them. Sugiki promises that he’ll make sure he can see them soon. Suzuki claims that he’ll be the one making Sugiki come, and Sugiki asks how he can talk like that when he was the one who looked like he was about to cry when Sugiki first touched him in the infirmary.

Sugiki peeks into Suzuki’s pants and wonders if he won’t get hard unless he touches him. Suzuki thinks it’d be weirder if he could get hard while looking at his own face, and wonders if Sugiki has AI in his crotch or something (Sugiki contends that it’s not his body). They fool around with each other until they finish, and Suzuki wonders why they didn’t change back yet. Sugiki suggests that maybe it needs to be just like the last time to count as a complete set, when they went at it until they fell off the bed, so both agree that they need to go for one more round. This then ties back to the title page, where they’ve finally managed to get back into their old bodies, but have now sprouted cat ears and tails.
Heat 2 of the booklet is 8 pages long, and contains short comics and illustrations that were not previously included in the volume releases. The comics include “How to 10 Dance”, a one-page comic with the Shinyas demonstrating the tango. Their privates end up touching, and Sugiki seems highly amused, gleefully asking Suzuki how it feels. Suzuki says that he was the one who got all bent out of shape over that back in volume 1, and tells him to lay off the sadist mode since they’re not dancing Latin right now. The second comic is “2nd Step”, and shows a glimpse of how the Shinyas were with each other after Suzuki gave the go-ahead for kissing. In fact, Sugiki ends up kissing him so much that Suzuki’s lips get sore and swollen. Sugiki then tries to kiss his neck as an alternative, but Suzuki’s not having it. The third comic depicts Suzuki’s first time in a public bath, where he realizes that Japanese people aren’t fully shaved everywhere like he is. Some of the old guys talk to him and slap their balls with their towels, and Suzuki, seeming a bit confused, gives his own balls a slap, too. After the comics are a selection of illustrations that were never used in the volumes, including this one from a Real 10 Dance event in 2018:

Heat 3 is 18 pages, and contains a variety of colored versions of both chapter covers and scenes from the manga, a couple of which I’ll share below:

Heat 4 includes 3 pages of insight from the professional dancers who consult for the manga, in which they explain the moves shown in specific panels.
Heat 5 is a single page look at Inouesatoh’s work space.
Heat 6 is 3 pages worth of advertisements that have been used to promote the series, including things like ads that were posted in subway stations:

Heat 7 is a single page look at the storyboard for chapter 1 of the manga.
Heat 8 is a single page showing the covers for foreign editions of the manga (Taiwanese, Korean, North American, and French).
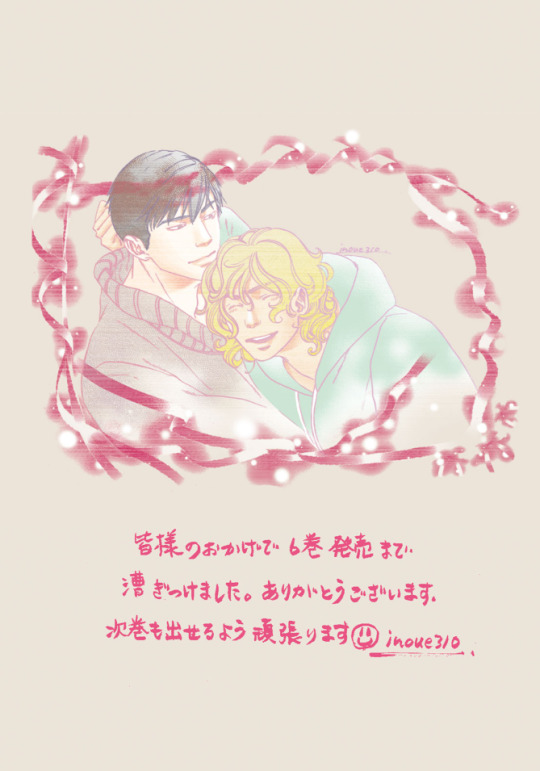
Finally, there’s one last page with a thank you message from Inouesatoh, including an absolutely precious illustration of the Shinyas in happier times.
And that’s that! This really is an incredible release, and I’d definitely recommend picking up the special edition if you can. CD Japan offers direct international shipping, and I’ve also seen that Kinokuniya lists it as “available to order” currently (though they don’t appear to have stock on hand, so might take longer).
33 notes
·
View notes
Photo
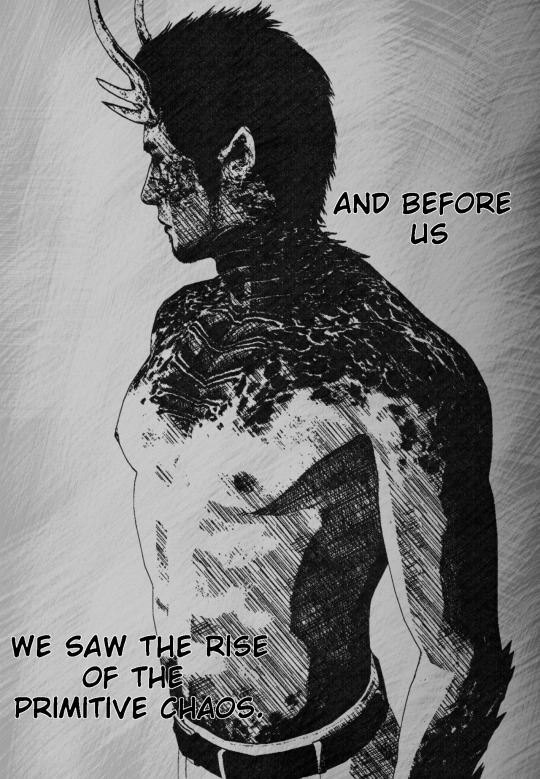
I was working on this piece partially as an inktober thing, and partially just to get used to working with larger areas of black on the regular, since I feel it helps my work look much more polished and professional than having JUST lines, and... well... I got a little carried away in the cleanup and editing process.
Originally I had just planned to slap a black background in behind him without using too much ink- but then I decided it looked kinda yuck, so I decided to use screentones. And then and then and then.... Now I have a full manga panel, I guess. It did provide a neat opportunity to test out adding in speech ballons, which is something I wanna make sure I know how to do well for my manga commissions / future comic page commissions, so I guess it's not all bad!
Anyway I am quite in love with this, and now that I've done something for myself it's time to dive back into commissions, haha.
Maybe I'll upload the version without all the trimmings as well? or maybe I won't, I'm not sure.
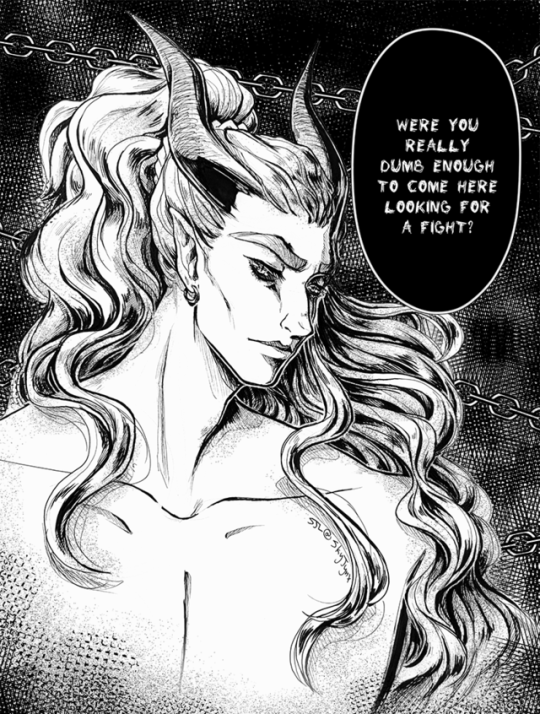
If anyone is interested in context on what's going on- well, originally it was just a portrait, but I had to come up with something to put in the speech balloon haha. Kosomot is a fire deity, but he's also associated to passion, love, war, and, oddly, healing. He's known in many regions as "The Burning God" or some variation of that, because of his penchant for setting himself on fire. He's incredibly strong, and being a warrior god as much as he is a god of lovers means that taking him on in a fight is... pretty damn stupid. But every now and then there's some idiot...
Oh! And I gotta say if I had started out with the intention to make this as a manga panel, I 100% would have gone with a wide / landscape panel layout, rather than a portrait- or if I was doing it as a full page spread I would have chosen a different pose / slightly different angle, but well- it just sort of morphed into that, so what can ya do? ;w;
#inktober#inktober 2019#inktober challenge#original character#original character art#manga page#my art
11 notes
·
View notes
Note
hi! i really like your most recent post, especially the effects! how exactly were you able to apply the color screentones? i haven't been able to figure it out and i'd love to know 😅
ah, hello!!! sorry for the late reply!! if you’re wondering about the colored screentones, they’re quite easy to apply!!
first I assume that you have CSP, since the program has a HUGE arsenal of free materials that you can use, if not uhh there are other methods...
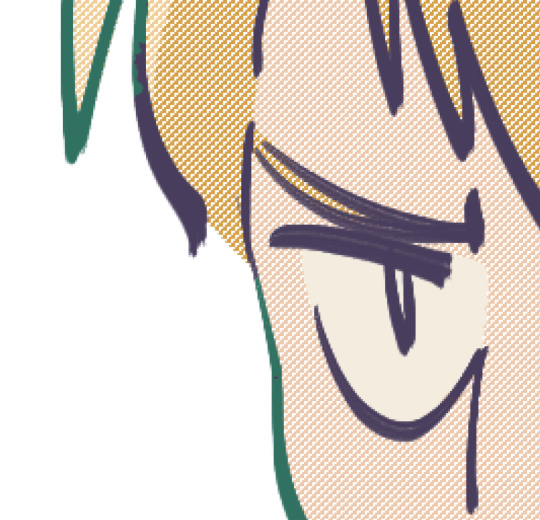
1) first, we’re gonna open up a drawing

here, I have my drawing with no screentones
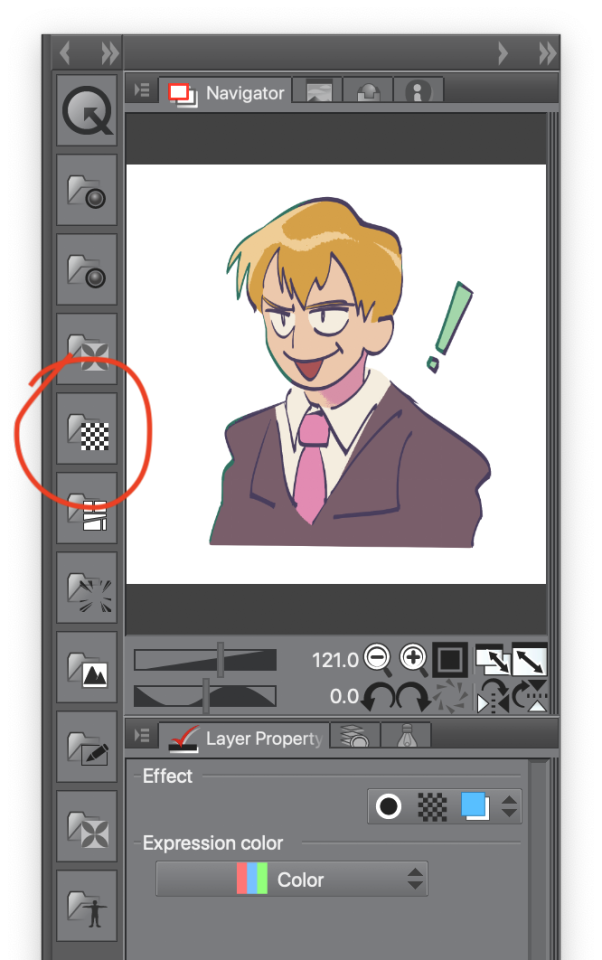
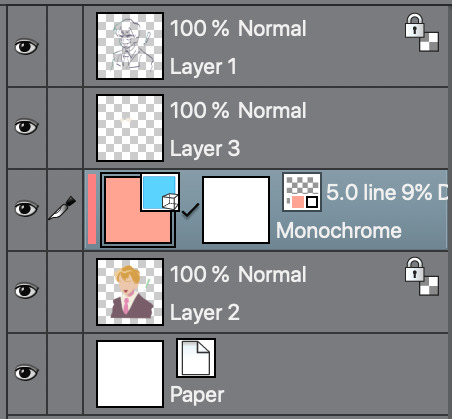
2) next, we’re gonna go near our navigator panel and to the left is a column of icons (materials), you wanna click on the one that has a checkered block

by clicking the icon, it opens up an additional window full of different screentones. there’s a whole bunch so choose any white or black pattern!! you will be able to edit the appearance later
3) to insert the pattern of your choice onto your drawing, you will want to click on the icon that looks like a clipboard
now the pattern is added to your canvas

it’ll appear different after the screentone is applied
now we want to change the appearance of the screentone! right now it looks to grainy and that’s not what we want

underneath the navigation panel is the layer properties tab, that’s where we’ll be editing the appearance of the screentone dots
4) next, we’re gonna want to change the size of our dots. change the screen frequency to a small number such as 5, after that keep scrolling through the tab and soon enough you’ll come across this:
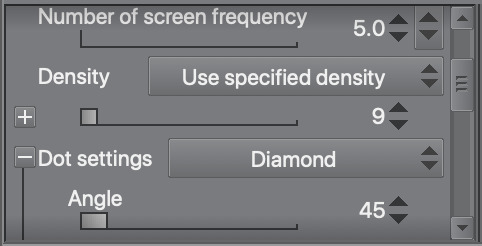
the density and dot settings
like the screen frequency, choose a low number for the density OR just play with the slider until you find an appearance that you like
for dot settings, that’s how we determine the shape of our dots! the default shape is circle but I chose diamond
there are a lot more patterns to choose from when you open the drop down menu for dot settings:
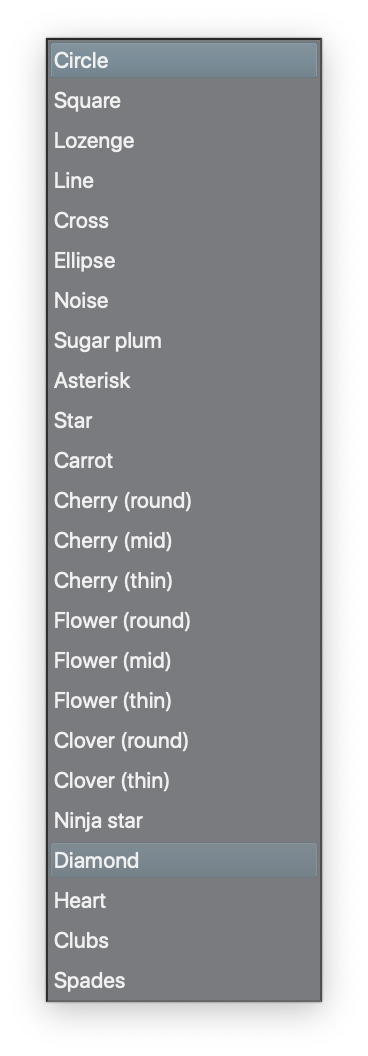
depending on the value of your density, the shape of the dots will appear different
this what the dots may look like if you choose a density value lower than 7

and this what they looked like when I chose a density value of 9
feel free to experiment with other shapes and densities!
now for the color...
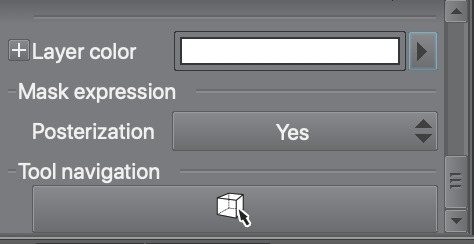
5) in the same layer properties panel, scroll to the very bottom. we’ll be changing the layer color in order to change the color of our screentone
click the arrow next to the long rectangle and a color settings window will appear
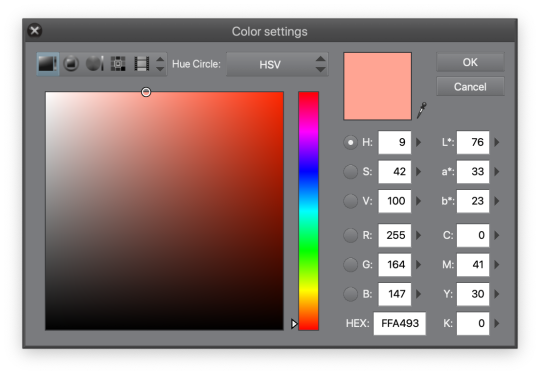
choose any color that you like! I chose a reddish pink color
after this step, you may want to clip your screentone layer over any layer you want the desired effect on
like so...
now we have a drawing with a colored screentone!
I didn’t like how all the dots were all the same color so I gave my screentone layer a blend mode (extra step)

before and after I applied the blend mode

6) and now we’re done! I hope this helps!!!
15 notes
·
View notes
Last Seen Blogs
femininelookingmale
casi nunca nadie dice que yo estoy enamorado tuyo

harold5gi1
Untitled

hgcx1009
Untitled

cttn85
Cotton candy Girls Clothes
sigursaudfe-blog
spatial time