#plover post
Text
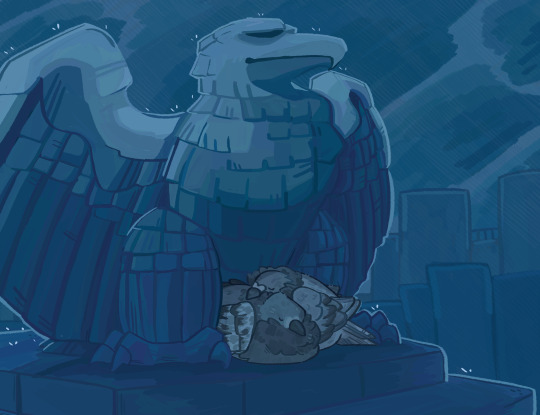
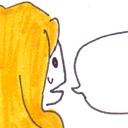
Have your smarter-than-average shieldon charge run a blog to advertise the museum it'll be a fun little project that might bring in extra visitors and make people more interested in fossil pokemon... They don't tell you about the cheese statues. They never say anything about the statues.
11 notes
·
View notes
Note
Polite little fish
Ahhh Kristen if you're going to post my sketches could you at least post the cool ones >///<
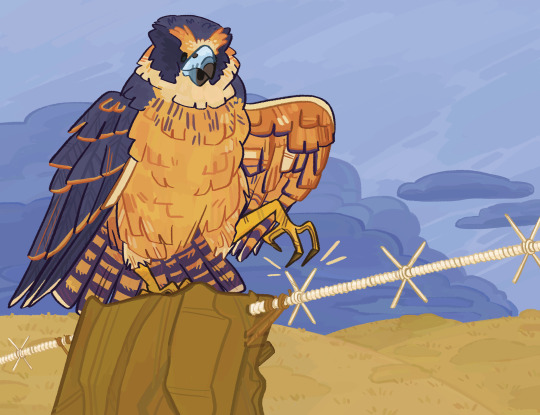
Here... We've been considering a couple tail shapes. Some fossils found in other areas of the same species suggest the more spear-like tail shape versus the flat diamond... I'm thinking it may be a difference in the evolution stage that's causing the confusion.
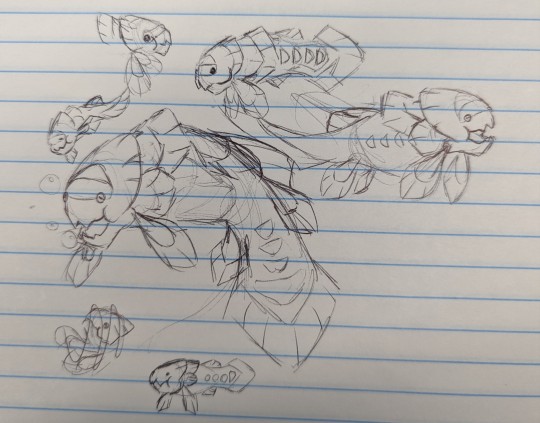
We just have to figure out which is which...
~ Plover
#plover post#pkmn irl#pokemon irl#rotomblr#rotumblr#asks#art post#//ooc part of me is like mmm yes point taik#//the other part really likes the coelecanth style tail
6 notes
·
View notes
Text

hmm anyway. holds u in my arms
#mine#cats#i did this a while ago n forgot 2 post whoopsies !!#anyway. my brain was so so small today colouring is so hard but...i think i may...have a solution....perhaps....we will test 2morrow and se#i hope everyone has had a good beginning to ur week also#tomorrow i need2 do orders and fix colouirng maybe and then thrusday finish colouring n then friday im going BIRD WATCHING#its fun ducks season i love fun ducks#ducks r so easy. unlike say a plover or a bunting of which there r 1000 and they are all the same
7K notes
·
View notes
Text
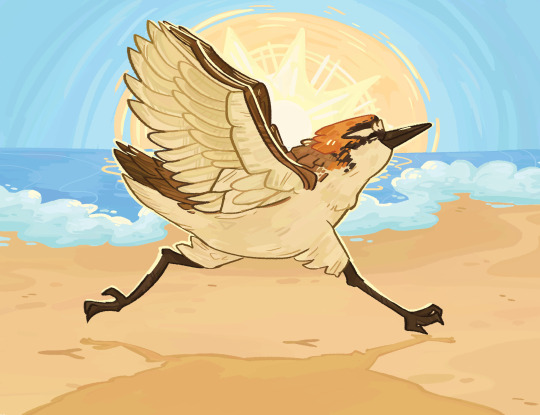

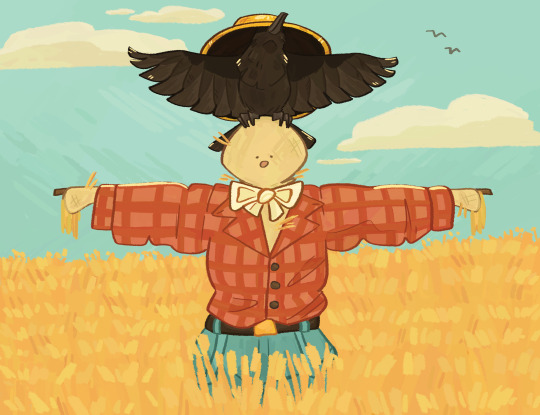

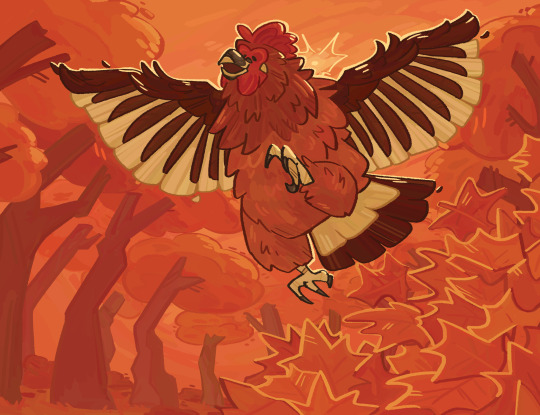
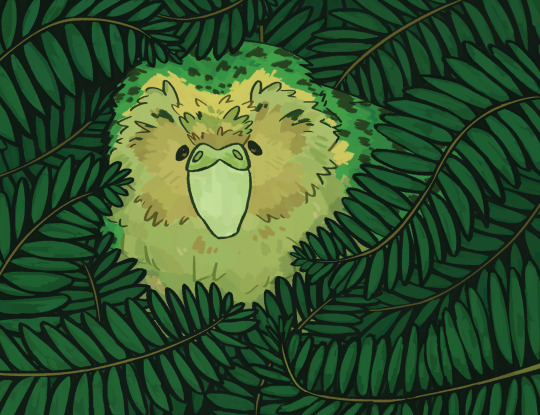


buncha birdies i spent the better part of december drawing for my mums christmas present :o)
#the goods#man how do i even tag this LOL#birds#bird art#animal art#red capped plover#pink cockatoo#raven#pacific black duck#chicken#australian hobby#pigeon#rock dove#kākāpō#kakapo#peregrine falcon#gouldian finch#rainbow lorikeet#christmas island goshawk#drew these all for a 2024 calendar!! it arrived the other day and she was very happy with it :) gave me the ok to post them#this was literally the only thing i was working on for most of the last month was very very fun having a big project to focus on#but im also very glad to be able to draw. not birds now LOL
66 notes
·
View notes
Note
what kind of cratures do you think the trigun gang would be?
CREATURES IN GENERAL OR SEA CREATURES. BECAUSE MY FRIEND MONTY N I WERE JUST TALKING ABOUT TRIGUN FURSONAS THE OTHER DAY. but i am the sea creature guy at heart so im gonns give u those i hope that is ok 😌 there are many benefits to being a marine biologist.
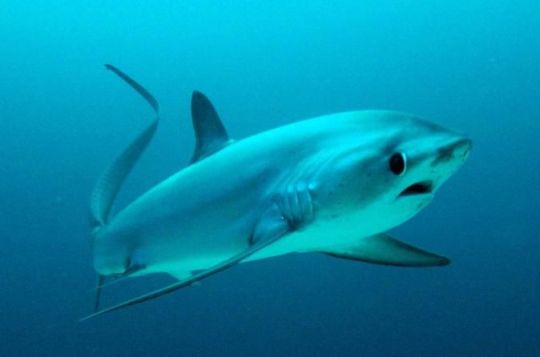
Vash: he is... so very shark coded to me. everyone looks at him and sees a dangerous killing machine. frequently covered in scars. do u see the connection here. he is specifically a thresher shark to me because of the whole sharpshooter thing and also the sad sad puppydog eyes 💙

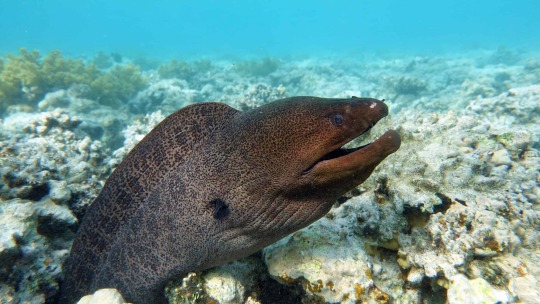
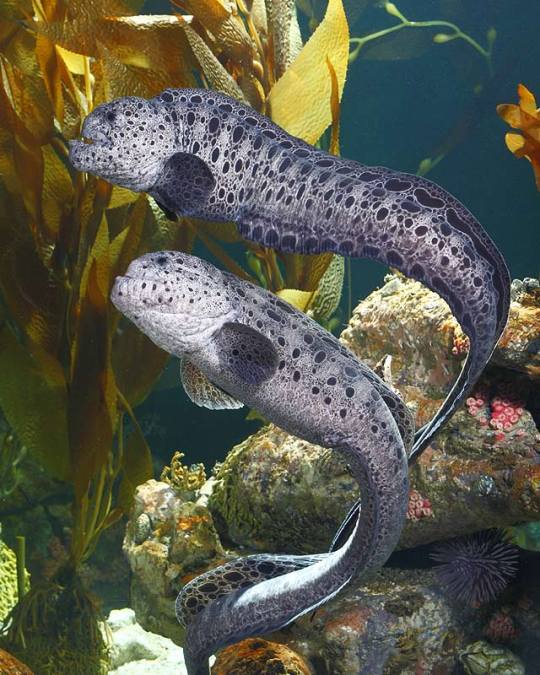
Wolfwood: i am torn between two different types of eels for him. giant morays are more aesthetically pleasing but personally i have to go with a wolf eel both for the name and because ive worked with these guys before and theyre sooooo cool so im biased
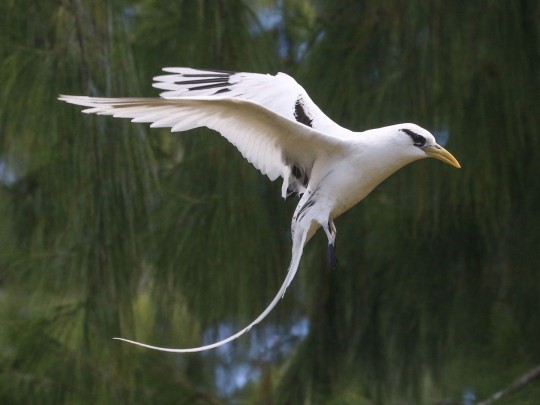
Meryl: not technically a sea creature because she is just so bird coded to me. White-Tailed Tropicbird
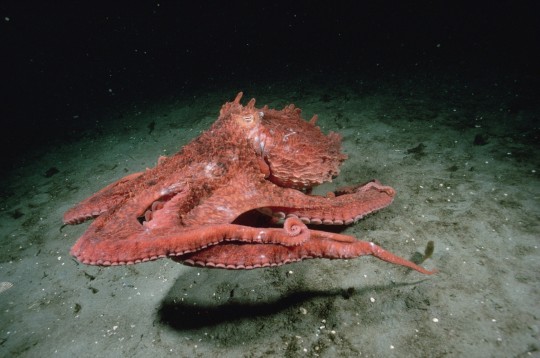
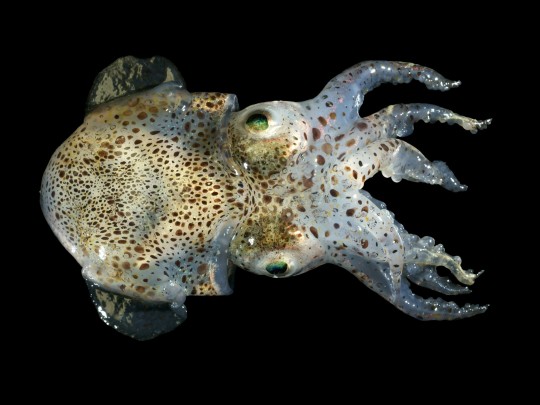
Milly: is it cheating to have two cephalopods on this list. because i think i really want to say giant pacific octopus for milly. either that or a whale shark 💙 yes those are two completely different animals no i will not be taking criticism at this time

bonus Knives because i love him and i feel the most strongly about this one:
BOBTAIL SQUID.
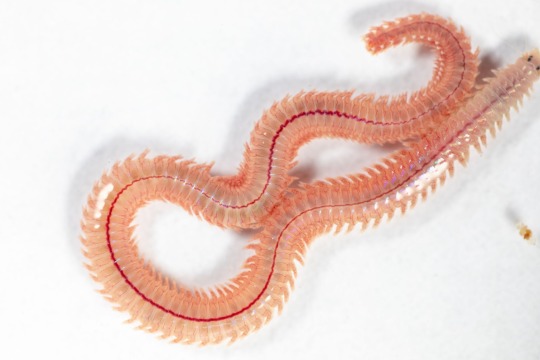
... and also a bristle worm . for what i hope are obvious reasons
#NORMALLY THOUGH meryl is an egyptian plover#shes sooooo so very much an egyptian plover. hold on i made a post about that the other day ill reblog it again for u :] hehe#i worked at an aquarium last year and every time we would pull a bristleworm out of one of our tanks id be like ohhh my god its knives.....#i love every opportunity to push my sea creature knives agenda. hes so sea creature to me. hes so marine biologist to me.#OH MY GOD ALSO LIVIO. LIVIO IS A GOLIATH GROUPER TO ME . <3#side note also . have you ever seen that picture of a hermit crab using a human skull as a shell#(<< the image is fake its photoshopped BUT)#thats legato. to me. except with a blueleg hermit crab. he is a blue leg hermit crab with a human skull for a shell#which is bullshit because i dont think legato deserves something that cool but alas it is unfortunately perfect for him#(<< this is /j i think legato is a cool and interesting character#i just think he has a punchable face and like 2 pretend i hate his guts cause its funny)#HI !!!! THANK U FOR GIVI G ME AN EXCUSE TO TALK ABT SEA CREATURES ILY <3333#asks#madnessmadness#sorry if u meant like... actual land creatures. unfortunately i am the fish guy forever <3#YES I REALIZE VASH AND KNIVES ARE TWO TOTALLY DIFFERENT CREATURES AND THAT MAKES NO SENSE BC THEYRE TWINS#BUT LIKE. I FEEL SO STRONGLY ABOUT BOTH OF THOSE THINGS#i could be persuaded to make knives a shark if needed bc there are so many cool shark species i could assign to him#but like. hes just soooo bobtail squid coded to me ive been saying that since i first saw his fuckin. snuggie in tristamp
24 notes
·
View notes
Text
banding him
#mega man#plover man#my ocs#sketch#photoshop#my art#ugh currently working on something i can't really show here. :(#making a zine and the vibes kind of clash with what i usually post lol#take this plover in the meantime while i work on it
9 notes
·
View notes
Text
#my videos#California#Gazos Creek State Beach#ocean#birds#plovers#okay this is the last thing to post#(there’s other videos but I’ll post those later)#look at them though#plovers. just little guys
11 notes
·
View notes
Text
🦇
#tbd#collapses in bed after delayed flights#thank god im working from home the next two days#there's like no time at all before the next update to post some drabbles#but i am going to make sure i post that exquisite little gen vanrouge fic from plover anon ❤️#i think we all might need it in the coming hours 🥲#anyways!! I'm back from vacation!!#i tried to scroll through nightly and catch up on the dash#but let me know if i missed something particularly adorable or angst-riddled 👀
14 notes
·
View notes
Text
About My Stenograph Machine
I thought I'd share some information on the equipment I use for stenography.
This is a very long post with several images (with image descriptions), technical explanations, and two videos attached. Thank you for reading, if you do!
I learned a lot about my machine after delving into the manual and trying to explain what I read, so I hope you do, too.
Note that while I am heavily biased towards stenograph machines, there are hobbyist keyboards made for steno that are much cheaper and readily accessible. If you would like to learn more, please click this link.
This is a Stentura 400SRT.
It's an older electric stenograph machine model, refurbished for student use.

[Image description: Photo of an electric Stenograph Stentura 400SRT Paperless Student Writer. The Stenoworks logo watermark is at the bottom left of the image. At the top of the machine are the black Platen Roller and the Paper Feed Roller. Below that is the cover/nameplate. An on/off switch and two indicator lights are at the top right of the nameplate. The first is green. Its label is to the left: a long line, with five dashes below it. Below the green indicator is a red indicator. Its label, to the left, reads: "DATA TRAN". Below the lights and switch are the words: Stentura 400SRT electric. Below that, the word Stenograph. Directly below the nameplate, on the left and right, are two horizontal Cover Release Levers. Even further below is the Stentura keyboard. At the top is a long bar called the number bar. Below that are 22 keys. At the lower left of this image is the Stenoworks watermark.]
It plugs into an outlet to keep power, has a removable battery, and uses a serial to USB adapter cable to connect to my computer. It's pretty old but sturdy and quite reliable.
The Front of the Machine
The cover of the machine, also called the nameplate, can be lifted up for further inspection and maintenance of the internal mechanisms. It also has a power switch and two indicator lights, one in green and one in red. Both flash or light up when set to different modes. If you wish to know more about the machine's various modes, please click this link to read the manual.
Below the cover are the keys of the machine.
Stenograph machines do not have the keys labeled in any way. This is to prevent writers from looking down at their hands when writing. Looking down at your hands while writing will ultimately slow you down, preventing you from reaching high speeds. This is sorta like how touch-typing is considered a faster way to type than looking down at your keyboard.
I will write a post summarizing the keys of the machine at some other point. Just know that each key doesn't represent individual letters but instead sounds, and that each stenograph machine has 22 keys plus a number bar. The keys at the far left and the middle of the machine are actually each one key, just with the appearance of being split in half.
The Bottom of the Machine
This part is not pictured, unfortunately. This is the area where you would install your external battery pack and your tripod.
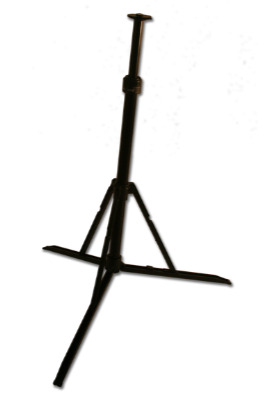
[Image description: Photo of a stenograph machine tripod.]
Above is an example of a tripod. The underside of the machine has a hole for attachment. This lets you write with the machine between your legs rather than with it sitting on a desk.
My model also has a wire bar at the bottom used for writing at a desk or table while standing called the "Bench Conference Stand". This is typically used for bench conferences, wherein the plaintiff and defendants' team will speak with the judge but exclude the jury and anyone else besides the court reporter from overhearing.
The Paper Tape Mechanism
Pictured below, the top of the machine isn't something I personally use. According to the manual, the silver bar and attached lined roller are called the "Paper Feed Roller" and the black roller it's grazing is called the black "Platen Roller". You might have already guess it, but this mechanism is used to print ink on what is called "paper tape".

[Image description: Close-up of the top of the Stentura. Middle of the image is the black Platen Roller and the Paper Feed Roller.]
Paper tape is just a very long sheet of paper you would use, before the task was automated using computers, to record your stenography notes. Stenographers would typically read directly from the paper in order to prepare transcripts or when asked to repeat, in verbatim, something that had been said in court.

[Image description: Photo of the back of the Stentura. Top, centermost part of the machine are the Paper Feed Roller, Platen Roller, and the paper apron. Below that is where you would, presumably, attach the paper tray. Bottom left of the machine is the 9-pin Communications port. On the bottom right, a hole for plugging your machine into an outlet. The Stenoworks website watermark is at the bottom left of the image.]
The above is a photo of the back of the machine. Underneath the paper feed roller is a barely visible silver landing strip called a silver apron.
On the bottom left is a 9-pin Communications port. You use that to connect the writer to your computer.
Then to the far right is a hole for connecting your machine into a power outlet.
In case you're curious as to how add paper tape to a stenograph machine, below are the steps:
Attach a paper tray to the back of your machine
Add paper to the tray
Take the top-most fold
Thread the paper between the black roller and the silver apron
Roll the black roller to "feed" the paper tape into it
When the paper comes up through the top of the roller, lift up the silver paper feed roller
Place the end of the paper coming up through the top underneath the paper feed roller
Pull the paper out a few inches
Place the top of the paper tray beneath the paper
For a video representation of these steps, below is someone adding tape to their own machine:
youtube
[Video description: A stenographer giving instructions and demonstrating how to load paper tape into their stenograph machine.]
Each depression of the keys, called a stroke, would print a letter or group of letters onto the tape. Below is what the paper tape's printout would look like using Plover's paper tape plug-in. The chords here spell out "hello world".
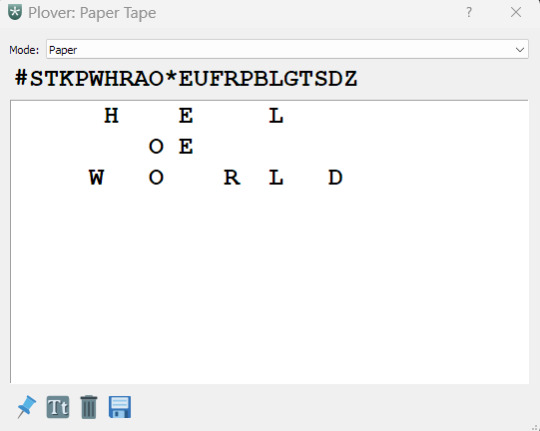
[Image description: Screenshot of the Plover paper tape plug-in. Top of the window has the Plover icon, which is a white asterisk on a green key. The window name is "Plover: Paper Tape". To the far right of the window name are the help (?) and cancel/exit (X) buttons. Below the window name is a drop-down menu labeled "Mode:". "Paper" mode has been selected. Below that is a line of the keys from the machine. The keys are: # S T K P W H R A O * E U F R P B L G T S D Z. Below that, in a white text box, are the following chords: H E L, O E, and W O R L D, each set on separate lines. At the very bottom of the window are four icons: a push-pin for pinning the window above other windows; a button with a capital and lowercase T for editing the font appearance; a garbage can for deleting what is on the paper tape; and a floppy disk for saving what you've written to the tape as a text file.]
The Longest Section: Inside the Machine
Below is an image of the internals of the stenograph machine.

[Image description: A photo of the inside of a Stentura 400SRT. All the parts that I could identify are labeled with a number. The parts are numbered from 1 to 17 in black text on top a black circle with a white outline. The Stenoworks website watermark is in the bottom left of the image.]
All the parts that I could identify with the manual are labeled with a number. After trying to write the image description for it, I decided that I should provide the names for each part below, then separately explain what each part is or does.
Parts Labeled
Cover Release Levers
key levers
blue Ribbon Advance knob
an unpictured red knob called the Depth of Stroke knob
an empty space where the Ribbon Cartridge would be installed when using paper tape
white Keystroke Pressure knob
green strip overlay with key adjustment screws
number bar lever
black Paten Roller
orange Platen Drive Gear
Platen Bearings
Manual Platen Advance Linkage
silver Paper Feed Roller
red Electric/Manual mode lever
machine handles
Cover/nameplate
An Explanation of Each Part
The first two things labeled in the image are the Cover Release Levers. You lift those horizontal bars/levers to release the cover and lift it up to reveal what's underneath. Then there are what I presume are just called the key levers.
Following that is the blue Ribbon Advance knob.
From what I understand after fiddling with the machine, each key depression and release causes this blue knob to automatically advance number 5, the ribbon cartridge, which typically contains a self-inking, continuous loop ribbon. This ensures the machine will continue to apply ink to the paper tape with every rotation.
Not pictured is a red knob called the Depth of Stroke knob.
You turn the wheel upward or downward to adjust how far down the keys go when you press them. There are ten settings available. Adjustment also lets you decrease or increase spacing.
To the far right of the blue Ribbon Advance knob is number 6, the white Keystroke Pressure knob.
Turning it lets you adjust the amount of pressure needed to press the keys.
Above where the ribbon cartridge would be, I think, is number 7, the key contact assembly.
The green overlay strip has all the keys of the machine labeled with corresponding screws above each one, called contact adjustment screws.
The number bar's screw is to the top-right of the others. The two big screws on either side are for removing the overlay.
You would insert a 0.35 inch Allen wrench into a screw. Then you would turn it after determining that the corresponding key's switch is in need of adjustment.
Immediately above the green overlay is number 8, the machine's number bar's lever used for printing numbers into the paper tape.
Above that is number 9, the black Platen Roller.
To the left is number 10, an orange knob called the Platen Drive Gear.
On either side of the Platen Roller are number 11, the Platen Bearings. They are a single frame, identifiable by the holes located at the center of each side. Those holes are specifically for lube.
Number 12 is the Manual Platen Advance Linkage, which is to the bottom-right of the Platen Roller. Above the Platen Roller is number 13, the Paper Feed Roller. Below that, not pictured, is the silver paper apron.
All these parts work in tandem to smoothly apply ink to the paper tape when a key is depressed, and then to advance the paper to the next available line when a key is released.
If you were using the Stentura with paper tape and an ink cartridge, you would also have to apply StenoLube1 to the Platen Bearings and Platen Drive Gear, and StenoLube2 to the Paper Feed Roller.
To the right of the Platen Roller is number 14, the red Electric/Manual lever.
You would typically change from one mode to the next when either trying to make adjustments to the machine's keys or when your machine is running low on battery and you have to switch to writing on the paper tape.
Number 15 looks like it's labeling two empty areas, but those are the handles for the machine. And of course, above all of these parts is number 16, the lifted cover/nameplate.
Keystroke Emulation
As you can see, each stenograph machine is a lever-based machine, just like a typewriter. Each key on the machine connects to an electronic switch.
After completing a stroke, the machine will send that input through the real-time cable connected to your computer. Software -- Plover or CAT (Computer-Aided Transcription) -- will emulate that stroke and translate it from shorthand into something else, presumably English or a command, using a dictionary.
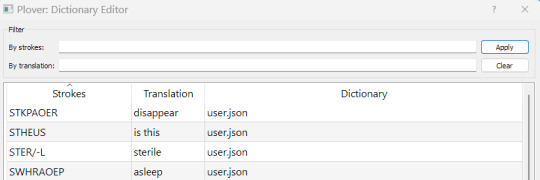
Above is a screenshot of the Plover Dictionary Editor. You can filter by strokes or by translations. You use this pop-up to edit, add, or delete strokes from the dictionary. All Plover users are given a pre-named dictionary called "user.json".
Rather than editing the "main.json" dictionary, which is a free user-created dictionary distributed through downloading the program, you would typically make changes to other dictionaries, especially user.json. This is to ensure that if Plover were to be updated even if your main.json were to be accidentally overwritten, you would not lose your dictionary changes.
Production of a Chord
Below is an attempt I made on December 25th, 2022, to write the top 100 English words using a metronome set to 140 bpm.
The bottom right corner of the video shows the digital paper tape emulated by Plover. Each stroke is then translated into English, as demonstrated by my completion of the drill at the center of the video.
youtube
[Video description: A video of my screen as I write to a Top 100 English Words drill on the website Stenojig. It begins with me setting a metronome to 140 bpm with stress on the 2nd of the 2 beats. In the top right is a WPM plug-in measuring my speed; on the lower right is a plug-in displaying emulated paper tape. Soon after setting the metronome, I switch tabs to Stenojig and begin the exercise. Green highlight indicates whether I've written a word correctly. And the end of the video are a set of stats indicating that I did not erase anything during the practice session, I averaged 2.15 strokes per second, and that it took me 0:47 seconds to finish the exercise, giving me an approximated WPM of 114. Then the video ends.]
#stenography#steno#open steno project#plover#education#court reporting#stentura#stenograph#stenographer#transcription#studyblr#accessibility#keyboarding#infodump#steno resources#long post#munchlax's musings
19 notes
·
View notes
Note
So many thoughts and feelings for something with a single brain cell that bounces around his head like a screensaver.
VERY true. But he's full of love-
And berries.
Yes. So many berries.
11 notes
·
View notes
Note
🅰
"Working in the medical ward for fossil pokemon can be pretty exhausting... But at least there's cute pokemon to lift my mood!"
~ Plover
4 notes
·
View notes
Text
when you're mean to me this is who you're being mean to :(
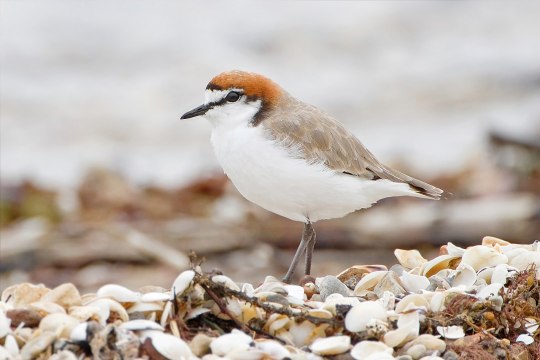
#red-capped plover btw. if you even care#this was gonna just sit in drafts but then i saw that plover post and i felt compelled. to actually post this#L.txt
1 note
·
View note
Text
moo/plover/mason
this is @cow-inthe-closets sideblog for various non-SpIn fandoms, including omori, wc fan stuff, whatever i’m interested in at the time. most utdr and splatoon stuff just goes on my main
also has like reblog games and stuff usually
pretty basic dni, terfs, 18+ etc.
#plover posting - posts by me
0 notes
Text

#collage#birds#bird#piping plover#charadrius melodus#art#my posts#now to be annoying about these little dudes#they’re pretty small; sitting somewhere between sparrows and robins#the ones here ^ are juveniles#you know because of the black beak#adults have an orange beak with a black tip#the oldest recorded piping plover was 16yo!#it was recaptured and rereleased in 2015 during a banding operation#it had been previously banded in 1999
0 notes
Text
being soooo brave and nice on iNat about correcting someone's obvious mis-ID of a gull as a plover
#and the other picture of a gull they posted they IDd as a yellowlegs.#being SO brave#tbf iNat for SOME reason was suggesting black bellied plover as a first choice and this person clearly doesn't know better
0 notes
Text
Intro Post (Edited on 06/30/2023)
Hello! You can call me Sleepy.
I also stream under the name Melody_Wisp over on Twitch! I stream video games :)
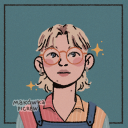
profile pic image description:
To be edited at a later date!
Full profile pic can be found here.
You can find me on:
Twitch: Melody_Wisp
YouTube: @MelodyWisp
TikTok: @MelodyWisp
And:
Discord: MelodyWisp
HiveSocial: SleepySnorlax
The StoryGraph: SleepySnorlax
Github: AnonymousMunchlax
Pillowfort: SleepySnorlax
Disabled.social: SleepySnorlax
Feel free to say hi, ask me questions, or chat with me!
My DMs are open on Discord, HiveSocial, Pillowfort, and here on Tumblr.
My Asks are also open on Tumblr.
I live in the US's EST time zone, but I'm up at odd hours of the day. You can just ask me if I'm online if you feel unsure.
I'm a super chatty texter, and I love meeting new people! I also love infodumps, and do not mind at all if people drop in-and-out of conversation without warning. I do the same (●'◡'●)
And I also like to help people, whether that's through education on the aspects of accessibility and ableism that I am most familiar with or helping to write alt text or image descriptions for images.
Also also:
If my image descriptions and alt text or whatever else are ever insufficient, please do reach out. I do review my own posts very often and try to adjust where I can, but I err pretty often as well.
This is not to say that I wish to put the onus on anyone for whom image descriptions and alt text are a necessity or a helpful accommodation, but that I will never be offended by a correction or a suggestion.
I know how it feels to attempt to help someone by offering advice on accessibility, or ableism, or other forms of bigotry and getting overwhelming pushback or microaggressions in return. It's exhausting!
So I promise to always be open-minded and to never take this sorta criticism personally :)
Important: I've started color-coding and emboldening every other line on lists to help with readability. It helps me substantially. The color isn't as important as the contrast, I think.
My interests include (besides those related to my identities):
stenography (machine shorthand)
transcription and captioning
language learning (Japanese)
webtoons and webcomics
manga, manhua, and manhwa
music (primarily Japanese)
video games
research
coding (beginner)
learning how to draw
accessibility (providing, learning about, and educating about it)
educational materials development (steno)
This blog will focus on providing updates on my studies in stenography, Japanese, drawing, and coding, as well as my adventures on StoryGraph.
Master tags for filtering my posts:
munchlax's musings (ALL posts)
steno update post
adding books to storygraph
learning how to draw
drawing progress
reblog
steno theory creation
PS:
I made this Tumblr ages ago, but never used it until now. My AuDHD brain just suddenly hyperfixated on my old blog, and ta-dah! I've been procrastinating for hours by customizing it!
Is it ugly? Yes. I'll keep experimenting with it. I'm not good with... organizing or making things look pretty. Or coding.
#introductory post#stenography#physically disabled#chronically ill#nonbinary#adhd#autistic#dysautonomia#plover#livlyisland#accessibility#transcription#captioning#studyblr#disabled#intersex#dyspraxia#hivesocial#storygraph#munchlax's musings#pillowfort#mastodon#Melody Wisp
4 notes
·
View notes
Last Seen Blogs
game-blaaaawg-blog
A random guy's Video Game Blog.

perozu
Um hi
seven-of-endless-hearts
A Coterie of Endless
makgilbert
mak is struggling