#embroided
Text

Palestine / Jerusalem -Embroidered unused Jerusalem postcard.
5 notes
·
View notes
Photo

Portada y contraportada de una edición de 1791 de Robinson Crusoe.
Lo curioso de estas cubiertas es que están bordadas.
10 notes
·
View notes
Photo

RMC® JAPAN DENIM — BONDAGE EMBROIDED DENIM JEANS.
#astéticas#rmc#rmcdenim#rmcjapandenim#pants#pant#apparel#japandenim#accessories#essentials#fashion#streetbeast#embroided#jeans#jean#denim#mensfashion#mensstyle#photooftheday#modern#modernart#contemporaryart#contemporary#dope#menstyle#hypebeast#highsnobiety#menswear#wash#asteticas
6 notes
·
View notes
Text

Meow!
Meow!
7 notes
·
View notes
Text
TONIGHT'S THE NIGHT!
We're only 12 HOURS AWAY from seeing if @taylorswift is attending the 2022 #VMAs !
Wouldn't she look #Gorgeous on this 'FLORAL & LEAF THREADWORK EMBROIDERED GOWN' by @oscardelarenta ?
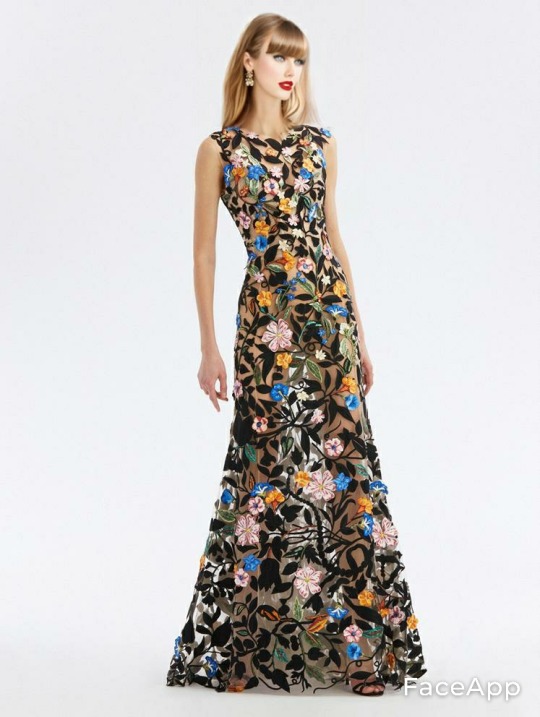
#taylor swift#swifties#taylors version#red carpet#floral dress#floral gown#threadwork#embroided#embroidery#oscar de la renta#silk gown#silk dress#mtv vmas#vmas 2022#vmas#floral#fashion#gown#haute couture#multicolor#fearless#speak now#red (taylor's version)#taylor swift 1989#1989 taylor's version#reputation#lover era#folklore#evermore#evening dress
3 notes
·
View notes
Text


Anastasia
#Model#Anastasia#Anastasia Now#Blonde#Long Hair#Skinny#Embroided#Leather#Black Leather#Pants#Trousers#Feet#Tight
0 notes
Text
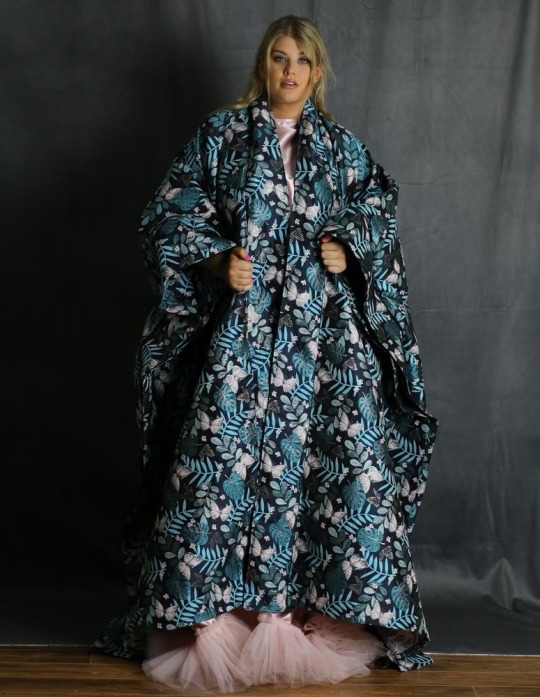

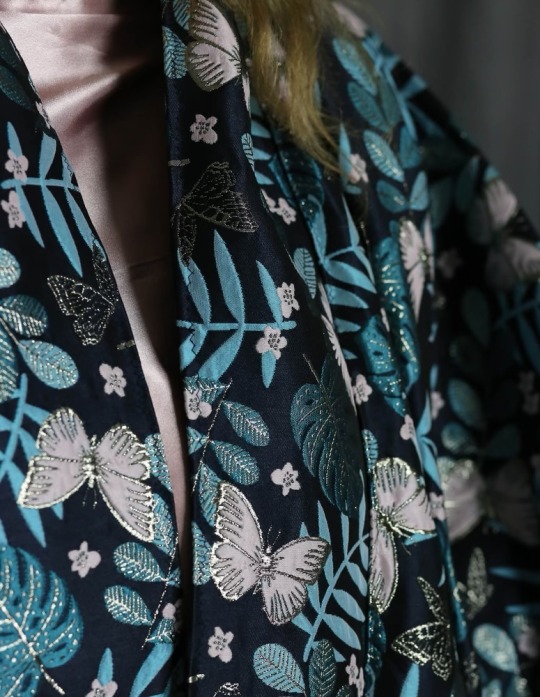

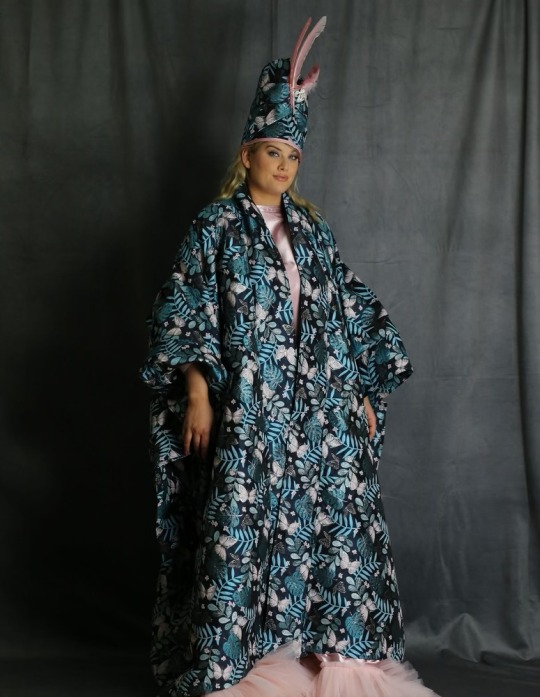
PAPILLON Opera Coat by MALCOLMPAULL SS23/24
#embroided#couture#designerduds#haute couture#style#fashionpost#runway#malcolm paull#oversized#photoshoot#kimono#kurt angle#papillon#butterfly#designer paypal afterpay unisex unisex fashion unisex clothing haute couture online shopping
0 notes
Text
In light of increasing anti-trans and anti-abortion laws in the United States, I am once again humbly requesting you inform yourself about jury nullification, your ability as a juror to vote against convicting people being prosecuted under unjust laws. Nullification was instrumental in legalizing abortion in Canada - it informed jurors can use it to help protect healthcare workers and protesters in the US, too.
#I am not a lawyer so please do not ask me questions - I will simply google them as you might#but I do care about this so so much#genuinely: read about it. post about it on social media. tell your friends who have jury duty about it#especially those in 'red' states#it can be so powerful#tam.txt#jury nullification#I still want to get embroidered 'research jury nullification' sweatshirts made.....
24K notes
·
View notes
Text
Had a few folks interested in how I made the patches I posted for Solarpunk Aesthetic Week, so I thought I'd give y'all my step-by-step process for making hand-embroidered patches!

First, choose your fabric and draw on your design. You can use basically any fabric for this - for this project I'm using some felt I've had lying around in my stash for ages.

Next, choose your embroidery floss. For my patches I split my embroidery floss into two threads with 3 strands each, as pictured. You can use as many strands in your thread as you prefer, but for the main body of my patches I prefer 3 strands.
Next you're going to start filling your design using a back stitch.

First, put in a single stitch where you want your row to start.

Poke your needle up through the fabric 1 stitch-length away from your first stitch.

Poke your needle back down the same hole your last stitch went into so they line up end-to-end.
Repeat until you have a row of your desired length (usually the length of that colour section from one end to the other). Once you have your first row, you're going to do your next row slightly offset from your first row so that your stitches lay together in a brick pattern like this:

Make sure your rows of stitches are tight together, or you'll get gaps where the fabric shows through.
Rinse and repeat with rows of back stitch to fill in your patch design.

When you're almost to the end of your thread, poke your needle through to the back of the fabric and pull the thread under the back part of the stitching to tuck in the end. Don't worry if it looks messy - no one's gonna see the back anyway.
This next step is fully optional, but I think it makes the patch design really pop. Once your patch is filled in, you can use black embroidery floss to outline your design (or whatever colour you want to outline with - it's your patch, do what you want). I use the full thread (6 strands, not split) of embroidery floss to make a thicker outline.

I use the same back stitch I used to fill the piece to make an outline that adds some separation and detail. You could use most any 'outlining' stitch for this, but I just use back stitch because it's just easier for me to do.
Once you're finished embroidering your patch, it's time to cut it out!

Make sure to leave a little border around the edge to use for sewing your patch on your jacket/bag/blanket/whatever, and be careful not to accidentally cut through the stitches on the back of the patch.
If you have a sturdy enough fabric that isn't going to fray, you can just leave it like this. If not, I recommend using a whip stitch/satin stitch to seal in the exposed edges (I find that splitting your embroidery floss into 3-strand threads works best for this).

And then you're done! At this point you can put on iron-on backing if you want, or just sew it on whatever you wanna put it on. Making patches this way does take a long time, but I feel that the results are worth it.
Thanks for reading this tutorial! I hope it was helpful. If anyone makes patches using this method, I'd love to see them! 😁
#solarpunk aesthetic week#sewing#tutorial#sew on patch#punk diy#diy punk#punk aesthetic#handmade#solarpunk#handcrafted#embroidery#embroidered patch#how to#how to make a patch
17K notes
·
View notes
Text
7K notes
·
View notes
Text


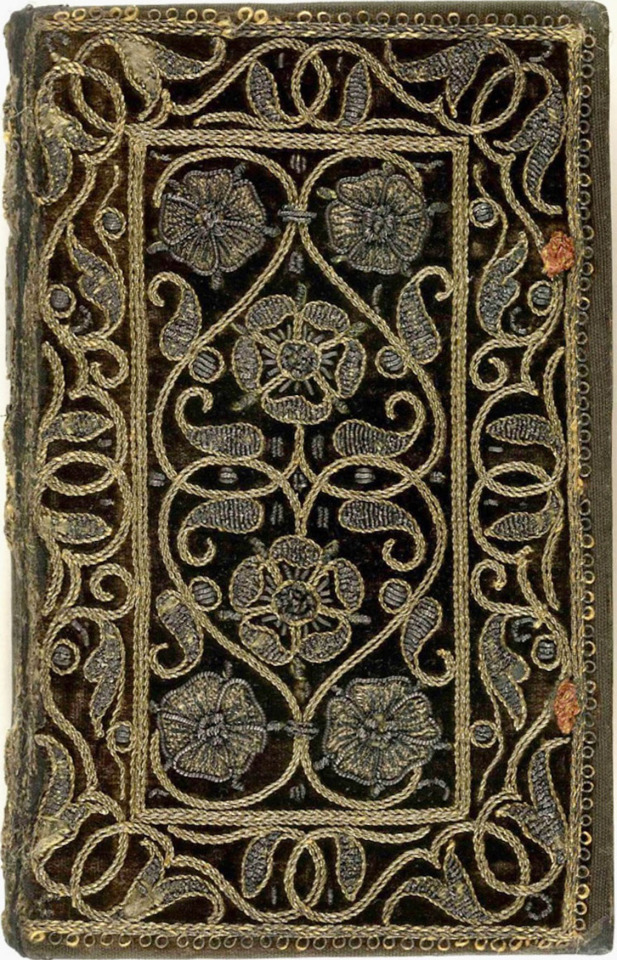
Embroidered book covers
#beautiful books#book blog#books books books#book cover#books#rare books#embroidered#embroidery#book design#book binding
5K notes
·
View notes
Photo

RMC® JAPAN DENIM — FLASHING GEISHA EMBROIDERED SELVEDGE DENIM JEANS, 2004.
#astéticas#rmc#rmcdenim#rmcjapandenim#pants#pant#apparel#japandenim#accessories#essentials#fashion#streetbeast#embroided#jeans#jean#denim#mensfashion#mensstyle#photooftheday#modern#modernart#contemporaryart#contemporary#dope#menstyle#hypebeast#highsnobiety#menswear#wash#asteticas
3 notes
·
View notes
Text

im whuh??
#2023#embroidery#cats#kittens#Referencing the beautiful Im Huh Im Whuh Im Bwuh - the ???? siblings picture#embroidered on black velvet for a pettably soft finish
4K notes
·
View notes
Text
i am thinking how much poorer, how much less colorful the world would be if art was only made by "professionals." if all the music, all the stories, all the sketches & paintings & craftwork of the world was created only by the small category of people able to make a decent living from their art. imagine if the only people allowed to create were the experts & the renowned & those aspiring to the top. what a grey world that would be. how much joy would be bleached away! i love you people who create for the sake of creating, i love you artists who do art for tiny audiences, i love you people who make things even just for one person, even just for themselves, even if no one's watching, thank you thank you thank you for decorating the world in which we all exist
#not a shitpost#related: the most powerful crafters alive are crocheters who spend 7+ years making an intricate table cloth no one is allowed to eat on#all that arcane magic into making a display object primarily for their own enjoyment#and that of the blessed few lucky enough to be invited into their home to behold what is by rights a sacred object#if you spend a certain number of hours crafting something u have the right to have it put in a shrine or museum of your choosing i think#you have imbued it with your Life Essence by sheer force of concentration and obsession it is Holy now#anyways. old ladies who knit/crochet/embroider etc are a thousands times more powerful and intimidating#than old white dudes who are obsessed with war memorabilia or whatever#i have nothing but respect awe and appropriate amounts of fear towards crafters. my liege
11K notes
·
View notes
Text
oh yeah btw i made this
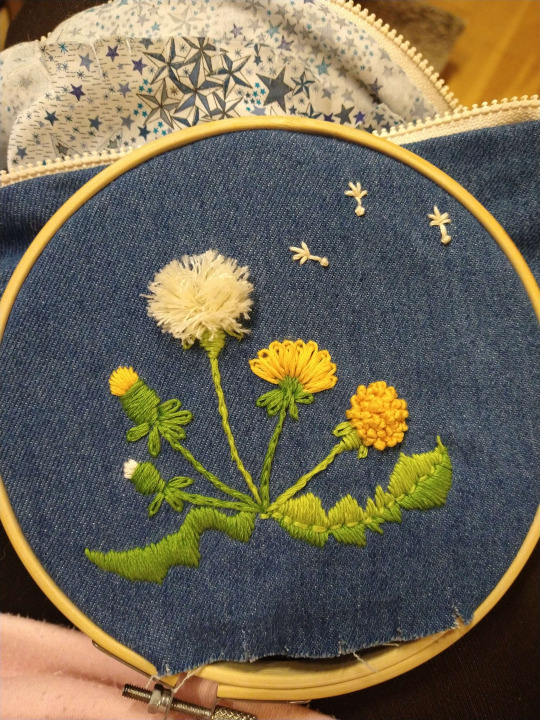
#it's my first time doing hand embroidery#my partner has taken up sewing so i embroidered this on their project#it was fun#now i gotta figure out what i'm gonna do next#embroidery#fiber art#textile art
2K notes
·
View notes
Text

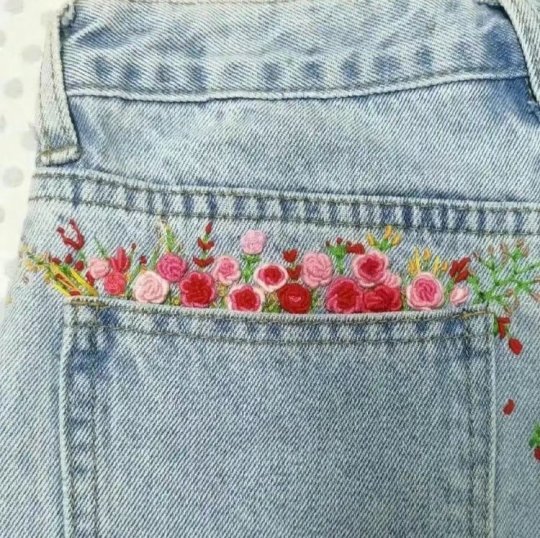
#superkursunaskr#embroidered#pants#flowercore#flowers#cottagecore#landscape#desing#beauty#beatiful#photography#kakaollusut#mayonezli#iyiyimlaben#sarhoskedi#morsaclizombi#bugeceicelim#busonolsun#solukmavipapatya#so cute#pretty in pink#pretty#indie#lostonyoubabe#love#kafaminguzelligi#biriyimbenbiri#visnelimeybuzz#vanilyakedisi#anlamazlarki
4K notes
·
View notes
Last Seen Blogs
mubun-arts
Art Dolls

boiledcaprisun
yuri jesus
narnour-momo-007
LEGO ppl live in houses made of their own flesh

jovialmakernacho
Untitled

tripod-baby
Untitled