#ts4 editing tutorial
Text
shading and lighting tutorial!
this was requested by an anon. a little before we start! i use procreate on my ipad pro with an apple pencil. unfortunately procreate is the only program i know but i imagine similar features exist in other programs as well. i feel like i need to say that i am in no way an expert on shading and i know it's not always accurate. also if you end up using this tutorial in some of your edits please feel free to tag me, i would love to see it! if i've missed something or if i explained something badly don't be afraid to ask me about it. okay long post ahead!

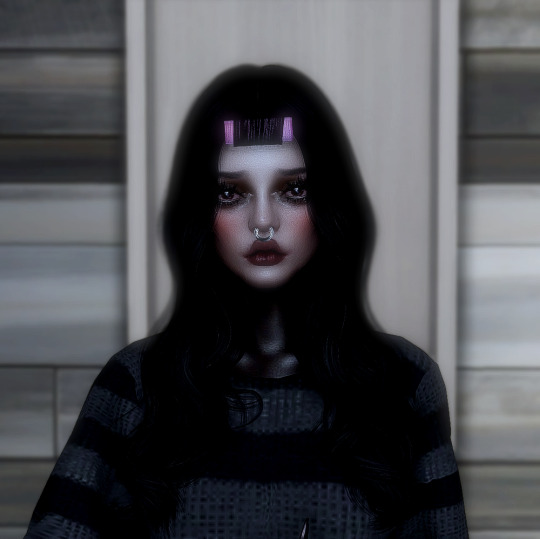
so i'm going to just make a little simple edit of my girl. this is a screenshot taken from cas that has the sunscreen filter on it from the built in windows photo editor on 20% intensity.
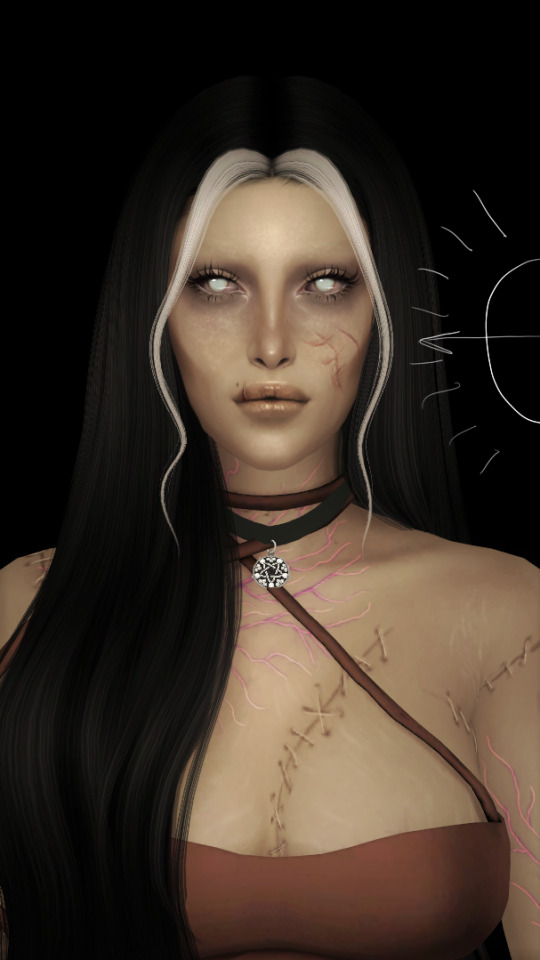
now i've added my normal little touch ups that i usually do, eyelashes, catch lights and highlights as well as touching up her scars. everything is painted with the soft airbrush except for some highlights that are painted with the 2B compressed charcoal brush. before adding highlights however you should figure out where you want the light to come from. i've drawn a little ugly sun for you to see where i've placed my light.
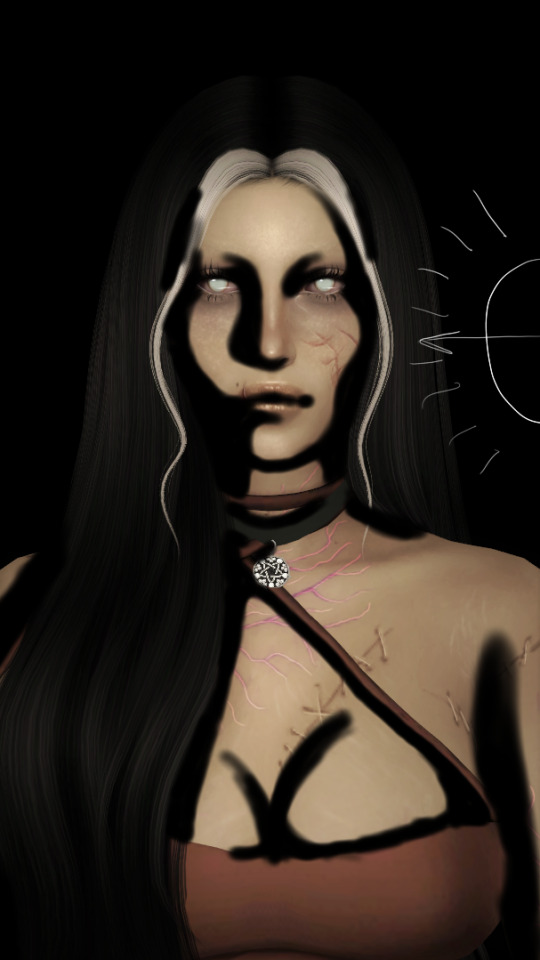
now i use the soft airbrush and paint with black where the shadows would be. if i would have fixed up the hair (which i didn't for this one because it's my least favorite part and i didn't have the energy) i would have made sure to make the shadow layer behind the hair ones since i think it looks better if the hair isn't shaded the way the face is. then i blend all of the black out with the smudge tool with the soft airbrush so it looks a little softer.
then change the layer to soft light and change the opacity to 60% and voilà! you have soft shadows! if some shadows still look to harsh for your liking just go back in with the smudge tool a little more.


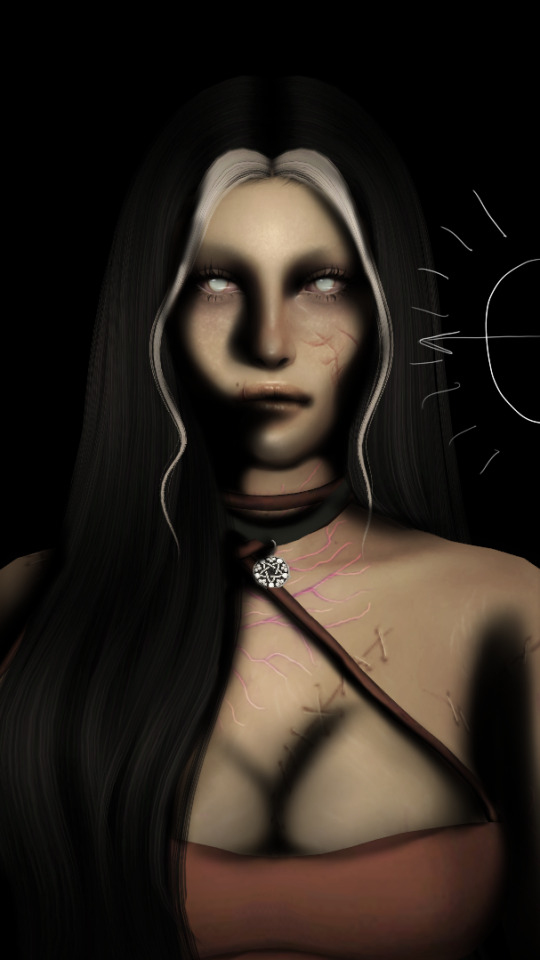
now do a layer on top of everything and kind of circle the part you want lit up the most with black again, smudge it and set the layer to soft light at 60% opacity.


this step is not a must, i don't do it very often anymore but if you want some extra color or light you can do this. choose a color you want your light source to be. i tend to feel like intense colors look the best. paint it where you want the light to come from, then use the gaussian blur tool until your satisfied.
now you can leave it in the normal layer setting or play around a bit with different ones until you find something that you feel fits. for this one i decided on using the difference layer setting on 70% opacity.


a step i always almost forget is shading the eyes! to do that you just repeat the normal shadow process. paint it black, smudge and put the layer to soft light on 60% opacity. it adds so much, i highly recommend this step! now you're done with the first part. now save it as an image and start a new canvas with that image.


if you want to use gaussian, motion or perspective blur now would be the time. i didn't for this one but i almost always do. this next step is also totally optional. we are going to use chromatic aberration in the displace setting on 90% opacity and slightly pull it to the side. then use the normal chromatic aberration between 5-10%. it just adds a lot of fun and weird color that i just love and makes the edit look so much more alive. then use sharpen, i usually do 10-15%. and after that use bloom. my edits are almost always dark so i use a lot of it. i think i did 35% for this one to give it a little glow. then use noise. my go to is 3% on max octaves. then go into hue, saturation, brightness and change the saturation to 55% (you can do however much you want but these are my go to's) and brightness to 49%.

now go into curves and play around. i always make the gamma brighter but the colors i play around with so much.

completely optional again but i've recently started to add a gradient map, especially instant or noir. for this one i used noir on 20%. and that's it, we are done!
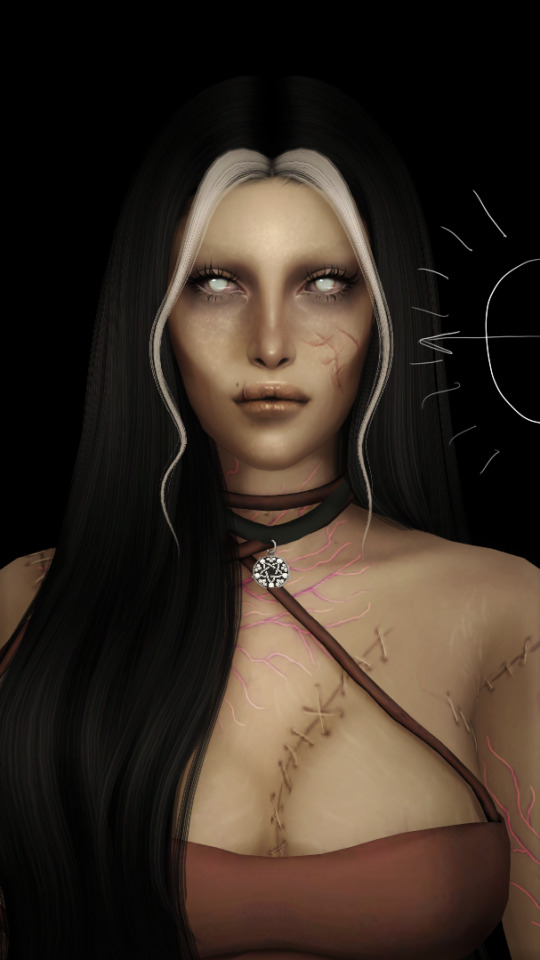
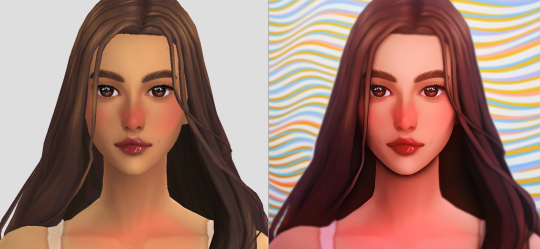
before/after.
hopefully this is understandable and helpful. have fun!!
128 notes
·
View notes
Photo
TS4 Procreate Hair Editing Walkthrough (Subtitled + Voice Over)
The long-awaited hair editing kind-of-tutorial is here! I'm genuinely sorry for how long it has taken me to make this. My hair editing process is just not organized at all, which you can probably tell after watching this. This video is also unscripted, which I probably shouldn't do ever again lol! I hope that this video helps.
This video took over a week to put together, caption, and edit. My hair editing is also something I hold dearly to myself as part of a huge essence of my Sims editing style, and I’m really proud of how far I’ve come with hair editing/painting. I hope that you appreciate me sharing this with you!
✨ PLEASE CONSIDER SUPPORTING ME ON KOFI! ✨
Find the video below! Feel free to speed it up if you need to.
youtube
#myedits#mytutorials#ts4#simblr#sims#sims edit#sims tutorial#ts4 tutorial#ts4 editing#ts4 editing tutorial#hair painting tutorial#procreate#the sims 4#sims art#solstice-sims#procreate tutorial#digital art
251 notes
·
View notes
Note
hi! i love your sims sm !! they’re gorgeous ! i was wondering if your willing to share how you edit your screenshots? if not, i totally understand ♡♡♡
omg thank u so much!!!!!!! <3 this means a lot to me djkhfjsd of course i can! i'm a novice when it comes to editing (literally only started a few days ago) so my process is still very basic but i can show u nonetheless. it'll all be under the cut :-)
okay so before i start i have to mention that i use three programs to do this: reshade (does the bulk of the editing for me via presets), SRWE (ensures that my screenshots are hq), and photoshop 2020 (for editing)
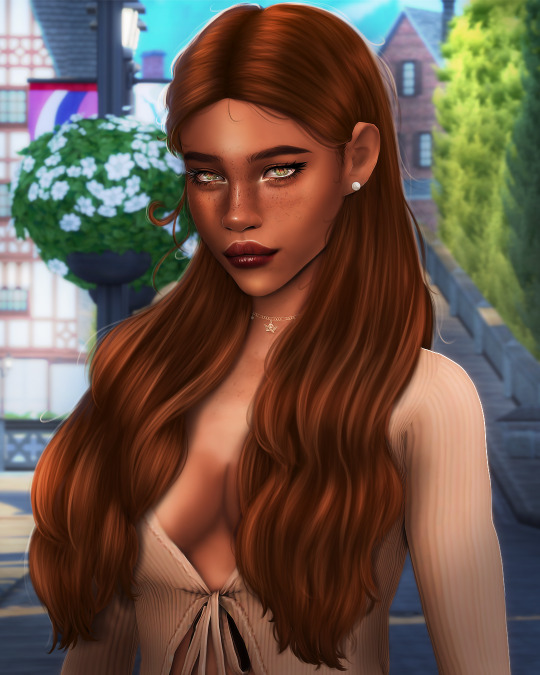
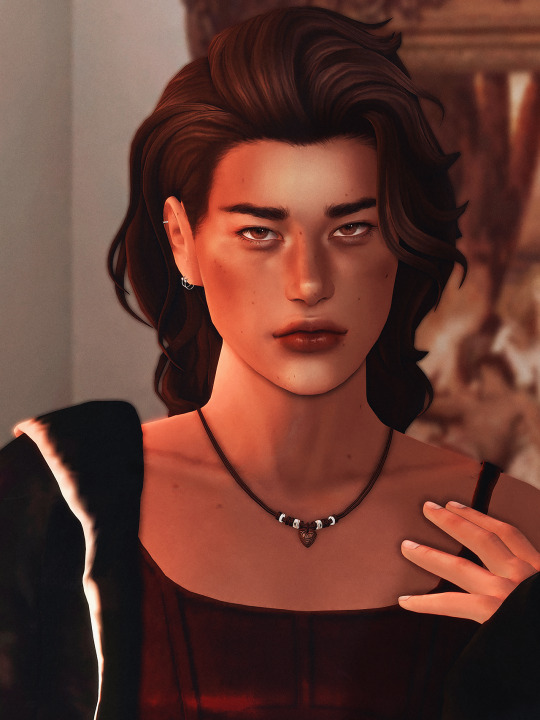
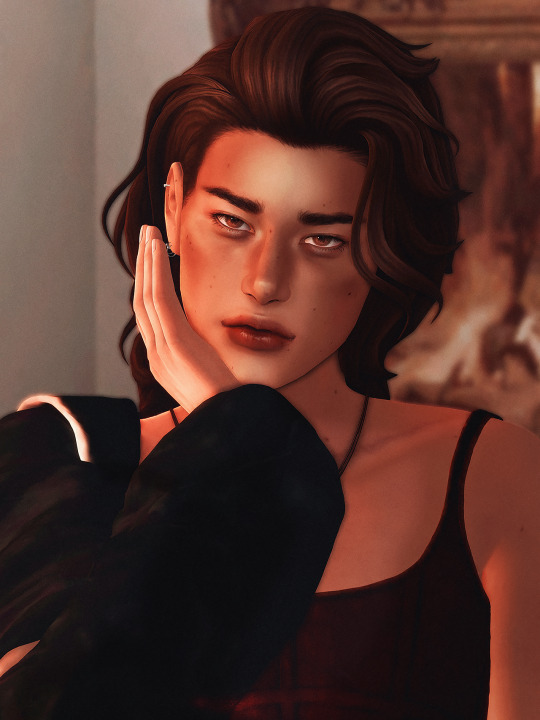
lets say i'm editing this picture

since i've already posed her, taken the pic w reshade, and cropped it to a size i want, i dont have to worry about any of that anymore. on to photoshop! (for ref: i didnt take this particular screenshot with SRWE because i didnt have it installed at the time, but for all of my current ones i do!)
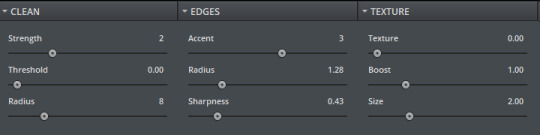
the first thing i do is open up topaz clean v3 - i got mine from [cough cough here]. idk anything abt topaz so this may be outdated but... it works good enough for me
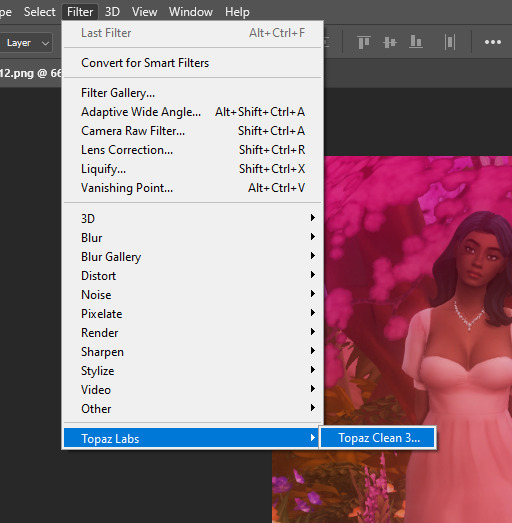
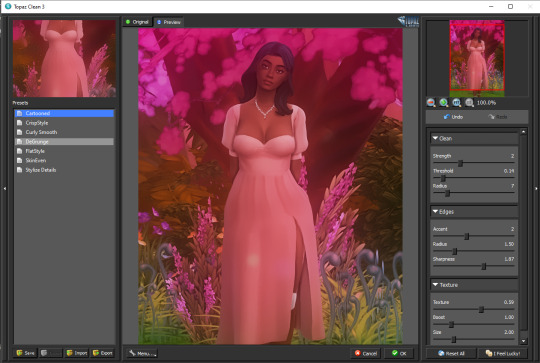
from there, i just mess around with the 'cartooned' settings until i find something i'm satisfied with. i try to keep it really subtle because i want my sim to actually look like themselves fkjhgjhf here are my personal settings for this specific photo
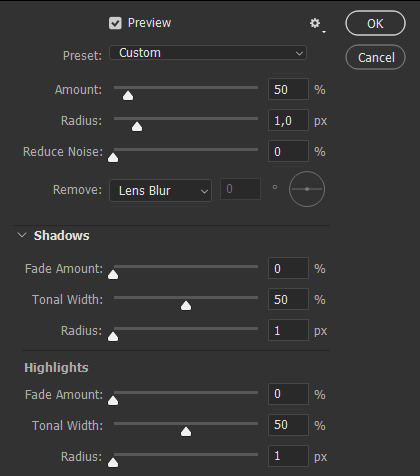
after this, i go to filter > sharpen > smart sharpen to bring out the details in the photo
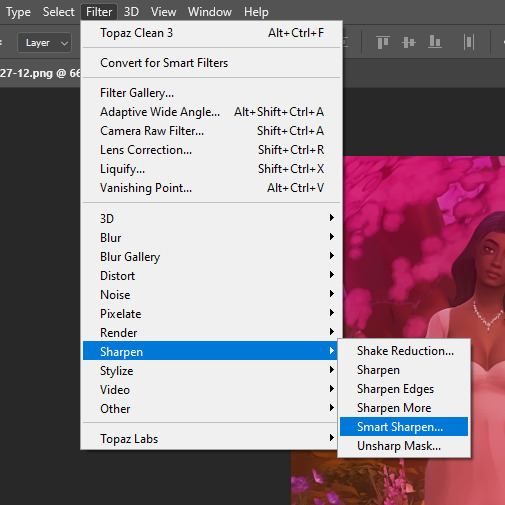
similar to topaz settings, i just mess around with the strength until i find something that i like. i try not to go too heavy with it but since i didnt take this pic with SRWE, i gave it a little more sharpening than i usually would

lastly, i use one of @wooldawn's actions from this action dump . i personally use 'o gradient' to make the photo a bit brighter

and thats it!

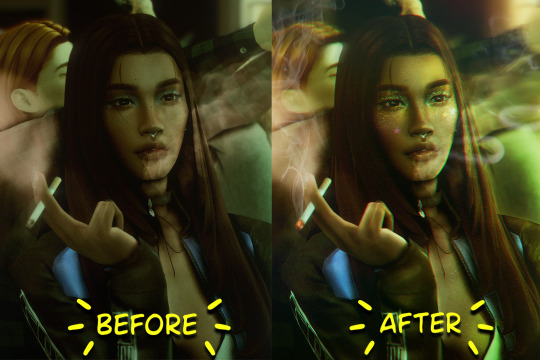
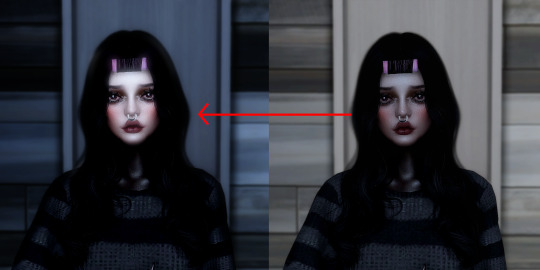
before (left) vs after (right)
again it's veryyyy basic but i think it does the job for right now hehe.. the process is the same for landscape screenshots too, i might add in a light flare or two in those to bring out the Cool Sun Rays for Ambience
#i hope this is good..... cries#ts4 tutorial#editing tutorial#photoshop#sims 4 editing#ts4 editing tutorial#mytuts#anonymous#the sims 4#ts4
22 notes
·
View notes
Text


average ubrite photography major with the absolute worst taste in fashion
#ts4#s4#ts4 cas#ts4 gameplay#s4 cas#kashisuns editing tutorial is sooo good#my simbs r literally glowing !!!!#obviously going to start a new gameplay with them & then promptly abandoned it#moss
963 notes
·
View notes
Text
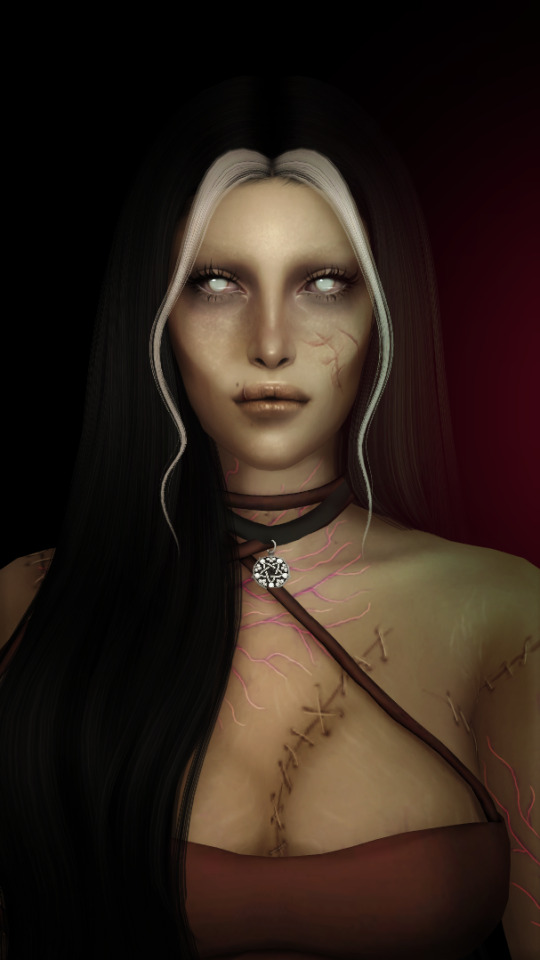
spill the milk
#simblr#sims 4#ts4#ts4 edit#ts4 cas#river dipping#theodore doe#echthroi#🦇#river how long did you just spend editing these photos of theo?#.........do not ask me that i'm fragile#i've been watching lighting tutorials from artists on youtube lately so note!!#i've highlighted around the corners of his lips and nose then blended it out a ton and then added little triangles under his eyes#honestly i could stand to take the opacity down on the shading and highlighting layers but i think i like the dramatic effect more#also i did say yesterday that theo's just some guy but then went into cas and gave him a cunty little outfit#i can't help it#let's just say this is a clubbing outfit#and i..... technically took these just to show off theo's face moles (i got VERY distracted in photoshop tho lmfao) but...#how am i supposed to crop out his little outfit when it's tewww good#just zoom .#i'm in loveeeeeee with his eye moles but he had those before#my new favorites from the ones i made for him are the two on his lips :3c#i... am not sure how well you can see them here tho#when i turn on my desktop i'll reblog this with closer pictures!!#i really just couldn't crop it closer to his face jdnghkjnh i LOVEEE this outfit
170 notes
·
View notes
Text
Updated: How I edit my sims 4 screenshots (night-time edition)
A more detailed editing tut so you can understand my process as it may help you, i edited this relatively quickly and usually spend about 1-2hrs editing something...so let's goo.....
Before taking screenshots:
Help yourself as much as you can in-game, I always make sure there is some sort of light source in my pictures or something interesting that I can add to enhance something already there
Understand good/bad composition and add variety by using different angles
I take LOTS of photos just to end up with 1 or 2 good ones

I'll just be using photoshop for this, but i also like to use the procreate app as i'm more confident w it.
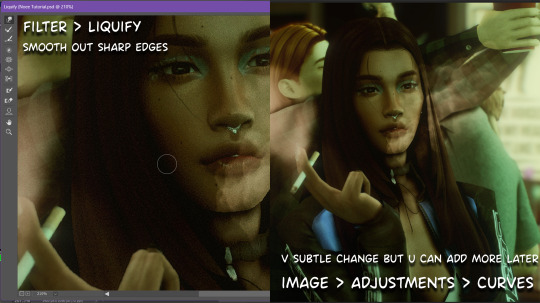
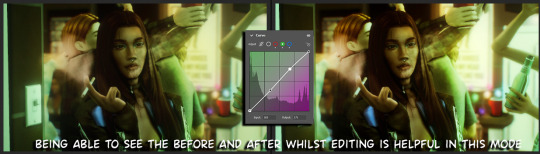
step1: I check if there are any major glitches or hard areas e.g, fingers elbows etc.. that have sharp points and pull them in liquify so they are smooth. Then use curves to change the contrast.
step2: *duplicates image* using the dodge and burn tools (keyboard shortcut: o ) i'll add emphasis to highlights and shadows (be careful with these as the dodge tool can ruin the image if used in excess) *merges image* (i duplicate and merge as i go, utilise using lots of layers so you can go back if you mess up/ want to change the opacity of an effect.)
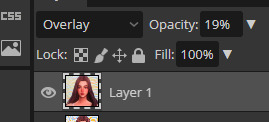
step3: making light sources POP. *new layer* change blending mode to overlay or soft light and choose a colour you like.

step4: *new layer* draw hair strands. i just use a basic round brush in photoshop and change the hardness or i'll use a sharp caligraphy type brush depending on my sims hair type. (i try not to overdo it as i like maxis hair and don't want it to look too realistic)
step5: i would then add a new layer and set the blending mode to multiply to add more shadows, but i don't feel like i need to at this point.
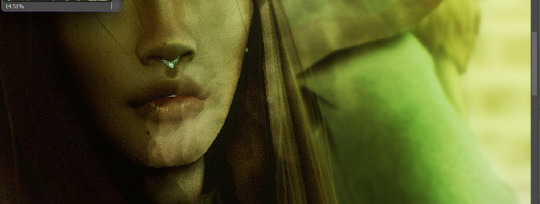
step6: *duplicates image* go to filter > camera raw filter, i change the "light" and "curve" panels, i like green tints in my screenshots especially the night ones. (this is where all the magic happens really so just adjust all the channels to your liking, lightroom is also really good to use)
step7: *create new layer* blending mode: screen or linear dodge (add) / makeup and finishing touches! - for this look i'll get stars and glitter pngs off google or unsplash same for the smoke, though if i'm using procreate they have free brushes for that :')

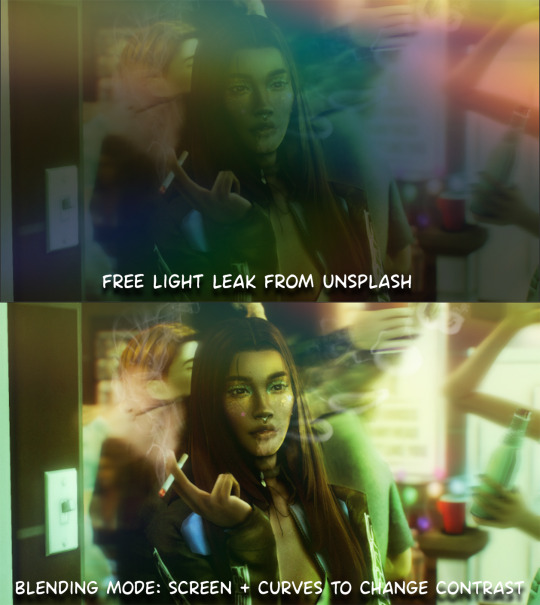
step8: add light leaks as they add some fun dynamic lighting and textures to your screenshots. (i also flip my image horizantally [image > image rotation > flip canvas horizontally] whilst editing as it's like a "fresh pair of eyes" when you've been editing for a while so you can see what looks off)
final step: merge all the layers (though i do merge along the way once i'm happy with something) go to filter > sharpen > smart sharpen. I leave it as the default setting.
extra step if u want: for party pics i might add chromic abberation here is a 60 second tutorial on youtube it makes the pic look cool and trippy.
And you're done!! congrats on surviving. if you have any questions please send them in my ask box so others can see and get help too.
129 notes
·
View notes
Text

The making of of the loading screen for the therapy game 🎮
Pics above and below edited by imagechef

Draft from photo studio
And the screenshot edited with incollage

#incollage#photo studio#imagechef#therapy game#underwater love#sims 4#simblr#ts4#sims 4 edits#windenburg#windslar#sims 4 tutorial
46 notes
·
View notes
Text
So I recently found a way to lighten up my sims whenever I take a screenie or do a render and it’s SUPER simple. I had to share! All you need is either gimp, photoshop, etc.
Here’s my original pic:
now we gonna enter gimp!
add a new layer (make sure it’s an alpha layer)
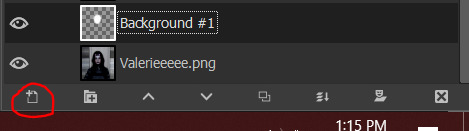
make sure the new layer is set to “soft light”

now go into paint

select a fuzzy brush and the color of your light. I chose white.
now paint over your sim’s face and/or body then go under filters -> blur -> gaussian blur (to your liking, I tend to go pretty high) and you’re done!
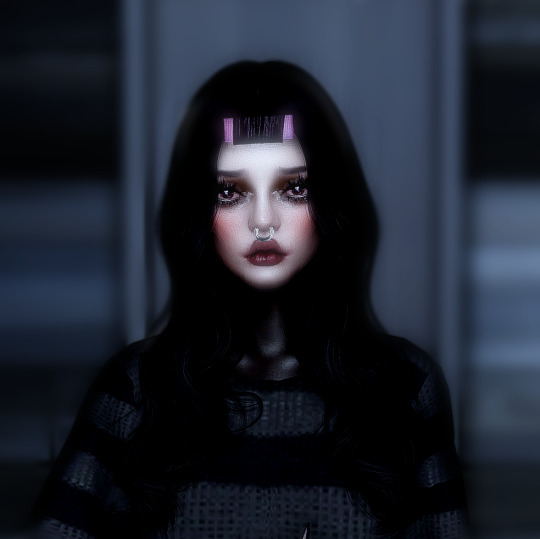
final pic is doing soft light on the background (color black and another layer is blue) and also gaussian blur on the background as well with erasing my sim so she’s unaffected.
#tutorial#gimp tutorial#ts4 tutorial#sims 4 tutorial#ts4 edit#ts4 screenshot#ts4 screenshots#sims 4 gimp#sims 4 tut#sims tutorial
136 notes
·
View notes
Photo

don’t fear the reaper
#bloodtw#ty lucien for the blurry. um. thing? tutorial... i was winging it but i think this is ok..#ts4#ts4 edit#sims 4 edit#the sims 4#edit#my edit#sunny#amongussy#scylla 06942#p
394 notes
·
View notes
Text

#ts4 render#sims 4 render#ts4 edit#my sims#simblr#sims community#back at it w the renders again#im also rly unsatified w my renders/edits these days😭#idk i wanna change the editing style im so bored of my current but idk whattt style i wanna do#and im struggling to even figure out what direction id like to take my blog in#i want a cohesive theme but i feel like i dont rly have one#its just so random lol#also pls ignore the terrible shadow issue around the lace#idk how to fix that#and i can't find any easy tutorials to follow😭#if anyone knows a fix tell me how. i'd love u forever lol
84 notes
·
View notes
Photo

and maybe I was never meant to be
#ts4#sims 4#sims 4 edit#ts4 edit#ts4 render#sims 4 render#simblr#you cant imagine how long it took because i absolutely refused to look up a tutorial
60 notes
·
View notes
Text
hey lovely simmers, how do you write down your characters? do you make a character list, moodboard, anything else? I have never really written my own ocs before (I write fanfics lol) so I'm really curious. how do you write down your stories? script like? novel like? I would really love to know! if you don't want to answer through this post then you can dm me instead <3
#sims 4#sims 4 community#simblr#ts4#sims 4 story#ts4 simblr#ts4 edits#ts4 gameplay#ts4 stories#ts4 tutorial#ts4 story#ts4edit#the sims community#the sims 4#sims 4 gameplay#sims 4 storyline#sims 4 stories#sims 4 stuff#sims 4 lets play#sims 4 legacy#sims 4 simblr#sims 4 storytelling#storytelling#writing#sims 4 help#ts4 edit#ts4 legacy#ts4 sims#sims 4 sims#ts4 storytelling
15 notes
·
View notes
Text
how I edit my sims screenshots without a tablet and downloading a program
So, I’m lazy. I own Clip Studio Paint and I own a tablet, but when I’m playing the sims I’m 90% of the time too lazy to paint over my pictures. But I’m still a sucker for ✨aesthetic✨ and I’ve been asked how I do it, so here’s a guide on how to! It might seem long but trust me, it’s super easy, especially when you get used to it.
First things to consider (but not essential)
○ Reshade makes all the difference! You can follow this tutorial without one and I will show you how you can work around it, but it really helps a lot because it acts like a lovely filter in-game. I recommend Gshade because it’s easy to disable so you can just turn it on when you need screenshots. It also has a lot of pre-made presets and supports reshade presets.
How to install Reshade on the Sims 4 || How to install Gshade on the Sims 4 || my fave reshade presets: daisies & rose colored lenses
note: Gshade also has this really cool function that allows you to cut out the background immediately in-game, which works if you have a flat CAS background (either default or custom). You can disable this when you’re finished taking screencaps as it turns the ‘transparent’ bits bright green in game, but saves as transparent.
○ Don’t want to / can’t install reshade/gshade? No worries, they are basically in-game photoshop. All you need is some psd (you don’t need photoshop to follow follow this step, trust!). I really reccomend intramoon’s psd/actions, so download the ones you like! You can also search for ‘psd download’ on tumblr and there will be plenty you can choose from.
Now to the actual editing! (aka the less boring bits)
1. Go to photopea.com and open your screenshot there by clicking “Open From Computer”. Photopea is entirely free and supports psd files too!
2. (Skip this if you want to keep your background) Assuming you didn’t activate ChromaKey with Gshade (skip this step if you did) - long press the eraser tool and pick “Background Eraser”. Do your magic.

note: you might want to fiddle with the brush size and “mode” depending on what results you get.

3. (Skip this if you kept your background) If you want to put a new background in, I recommend Pexels.com and search for “abstract background” or whatever you’d like. Once you’ve found one you like, download it.

Open your background in PhotoPea. However, do it through Open > Open & Place

Then resize the image that got imported and put it behind your sim. Bam, there’s your background!
If you’re happy with how it’s looking, merge the layers by right clicking your sim layer and click “Merge Down”
4. (skip this step if you don’t want to use any psds) Open your .psd by clicking “Open”

Then select all the layers and press Ctrl+C

Switch tab and go to the file you were working with, you can find your tabs underneath the top menu

Then once you’re there, press Ctrl+V and your .psd layers will import to that file. Now adjust it accordingly, it might require experimenting since all psd files are different. I typically just collapse the folder (if they have it) and lower the opacity.
Then once you’re finished, select all your layers and select “Flatten Image”

5. (Skip this if you used reshade) To add a soft glow, duplicate the layer by right clicking on it, select “Duplicate Layer” and then change the layer to “Overlay”. It will look extremely bright but don’t worry about that for now!

Go to Filter and press Blur > Gaussian Blur, then press OK.

Then lower the opacity to make it less bright. I usually have it very low, around 15 - 30%
6. Now it’s time to fix the jagged edges. Duplicate Layer by right clicking or press Ctrl+J

Go to Filter > Liquify
Now zoom in on the areas that stick out to you, that you’d like smoothed. Using the liquify brush, carefully manipulate the image until it looks how you’d like. You might have to play around with the settings, but I usually just change the brush size.
When you’re finished, press OK.

6. Now to polish your piece! Press Ctrl+J to duplicate your layer and then go to Filter > Stylize > Oil Paint
Untick “lighting” to get rid of the squiggly lines. t should now just look smooth, press OK.
Now go to eraser tool (you might have to hold it to get out of the “background eraser”. go to the brush settings and pick a soft brush, you can also adjust the size there.
Use the eraser to get back any detail that was lost when you used the oil paint effect. Usually this is around the eyes, but do it anywhere you feel like you want the detail restored. Click Ctrl+E to merge the layers once you’re finished, or use the flatten image method.
7. Duplicating the layer again (Ctrl+J), to get a more illustrated effect go to Filter > Blur > Surface Blur, then click OK. Repeat the Same process as you did at step 6 where you use the eraser brush to restore any detail lost (usually the hair), and then press Ctrl+E once you’re finished to merge your layer once more.

8. To add depth to the layer, duplicate the layer (Ctrl+J) and press Filter > Blur > Gaussian Blur. Change the radius to something low-ish and press OK.
Then using a bigger eraser brush, focus on the middle of the face/body, leaving the edges of the body/hair and background blurry. Then flatten the image once you’re finished (Ctrl+E)
9. To make ambient light, duplicate layer (Ctrl+J) and set the layer to Multiply. It will look very dark.

Click Ctrl+U and you will get a window that says “Hue Saturation”. Change it to a bit unnatural colour, I usually like pinkish tones but feel free to experiment. Don’t worry if it doesn’t look good right now. Lower the opacity a little bit, but not a lot. You still wand it to look a little odd.
Click on the black and white squares to make your colours black and white. Press the two arrows beneath it so that the white colour in top, then press on the Gradient Tool. Then go to the Menu and select the second option.

Use the gradient tool from one of the corners (select only one corner, feel free to experiment which one! All gives a different vibe), and drag it so that half is light and half still looks dark. Once you’re satisfied, flatten the image. (Ctrl+E)
10. For the last (and easiest step), sharpen your image. This time you don’t have to mess with the layers, just go to Filter > Sharpen and pick any of the sharpen options, I personally like Sharpen More. This maks the facial features pop.
That’s it! Simple, and trust me, the more times you do this, the easier it gets. ♥ I hope this was of any help!

260 notes
·
View notes
Note
hi! have you ever shared info about how you take and/or edit your Sim portraits, and if not, would you consider it? your edits have such a gorgeous and distinctive look. I would be really interested in learning about your process! thanks for your time!
aww oh my gosh thank you so much!! <33 i honestly don't even do all that much, i use my cinemascope reshade preset; sometimes i add a bit of bloom (mostly using prod80's bloom shader), but i don't do much apart from that. then i open the picture in photoshop and do a few things:
topaz clean; here are my settings
2. i resize the screenshot - this is solely for the purpose of not filling up my hard drive, because i take my screenshots at 4K using dsr. i don't always do this, as sometimes it's just not necessary, but for portraits it's okay, as you don't really lose all that much detail
3. smart sharpen; here are my settings
4. (optional) add noise! i do it only sometimes lol
that's really it! oh and if you're wondering about my cas lighting (which definitely helps a lot!), it's pennyroyal tea by @/rebouks
hope this helps! :3
9 notes
·
View notes
Note
How do you take such great screenshots in bg3?
aaaaawwwwwwww wow thank you so much! im flattered u wanted to ask me this 😁
sometimes i use the free camera mod, but honestly it's kinda much so i don't bother often. it does greatly improve the quality of my screenshots since there's built in hotsampling and you can get better angles and stuff, but most of the time the default camera is good enough for this purpose, especially for gif making purposes. i never use free camera while making gifs :'). if you have any questions/want to know where to download free cam, hmu!!
otherwise when im making gifs or taking screenshots w the default camera, i just use the f10 key to hide the ui (this is default w the game!!) and then i take my screenshots using f12, which is the default camera for steam. if you install a program like reshade, you can use that to take screenshots n customize where you want those screenshots to show up and what toggles to use etc
oh then i lightly edit the pics/gifs in photoshop. i add brightness and saturation, then run it thru topaz clean and smart sharpen then crop it and thats it. i hope this helped sorry its so long ily!!
#jade answers#anonymous#i promise one day i will make an updated editing tutorial#probably not for bg3 specifically since the process is so easy. but for ts4 yes i promise i will one day
9 notes
·
View notes
Text
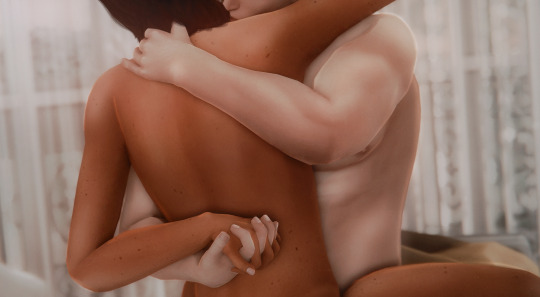
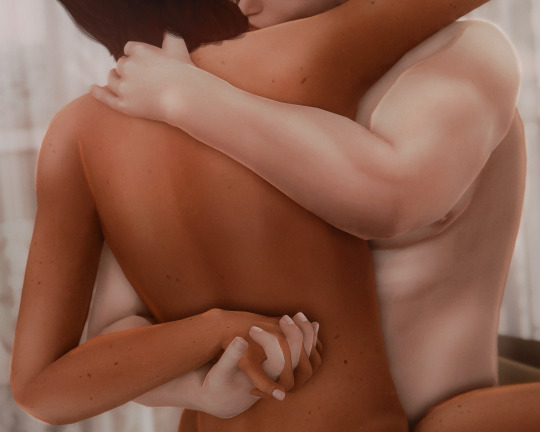
prove to me i'm not gonna die alone, put your arm 'round my collarbone and open the door. don't lie to me if you're putting the dog to sleep, that pet you just couldn't keep.
#the sims 4#sims 4#ts4#ts4 edit#ts4 screenshots#river dipping#🦇#theodore doe#matthias evanoff#echthroi#a burning house to live in#sim spice#or whatever jndfkhnf#do i like the hair strands? not really but if i post this without the hair strand layer you can see theo's hair clipping w/ matthias#(which wouldn't have been a problem had i not switched theo's hair since i made this pose with the old one on the custom rig)#and even tho i TRIED fixing it it just looks bad so you're getting this instead... be gentle i literally have never done this before#i also didn't watch or read any tutorials on how ppl normally edit... which i probably should have dkhnkfgh#anyway editing aside!! this pose is from a series of paintings so i've got more poses i'm making based on them#oh and the caption comes from putting the dog to sleep by the antlers which is theo and matthias's song!!!#like it's THEIR song!!! no one else can listen to it actually not even me! it's just for them when they're slow dancing in theo's apartment#reading the lyrics is akin to torturing myself i won't lie like i'm being waterboarded and teeth are being pulled every time#we'll see if tumblr gets me for this post... lmao
277 notes
·
View notes
Last Seen Blogs
pao-sol
Ocean eyes

eli-is-bad-at-everything
Circadian Rhythm? I don't know her
wondergeem
pelusa por aqui pelusa por aca~
msuspartorialist
The Spartorialist

doink
DoInk