#chai recipe
Text
Chai Espresso [1.5 Liter] - Teku's Style
I've been working on this recipe for a couple of months, trying to perfect it to my personal preference and thought I'd share it. I know it wont be everyone's cup of tea (hehe get it?), but perhaps someone else out there will like it. This is a strong Chai Espresso. No light flavors here.
It started when I bought this Pumpkin Spice Latte drink from Starbucks and I got my first introduction to Espresso. I was like wait- this tastes like coffee, but stronger and has more depth. I'm actually not a coffee person, but I realized then that I was an espresso person. I'm also very much a cinnamon person and that carries over to all things Chai and Pumpkin Spice. So here I am combining Chai and Espresso.
We aren't going to do this the lazy or easy route however, we're going to do this the legit route. You can find some shortcuts doing this yourself and I'll offer examples of things you can substitute in and out, but I'll be showing you how I do it and the things I use.
This recipe is also going based off the fact that you have an Espresso Machine that can make 2-4 shots of espresso at a time. You can also make the chai and drink it by itself, just do not add the espresso!
That being said, here's some items you'll see me use, and potentially items you may need. Keep in mind you do not need the exact same brands. Just because I have McCormick cinnamon sticks, doesn't mean you need to have McCormick cinnamon sticks. Infact I just ordered more cinnamon sticks from Spicy World (they appear to be a different type of Cinnamon - Saigon, where McCormick is Cassia). Buy and use what you prefer to use.
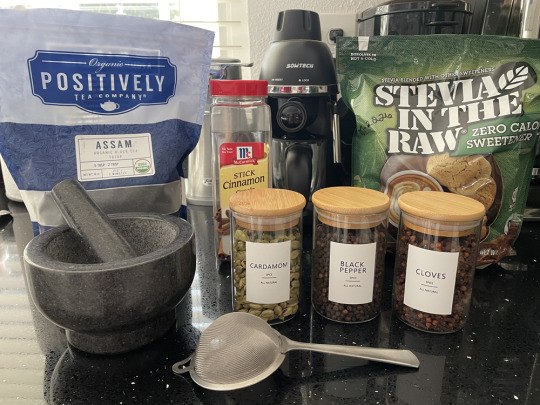
Three of the things not shown here that will also be used, is ginger, milk and a pitcher that can hold 1.5 liters. If you're looking for a recipe list:
7 Cups Water (goes into the pot)
16 Cardamom Pods
12 Black Peppercorns
9 Cloves
8 Slices/Coins of Ginger
5 Sticks of Cassia Cinnamon (McCormick for example), 4 Stick of Saigon Cinnamon (Spicy World for example)
1 1/2 tbsp Assam Tea (can substitute out for packets of tea or other favorite loose tea)
2 to 2 1/2 tbsp Milk (adjust to personal preference)
5 tsp Stevia (or substitute out for sweetener of choice, may need to adjust measurement)
3 1/2 to 4 shots Espresso (made via machine and add by preference)
4 Star Anise (optional, I don't add this)
Everything in this recipe is adjustable to personal taste. I put some explanations in parenthesis already but I'll add more in-depth explanations as I go further down the post. I just know people (myself included) like short and simple recipe lists.
If you want to add star anise, I'd say probably add 4 for this recipe and work your way up or down on preference. I personally do not like it so I didn't bother with it 🤷🏻♀️
Step 1. Throwing everything into your pot and putting it onto the stove to boil.
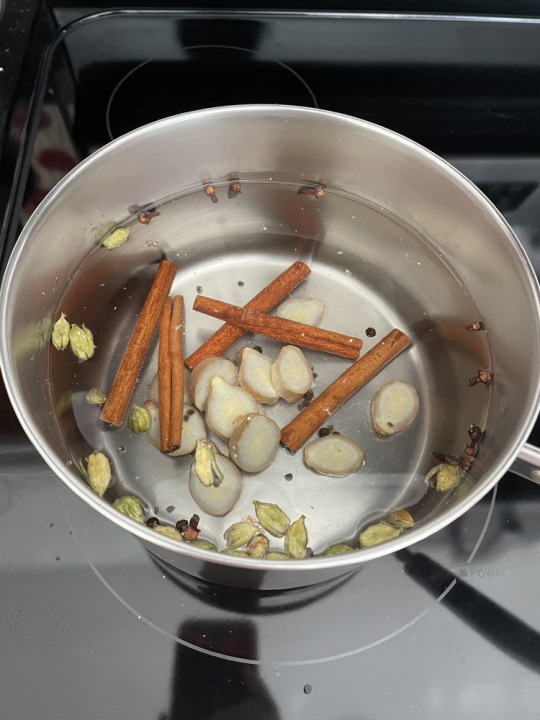
This is rather simple actually. To start, add 7 cups of water to a medium sized pot.
We're just going to grab our handy pestle and mortar with our 16 Cardamom pods and give them a gentle pound to open them up.
We're also going to slice up our fresh ginger until we have 8 coins/slices. I find this to be the easiest and quickest way to use ginger. I mean, yeah we can dice it up, or we can cut a piece off and crush it, but it takes so much more time and then we have more things to clean. Trust me, this is easier and we still get all the flavors.
Next we're going to simply grab 12 peppercorns and 9 cloves and plop them into the pot, along with 4 or 5 cinnamon sticks- depending on if they are Cassia or Saigon (and optional star anise). Cassia and Saigon have different flavor profiles and strengths, so there is a reason why we are adding more or less of these.
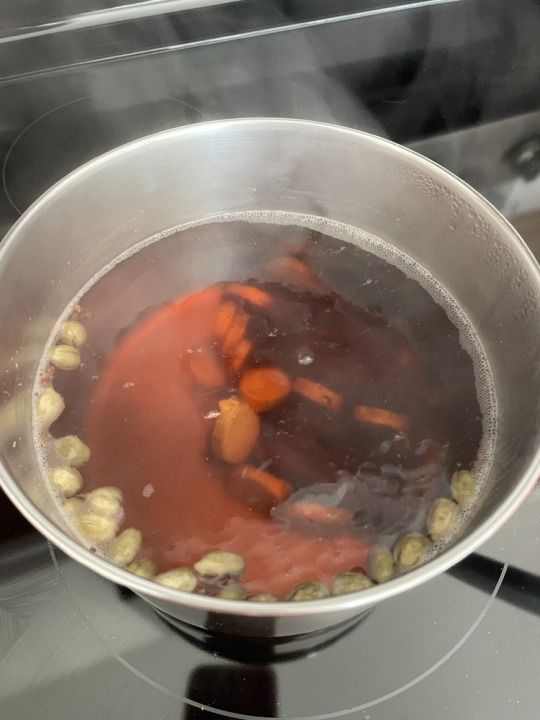
I set this to my next to highest heat, which is 8 or 9, until it comes to a rolling boil. When it reaches that point, I set it to a medium point, around a 4-5 for about 20 minutes or so.
This does actually take a bit, but you want the spices to release and infuse the water, and for the water to get a nice rich brown color. You'll notice the cinnamon sticks open up, the cardamom pods get poofy, and it'll very much already smell like chai.
2. In the meantime, get your Espresso going.
It's as simple as that. My machine will vary from yours so I cannot instruct you here. But prepare 3 1/2 to 4 shots of Espresso of your favorite blend to pair with this chai. When it's finished, set it aside. You can potentially get this done in the time your chai is doing its thing in the background.
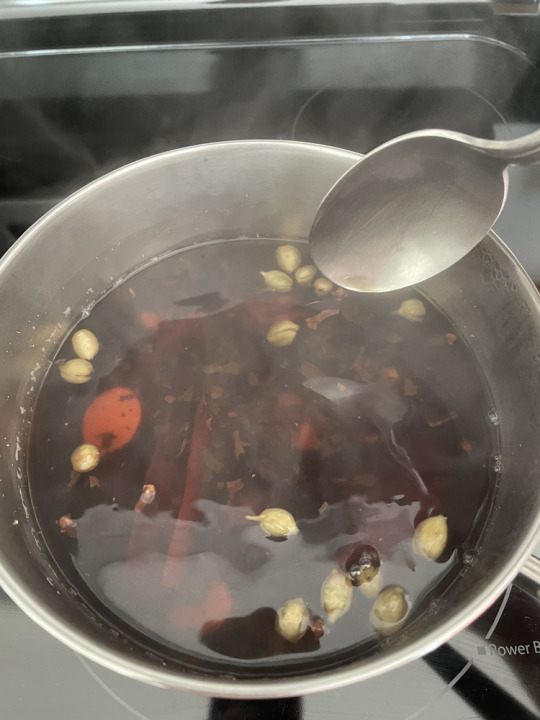
3. Back to the Chai
So your cinnamon sticks are opened up, cardamom pods are poofy, your pot of chai actually smells like chai.
It's at this point that I turn down my stovetop even further to around 3, and I add my 1 1/2 tbsp of Assam tea (or other favorite loose tea, or 3 packets of tea).
It only takes about a minute (or two) of letting the tea sit in the pot when I take it off the heat. Letting tea seep too long can make it bitter, so I try not to leave it too long. I know there are some debates that this isn't the case with herbal tea and black tea but I beg to differ with black tea 🤷🏻♀️.
Basically when the leaves "open up" or no longer look shriveled as they do in the bag, that's when I take it off the heat. It'll continue to 'cook' in its residual heat even after I remove it off the burner anyways.
This is where we add about 2 to 2 1/2 tbsp of milk. I usually eyeball this but I measured it out for this recipe. You can add more or less depending on your preference, but you're aiming for a caramel color with your chai. As for your milk, I personally use 2% lactose-free milk because its what I was raised on and what I'm used to, but traditionally for chai, whole milk is best. Choose what you prefer.
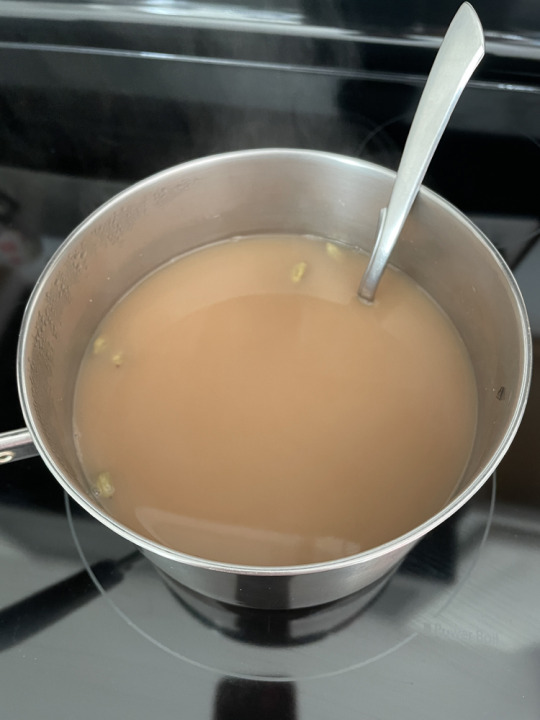
Remember that small strainer tool from the first picture? We get to fetch that for this next part. We also get to fetch our Espresso from Step 2 and our 1.5 Liter Pitcher.
My pitcher is a little extra, in that it is dishwasher safe and can withstand hot fluids. I don't have to wait for my Espresso or Chai to cool down before pouring them into the container. If yours is not capable of this, you may have to wait until your fluids cool down, which could take a while. Please be cautious and double check any container you intend to use for this before hand, as it may warp or melt.
I always first pour in my Espresso into the pitcher, followed by adding in the 5 tsp of Stevia and mixing well. If you're using a different sweetener, or pure sugar, you may have to adjust the amount of sweetener used as I've never used another type of sweetener.
Next is something you can opt to do or not, it's just a convenience thing. I take a pair of metal tongs and fish out the cinnamon sticks before straining (toss them away in a compost bin or however you choose to dispose of them). I find they like to jump forward at you during the straining process and this makes it a little less messy in the long run.
Take your strainer and strain the pot of chai into your Pitcher. Give it a stir with a paddle or spoon durable of the heat, and you're finished! Viola, Pitcher of Espresso Chai!
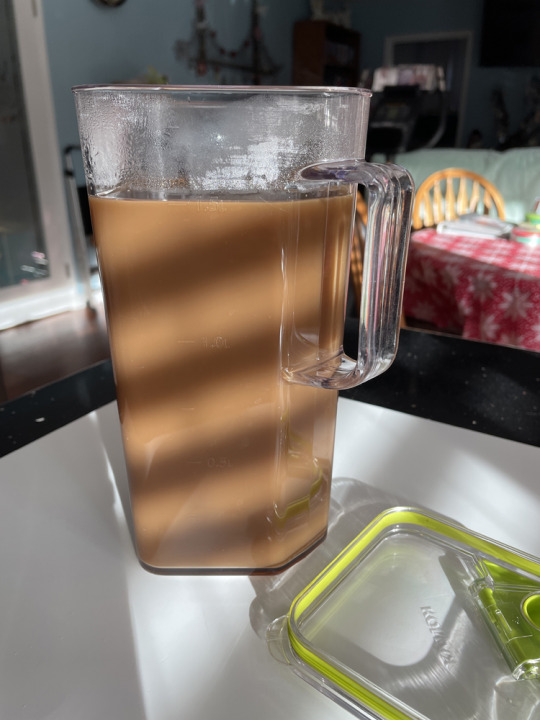
Exactly 1.5 liters.
Step 4. All that's left is to drink some in your favorite mug.
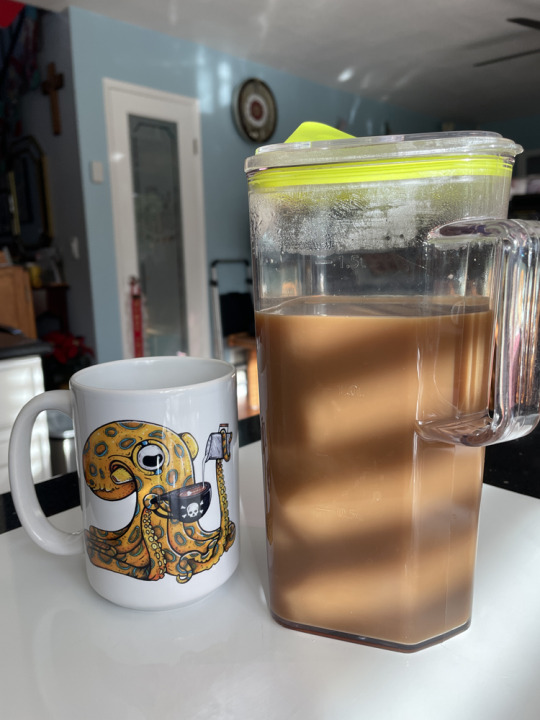
(mug is from OctoNation 🐙💓) And no, nothing in this post is an Ad. Everything is just stuff I love a lot.
If you have comments or tips to share, feel free to drop them!
❘✧༻༺༻༺‿︵‿༻༺✧*̥˚‿︵‿ °∘❉∘°‿︵‿*̥˚✧༻༺‿︵‿༻༺༻༺✧❘
#teku.blog#teku.recipe#chai#espresso#chai espresso#espresso chai#chai recipe#espresso recipe#drink recipes#this post is long- I know- I'm sorry lol 😅🙃🫠
1 note
·
View note
Text
Do you guys know how easy it is to make a chai latte at home? Like, heat 2 cups (per serving) milk until bubbles appear on the side of your pot, turn the heat off and steep 2-3 tea bags for 3-5 minutes in the milk then turn the heat back on and add in 3/4 tsp ground cinnamon, 1/4 tsp ground ginger, 1/8 tsp ground cloves and some maple syrup or sweetener to your milk tea, whisking until the milk is pretty hot. Then you just drink it or put it in the fridge and it can be iced. This is groundbreaking information.
1 note
·
View note
Text
Chocolate Chai
Spicy cinnamon chai tea with chocolate is a great warm drink for those cold winter nights!
0 notes
Text
0 notes
Text
"So Much Drama": Viral Video Shows Bizarre Recipe Of Dum Ki Chai
For many of us, a cup of hot tea is the first thing we need in the morning. It is one of the most popular drinks around the world and continues to rule our hearts. The aroma of freshly brewed tea has the ability to lift anyone’s mood. Besides its deliciousness, tea has earned worldwide popularity because it is easy to make. All you need is a handful of ingredients. The recipe for classic tea…

View On WordPress
#bizarre food#bizarre food combination#bizarre food in india#bizarre recipes#chai recipe#dum ki chai
0 notes
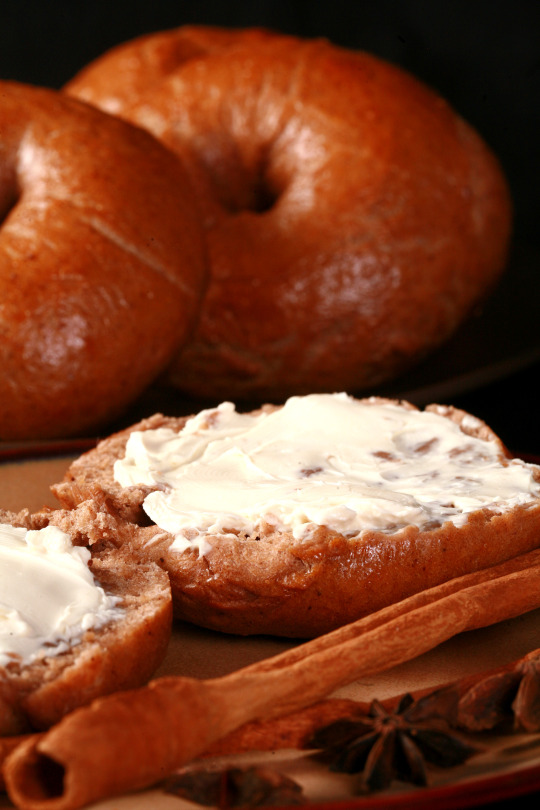
Text
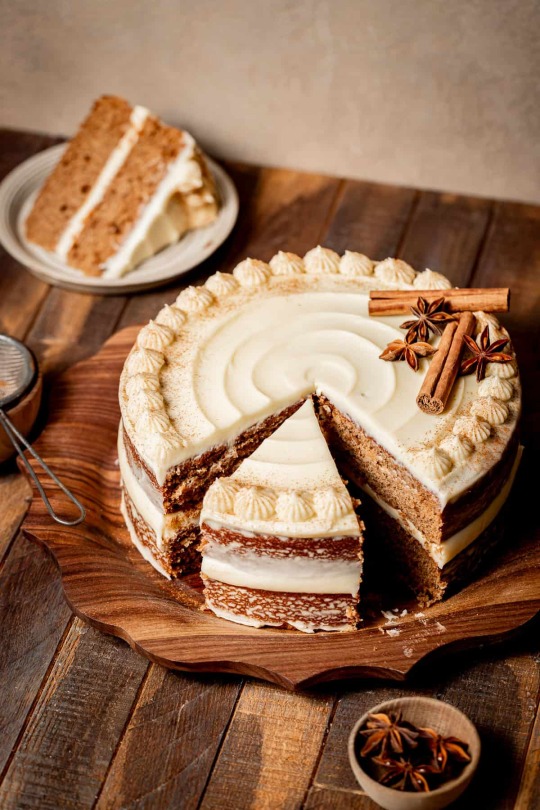
Chai Cake
#chai#cake#food#spice#dessert#tea#cinnamon#cloves#recipe#autumn#winter#birthday#thanksgiving#frosting#ginger#atsloanestable
483 notes
·
View notes

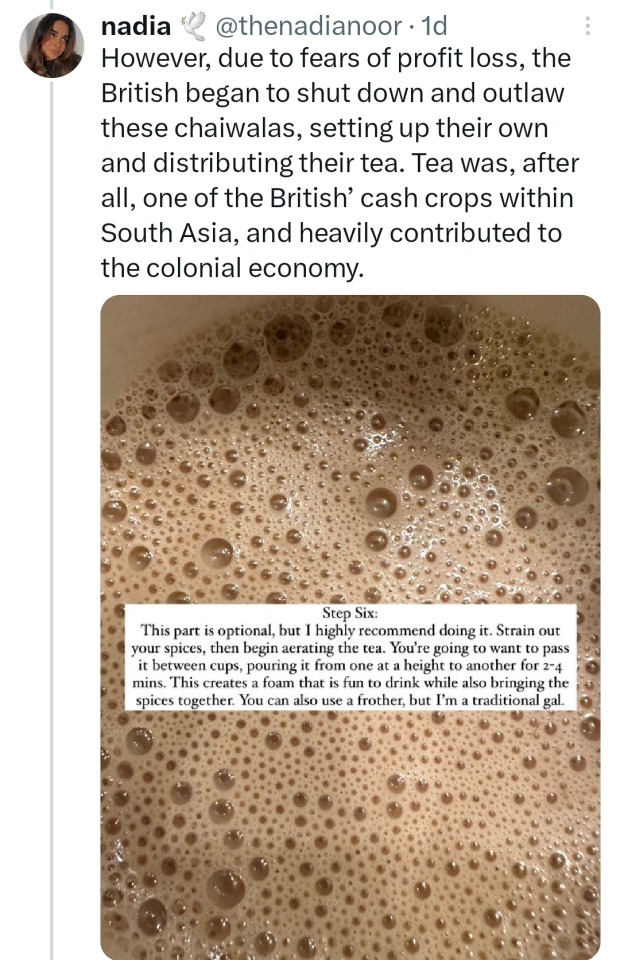
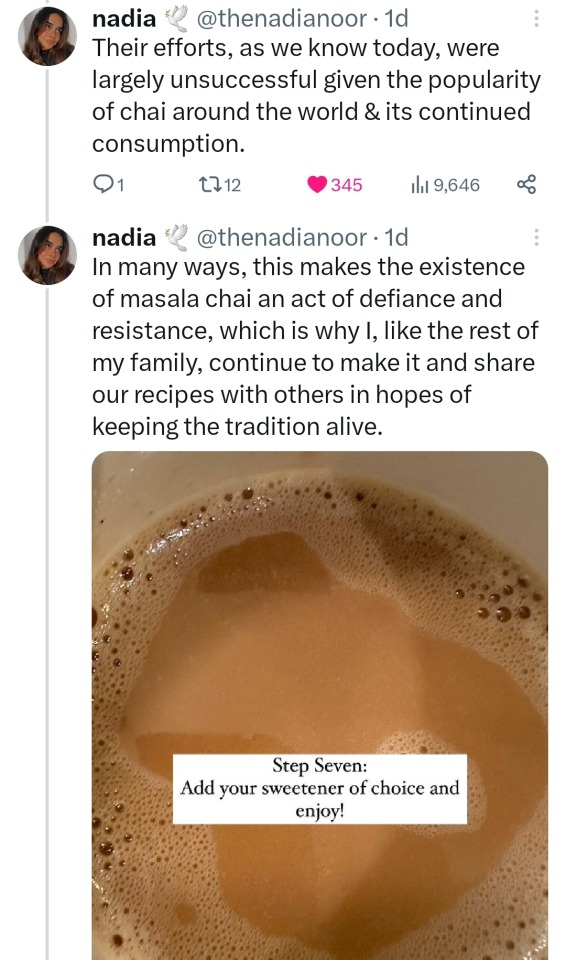
Text

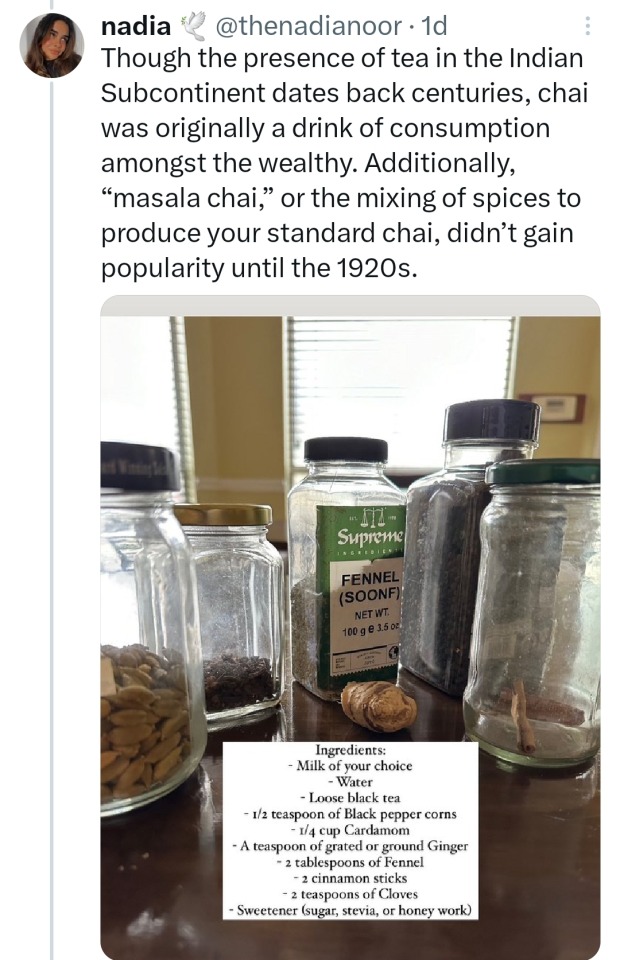
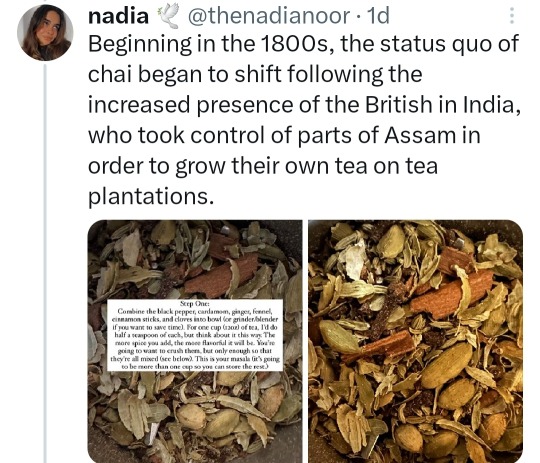

#feminist#resistance#tea#chai#masala chai#homemade#history#india#fuck imperialism#fuck colonialism#spices#recipe#the best chai i've ever had was from my childhood friend's mom who used the same recipe that her family uses in India. love at first sip#food#writing
81 notes
·
View notes
Photo

Vanilla Chai Hot Chocolate
517 notes
·
View notes
Text
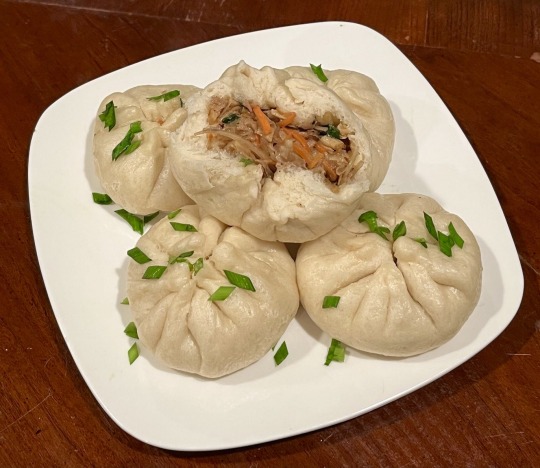
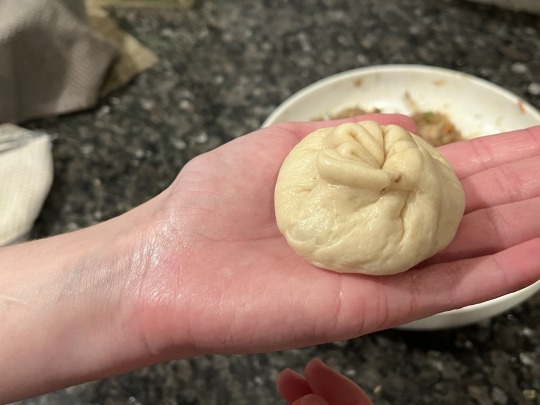
[ID: Five large, enclosed bao piled on a plate. The topmost bao has been opened to show a bread-like dough texture and a vegetable filling. The bao are garnished with chopped chives. End ID]
Bánh bao chay (Vietnamese vegetable dumplings)
Bánh bao are an iteration on the Chinese da bao (大包) brought to Vietnam by Cantonese immigrants. Like da bao, bánh bao are commonly filled with some combination of minced meat, Chinese sausage, and hard-boiled eggs; however, some versions of bánh bao are also made with Vietnamese vegetables, herbs, and flavorings. Vegetarian bánh bao (bánh bao chay) may have no filling, a filling consisting of a variety of vegetables, or a filling of sweetened beans or sweet potato.
This recipe combines Vietnamese vegetables, herbs, spices, and sauces with Vietnamese meat substitutes to make a well-rounded filling that's equal parts umami and fresh. The yeasted, enriched dough is tasty, fluffy, and light, but still has enough structure to hold up against the filling.
Recipe under the cut!
Patreon | Tip jar
Makes 16-20; serves 6.
Ingredients:
For the dough:
4 cups + 2 Tbsp (500g) all-purpose flour
2 tsp (7g) active dry yeast
7 Tbsp (90g) granulated sugar
1/2 tsp salt
2 tsp (10g) baking powder (optional)
2 Tbsp (16g) cornstarch (optional)
1 - 1 1/4 cup (135-295 mL) lukewarm soy or oat milk, or water
1 Tbsp cooking oil
The basic components of this dough are flour, yeast, sugar, salt, oil, and milk. The baking powder is added to help with leavening; the cornstarch works to create a light, fluffy dough that will not become soggy when filling is added.
For the filling:
1 large carrot (100g)
4-inch piece (120g) cassava root / yuca
1 cup (100g) shiitake or wood-ear mushrooms, diced
4 large pieces (50g) sườn non chay, or 1/2 cup diced or crumbled chả lụa chay
1/2 cup water + 1/2 tsp vegetarian 'chicken' broth concentrate (optional)
50g tofu skin (đậu hủ ky)
1 red onion, minced
5 cloves garlic, chopped
4-5 chives or scallions, finely chopped
1 tsp freshly ground black pepper
1/2 tsp sugar, or to taste
1/2 tsp salt, or to taste
2 tsp bột nêm chay, ground to a powder (optional)
1 1/2 tsp fermented bean paste + 1/2 tsp light soy sauce (or 2 tsp vegetarian fish sauce)
2 tsp vegetarian oyster sauce
1/4 cup soybean oil, peanut oil, or other cooking oil, divided
Sườn non chay (roughly, “vegetarian ribs”) is a meat replacement made of textured soy protein. It may be found in bags online or in the pantry / dried goods section at your local Asian grocery store—the bags will be labelled “sườn non chay” as well as “vegan meat slice,” “textured soy bean protein,” “vegetarian food,” or “vegan food.” Most sườn non chay are large and pale in color, but they sometimes come in "beef" or "pork" styles—the difference is not the flavoring but rather the size, shape, and coloring of the pieces. In my experience, the "beef" ones are more darkly colored, and both "beef" and "pork" styles are smaller in size and thinner in shape than the non-specific ones, which I often use to replace chicken.
Chả lụa chay is a vegetarian version of a Vietnamese pork sausage. It can be found in the form of a large loaf in the refrigerator section of a Vietnamese or Asian grocery store. It will be labelled "chả lụa chay" or "gio lụa chay," as well as "vegetarian pork roll," "wheat meat," or "vegetarian food."
Đậu hủ ky, or tofu skin, is prepared by taking the film off of a batch of tofu as it sets. Tofu skin may be purchased fresh or dried, in sheets or in sticks: for the purposes of this recipe, any kind will work! Chinese tofu skin produced for sale abroad may be labelled "dried beancurd sticks."
Bột nêm is a Vietnamese seasoning sold in powder or granule form. Vegetarian ("chay") versions of the seasoning may contain shiitake mushroom, lotus seeds, carrots, tomatoes, and kohlrabi, as well as salt and MSG. It can be purchased in pouches or boxes from an Asian grocery store, or you can use any other vegetable stock powder.
Fish sauce and oyster sauce are common inclusions in pork fillings for bánh bao but are often simply omitted from vegetarian ones. I've used vegetarian substitutes for these ingredients—if you don't have vegetarian imitation fish or oyster sauce, just increase the amount of salt, sugar, and bột nêm to taste.
Instructions:
For the dough:
1. Heat 1 cup (135mL) non-dairy milk to lukewarm in a saucepan or in the microwave. Stir in the yeast to dissolve. if you’re not sure your yeast is alive, proof it by allowing to stand for 10 minutes—it should foam.
2. Add the baking powder, sugar, and salt and whisk to dissolve.
3. In a large bowl, whisk together flour and cornstarch. Pour in the milk mixture and mix well to combine. Add additional milk 1 tsp at a time if it remains too dry to combine. The dough should be slightly tacky but not sticky.
3. Add oil and knead by hand until dough is smooth and elastic, about 10 minutes. Cover with plastic wrap and allow to rise in a warm place for about 3 hours until doubled in size. If you live in a cold climate and don't have a proofing drawer, heat your oven on the lowest setting for a few minutes, turn it off, and then proof the dough in the oven.
For the filling:
1. Prepare the proteins. Soak the tofu skin (if you're using dried) and sườn non chay in cool water for about half an hour until rehydrated (or simmer them for a shorter amount of time). They are fully hydrated once flexible and a couple shades lighter. Gently squeeze the water out. Dice tofu skin; rip sườn non chay into small pieces lengthwise and then dice widthwise.
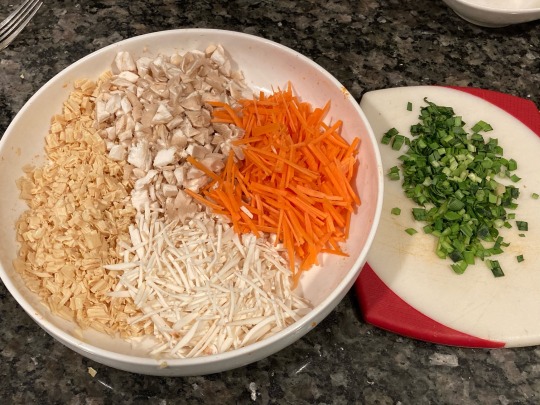
2. Prepare the vegetables. Peel cassava root and carrot. Cut both into a fine julienne, or grate them. Dice the mushrooms; mince the red onion; chop the garlic.

3. Cook the filling. Heat oil in a large skillet on medium. Add the garlic and sauté until fragrant.
4. Add the red onion and continue to sauté until fragrant and slightly softened. Add black pepper, bột nêm, and salt and allow to cook another 30 seconds.
5. Add carrot, cassava, mushrooms, chả lụa chay (if using), and tofu skin and stir to combine. Reduce heat to low and cook, stirring often, until tender. Remove from pan.
6. If using sườn non chay: in the same pan, fry sườn non chay in 3 Tbsp of cooking oil on medium until they’ve absorbed the oil. Whisk 'chicken' stock concentrate into a small amount of hot water, then add the stock into the pan. Cook until mostly dry.
Soaking in water, deep frying in oil, then simmering in a flavored broth is the typical Vietnamese preparation of sườn non chay. The simmering in stock could potentially be skipped if you're including vegetarian oyster and/or fish sauce, but personally I find that dried soy products benefit from being soaked or simmered in something other than water.
7. Mix sườn non chay in with other filling ingredients, salt, sugar, sauces, and chives.
To assemble:
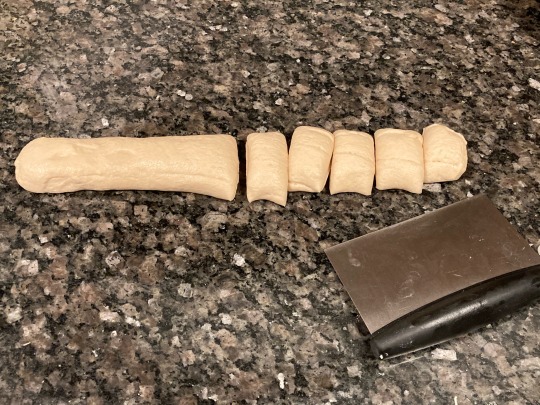
1. Turn dough out from its proofing bowl and gently divide into two even parts. Cover the half you're not using and gently roll the other out into a log of even width. Use a dough cutter or sharp knife to divide the log into 8 or 10 even pieces.
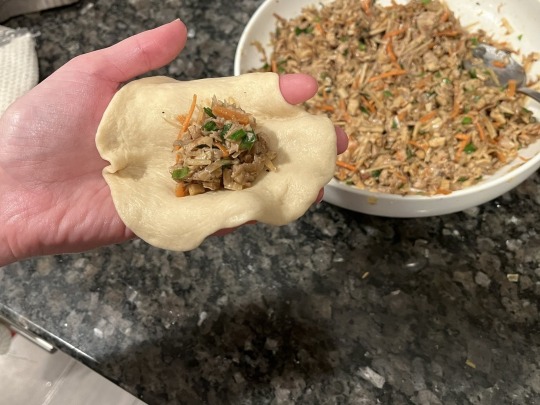
2. Place each disc of dough on its side and roll it out into a circle about 5" (13cm) in diameter. The edges of the circle should be much thinner than the center, since the edges will be bundled up and folded together.
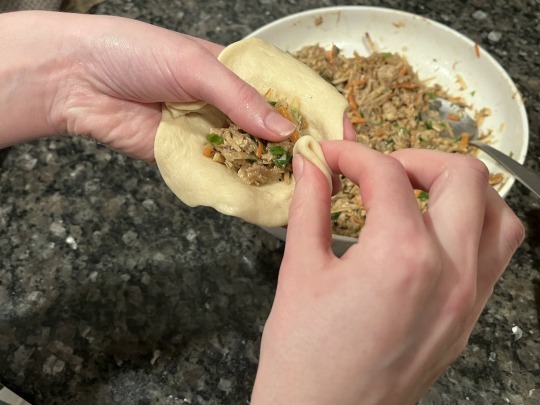
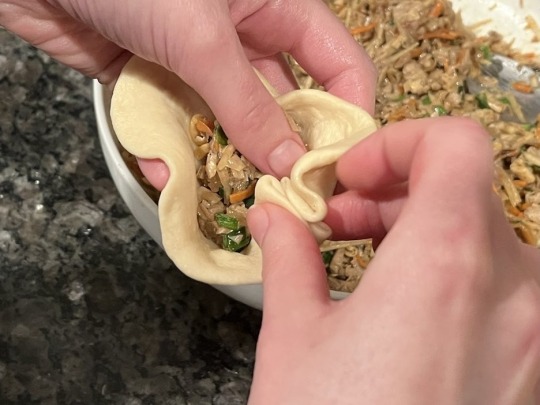
3. The folding method is the same as for baozi and momos. Hold a wrapper in the palm of your non-dominant hand and add a couple tablespoons of filling (if you’re not experienced with making dumplings, it may be easier to add less). While pressing the filling down with your non-dominant thumb, use your other hand to pinch pleated folds in the dough all the way around the circle of the wrapper. Remove your thumb and make one last fold to close the bao. Pinch firmly at the place where all the pleats come together (where the drawstring would be if it were a drawstring pouch) and give a small twist to seal.


4. Set each finished bao on a small square of parchment paper on a baking sheet or in a steamer and lightly cover with plastic wrap or a light kitchen towel. Continue folding until you have formed all of the bao.
To steam:
1. Place a bamboo steamer in the bottom of a wok or large pot, and fill the wok with enough cool water to cover the bottom rim of the steamer by ½". If you've added baking powder to your dough, you may add a splash of vinegar to the water to help neutralise the dough's pH and combat yellowing of the dough.
If you’re using a metal steamer, tie a kitchen towel around its lid to prevent condensation from dipping back down onto the dumplings. Carefully place the bao, along with their parchment paper squares, into the steamer, leaving an inch or so between each one. They will expand as they steam!
If you don’t have a steamer, place a small bowl in the bottom of a wok or large, deep pan or pot. Place the dumplings, with their parchment paper squares, on a plate and place the plate on top of the bowl–the plate should fit inside your pot. Make sure that you can cover the plate and dumplings with a lid. If your lid is domed, there is no need for a kitchen towel, since the condensation will run down towards the outer rim. If your lid is flat, tie a tea towel around it just as you would with a metal steamer. Fill your cooking vessel with 2 or so centimeters of cool water.
2. Raise the heat to high and allow the water to come to a boil. Once boiling, lower the heat to medium-low and cover your steamer or pot. Steam the dumplings for about 8 minutes, until the dough is tender and cooked through. Keep finished bao warm in a covered casserole dish in an oven on low while you steam the others.
#vegetarian recipes#recipes#vegan recipes#Vietnamese#dumplings#carrots#cassava root#tofu skin#mushrooms#sườn non chay#chả lụa chay#fish sauce#chives
236 notes
·
View notes
Photo
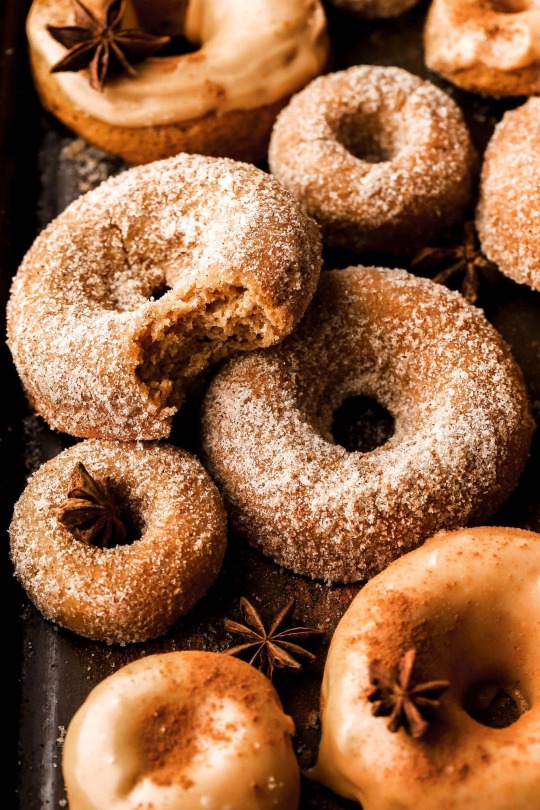
Chai spiced apple cider donuts
#donuts#apple cider donuts#doughnuts#sweet food#food#baking#dessert#cinnamon#caramel#chai spice#chai#cinnamon sugar#baked donuts#tasty#foodporn#delicious#cooking#food photography#foodgasm#recipe
597 notes
·
View notes
Photo
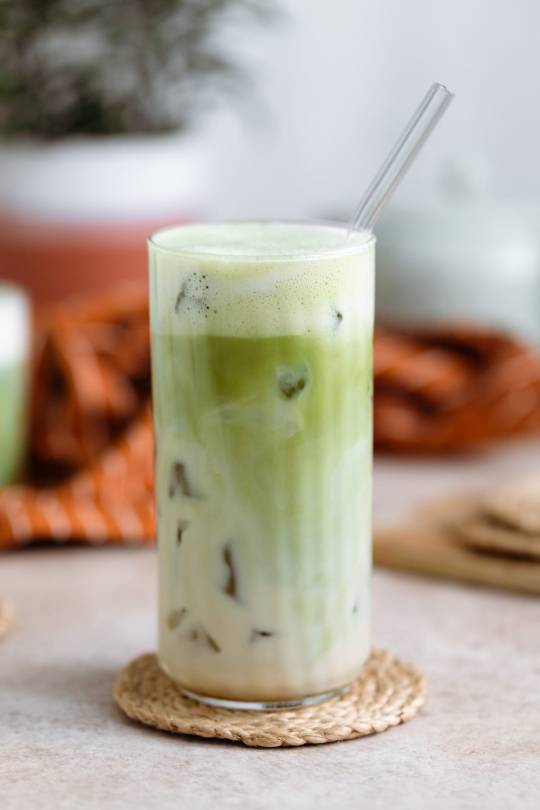
Iced Matcha Chai Latte
#food#recipe#drink#iced tea#latte#chai#matcha#green tea#tea#cardamom#cinnamon#maple#vanilla#vegetarian#vegan#gluten free
612 notes
·
View notes
Text

Chai Latte Cupcakes
#chai#chai latte#tea#cupcakes#cinnamon#dessert#snacks#recipe#recipes#baking#icing#frosting#food#sweet
16 notes
·
View notes
Photo
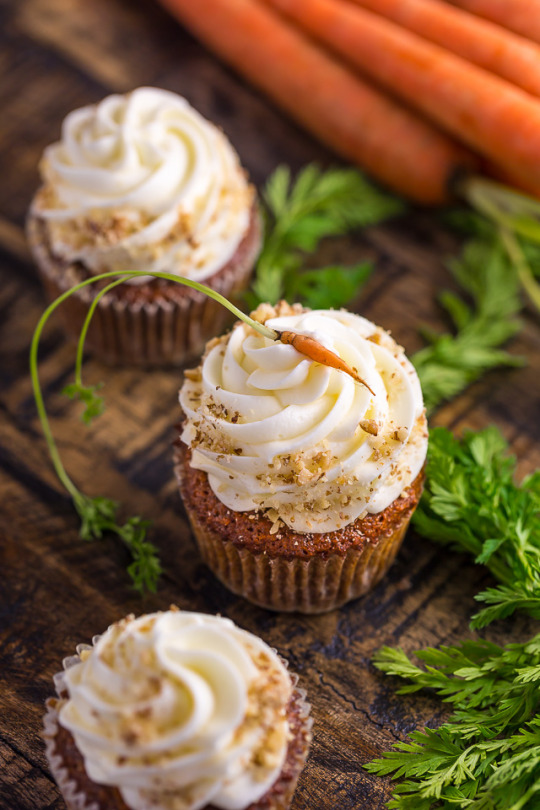
Chai Spiced Carrot Cake Cupcakes | Baker by Nature
Follow To Explore The Foodie In You
74 notes
·
View notes
Photo
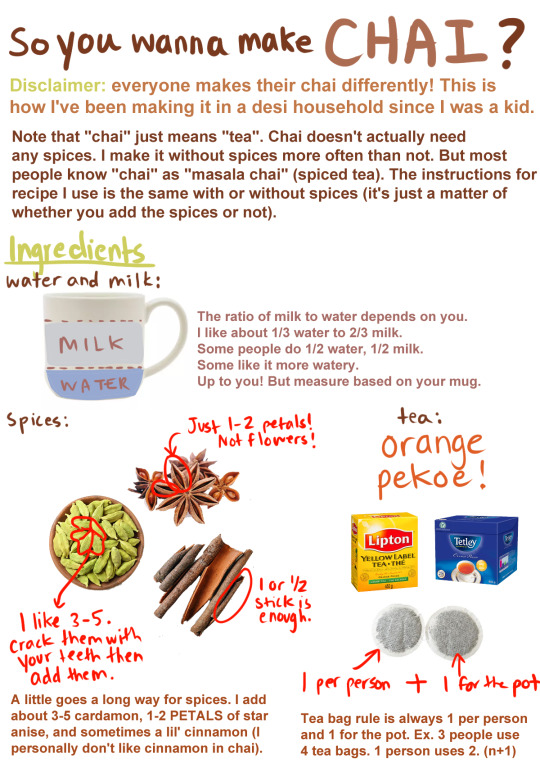
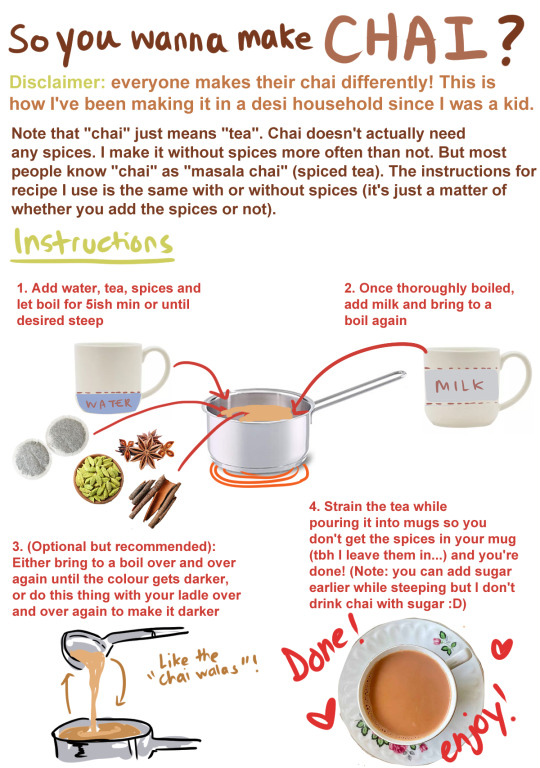
I made this handy diagram explaining how I make chai for a friend online and decided I'd share it here, too 🌞 I've been making it this way since I was a kid (I know everyone is super passionate about their own chai recipes so please don't come for me 😭🙏Not about to be cancelled by the desi side of Tumblr LMAO)
Just to drive home the point: I don’t grind my spices because ain’t nobody got time for that. Normally I only drink it with cardamom (”elaichi chai”) and just crack the pods with my teeth (3-5 pods) and throw them in.
This recipe makes 1 cup, but adjust ratios as needed for more cups :)
125 notes
·
View notes
Text

Maple Chai Sticky Buns
#maple#chai#sticky buns#bread#rolls#baking#buns#recipe#autumn#winter#breakfast#dessert#tea#spice#cinnamon#brown sugar#cloves#cardamom#chai spice#ginger#nutmeg#allspice#tangzhong#atsloanestable
524 notes
·
View notes
Last Seen Blogs

islanderthistle
Heather Isle

hzxstone
Xiamen HZX Stone, A Chinese Stone Factory & Commercial Project S


humbledoodles
Humble Doodles

steadmondfinancebrokers
Phil Steadmond