#px-70
Text
[PX Fic Rec 67] 一觉醒来我兄弟变成了我老公
by 阿池
Translated title: When I Woke Up, My Brother Became My Husband
Relationship: Zhang Qiling/Wu Xie
Writer's attribute: PingXie Only
Status: Complete + Extra
Language: Chinese
Length: 23 Chapters + 3 Extras
Tags: Canon + AU Setting—Yucun A/B/O (Omegaverse), Alpha Ping × Straight Man Omega Xie, Travel to a Parallel Universe, AO, Getting Married
What's inside the fic: Wu Xie's First Person POV, Zhang Family's appearance, Humor/Comedy, HE
Warnings: Mpreg, slight HeiHua, OOC warning is given by the author
About this fic:
It's a pity that this idea is too unrealistic. I have seen grooms running away from marriages and brides running away from marriages. If two people run away from marriage together, that's not called running away from marriage, it's called elopement.
PingXie travel to a parallel universe of A/B/O (Omegaverse). Wu Xie tried to cope with the situation where he and Xiaoge are a couple, ready to get married.
Personal opinion:
This fic is hilarious XD They wasn't ready to get married, while the other version of them wanted to have a baby. In the end, it's all good. They got what they wanted and happy ending :) ✨✨
Supplementary files: The author is also good at drawing, the wedding photo fanart is here on Lofter
Where to read: Lofter
#pingxie#pingxie fic rec#zhang qiling x wu xie#pingxie only#dmbj#px fic rec 61 to 70#canon au#a/b/o#time travel#straight wu xie#marriage fic#getting married#zhang family's appearance#mpreg#multichapter#阿池/salazarchi
6 notes
·
View notes
Text


𖥨 ̟⊹♡ a / s / l ?
wake up , babe ! a new gordonramsei page just dropped ! introducing a / s / l ? a javascript - free faq page ! the page is designed to be compact but still aesthetically pleasing with it's monospace font and script pairing ! there is unlimited space in the question container to fill with as much content as u desire ! i hope u all think she's as cute as i do ! as always , if u encounter any issue within the code , pls let me know and i will troubleshoot asap !
if u intend on using this theme or just want to be a supportive hottie , please give this post a like and a reblog ! stay hydrated and be sure to pet a cute animal today ! mwuah ! 🤍 🤍 🤍

ⅰ. PAGE FEATURES .
x. this page is 100% javascript - free
x. full - height accent line on left side
x. scrolling container for ur questions w/ aesthetically pleasing q & a formatting
x. single icon sized at 70 x 70 px
x. page must be edited in the html
x. for a more detailed compilation of credits and features , please see the google doc containing the code

𖥨 ̟⊹♡ this page is a patreon exclusive : want access ? consider signing up to join the fam - a - lam to get ur hands on this page as well as my entire coding catalogue . click here to learn more !
source link directs to a live preview of a / s / l !

#rph#rpt#indie rp theme#rp theme#tumblr themes#supportcontentcreators#fyeahpoc#mine#rec#for patreons#for patrons
34 notes
·
View notes
Note
hi! do u mind explaining how u did the square overlay in this set? thank u sm 🫶🏽
hi sorry for taking so long to answer. i hope this helps and makes sense (if you have any other questions feel free to ask or I could even send you the psd if you want). tutorial below the cut as it's image heavy :)
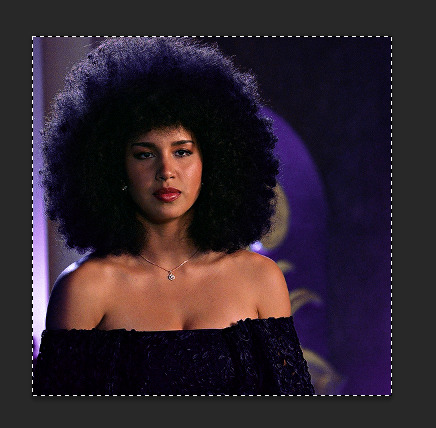
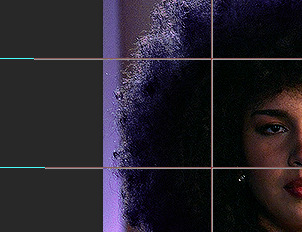
So basically I started with my 2 gifs at 540x540 pixels. This isn't essential, but I'll also note that when I crop the gifs I like to uncheck the "Delete Cropped Pixels" box so that I can move them around after cropping in case I don't like how it was cropped initially.
For this gifset I ended up putting the two gifs and their colourings in a group with clipping masks for the colouring layers (curves, vibrance, etc). Making the two gifs into smart objects would also work and would be my usual preferred method, but for this particular set it was easier to use the groups so I could keep the colouring of the you weren't a maybe speech.
Once the gifs are overlayed on top of each other only the top gif should be visible (as below)
To create the grid effect there are some tutorials for versions of photoshop which have a setting where you can just input the configuration you want (e.g 4x4) and it will draw up the guides for you. Here is the initial tutorial I saw showing how to do that and another one I found just now which outlines the exact same grid effect as in my set. This way is easier than the way I did it, but my photoshop doesn't have the option 😭
For mine I created a New Guide by following the menu path "View > New Guide"
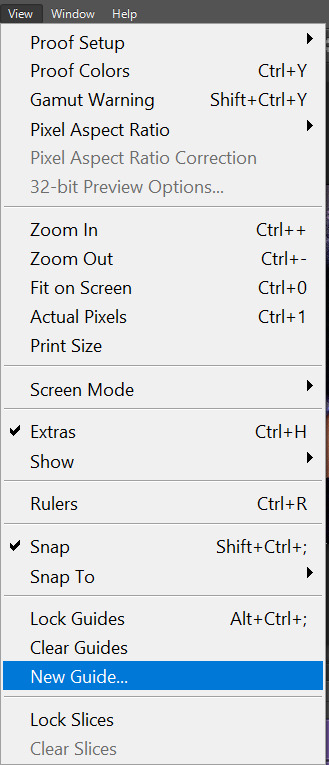
This opens up a dialog box that looks like this

As the guide menu is in cm I doubled checked what the size of the canvas is in cm. A 540 x 540 px canvas comes to 19.05 cm. I wanted to draw a 4x4 guide, so to start I divided 19.05 by 4. This comes to 4.76, so I input this value into the box and clicked ok.

To draw the other lines I just added 4.76 to each previous line drawn so that the lines were even. The guides ended up being (4.76, 9.52 and 14.28). I then repeated the same numbers but with the Vertical orientation button selected.
This gives you a guide which looks like this:

To start exposing the other gif I grabbed the rectangle select tool and started selecting the areas I wanted to mask. The tool should snap to the guides so it is fairly easy to stay within the squares.

Then I just masked over it with a black paintbrush

I continued on with this until I was happy with how it looked - this was my final result
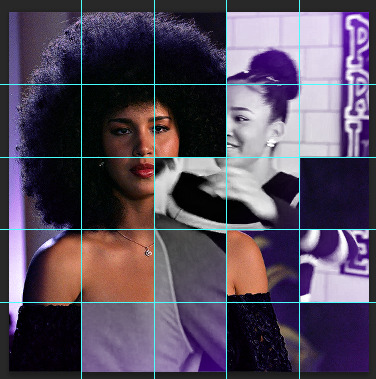
And this is how my layer mask looked
To draw the lines I then selected the line tool and set it to white and 2px. To draw them I held down the shift button, which allowed me to snap the line I'm drawing directly on top of the guides and continue with it as all one shape.
When you draw on top of the guides they go orange
I then toggled the guide off by pushing ctrl + ;
I checked to make sure all the boxes and lines were aligned properly and just cleaned up the gifs by using the selection box and masking until it was perfect (as I'm very type A)
I set the line layer to "Lighten" blending mode and an opacity of 70% as I thought it looked better.
Then I just added the text and moved it around how I pleased.
#asks#resources#tutorials#ps help#usergif#completeresources#allresources#i really hope this makes sense and helps :)
84 notes
·
View notes
Note
your coloring and gifs are so pretty… do you have a tutorial on how you do that and also what save and sharpenint settings you use? also how do you so the fade in and out captions? they’re friggin cool!!
hi!!!! thank you 💞💋💞 gonna put this under a read more bc i need to answer this in 3 parts
I. coloring
i don't actually have a tutorial! i think the last tutorial i made was years ago and it was for hockey games lol plus there are so many great tutorials available already and given i don't do anything special i think it's kind of obsolete….. but let me tell you!!! the camera raw filter is a must!!! it's the best way to color And color correct imo. you can also use it to enhance the quality of your gif if you're feeling fancy….. the only downside is that the filter is kind of heavy so it'll take a little longer to export the gif 🥹
II. sharpening
these are my smart sharpening settings (i set the first one to 70-80% opacity usually bc i like it #subtle)


i also use gaussian blur (0.9 px/10% opacity and high pass (4px/soft light mode/25% opacity) btw. i consider these part of the sharpening process. again it's a Very subtle change but it's My preference
III. fade in and out captions
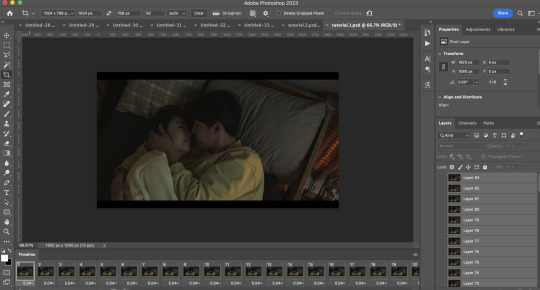
surely there must be another way to do it but this is How I Do It…. it's quite easy, just a matter of opacity!!! okay so i save adding captions/subtitles/etc for last before exporting and saving my gif. along w setting the gif speed. this is how my workspace looks like (after converting ALL the frames to smart object then flattening frames into clips)

choose the frame you want the text to start to fade in and set the text layer's opacity to 20%

select the next frame and set the text layer to 40%

keep doing it by 20% until you get it 100%

the process for the fade out effect is the same but in reverse (100% > 20%) and that's it!!! see the final result here 😁💝
7 notes
·
View notes
Text
Opening portrait commissions!!!

I'm currently only offering portrait commissions since my style has developed quite a lot recently. I hope I'll be able to offer more varied commissions in the future!
Basic aspects
Contact me at [email protected] (DM me privately first)
Canvas size: 3.000 x 3.000 px
Payment via PayPal invoice after approval of sketch
Simple background
NO commercial use
NO AI
NO NFT
Won't draw
Furry
Mecha
Animals (can be discussed)
Pricing aspects
Base price (black & white): 70€
Base price (color): 80€
Overly complicated details, pose, or expression will lead to an increase in pricing
What I'll need
Character references
Pose references
Patience!
Can't wait to hear from y'all!!
54 notes
·
View notes
Text
Character info time woo:
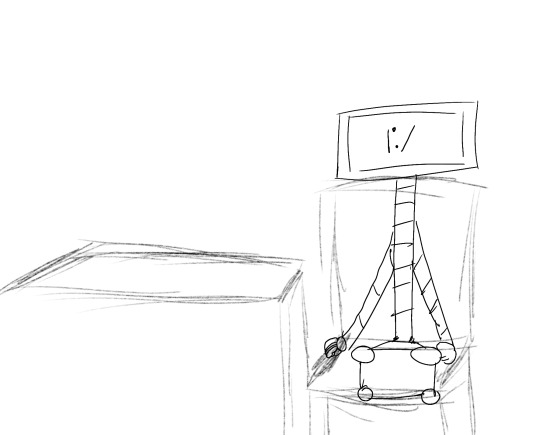
Vector
He’s still stuck in space
Through various objects he found in space, he was able to build a computer strong enough to send text based messages back to earth. Unfortunately for him, the texts ended up going straight to the AVL, where a robot was created for him to speak through.
Vector cares less about the fact that his messages are only being shown to the AVL and more about the fact they deliberately choose to save him from space.
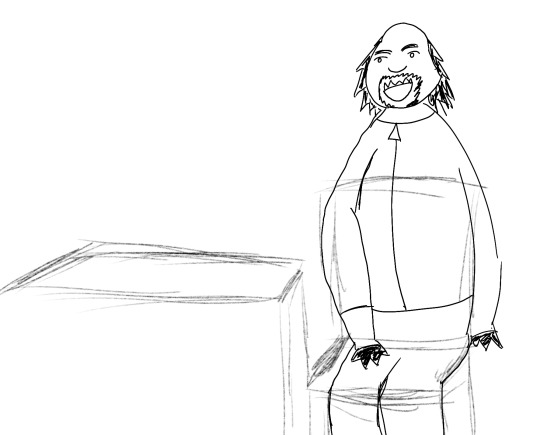
El Macho
After being knocked out by Dr Nefario and the Minions, El Macho was taken in by the AVL
Instead of reversing the effects of the PX-41, the AVL just gave him a custom prison uniform
El Macho has made peace with his situation, not feeling much anger towards the others around him. The two thing that have upset him are the facts the AVL 1. Won’t change him back to his human form and 2. Won’t tell him where his son is and how he’s doing.
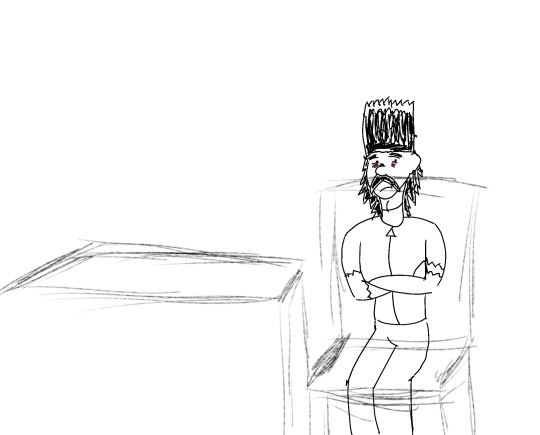
Balthazar Bratt
After being left to hang in the air stuck in his own bubblegum, AVL helicopter’s captured Bratt and arrested him
The most the AVL did for Bratt was give him clothes, but after that they refused to accommodate for him in any way.
Bratt is extremely unhappy and is constantly trying to escape through any means necessary, which includes ripping up his own clothes (which is why his sleeves are torn). He’s also not feeling well physically because of the poor quality of the prison food.
Despite desperately wanting to escape, the one thing Bratt really wants to know is what happened to Clive.
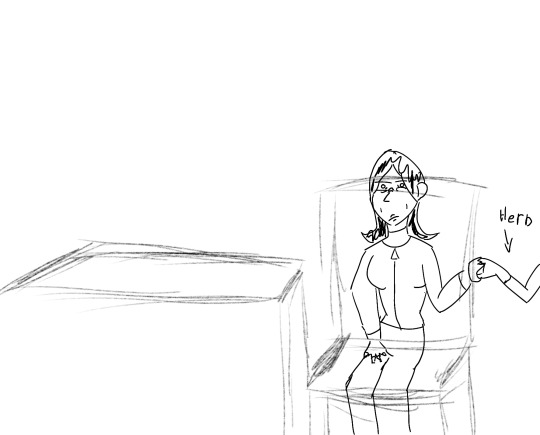
Scarlet and Herb Overkill
Several years ago, after being frozen by Gru, the AVL arrested the couple.
Scarlet is borderline feral. She feels as if she’s entitled to royal treatment for being the first female villain. Most people show her minimal respect while otherwise being annoyed by her.
Herb on the other hand is similar to El Macho. He’s had several years to relax and except his life. He still loves Scarlet a lot, but treats everyone around him with respect unlike her. In turn, people like Herb
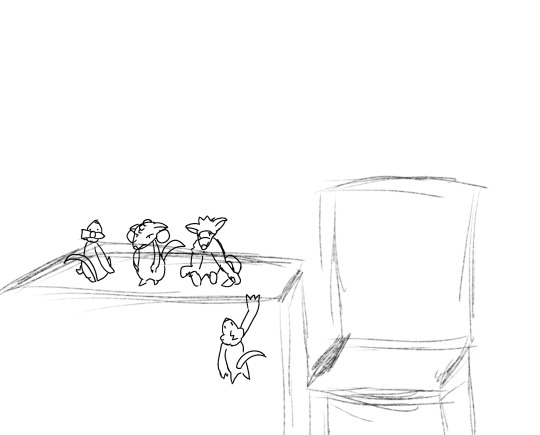
Vicious… 4
Several years ago, after being turned into rats by the zodiac, the Vicious 6 were captured and arrested.
The AVL never captured Wild Knuckles after he faked his death, and he was never tracked again. Since Nun-Chucks was on the older side, she ended up passing away in prison.
The remaining members are incredibly annoyed by their situation. After all these years, the AVL deliberately chose to not turn them back into humans, with the excuse being that they can only be changed back during the New Years. Belle has managed to use this to her advantage, sneaking around the prison, though she’d still rather be human.
Relationship Chart:
Everyone is either chill or has no opinion on El Macho and vice versa
Vector tries to be friendly with most people, but particularly hangs with El Macho
Bratt and Belle get along well, with both of them trying to escape aswell as both of them having interests in particular Eras (Bratt being 80s themed and Belle being 70s themed)
Bratt is extremely annoyed by Vector in general. Vector doesn’t have to strong of an opinion on Bratt, mainly thinking he’s just weird.
Belle is convinced Vector has not interacted with a woman in his entire life.
No one hates Herb.
Scarlet views everyone except Herb as inferior to her.

#despicable me#despicable me 2#despicable me 3#minions#minions rise of Gru#despicable me vector#vector perkins#despicable me El macho#despicable me eduardo perez#el macho#Eduardo Perez#despicable me balthazar bratt#balthazar bratt#minions scarlet overkill#minions herb overkill#minions vicious 6#scarlet overkill#herb overkill#vicious 6#minions belle bottom#belle bottom
15 notes
·
View notes
Text

[OPEN] NARUTO/BORUTO ADOPTABLE XIII ~
LINK> https://www.deviantart.com/naty-js-adopts/art/OPEN-NARUTO-BORUTO-ADOPTABLE-XIII-1055166440
==========================================
Accepting point payments and mixed payments (points+paypal/ko-fi)! ♦ I do a Paypal Payment Plan! ♦ Don't claim/bid if your account is less than 3 months and/or has been inactive for a long time ♦ $1=100pts
🔰 This character was based on Naruto/Boruto's art style, but don't feel obligated to use this character in Naruto/Boruto fandom, you can use it in any fandom that you want! 🔰
==========================================
1. Nar02
Owner:
SP 1 = $140 (Personal use only)
SP 2 = $280 (Commercial License)
Free: Add a symbol on the bandana!
What you'll get: 3800 x 2716 px .png without the background
===============
For FREE =As soon you claim the character you can tell me the colors changes that you want! You will receive 2 versions drawings: the original and with one with the color changes! (validity only 1 time; only after payment; I'll need color hex codes!)
===============
🌿 RULES 🌿
➽ Accepting point payments and mixed payments (points+paypal/ko-fi)!
➽ Before claim / bid / offer for a character, make sure you have the money needed to pay in 24 hours. If not, please do not claim / bid / offer for the character.
➽ No refund.
➽ Don't use the character and drawings for commercial purposes. Except if you buy the commercial license!
➽ On the first drawing of the adoptable, please credit me for design.
➽ I don't accept bids or purchase orders of accounts with less than 3 months old and/or accounts that have been inactive for a long period of time.
➽ You can change the character and use in any fandom you like, even if you buy an adoptable from a specific fandom you can change it.
➽ You can trade, give, and resell the character for the same value you bought except if have an extra art. Character that you received for free by some event can only be sold if they have extra art!
📌LINKS
ALL MY ADOPTABLES SHOPS/ACCOUNTS === COMPLETE INFO ABOUT ADOPTABLES/YCH/CUSTOM === Official RESALE/TRADE CENTER === HOW WORKS AN AUCTION ?
==========================
🍋 COMMERCIAL LICENSE x PERSONAL USE 🍋
With the personal use license, you cannot do things with the character/ych/custom that give you a monetary return! Like webcomics on Webtoon/Tapas, Vtuber, monetized videos on TikTok, Instagram, youtube, things to sell, etc.
📌COMMERCIAL LICENSE price for adoptables/ychs/custom of:
$1 --> $70 the price is ("personal value"+ $70)
$71 --> infinite the price is x2 of the original value
Adoptables that you bought from a resell or trade, or get for free by some event made by me can also get a commercial license! Just send me a message and will give you the price!
After purchasing the commercial license, it's not necessary to renew the license and you can use the character commercially the way you want and anywhere!
============================
🌵 PAYPAL INVOICE PAYMENT 🌵
I'll need your PayPal email to you be able to receive the PayPal invoice and make the payment! The invoice is made by the Paypal platform and sent by the Paypal platform.
Your email will not be saved, except if you do the Register of Clients to jump the process of giving me the email at all times that you claim an adoptables/ych/custom. In any case, I'll not use your email for anything.
📌PAYPAL PAYMENT PLAN
Option available for adoptables/ych/custom over $100 !
The installment value only increases in divisions of 3 or more installments!
Example: Final price is $200 = 2 installments of $100 each, or 4 installments of $52 each
============================
🌵 KO-FI PAYMENT 🌵
You do not need to have a Ko-fi account to pay.
>>You can pay through Ko-fi using Stripe or Paypal
On the quantity you put the value and on the message you need to copy and paste the message that I'll be sending to you!
📌 My Ko-fi: ko-fi.com/natyjs
Please do not send payment before I have contacted you so your payment will not be trusted like a donation!
============================
🌵 POINTS PAYMENTS 🌵
$1 = 100pts.
Points are paid through the commission widget!! I don't accept points to payment of adoptables/ych/custom by donation pool!
Please do not send payment before I have contacted you so your payment will not be trusted like a donation!
——————–
Art Only @naty-js | | Deviantart Shop | | How buy an adoptable | | My adoptables info page | | Register of Clients | | JJK CUSTOM | | BNHA CUSTOM | | KNY CUSTOM | | ONE PIECE CUSTOM | | CUSTOM ANY FANDOM OFF-BASE | | PERSONA 5 CUSTOM | | CUSTOM IN-BASE ANY FANDOM
#adoptables#adopt#naruto#naruto oc#boruto#boruto oc#naruto fan character#naruto shippuden#naruto classic#set price#ufs#up for sale
4 notes
·
View notes
Note
Hey, Taylor! Hope you’re doing good these days! I remember that some time ago you mentioned you wanted to change the way you make your gifs because they weren’t turning out the way you thought they would (or more like tumblr was helping decrease quality even when they’re in 4K? something like that) either way, I remember you were annoyed by the final result and wanted tips to change to another way to make gifs. I’m going through something similar so I decided to ask if you found a new way to gif that works well for you. And if so, is there a tutorial you’d recommend? Btw I love your gifs and think they look awesome, so there’s that! Take care 🫶🏻
HI ANON I LOVE YOU! I’m still not happy with the quality of my 540 px gifs but at this point I think it’s just a limitation of the programs I’m using (Photopea, mostly, but it’s still a REALLY strong substitute for Photoshop). It also might be the intensity of my coloring 🫡 but I can share some of the things I’m doing!:
Making my multi-column gifs 1 size larger than they need to be & adding a high pass filter (I go into both here)
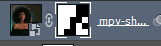
Screencapping with MPVplayer (mpv.io) instead of uploading the clips directly to Photopea (tutorial on how to download it on Windows here) I think this has helped with my quality a bit but it also makes my editor crash if I use too many frames :’) Firefox seems to handle it best. Here’s a tutorial on how to upload frames as a stack in Photopea (about midway through the tutorial) and I’ve used a handful of the tutorials they list under “other helpful tutorials” as well! (take a drink every time I say “tutorial”)
And here are some of the ways I've been "correcting" blurry gifs:
*note: major flashing gif warning + in the actual set I used a raster mask to sharpen the middle scene more gently, I want you to mostly focus on the background here!
no sharpening: background scene taken from 4k footage

smart sharpen filter only: amount = 150%, radius = 1.0 px (this is the default for Photopea)

high pass filter only: radius = 0.2 (I usually stay between 0.1 and 0.2, otherwise you start getting dark, blurry edges)

smart sharpen + high pass: same settings as above and using this method here
smart sharpen + high pass + reduce noise aka my newest method: sandwiching! I prepare my smart sharpen and high pass folders using the above method then BEFORE MERGING duplicate the sharpened folder and apply a reduce noise filter, strength = 5, protect detail = ~70% and adjust the opacity as needed


this can help soften the sharpening, but I'm still seeing some colorbanding happening behind her in the middle scene. so when the tumblr size limit allows me my ideal method is...
smart sharpen + high pass + reduce noise + add noise: BEFORE MERGING, I take that "smart sharpen + reduce" folder and add a noise filter, 1%, distribution: uniform, monochromatic. Yes, this seems counterintuitive but compare the water behind her in this gif versus the last two!
I find that sandwiching the noise filter between my sharpening and high pass gives me some of the smoothing benefits of a normal noisy gif without the overwhelming grain (or file size)!
and here's how the gif turned out in my set! (I partially masked out the middle gif so it didn't get the full force of the sharpening + applied a smart sharpen filter to the painting before doing all that ^ but you get the gist!)
before & after

19 notes
·
View notes
Text

CLOSED
up for sale at 70$ USD via Paypal, please message or comment to claim, first come first serve
full size file is 5723 px x 4986 px. It will be delivered Via email upon completion of payment.
I imagined her to be quite small so she has made a skirt out of the shed down feathers of young swans, as well as a perfect snowflake. She glitters just like snow
#adoptable#oc adopt#open adopts#fairy adopts#snowflake#snow#glitter#frost#ice#faerie#fae#fae folk#oc#art#pastel#blue#feathers
8 notes
·
View notes
Note
will take this opportunity to ask the burning question that is in my mind for all kinds of creators on this app: how the hell do you make sure your file sizes are small enough to be able to post while keeping such crisp quality (in your case, for your gifs)
so, when it comes two gifs, there are the major factors you need to keep in mind—the dimensions of your gif, and the number of frames your gif has. the bigger the dimensions of your gif, the more you'll need to cut down on your frames. for example, gifs that have a small width and height (like 268 x 268 px for example) can have even up to 200 frames, and you'll be able to keep it within the 10 mb limit. for bigger gifs, with 540 px, it's not so flexible. the bigger the height of these gifs is, the less frames you can have. so to break it down roughly:
540x300 px — 80-100 frames
540x400 px — 70-80 frames
540x500 — 50-60 frames
and so on. having a uniform color palette also helps reduce the size of the gif—if there are any random colors that don't fit in with the overall palette, your best bet is to eliminate them and that will cut down on your file size. also, gifs of super dark scenes (like the lightning strike, for example), usually have smaller file sizes and are really flexible. so this is everything that factors in!
come talk to me!
#i know you Did Not ask for all of this but i can't help but ramble when it comes to the giffing process#neethu answers#poughkeepsies#gifmaking things
20 notes
·
View notes
Text
please help!!
i wanted to get opinions on this bc i grapple with pricing and i'm so hyper aware of most people struggling financially as well as myself so i'm just so fhuidhsdhf about it ;-;
images are always 300 DPI, and canvas sizes are typically 2000 x 2000 px depending on what it is (if that factors in at all)
SKETCH
☆ Bust: $25
→ Complex: $35
Half-body: $45
→ Complex: $55
→ Armored: $70
☆ Full Body: $65
→ Complex: $75
→ Armored: $90
! +$5 to add flat color to bust & half-body sketches !
+$10 to add flat color to full body
RENDERED
☆ Bust: $55
→ Complex: $65
☆ Half-body: $75
→ Complex: $85
→ Armored: $100
☆ Full Body: $105
→ Complex: $115
→ Armored: $130
SPECIALS
☆ HD Portrait: $150
☆ Character Sheet: $200
feedback is really welcomed, especially from fellow artists and people who commission work a lot!
#poll#trix speaks#art#artists on tumblr#i had to remake this bc the txt got funky idk what happened#but help would be really appreciated
4 notes
·
View notes
Text
[PX Fic Rec 70] 不寐
by 漫漫唯一
Translated title: Insomnia
Relationship: Zhang Qiling/Wu Xie
Writer's attribute: PingXie Only
Status: Complete + Extra
Language: Chinese
Length: 18 Chapters + 11 Extras*
Tags: Canon Setting—Yucun, Pierce the Window Paper, Straight? Ping × Not Straight Sha Hai Xie, HE
What's inside the fic: Wu Xie's First Person POV (Main Story), Zhang Qiling's Third Person POV (Extra), Double Perspective
About this fic:
Wu Xie kissed Zhang Qiling out of the blue, and it changed the ambiguous relationship between them, but of course it wasn't that easy...
Personal opinion:
I'm feeling sorry for Wu Xie (T_T) They are in the situation where the person that he loves so much is right in front of him, but he can't reach him. Wu Xie here is still in the state of Sand Sea, he hadn't reconciled with his feelings yet. His inner demon started to consume him to the point of madness, he couldn't suppressed it anymore. On the other hand, due to his life experiences and upbringing, Xiaoge here is more likely to restrain his feelings. Even so, once he let go of his suppressed feelings, it's overflowing like a tide. Very good ✨
A little note:
The title of Zhang Qiling's POV (Extra) is 《晓看天色暮看云》 Look at the Sky at Dawn and the Clouds at Dusk.
Where to read: Lofter (Main Story: 不寐) | Lofter (Extra: 晓看天色暮看云)
#pingxie#pingxie fic rec#zhang qiling x wu xie#pingxie only#dmbj#px fic rec 61 to 70#canon compliant#window paper#straight xiaoge#double perspective#multichapter#漫漫唯一
4 notes
·
View notes
Text
꒰ ͙ ❄ PRETTY IN 🍑 . ꒱
hey , hi , hello , friends ! check out my newest theme , PRETTY IN PEACH is my first code geared toward writeblrs , with a special focus on advertising ur current projects as well as shouting out the books ur currently invested in . she is filled with unique sliders that will help u create a design that is personal to u and ur aesthetic eye . as per usual , let me know if u encounter any errors and i will do my best to troubleshoot asap !
if u intend on using this theme or just want to be a supportive hottie , please give this post a like and a reblog ! stay hydrated and be sure to pet a cute animal today ! mwuah ! 🍑 🍑 🍑

ⅰ. THEME FEATURES .
x. optional gradient footer wave design
x. optional gradient for sidebar image
x. accessible font size toggle
x. linked writing projects section
x. space to shoutout ur current reading list
x. about u blurb when hovering over sidebar image
x. an area for u to copy and paste symbols to appear before and after ur title , should u opt to use them
x. simple , single sidebar at 80 x 150 px
x. one navigation image at 70 x 100 px
x. options for background images on both the sidebars and background
x. a description area located within the navigation tab
x. placing for a symbol over ur navigation image that has a jello wiggle effect on hover
x. one single free link
x. link to ur inbox
x. for a more detailed compilation of credits and features , please see the google doc containing the code

͙ ❄ this theme is a patreon exclusive : want access ? consider signing up to join the fam - a - lam to get ur hands on this theme as well as my entire coding catalogue . click here to learn more !
source link directs to a live preview of PRETTY IN PEACH .
#rph#rp theme#indie rp theme#rpt#premium theme#supportcontentcreators#paid theme#mine#rec#themes#for patreons#for patrons
28 notes
·
View notes
Text

Style tests for blueprints used in the 2021 Sellbot Task Force ARG, created by Piranhartist/Katherine Leiter.
Transcription of the notes is available below.
LEFT (Top to bottom)
Surlee style test(s)
White screen texture
(BG texture white grain uniform)
Helvi Glaze Multiply 34%
54 px Grid - Overlay 25% Inking Brush White.
Grain Pencil Heavy Chanelle - Sketching White
Brush nib multiply soft - 70%
RIGHT (Top to bottom)
COG Style test(s)
Tarkine multiply 34%
Noise Brush multiply 15%
30 px grid overlay 13% inking brush
Base colors watercolor Brush
Normal
Fountain Hatching Brush
Core watercolor smudge
Brush nib multiply soft - 70%
9 notes
·
View notes
Video

flickr
Winchell's Donuts by Nick Leonard
Via Flickr:
Polaroid SX-70 Sonar Land Camera, Impossible Project PX 680 CP film. Las Vegas, NV. www.nickleonardphoto.com | nickleonard.tumblr.com
#nick#nick leonard#las vegas#nevada#polaroid#polaroid SX-70#SX-70#polaroid SX-70 land camera#land camera#instant film#integral film#color shade#color protection film#PX680#PX680CP#dozen#twelve#donuts#doughnuts#icing#sprinkles#colors#colorful#sweet tooth#sweets#food#winchell's#winchell's donuts#ND pack filter#scan
1 note
·
View note
Note
Hello, it’s me again the one who is very struggling with making gifs. Can you show me a tutorial of your gif making process, like from A to Z? So I can learn from it and try one last time cause I’m losing my shits.
You guys, the gif making people idk if this is a polite way to say but yeah, you guys really cool people with massive passion 🤍
hey there!
tbh I’m not the best at explaining but I hope my humble tutorial will help you. Also, I referenced from the tutorials @usergif a lot. It is my go to when i need tutorial or help :)
Shoutout to all the amazing gif/content creator out there! Also if any of my content creator moots have any helpful guides, please do leave it under the reply ❤️
Firstly, i’ll have my scenes to gif ready. I either use VLC player or Quick Time player to screen record ( i’m very basic lol). Then I open Photoshop and here goes.
1. File > Import > Video frames to layers. And then I’m gonna choose the file that I’ve trimmed from screen recording and choose the part I want to gif first (circled in screenshot)

2. Then you can see the amt of layers, you can play and see which part you want (if it’s a LOT of layers) to delete because too many = exceeding 10mb limit for Tumblr
I have my own theory 🧐 that for certain size, only a certain amount of layers will fall within Tumblr 10mb limit size. I mainly use these 3 sizes to crop so: square (max 45-50), 1028px (max 60-65), 1280px (max 70-80). if you’re doing extensive colouring/gradients/blending etc this needs to be further limited so that it doesn’t exceed 10mb. Crop sizes I usually use:

3. Set frame delay. I click on the 3 lines > Select All Frames. Click on 1 of the layer dropdown > Other > 0.05s. Tip: you can set at 0.03s and then after you’re done with your gif, you can re-time it to 0.05s, it’ll be smoother but I’m lazy so I just do at 0.05s.

From this steps onwards, it will be very long. I made an action for myself where I click on the play button and it’ll automate for me but idk how to share this with you 😭 so bear with me for the steps.
4. Click on the 3 lines again > Convert to Video Timeline
5. Select > All Layers
6. Filter > Convert for Smart Filters. And then you have a single layer like below:

7. Now we go to Sharpening. I refer from usergif tutorial on sharpening (you can follow the tutorial!) I tweak it around to my preference and use high pass instead of vivid.
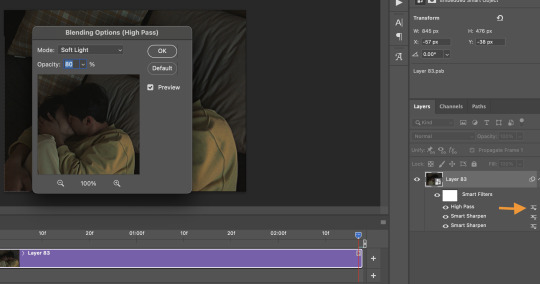
For high pass if you want to try. Filter > Other > High Pass > 4.0 radius. Then you want to double click on the line beside high pass, Mode: Soft Light, Opacity: 80%
8. Next! The fun part. Colouring!! (I’m not an expert at this because I play around a lot) All my sets are coloured from scratch but I use this settings for easier colouring. It can very long if it’s a difficult scene to colour. This tutorial from usergif tutorial is very helpful!

9. Then I will resize this. Image > Image size > Width: 540 px

HOPE THIS HELPS!!
5 notes
·
View notes
Last Seen Blogs

simple-an-clean
Best Drawer Safe

jeffreybewley007-blog
Telecommunication Jaffrey Bewley
cutefurryart
CuteFurryArt
fujiyama-ma-ma
fujiyama mama