
someblakearts
blake.toys
I'm Blake and I like to tinker with things and make stuff. When I'm not programming or developing random systems, I'm playing with electronics, doodling bits of art, 3D modelling or sculpting and painting things or nerding out watching sci-fi or horror TV.
24 posts
Don't wanna be here? Send us removal request.
Last Seen Blogs
with-my-heavydirtysoul
Ophiuchus.


dacreativegenius
The Art & Crimes of DTM -creativegenius
rockmangurl
Plasma Power!!!

80sdaily
Welcome to the 80's!
Text
System Shock 2 in Unreal Engine 5
Tools, tools, tools
Back when I worked in the games industry, I was a tools guy by trade. It was a bit of a mix between developing APIs and toolkits for other developers, designing database frontends and automated scripts to visualise memory usage in a game's world, or reverse engineering obscure file formats to create time-saving gadgets for art creation.
I still tend to do a lot of that now in my spare time to relax and unwind, whether it's figuring out the binary data and protocols that makes up the art and assets from my favourite games, or recreating systems and solutions for the satisfaction of figuring it all out.
A Shock to the System
A while back I spent a week or so writing importer tools, logic systems and some basic functionality to recreate System Shock 2 in Unreal Engine 5. It got to the stage where importing the data from the game was a one-click process - I clicked import and could literally run around the game in UE5 within seconds, story-missions and ship systems all working.
Most of Dark engine's logic is supported but I haven't had the time to implement AI or enemies yet. Quite a bit of 3D art is still a bit sketchy, too. The craziest thing to me is that there are no light entities or baked lightmaps placed in the levels. All the illumination you can feast your eyes on is Lumen's indirect lighting from the emissive textures I'd dropped into the game. It has been a fun little exercise in getting me back into Unreal Engine development and I've learnt a lot of stuff as usual.
Here is a video of me playing all the way up to the ops deck (and then getting lost before I decided to cut the video short - it's actually possible to all the way through the game now). Lots of spoilers in this video, obviously, for those that haven't played the game.
youtube
What it is
At it's core, it's just a recreation of the various logic-subsystems in System Shock 2 and an assortment of art that has been crudely bashed into Unreal Engine 5. Pretty much all the textures, materials, meshes and maps are converted over and most of the work remaining is just tying them together with bits of C++ string. I hope you also appreciate that I sprinkled on some motion-blur and depth of field to enhance the gameplay a little. Just kidding - I just didn't get around to turning that off in the prefab Unreal Engine template I regularly use.
Tool-wise, it's a mishmash of different things working together:
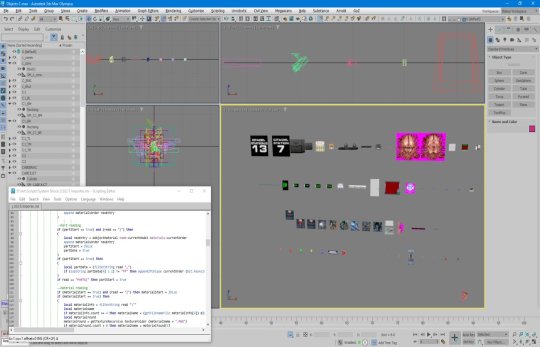
There's an asset converter that organises the art into an Unreal-Engine-compatible pipeline. It's a mix of Python scripting, mind numbingly dull NodeJS and 3dsmaxscript that juggles data. It recreates all the animated (and inanimate) textures as Unreal materials, meshifies and models the map of the ship, and processes the objects and items into file formats that can be read by the engine.
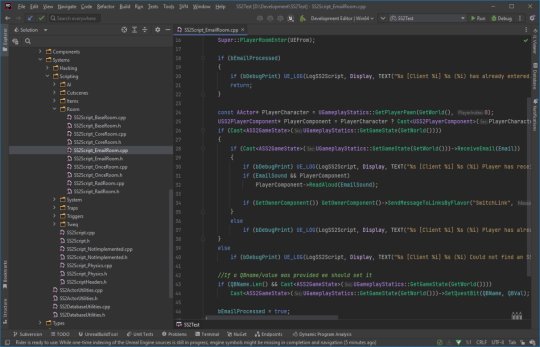
A DB to Unreal converter takes in DarkDBs and spits out JSON that Unreal Engine and my other tools can understand and then brings it into the Engine. This is the secret sauce that takes all the levels and logic from the original game and recreates it in the Unreal-Dark-hybrid-of-an-engine. It places the logical boundaries for rooms and traps, lays down all the objects (and sets their properties) and keys in those parameters to materialise the missions and set up the story gameplay.
Another tool also weeds through the JSON thats been spat out previously and weaves it into complex databases in Unreal Engine. This arranges all the audio logs, mission texts and more into organised collections that can be referenced and relayed through the UI.
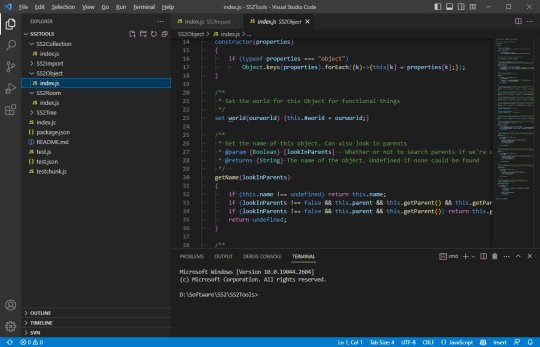
The last part is the Unreal Engine integration. This is the actual recreation of much of the Dark Engine in UE, ranging all the way from the PDA that powers the player's journey through the game, to the traps, buttons and systems that bring the Von Braun to life. It has save-game systems to store the state of objects, inventories and all your stats, levels and progress. This is all C++ and is built in a (hopefully) modular way that I can build on easily should the project progress.
Where it's at
As I mentioned, the levels themselves are a one-click import process. Most of Dark engine's logic, quirks and all, is implemented now (level persistence and transitions, links, traps, triggers, questvars, stats and levelling, inventory, signals/responses, PDA, hacking, etc.) but I still haven't got around to any kid of AI yet. I haven't bought much in the way of animation in from the original game yet, either, as I need to work out the best way to do it. I need to pull together the separate systems and fix little bugs here and there and iron it out with a little testing at some point.
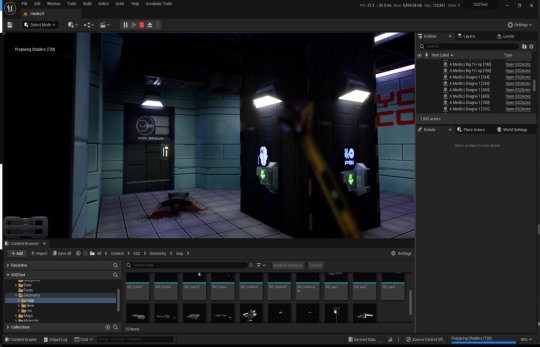
Lighting-wise, this is all just Lumen and emissive textures. I don't think it'll ever not impress me how big of a step forward this is in terms of realistic lighting. No baking of lightmaps, no manually placing lighting. It's all just emissive materials, global/indirect illumination and bounce lighting. It gets a little overly dark here and there (a mixture of emissive textures not quite capturing the original baked lighting, and a limitation in Lumen right now for cached surfaces on complex meshes, aka the level) so could probably benefit with a manual pass at some point, but 'ain't nobody got time for that for a spare-time project.
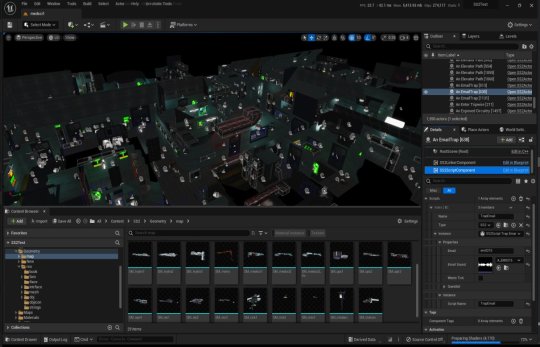
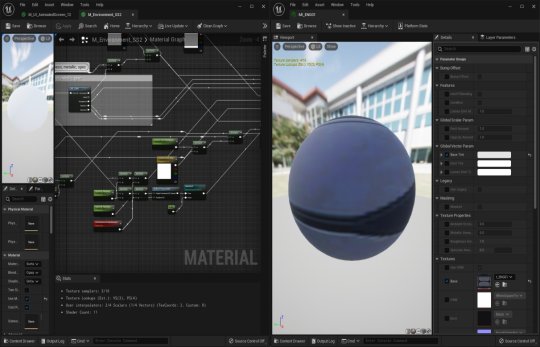
The unreal editor showcasing some of the systems and levels.
Where it's going
I kind of need to figure out exactly what I'm doing with this project and where to stop. My initial goal was just to have an explorable version of the Von Braun in Unreal Engine 5 to sharpen my game dev skills and stop them from going rusty, but it's gotten a bit further than that now. I'm also thinking of doing something much more in-depth video/blog-wise in some way - let me know in the comments if that's something you'd be interested in and what kind of stuff you'd want to see/hear about.
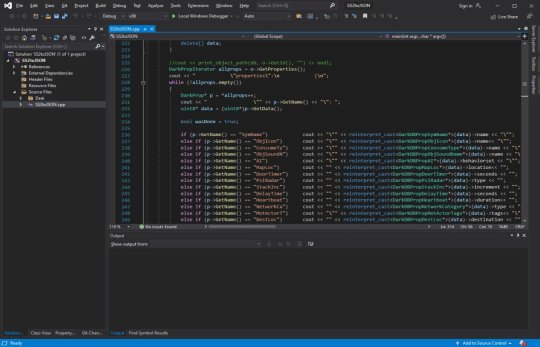
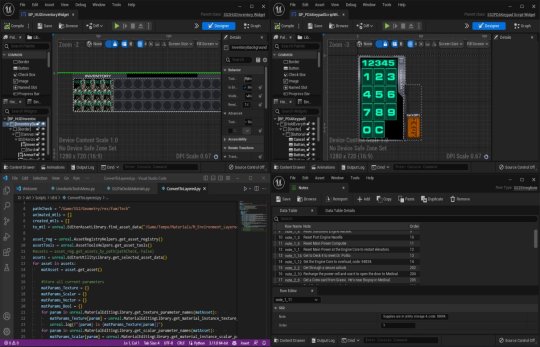
The DB to JSON tool that churns out System Shock 2 game data as readable info
Anyway - I began to expand out with the project and recreate assets and art to integrate into Unreal Engine 5. I'll add more as I get more written up.
#game development#development#programming#video game art#3ds max#retro gaming#unreal engine#ue5#indiedev#unreal engine 5#unreal editor#system shock 2#system shock#dark engine#remake#conversion#visual code#c++#json#javascript#nodejs#tools#game tools#Youtube
1 note
·
View note
Text
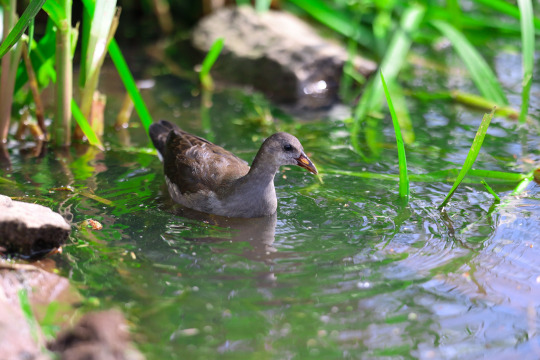
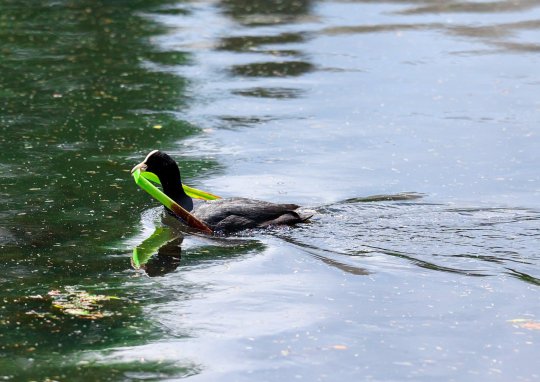
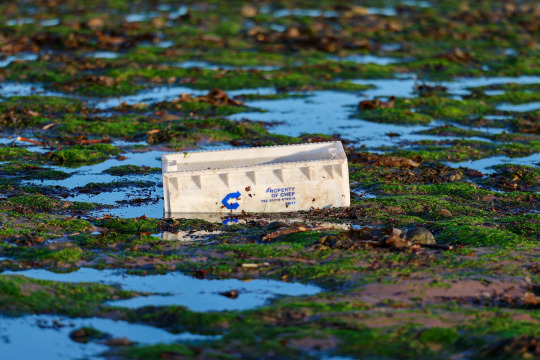
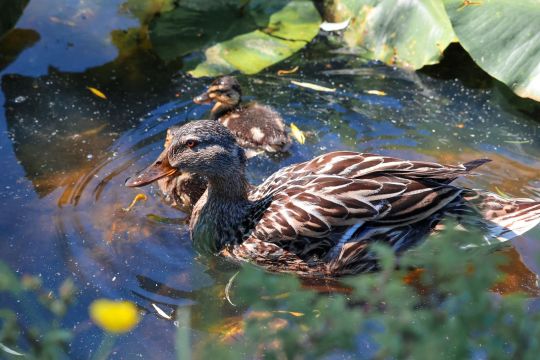
Photography - 25th June 2023


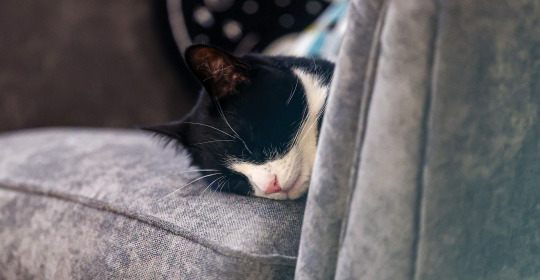


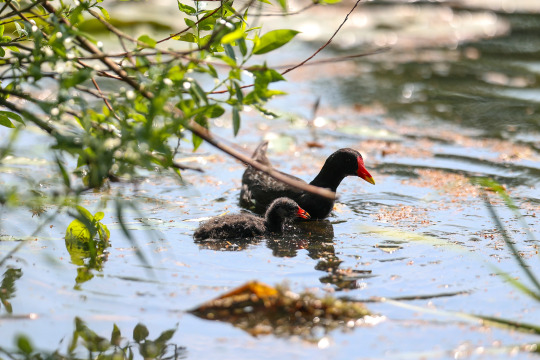
#animal photography#photography#nature photography#pond#duck#coot#bug photography#macro photography#woodlouse#seagul#cat#cat photos#crow#sparrow#water lily
0 notes
Text
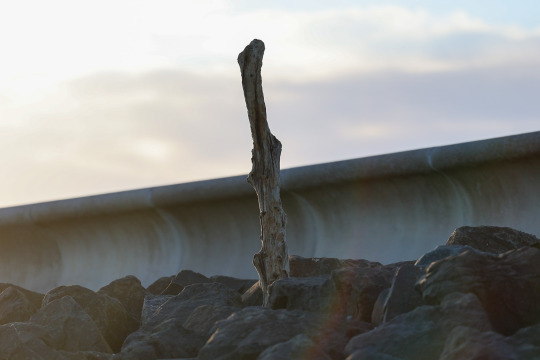
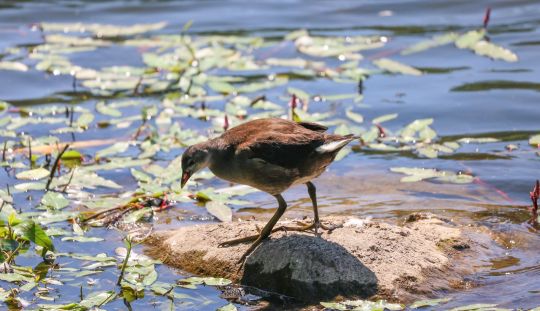
Photography - 21st June 2023

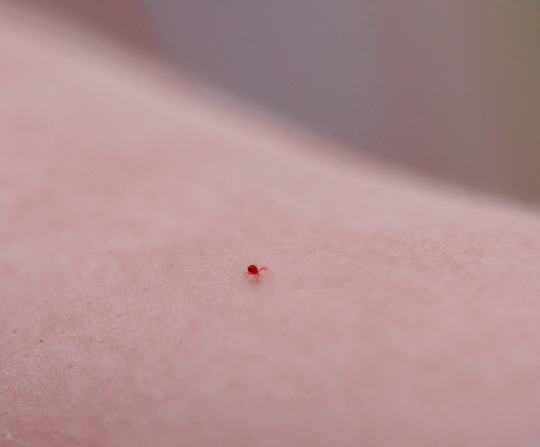


#nature photography#bug photography#insect photography#insects#bugs#photography#135mm#coot#moorhen#spider#arachnid#bee#mite#thorn#plant photography
0 notes
Text
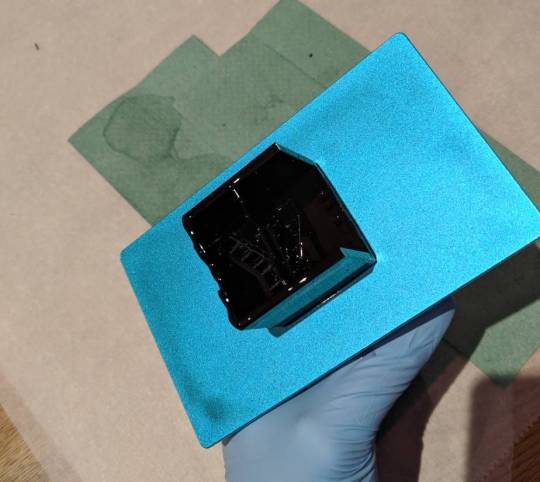
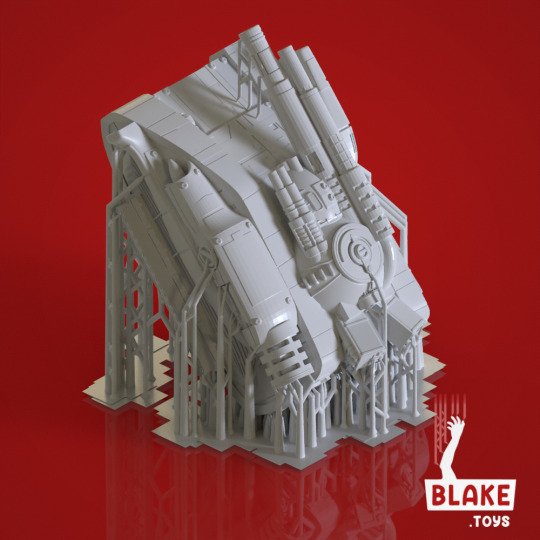
Boss room from Silent Hill 2


Continuing on with the theme of 'levels from my favourite games', here's the 3D model, print and print of the room that you first battle the Pyramid Head monster in Silent Hill 2.
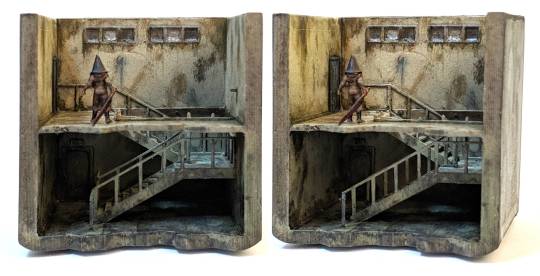
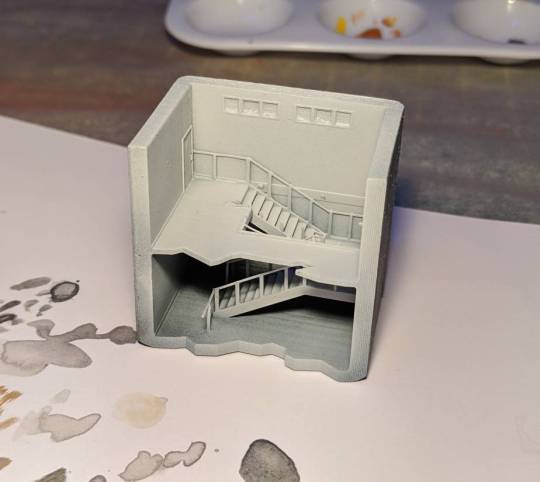
I had the game open on another screen to use as a reference while 3D modelling. As with The Edge, I printed it straight onto the bed which sped up the print time a little and reduced the risk of it warping/being pulled off the bed.
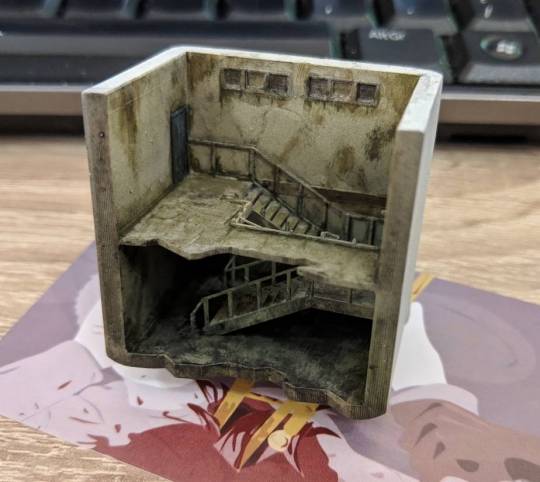
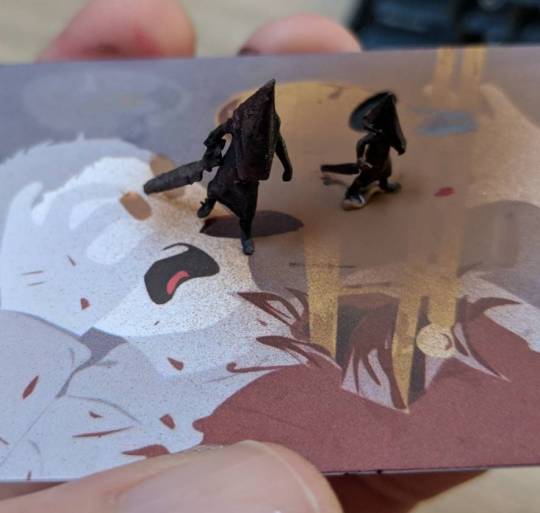
I gave it a basic airbrush coating then started to grime it up with washes and dry brushing. To finish up I modelled and printed out a tiny Pyramid Head and stuck him in the scene.
I'm happy with how it came out, and it only really took a few hours to do from scratch. Here's the original room, for comparison:

and here are some work-in-progress shots along the way:


#3d modeling#3d printing#video game art#miniatures#3ds max#miniature painting#retro gaming#3d print#tiny things#iconic#classic games#pyramid head#silent hill 2#silent hill#team silent#remake
9 notes
·
View notes
Text
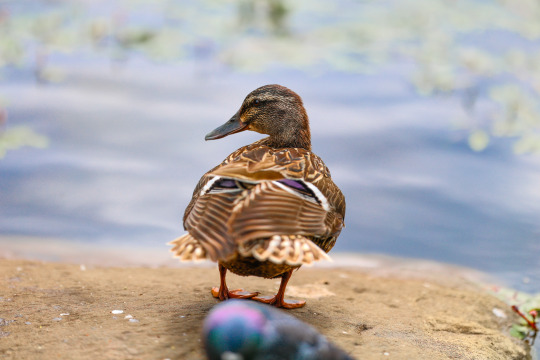
Photography - 19th June 2023


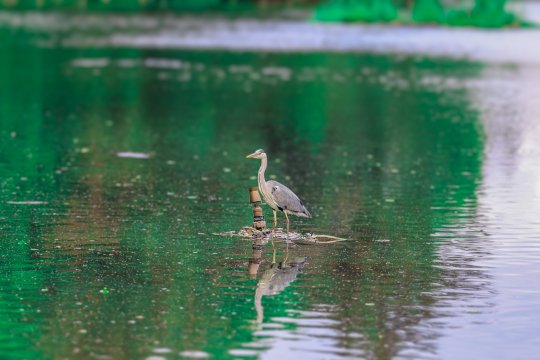
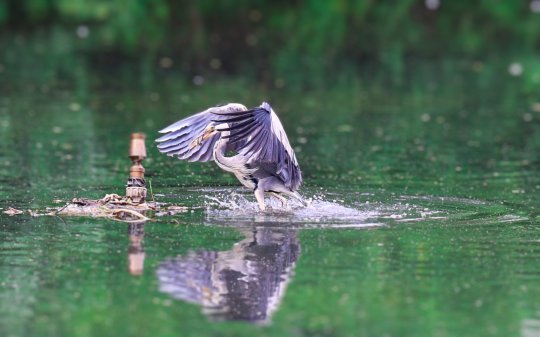


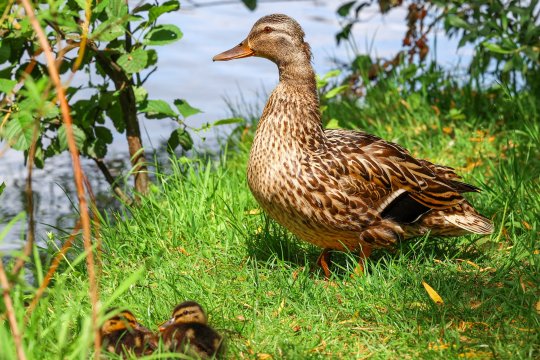


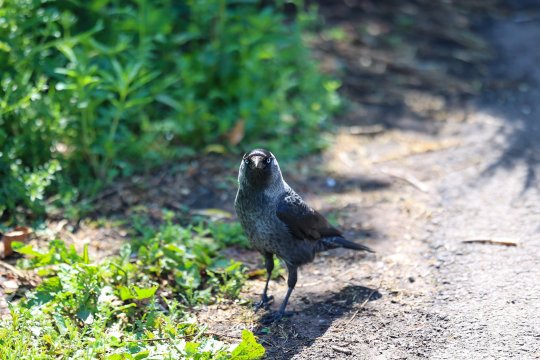

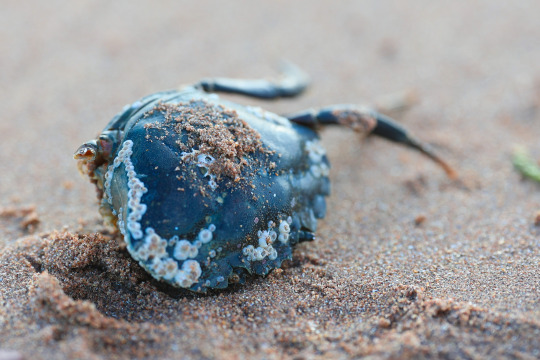


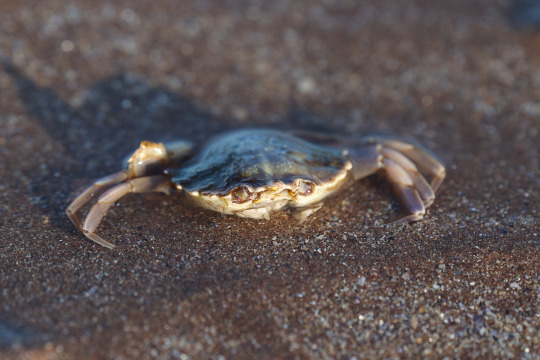


More bits around the pond, testing out a new lens I treated myself to.
I really love this lens but it's going to take a while to get used to 135mm (my current favourite, go-to lens has been 85mm).
#animal photography#photography#pond#bird photography#birds#ducks#coots#crows#bug#bug photography#beach photography#crab#sea#ocean#sandhopper#135mm#jackdaw
1 note
·
View note
Text
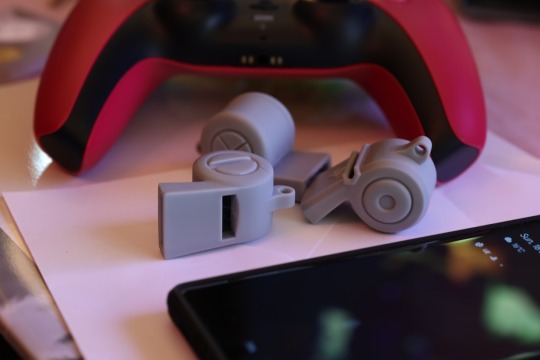
Delver Whistles from Made in Abyss

Here's a 3d model, print and paint of some of the Delver whistles from the anime 'Made in Abyss'. There's quite a few existing prints of them on sites around, but I really wanted to give them a more accurate model myself based on the concept art.
I also made mine stand out a bit by including some distressed/weathered versions with scratches, chips and general day-to-day usage marks.
You can find them over on my Cults3D or MyMiniFactory if you want to give them a print and paint yourself.


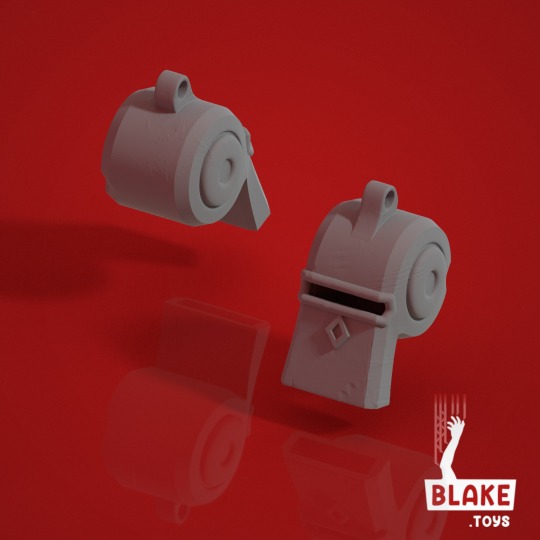

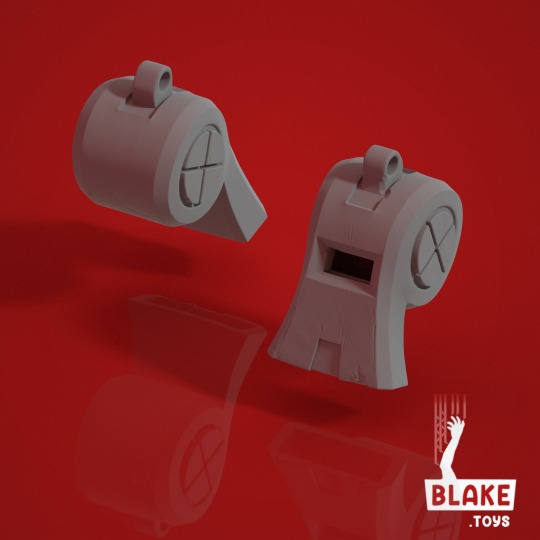
I'm really happy with how they've come out. They feel nice and chunky and like they'd work good for cosplay or having as a prop on a shelf.
Unfortunately only the red whistle seems to make any noise when blown, so I need to investigate the science/aerodynamics behind whistles to see if I can get future prints to shriek.


I want to give some of the white whistles a go next, and perhaps try to make my own custom one - we'll see. I'll post more as I get more done.
Are there any anime series you'd love to see props or objects printed from? Feel free to pop ideas in the comments below!
#anime#made in abyss#madeinabyss#3d print#3d modeling#3d printing#anime art#anime fanart#miniatures#jewellery#cosplay#whistle#prop#anime prop
20 notes
·
View notes
Text
Crota's End map from Destiny
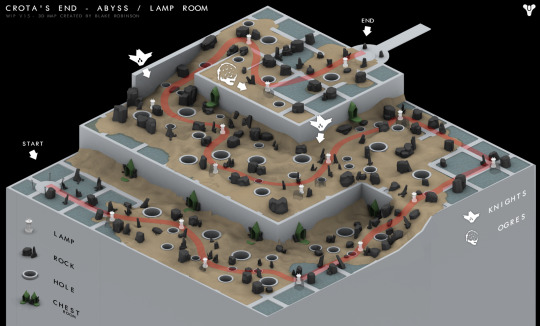
Here's my 3D illustration of the Abyss, sans-darkness-and-fog, that I posted for the Destiny community a few years back. There are some great maps out there already but I figured creating an isomeric one might give a better sense of the vertical space
It was shared to help out new players with their first raid, or experienced players looking to figure out new strategies or paths.
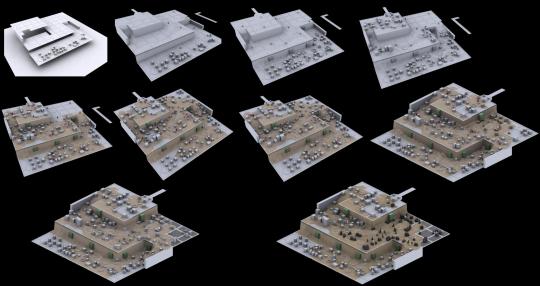
It's recreated by eye as I ran around, so there might be mistakes or missing bits and bobs that someone might spot, but it should be pretty accurate. Feel free to reply if you spot anything wrong and I can fix it.
Here's some work-in-progress shots as it came together and a 3D model you can look around in your browser:
sketchfab
0 notes
Text
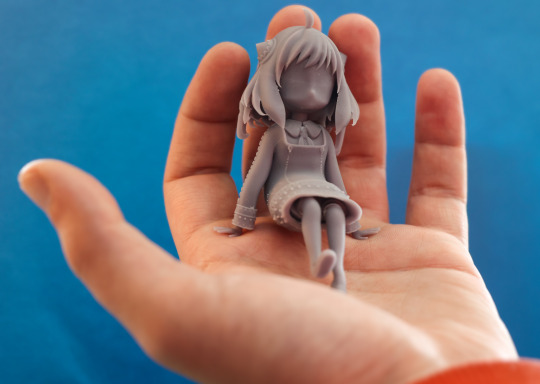
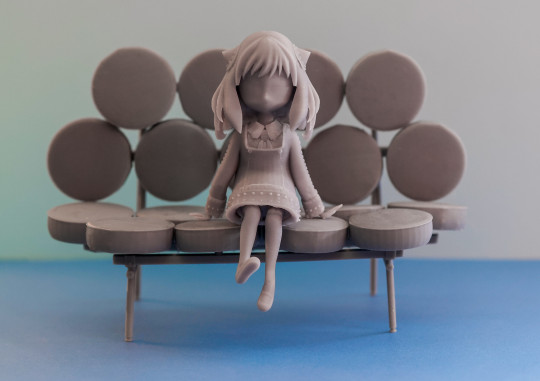
Anya Forger from Spy x Family heh
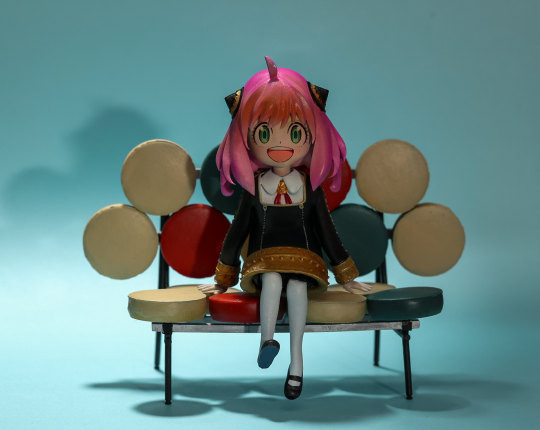
Here's a 3D model, print and paint of Anya Forger from the Anime 'Spy x Family'.
I wanted to recreate the manga cover with her in the chair. Overall, I'm relatively happy with how it came out. As with most of my anime paints, the face is a transfer. I'm not 100% happy with it as it looks a bit low detail, so I might try to reprint and retransfer those at some point.
I also needed to subdivide the mesh a bit more, I think. There are some obvious polygons here and there. Perhaps I could have sanded it down a little more before painting, but I was impatient, as usual.

During the printing journey I also ended up reprinting her a little bigger, so I now have a spare, smaller unpainted version I may do something with. Just a rando fact for you there. Here's some fun WIP pics:


#3d modeling#3d printing#digital art#video game art#miniatures#sculpt#3ds max#spy x family#anya#anime#figurines
12 notes
·
View notes
Text
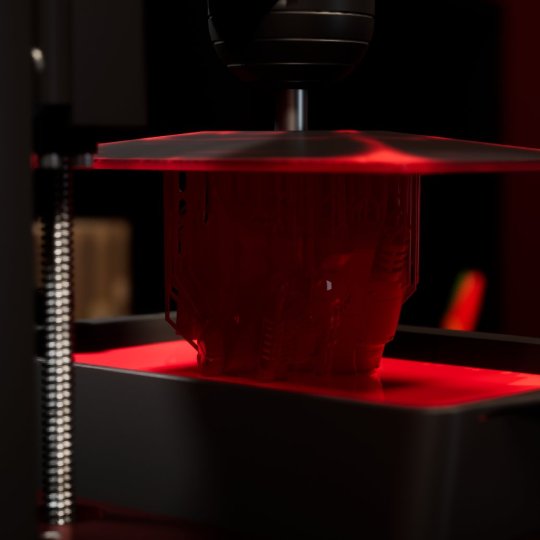
Cryo Pod from System Shock 2
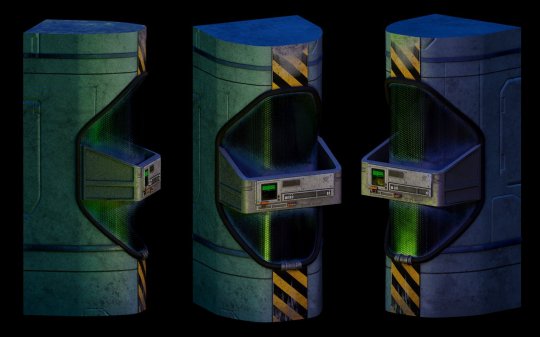
Here's a hi-res version of the Cryo Pod from System Shock 2, trying to stay pretty faithful to the original. It’s also made to the exact same scale so that it slots into the level.
It was mainly made to see how much effort re-creating assets would be for my personal SS2 project:
youtube
Regarding the model - it’s a bit high-poly for what it is, but originally I wasn’t sure if I was going to use it for pre-rendered assets. I figured I can always bake down some of those polys to the normal map later on if I need to cut it down a bit. It’s also a little bit too weathered for a brand new ship like the Von Braun, but I was hiding my inadequacies as an artist behind grime textures/normals :p
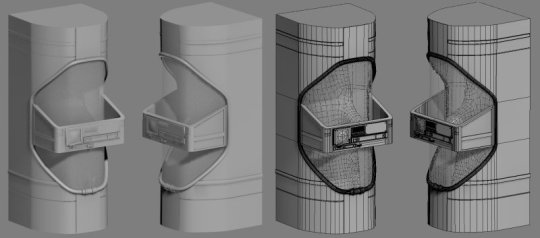
The model was created in 3ds Studio Max and textured in Substance Painter.
You can also view a 3D model by clicking the image below:
sketchfab
System Shock 2 Cryo Pod by blakearts on Sketchfab
#system shock 2#systemshock#systemshock2#ss2#cryopod#cryo pod#scifi#sci-fi#tech#video game art#game fanart#video game#retro gaming#3ds max#digital art#3d modeling#dark engine#hd remake#high resolution#Youtube
2 notes
·
View notes
Text
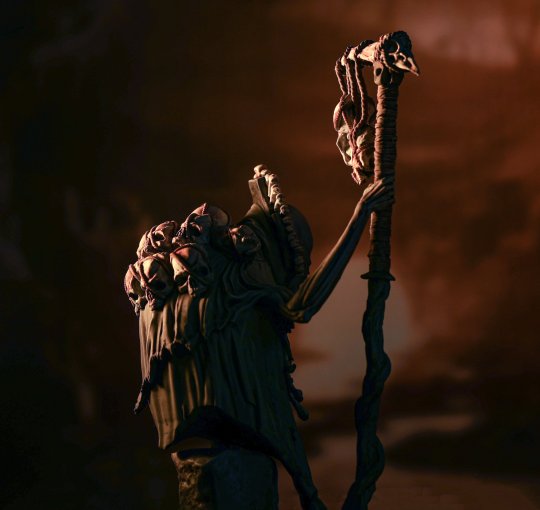
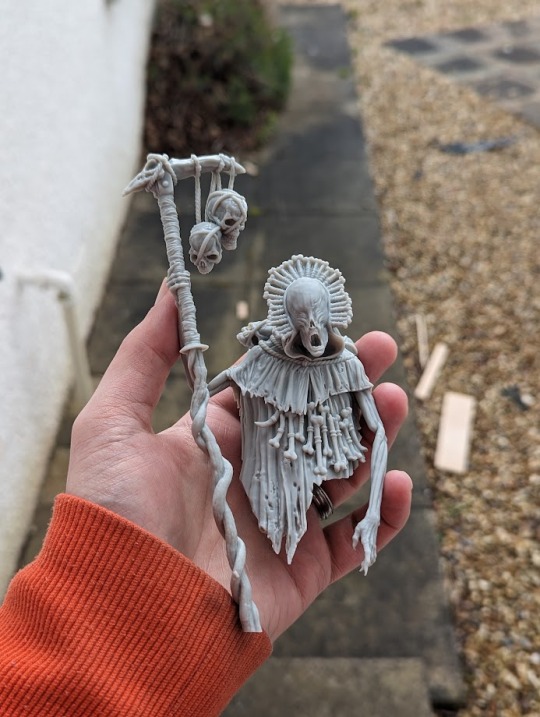
Bestiarum's Dread Necromancer bust

Here's a print and paint of Bestiarum Game's Dread Necromancer bust.

I've got quite a few of Bestiarum's busts printed out - they make some incredible miniatures and I love the look and lore behind them all. This is the first thing I've painted in a while and I'm pretty happy with how it came out.
For reference, here is their original:

I stayed pretty faithful to their colour scheme and look. Technique wise it was a quick primer and then blocking out the base colours with the airbrush. Then I went in and detailed everything with a brush before giving it a generous coating of flesh, black and 'blood' washes to grime it up a little. Finally added some drybrushed highlights on top of the grungy, washed up model before coating it in Mr Hobby clear matte and some satin varnish for the skin.
The base was a quick airbrush, wash and drybrush and then I promptly glued my fingers together while trying to attach the base to the model itself.
Here are some promo-style-shots:


Here are some WIP shots:


Definitely enjoyed doing this one and looking forward to painting some more - I'll share what I get done here.
#3d printing#miniatures#miniature painting#bestiarum#horror#figurines#mini painting#hand painted#acrylic painting
50 notes
·
View notes
Text
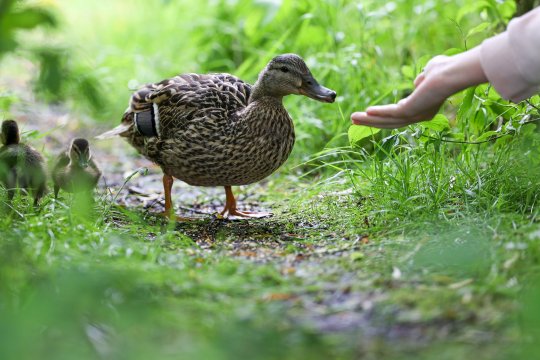
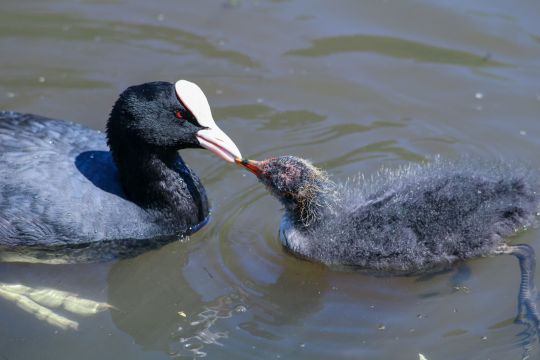
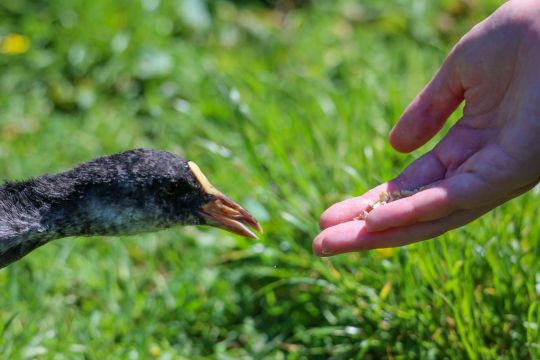
Photography - 16th June 2023


3 notes
·
View notes
Text
Lunaris 'Talon' bust
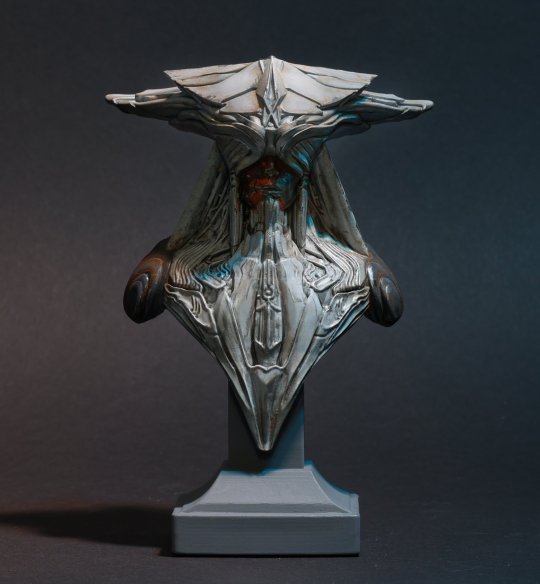

Here's a print and paint of the bust version of Lunaris Figures' 'Talon' bust. You can find the STLs in their welcome as part of their Tribes/Patreon membership.
There's something I really love about Lunaris Figures' set of busts. They have this really cool Sci-fi aesthetic that reminds me a little bit of Bungie's Destiny, but also brings in other elements I've seen in some of my favourite sci-fi art.
There's no real existing guide for painting this, so I went with an aged, slightly-rusted and damaged glossy robot style look. Originally I painted the face a bright orange, but it felt too fresh and bright, so I weathered it away and made it look grimey and aged. The main paint work was done with an airbrush. I did a zenith-lighting coat of black and white and then proceeded to put a gloss lacquer on the main panels. I went over this with some oil-based washes before added in edge details with a brush and silver paint.
There are some things I feel didn't work in the paint-job. It's hard to grime things up without going too far, which I think I did. I'm also still not sure on the weather-face effect. It feels paint-peely and grimey, but still not 100% sure it fits.
Here are some promo-style-shots


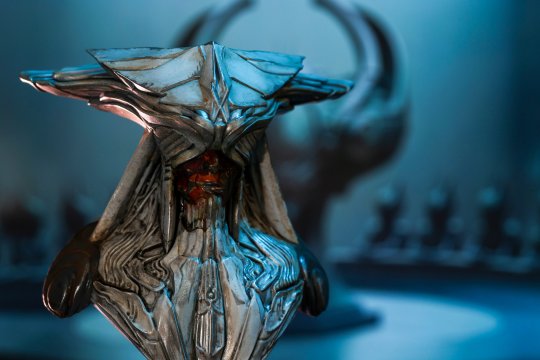
Still, I enjoyed doing this one and there are plenty more Lunaris figures I want to paint. I'll share what I get done here.
1 note
·
View note
Text
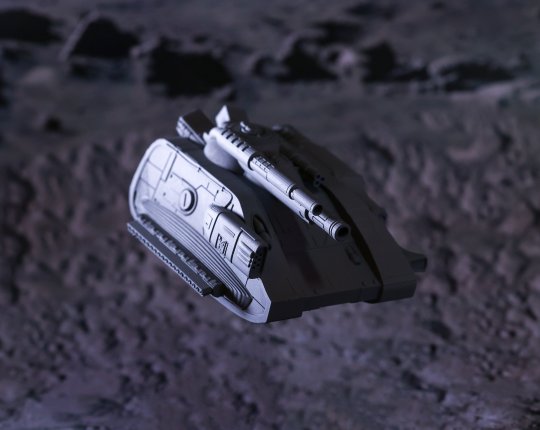
Truman Bobcat from Battlezone '98

Here's something a little different.
It's the tank that everyone associates with the Battlezone remake that was never actually seen in the final game - the 'Truman Bobcat'. This tank adorns the promotional material (and installer splash) of the original game, but was replaced by the Grizzly by the time the game went final. There are some pictures out there of early beta-versions of the model in game, but good references are pretty sparse.
This tank is part of my third generation of Battlezone prints, specifically the 80mm range, which you can read about in more detail here. The design is based on concept art, as well as various posters and pictures that showcased the Truman Bobcat.
Let's take a quick look at the initial print:


Next step - painting
It successfully printed and I'm pretty happy with the details so I'm posting a WIP here and the model to my MyMiniFactory profile. I'll hopefully get around to painting this unit soon and post some more pictures.
Thoughts on the design
I'm really satisfied with the level of detailing on this model. However, similar to the tug, some parts might be slightly too small for the 80mm scale. While everything printed fine, I feel that certain areas could benefit from some reinforcement. Additionally, I improvised some greebles in certain places, but I'm still not entirely sure if I'm completely happy with them. As mentioned earlier, finding good references for the original model has been challenging, and the topology of the concept differs greatly from the rough 3D model used in promotional art.
Originally I had also stayed very faithful to the topology of the big, Battlezone box-art:

However, I had some reservations about the side of the tank. Upon closer inspection, the promo mesh doesn't hold up well. It has a low polygon count and "organic" shapes that don't quite align with the Battlezone aesthetic. Moreover, the promotional artwork relied heavily on rough-looking UV and texture work to depict the details, which didn't translate effectively into a printable model requiring tangible 3D details.
To address this, I decided to keep the features that felt feasible and iconic and then incorporated some of the original concept art details. Finally I supplemented the model with greebles and mechanical components to enhance the overall level of detail.
Here's a look at how it came together in 3D Studio Max over the space of a day or two:


And here are some of the usual style promo-style-shots:


Print it yourself
You can find the STL for this model over in my MyMiniFactory page here if you want to try printing this yourself. There's a pre-arranged STL for printing off something quickly, or you can take each part of the STL and combine how you see fit
#3d modeling#3d printing#digital art#video game art#miniatures#3ds max#retro gaming#3d print#battlezone#bz98#battlezone 98
0 notes
Text
Even & Dicey from Lost in Random

Last year I worked with a company called Zoink Games on the soundtrack for their game, 'Lost in Random'. It has a very Tim Burton-esque aesthetic and I love the art look and feel of the game, it's world and it's characters. I wanted to make a little something from it to sit on my desk. Here's the results:
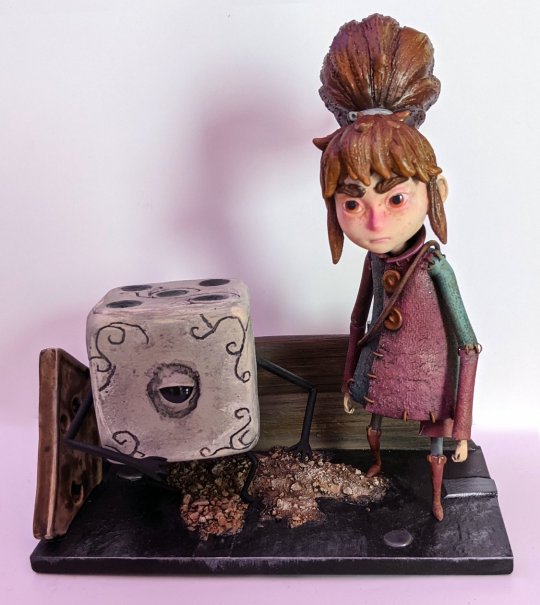
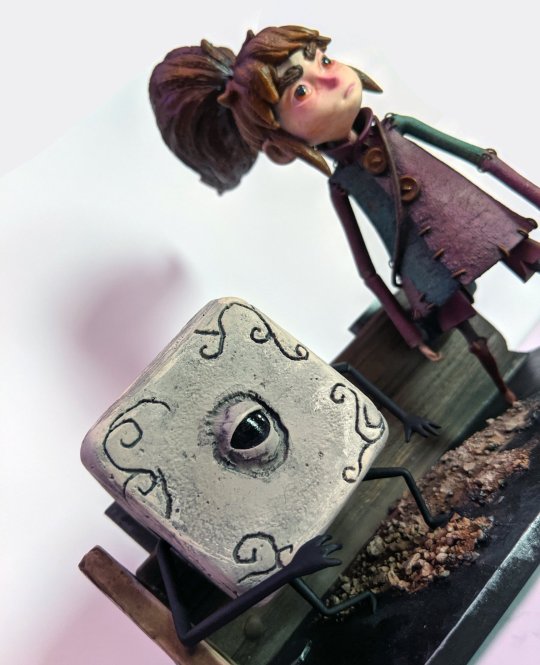


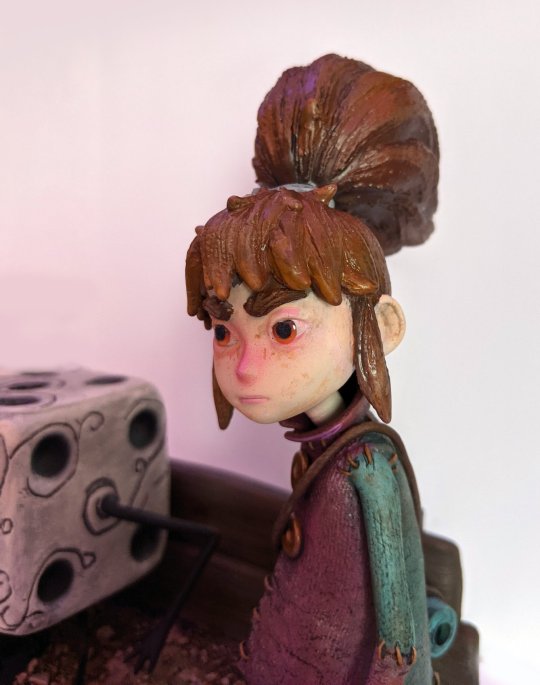
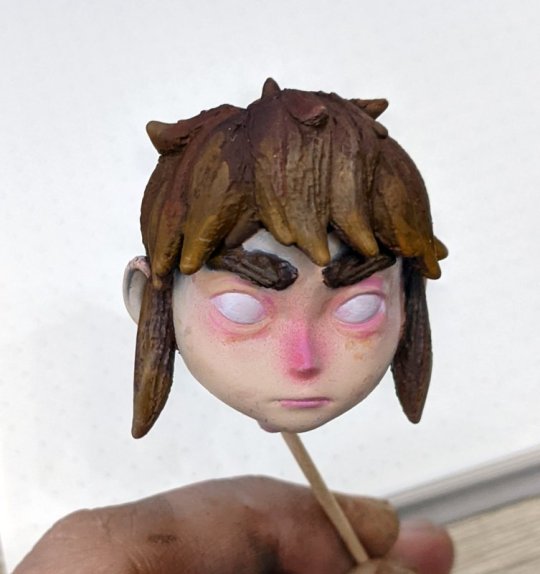
I'm pretty happy with how it turned out. Dicey was a lot easier to paint as he's so much simpler, but Even was still relatively quick to do. The hardest part was the face. I struggle painting faces, and this one has so much detail and character that I wanted to get across in the model. I was quite lucky in that I had the idea to use the airbrush for the reddened eyes and nose, but forgot to thin down the paint enough and caused splatter. However, these turned out looking like the freckles and imperfections in the game's model and looked great.
The first print of Dicey was a little... dicey. You can see in the picture below that the detail just wasn't quite there and I had to go through and re-carve out the lines and shapes, and add a much more pronounced displacement map to the final mesh to have the details really pop. That way it would be easier to pull the details out with a wash and dry brush later on.

The diorama itself is also the first big print (that wouldn't have been possible with my previous printers) with my new Phrozen Sonic Mighty 4k. I was worried that the bigger print area would reduce the detail and make noticable edges/layers on prinst, but it turned out great and there's very little difference between the quality of the Mini and the Mighty 4k. For example, here's the Mini and Mighty 4k's next to each other:

Here's some more work-in-progress shots along the way:


Here's the characters individually:


Even's dress still doesn't feel quite muddy/dusty enough to match the in-game aesthetic, but I'm too worried about ruining it now to go much further, and I think it looks okay how it is with the more prominent colours.
What do you think? Have you played the game? Any other characters you'd want to see printed and painted? Feel free to pop a comment or a repost with your thoughts.
#lost in random#3ds max#3d printing#3d modeling#digital art#video game art#miniatures#sculpt#miniature painting#odd even#character art#zoink games
28 notes
·
View notes
Text
Art meets mechanics
I've been experimenting today with 3D printing mechanical parts. For the next stage of my Battlezone '98 print project I really want to try to get some moving/functional aspects to the print.

I whipped up some quick models that featured gearing for wing tilting/steering racks.
I don't really know what I'm doing as I just freestyled it in 3ds max, but it works really well and feels quite smooth:
I'm envisioning a model of the Grizzly or Bobcat that sits on a base and bobs up and down, fins twisting to give the effect of hovering over the moon surface.
I'll post more as I get more figured out.
1 note
·
View note
Text
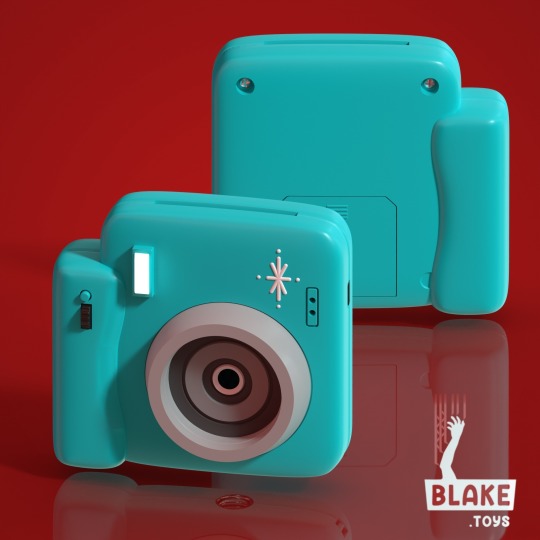
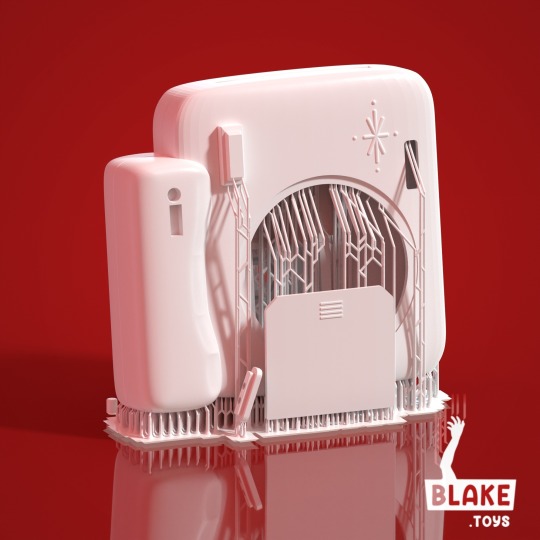
March 7th Camera from Honkai Star Rail
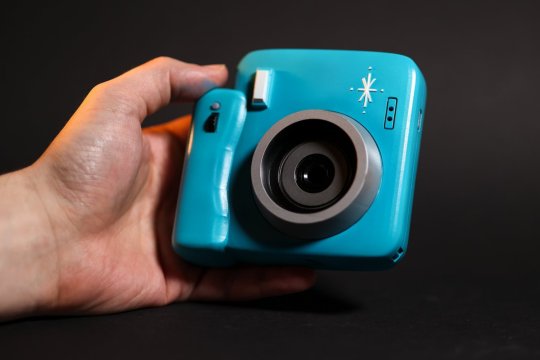
Here's another print from Hoyoverse' new title 'Honkai Star Rail'. This time it's a model, print and paint of March 7th's polaroid camera:

It was printed on the Elegoo Mars 3 Pro before being primed, painted (airbrush+vallejo) and lacquered to give it a plastic-cast toy texture and finish.
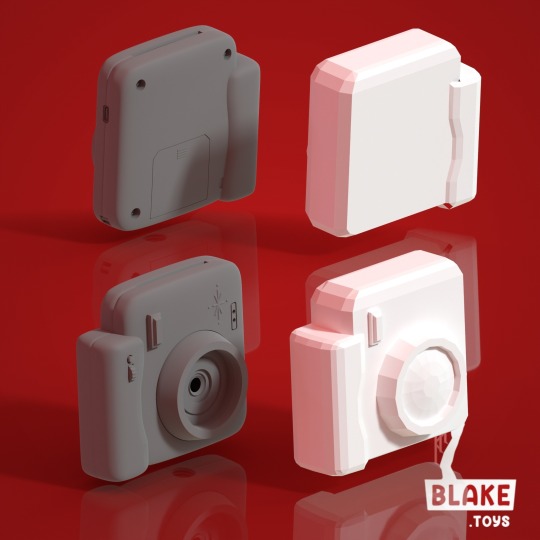
I'm really happy with how the model and print came out. It feels satisfying to hold in the hands and it looks great. I'm still not 100% sure on adding the wheel to the front part (instead of the viewfinder-hole) but anyone printing that could optionally not stick that part on.
I also need to pick up some better lacquer. This one is a bit too textured. It kind of works for this piece as it gives it that rough plastic toy texture, but it would definitely affect more detailed prints. Any suggestions would be welcome!


Here's how it compares to the in-game mesh details-wise:
Want to print and paint this yourself? You can find a. free download in my collections over on Cults3d or MyMinifactory
#3d modeling#3d printing#digital art#video game art#miniatures#3ds max#honkai star rail fanart#honkai star rail#march 7th#game props
1 note
·
View note
Text
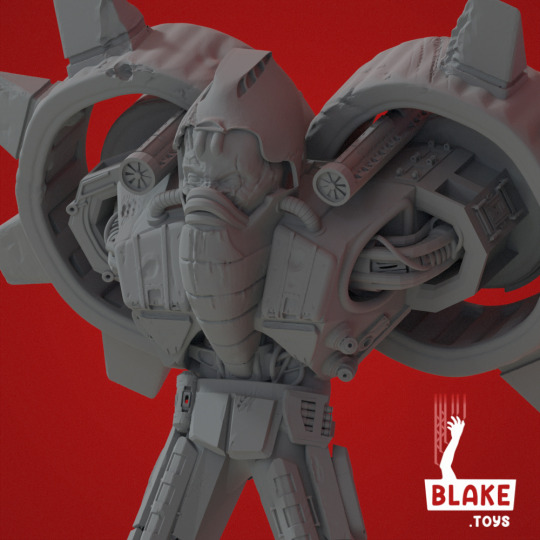
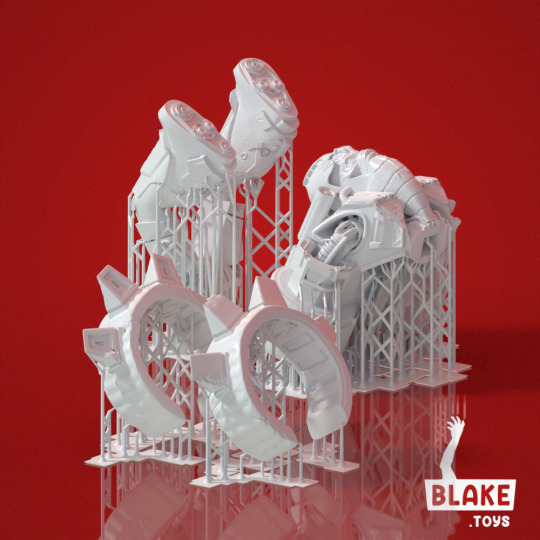
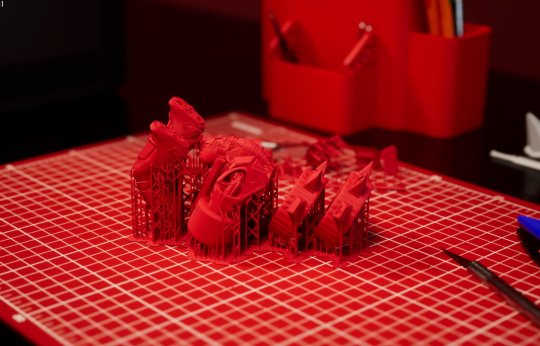
Icarus from Quake 2

Here's a shot of the Icarus enemy from Quake 2. The intent was to give it a print and paint, so I wanted to add in lots of extra details and bits and bobs, but stay really true to the original:
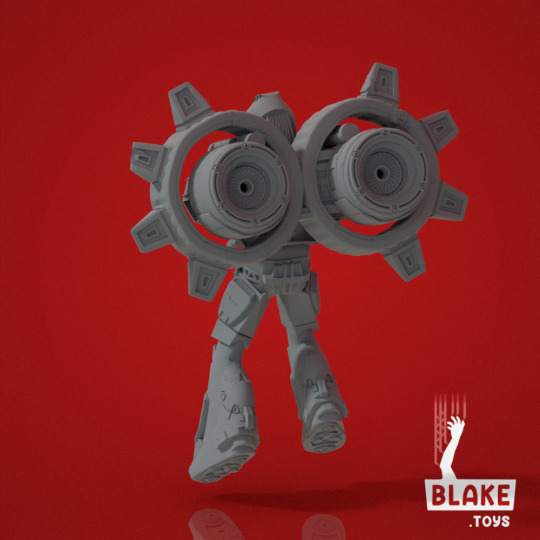

It finished up at 3m polygons with lots of little battle-scars and small details. As with the Technician, I cheated with some kitbash kit bits and bobs alongside modelling by hand.
Here's how it compares to the original in-game mesh:

If you want to give this a print yourself you can find the STLs over on my Cults3D and MyMiniFactory pages for the price of a coffee. Use the code blaketoys50 for 50% off!


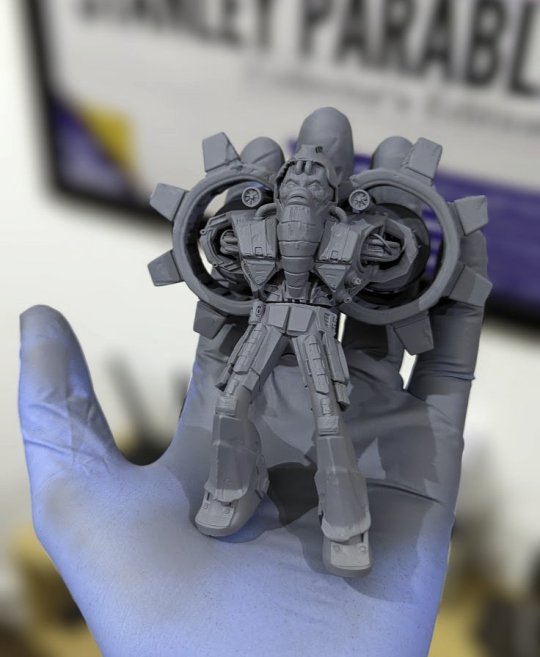

As always, I'll post more pictures once I get it painted.
#3d modeling#3d printing#digital art#video game art#quake 2#quake#retro gaming#sculpt#scultpure#horror#sci-fi#cyborg#miniatures#action figures#classic games#id software#strogg#stroggos#icarus#zbrush#3d sculpting#3d model
8 notes
·
View notes