#diy handmade
Photo
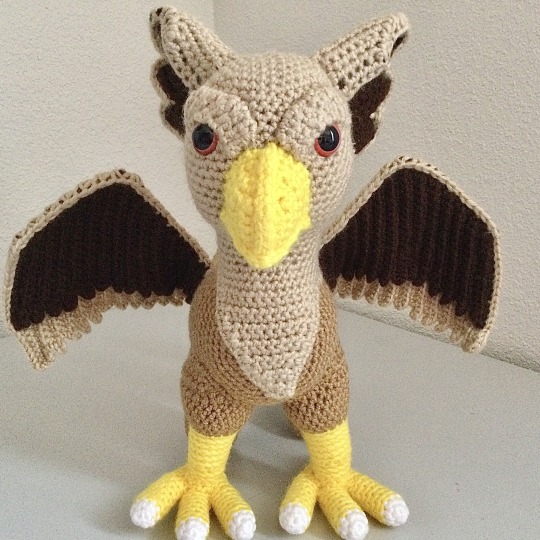

My crochet griffin amigurumi design with its majestic asymmetrical wings expanded! 🦅
Etsy | Ravelry
#griffin#crochet pattern#hippogriff#amigurumi#doll#plushie#pattern#photo tutorial#mythical#gryphon#creature#amigurumi pattern#soft sculpture#string art#diy handmade#plush doll#crochet design#jbcrochetwizard#dollmaker#amigurumidesigner
36 notes
·
View notes
Text

Finished the blanket - finally
I can’t believe it's over 😅
Pattern: Starlite
#crochet#diy#häkeln#blanket diy#diy or die#diy projects#galaxy#galaxy art#crochet blanket#handmade#sun#moon#stars#sky#handarbeit#project
9K notes
·
View notes
Text
Had a few folks interested in how I made the patches I posted for Solarpunk Aesthetic Week, so I thought I'd give y'all my step-by-step process for making hand-embroidered patches!

First, choose your fabric and draw on your design. You can use basically any fabric for this - for this project I'm using some felt I've had lying around in my stash for ages.

Next, choose your embroidery floss. For my patches I split my embroidery floss into two threads with 3 strands each, as pictured. You can use as many strands in your thread as you prefer, but for the main body of my patches I prefer 3 strands.
Next you're going to start filling your design using a back stitch.

First, put in a single stitch where you want your row to start.

Poke your needle up through the fabric 1 stitch-length away from your first stitch.

Poke your needle back down the same hole your last stitch went into so they line up end-to-end.
Repeat until you have a row of your desired length (usually the length of that colour section from one end to the other). Once you have your first row, you're going to do your next row slightly offset from your first row so that your stitches lay together in a brick pattern like this:

Make sure your rows of stitches are tight together, or you'll get gaps where the fabric shows through.
Rinse and repeat with rows of back stitch to fill in your patch design.

When you're almost to the end of your thread, poke your needle through to the back of the fabric and pull the thread under the back part of the stitching to tuck in the end. Don't worry if it looks messy - no one's gonna see the back anyway.
This next step is fully optional, but I think it makes the patch design really pop. Once your patch is filled in, you can use black embroidery floss to outline your design (or whatever colour you want to outline with - it's your patch, do what you want). I use the full thread (6 strands, not split) of embroidery floss to make a thicker outline.

I use the same back stitch I used to fill the piece to make an outline that adds some separation and detail. You could use most any 'outlining' stitch for this, but I just use back stitch because it's just easier for me to do.
Once you're finished embroidering your patch, it's time to cut it out!

Make sure to leave a little border around the edge to use for sewing your patch on your jacket/bag/blanket/whatever, and be careful not to accidentally cut through the stitches on the back of the patch.
If you have a sturdy enough fabric that isn't going to fray, you can just leave it like this. If not, I recommend using a whip stitch/satin stitch to seal in the exposed edges (I find that splitting your embroidery floss into 3-strand threads works best for this).

And then you're done! At this point you can put on iron-on backing if you want, or just sew it on whatever you wanna put it on. Making patches this way does take a long time, but I feel that the results are worth it.
Thanks for reading this tutorial! I hope it was helpful. If anyone makes patches using this method, I'd love to see them! 😁
#solarpunk aesthetic week#sewing#tutorial#sew on patch#punk diy#diy punk#punk aesthetic#handmade#solarpunk#handcrafted#embroidery#embroidered patch#how to#how to make a patch
17K notes
·
View notes
Video
folding paper airplane by 嘉骐手工
22K notes
·
View notes
Text
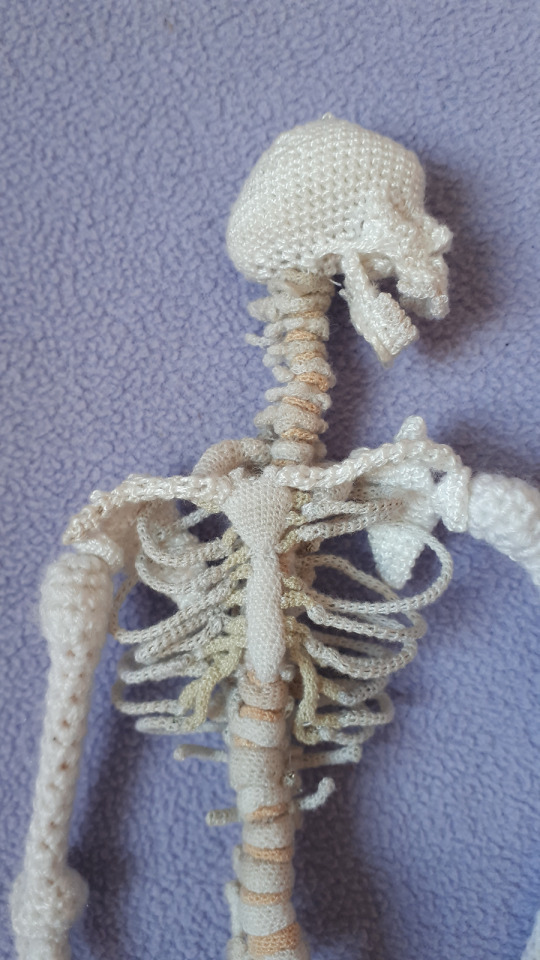
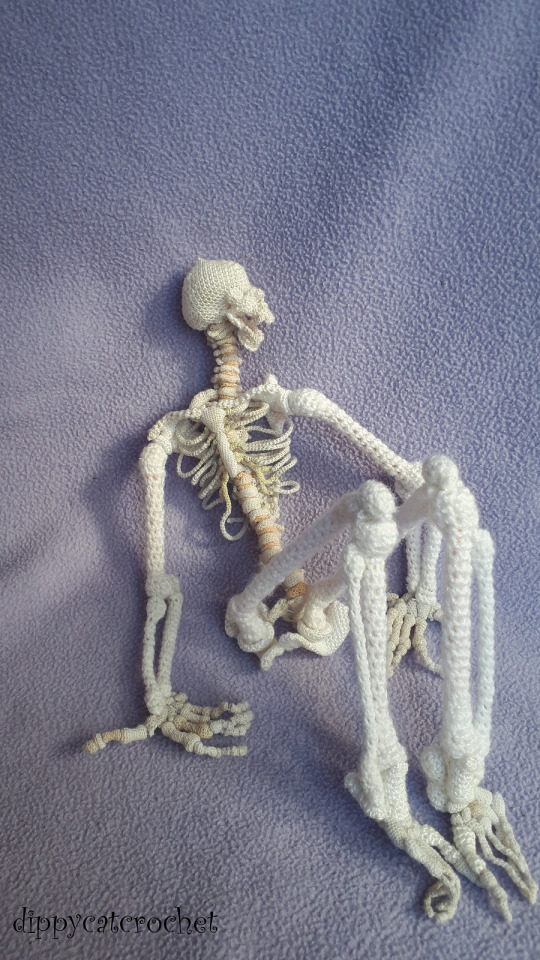

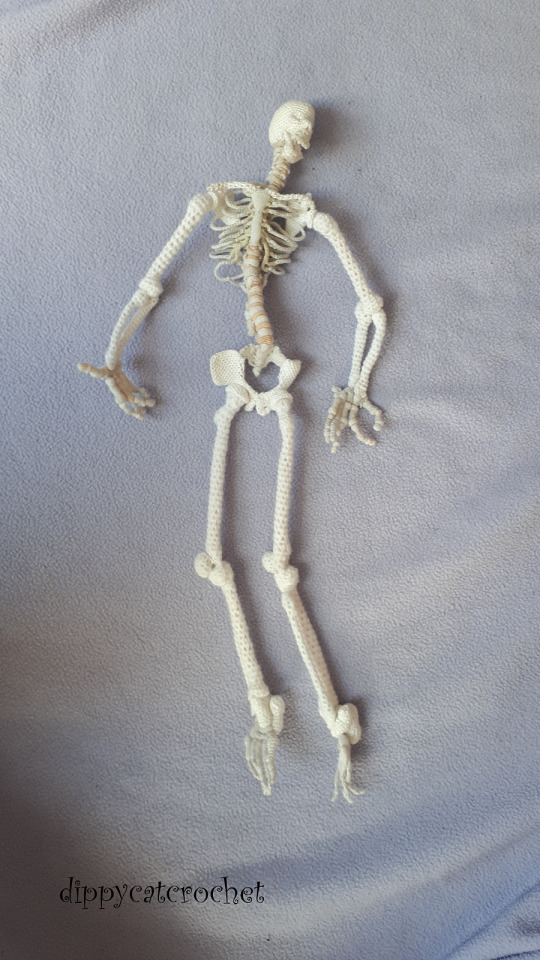
Crochet an Anatomically Correct Skeleton - FREE Pattern Includes All 206 Bones, 1/5th Size Scale Model! 👉 https://buff.ly/3sxUOW6 💀
11K notes
·
View notes
Video
square 紫砂壶zishahu/yixing clay teapot by 董群飞dong qunfei
#china#crafts#crafting#handmade#handcrafts#craftsmanship#diy#zishahu#yixing clay teapot#these are semi-finished#they will be taken to the kiln to be fired
15K notes
·
View notes
Text
Shoelaces - never as simple as a lace
Shoe laces are a common shoe accessory in our daily lives. Although they may seem insignificant, shoelaces have a long history and powerful functions. According to historical records, as early as more than 5000 years ago, human beings have already used shoelaces for decorative adjustment. In the pursuit of individuality and fashion today, shoelaces have been treated as more than just a functional accessory. It is a fashion accessory that is used to match different wearing styles and is the latest accessory to show the personality of wearing shoes.

Shoe laces are not only shoelaces, but also can be used as headbands, bracelets and so on. Anyway, it is very powerful, when the head rope can not worry about the lack of rubber bands, when the bracelet even buy bracelets to save money, and also very good-looking, also very fashionable! Currently the most versatile is polyester material, its cheap, pull off force is strong, relatively dirty. The next is polyester and cotton.
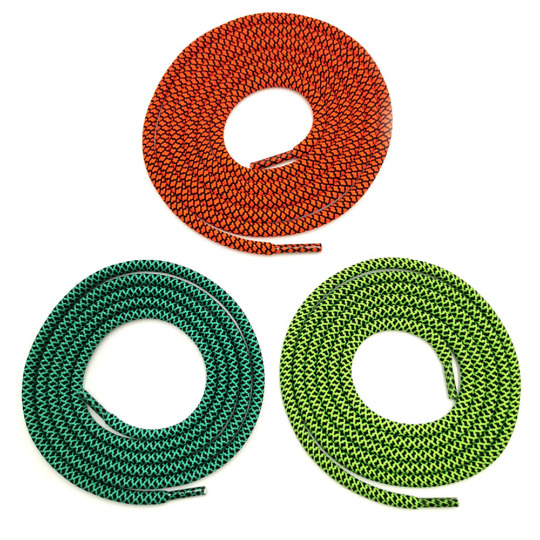
The main function of the laces is to adjust the tightness of the shoes. As teenagers grow in the foot version of the width, the thickness of the foot surface is constantly growing, to have shoes with laces, so that the foot has sufficient space to develop.
0 notes
Text
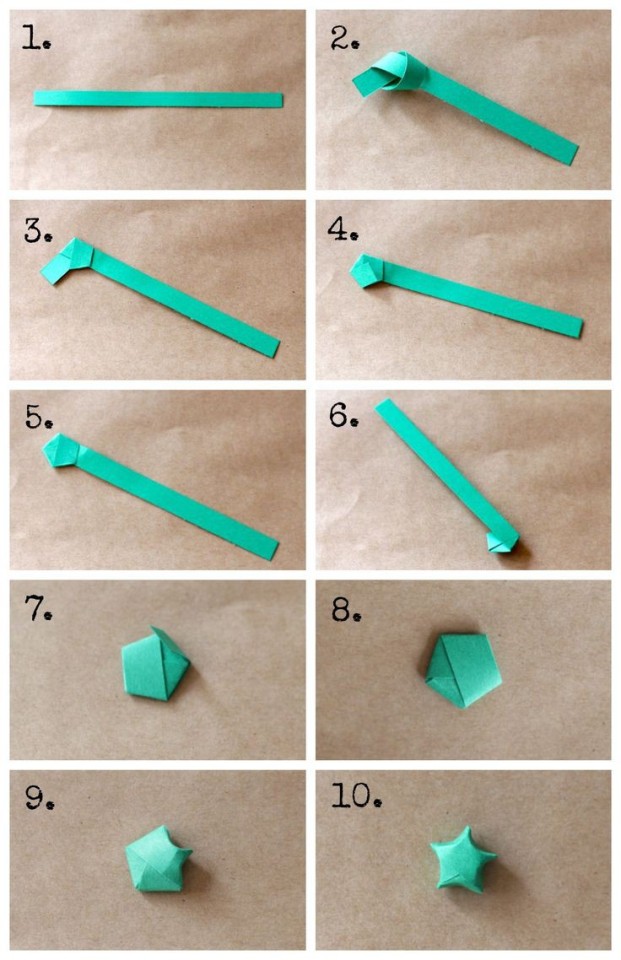
➩ Tutorial on a Paper Star 🌱
#tutorial#paper stars#paper star#star#papercraft#paper art#origami#aesthetic#greencore#green aesthetic#handmade#diy#crafts#starcore#design#art#goblincore#goblin aesthetic#green#green goblin#fairycore
1K notes
·
View notes
Text
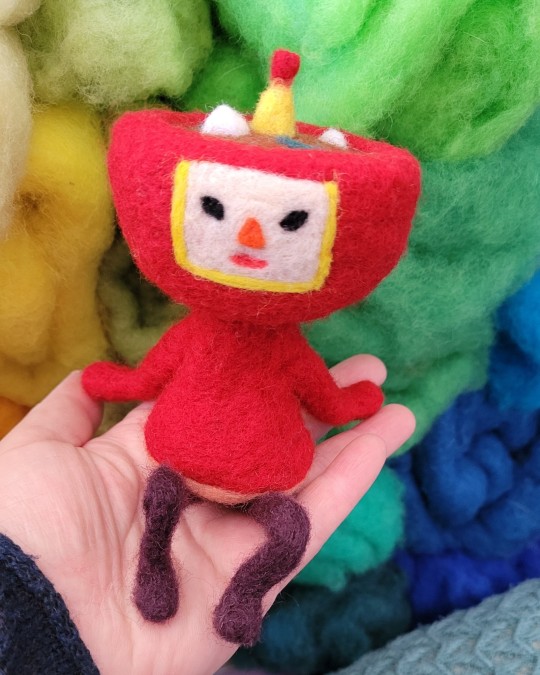
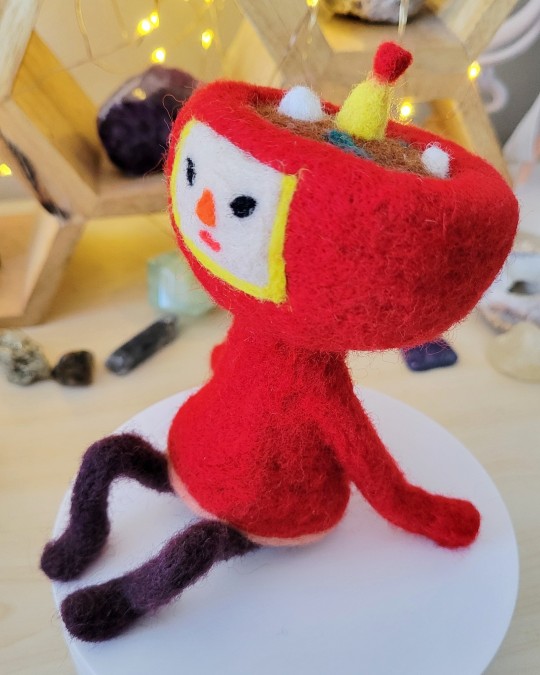

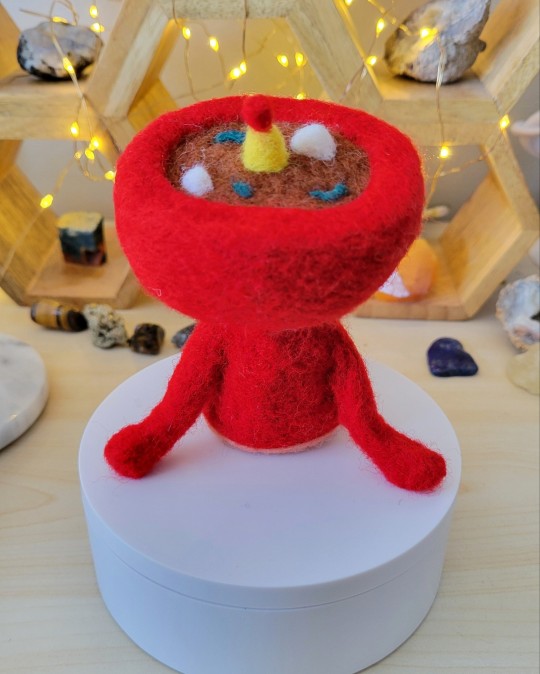
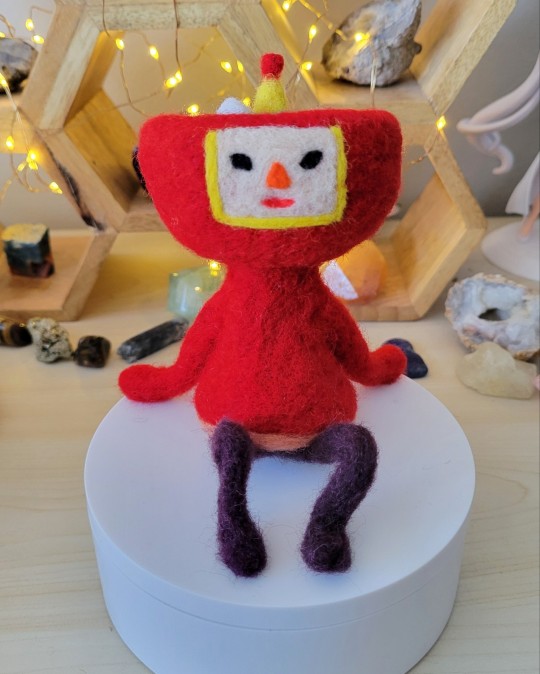
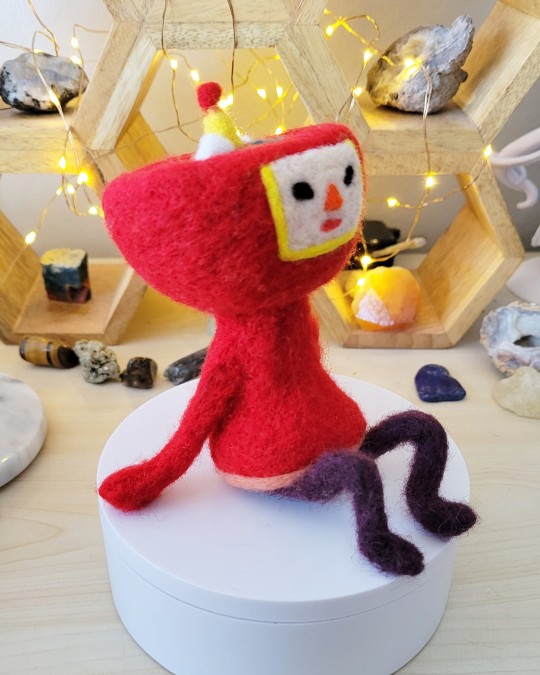
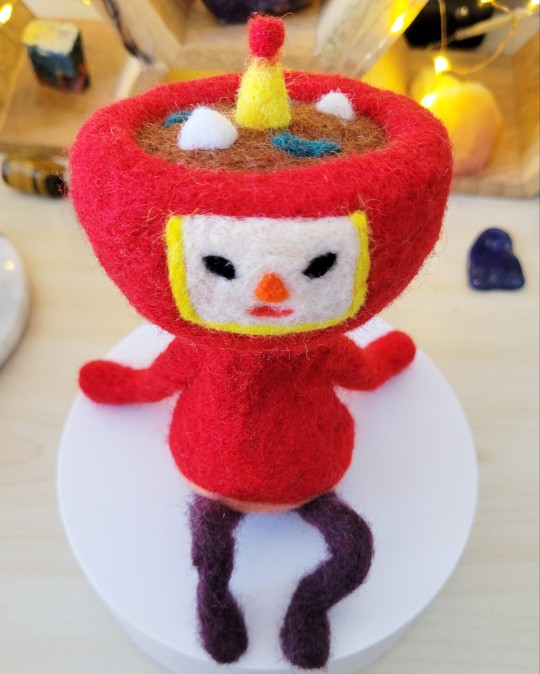
Any Katamari Damacy fans?
Needle felted cousin Miso.
#needle felt#needle felting#felting#handmade#wool felt#wool felting#diy#hand crafted#katamari#katamari damacy#we love katamari#katamari cousins#katamari reroll
656 notes
·
View notes
Text

I’ve made matching jackets for me and my brother for his birthday
465 notes
·
View notes
Text
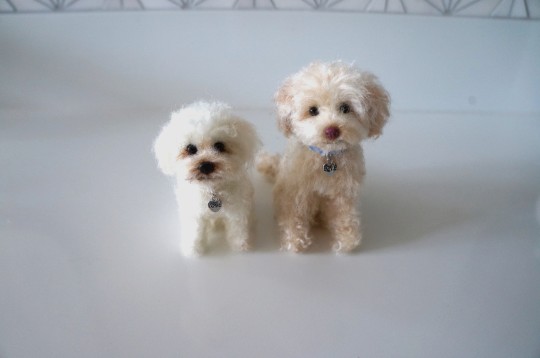

Two needle felted dogs. Hope you are having a great evening (or morning)!
#janetsneedlefelting#crafts#handmade#pet memorial#needle felting#art#dog art#petmemorial#pet portrait#pet loss#diy#diy projects#bernedoodle#maltese
592 notes
·
View notes
Text

Still a wip
Finished photo on my profile
#crochet#blanket#galaxy#galaxy art#fiber crafts#fiber art#häkeln#handmade#blanket diy#diy or die#diy#stars#sun#moon
2K notes
·
View notes
Text
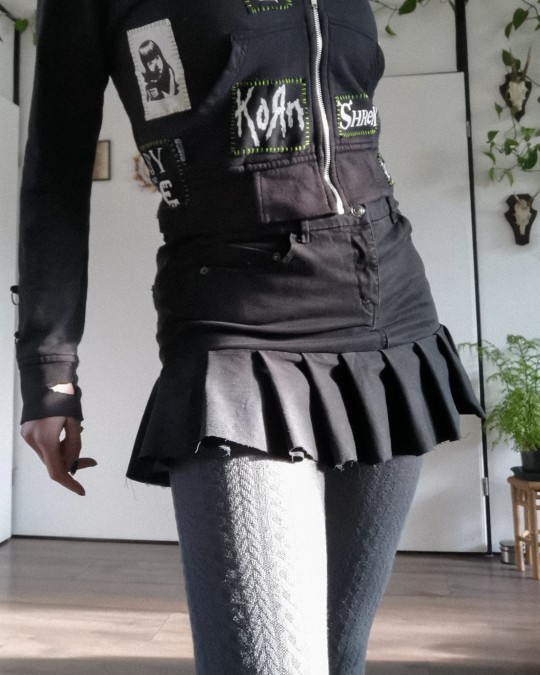
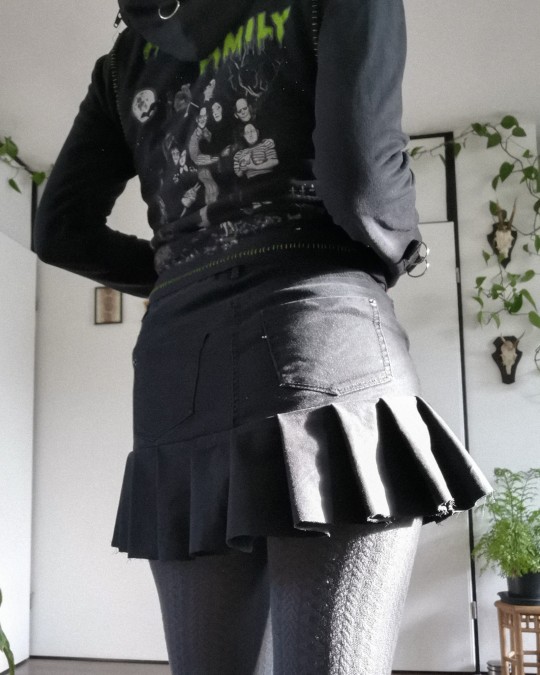
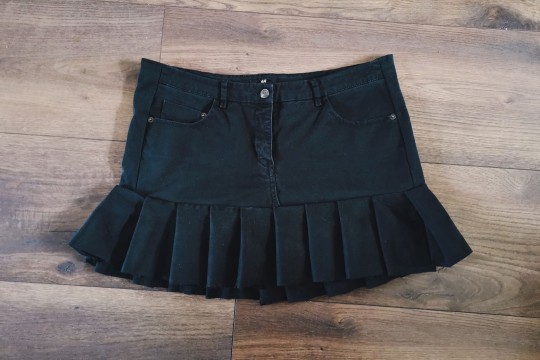
jeans to y2k/tripp inspired skirt ݁ ˖ִ ࣪✩₊ ⊹˚
I thrifted some jeans recently, not knowing if they would fit me, but buying it anyway bc 1) it was €1 and 2) if it didn't fit I could surely make something with it.
turns out it was wayyy too small 😂 so I decided it would be perfect to make one of those tripp/y2k skirts with!
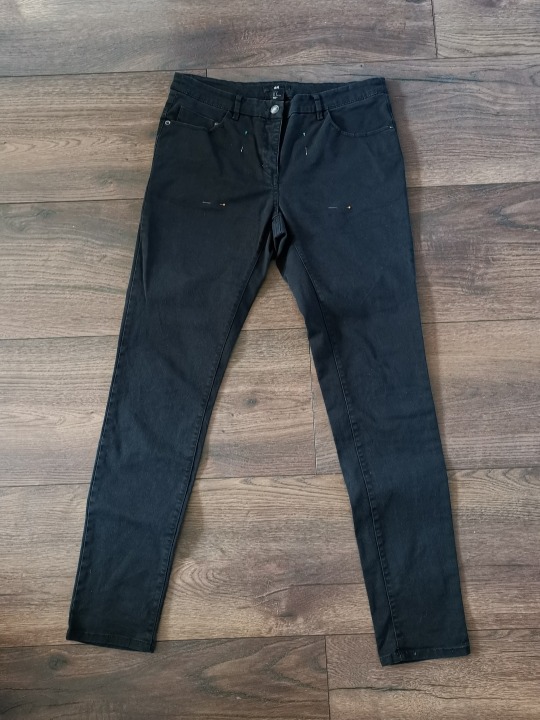

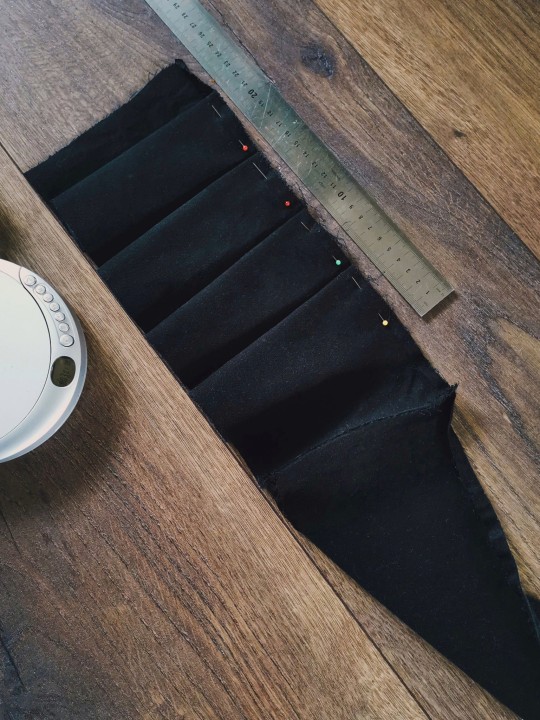
firstly I cut off the legs just above the crotch. I then tried it on, found it was too tight still, and added two strips of leftover fabric on either side. it fits perfectly now!
then I cut the remaining pant legs in even strips and connected them all to make one long strip. I folded ruffles of 5cm along the length, and sewed it in place before I sewed it onto the bottom of the skirt!
and just like that, I have a new skirt 𓆩♡𓆪 I might add some strips with d rings on it once I figure out the placement ^_^ but for now it's done
#mine#i showed it to my partner who immediately was like YOU HAVE SO MUCH TALENT#which was rly cool to hear actually#goth#alternative#diy#crafts#handmade#tripp#skirt#y2k#selfmade#tutorial? kinda???
306 notes
·
View notes
Text

Purkin! I’ve never made any kind of crocheted pumpkin before, but this was reeeaaaally fun!
Pattern by Moon Leaf Creates on Etsy!
#amigurumi#crochet#yarn#cute#diy#crafts#handmade#kawaii#craft#halloween#cat#pumpkin#pumpkin cat#fall season#autumn#halloween decorations
846 notes
·
View notes
Text
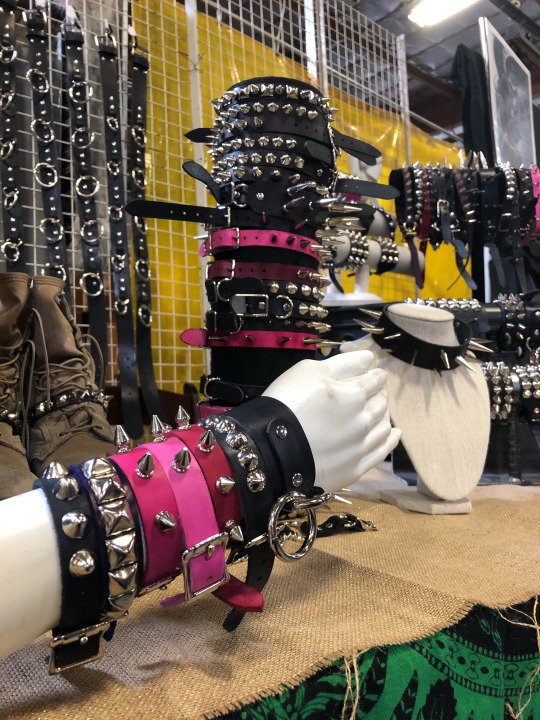
Booth stuff from 2/2020
#i made it#leatherwork#punkstyle#leathercraft#diy punk#goth fashion#i made something#handmade#gothaccessories#punk fashion#crafts#handcrafts#spike bracelets#spiked collar#spike bracelet#spikes#leather#goth#punk rock#punk#punk stuff
481 notes
·
View notes
Text
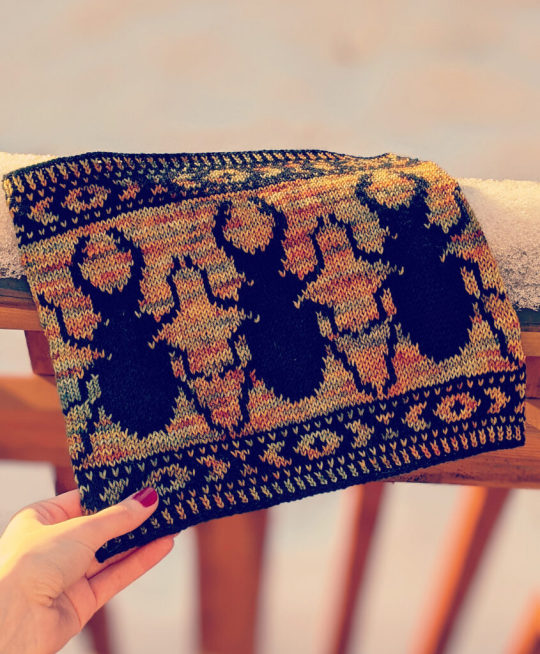

Knit a Stag Beetle Cowl, It's Unusual and Unusually Gorgeous … Great Design By Alexandria Wenninger: 👉 https://buff.ly/3oX05Uw
2K notes
·
View notes
Last Seen Blogs


ebru-gurbuz00
bir gökyüzü aşığı

ssomepersonn
:0!

ashish-prajapati
Welcome to my Arcade

dsilvadesigns
Danny Silva