#like even if a recipe here uses 250g of butter (our butter is in 250g idk what size american butter is) IT SAYS USE 250G OF BUTTER
Text
Cooking and baking
A small pet peeve of mine with cooking and baking is when recipes say the container rather than the amount
Like, instead of saying "500ml of cream" you say "a pot of cream". Or "a whole can of corn". Like okay which kind of can??? What amount???? Corn comes in more than one size you can't just tell me a can. PLEASE i am begging you tell me the WEIGHT
This is especially a problem with recipes from different countries, for example America. Because your stick of butter is different to our butter. STOP SAYING STICK OF BUTTER TELL ME THE QUANTITY IN GRAMS PLEASE I HAVE A FAMILY
that being said I feel like I see this crop up in like american recipes in particular. Idk if I've ever seen a recipe in one of our cookbooks that does this....
anyway please just tell me the gosh darn weight I am dying here I have a family I JUST NEED TO KNOW THE WEIGHT
#ramble post#randy rambles#recipes#cooking#baking#'a stick of butter' is the worst for repeat offender i see that crap everywhere in american recipes#JUST SAY THE AMOUNT#like even if a recipe here uses 250g of butter (our butter is in 250g idk what size american butter is) IT SAYS USE 250G OF BUTTER#actually tbf i think butter size is not something thats like fully conventional cuz i just googled lurpack and it says that one is 200g#fun fact our butter isnt a long weird stick like americans. why is your butter like that that looks awful to get on a knife to spread#ours is still rectangular its just like more square#ALSO LIKE IDM CUPS. I have measuring cups that have cups AND ml. I WOULD GLADLY TAKE MEASURING IN CUPS OVER 'STICK OF BUTTER' 'CAN OF CORN'#also for the record what spurred this on is i asked someone for their recipe of something and half the stuff is quantified in this way.#'1 box jiffy cornbread mix' what the frick is that please i have a family#like no hate to them lemme be clear but also WHY ARE AMERICAN RECIPES LIKE THIS IM CRYING#i could be wrong that its just american recipes but i SWEAR ive never seen this in any of our british cookbooks but everytime i try and loo#up an american recipe online or ask an american friend for a recipe they give me quantities like this and im over here quietly dying as i#try and decipher what the frick they just told me to use. what is going on why are recipes there like this#(also idk if they do it for cream i just wanted to give an example that wasnt just can of corn or can of soup)#(SOUP AND CORN COME IN MULTIPLE CAN SIZES YOURE HELPING NOBODY SAYING JUST 'A CAN')
111 notes
·
View notes
Text
Dutch Pancakes with Sausages and Sweetcorn Recipe
If you're looking for a delicious and hearty breakfast that makes your morning even more enjoyable, then try our traditional Dutch pancakes with sausages and sweetcorn. These fluffy pancakes are the perfect start to your day!
Usually made with a simple batter of flour, milk, and eggs, our Dutch pancakes are easy to make and incredibly satisfying. The secret to their light and fluffy texture lies in adding a large cube of butter to the pan as it heats up. This method ensures that the pancakes cook evenly and don't stick to the pan.
To make our Dutch pancakes even more flavorful, we recommend adding a spoonful of canola oil and a squeeze of fresh lemon juice to the batter. The canola oil adds a subtle nuttiness, while the lemon juice adds a refreshing twist.
Once the batter is ready, simply pour it into a hot, nonstick frying pan and cook until golden brown. You can then flip the pancakes over and cook them for a few more seconds until they're fully cooked. You'll be left with a stack of delicious pancakes that are slightly crispy on the outside and fluffy on the inside.
For an extra indulgence, drizzle some syrup over the pancakes or sprinkle them with granulated sugar. You can even add some cooked sausages and sweetcorn overtop for a more savory twist. The possibilities are endless!
Whether you enjoy these Dutch pancakes for breakfast or brunch, they're sure to leave you satisfied and craving for more. So don't wait any longer, try our mouthwatering recipe today and taste the magic of Dutch cuisine!
Ingredients
To make Dutch pancakes with sausages and sweetcorn, you will need the following ingredients:
- 2 cups of all-purpose flour
- 2 beaten eggs
- 2 cups of milk
- 2 tablespoons of granulated sugar
- 1 teaspoon of salt
- 1/2 cup of sweetcorn kernels
- 4 cooked sausages links, sliced
- 1 tablespoon of canola oil
- Butter for cooking
Optional toppings and sides:
- Maple syrup
- Butter
- Fresh lemon juice
These ingredients will make fluffy Dutch pancakes that are slightly crispy on the outside and tender on the inside. The addition of sausages and sweetcorn gives them a savory twist that is perfect for breakfast or brunch.
To start, mix the flour, beaten eggs, milk, sugar, and salt together in a large bowl until smooth. Then gently fold in the sweetcorn and sliced sausages.
Heat a nonstick or cast iron skillet over medium heat, adding a small cube of butter or a drizzle of canola oil. Spoon the pancake batter onto the skillet, making small rounds like traditional pancakes or crepes.
Cook the pancakes for about 2 minutes on each side, or until they are golden brown. Flip them over using a spatula and cook for another 2 minutes on the other side.
Once cooked, you can roll the pancakes up or leave them flat. Serve them with your choice of toppings, such as maple syrup, butter, or a squeeze of fresh lemon juice.
These Dutch pancakes with sausages and sweetcorn are a delicious and unique twist on a classic breakfast dish. They are easy to make and can be customized with different toppings or fillings. Enjoy!
Each serving contains
To make your Dutch pancakes with sausages and sweetcorn even more delicious, try adding a drizzle of brown syrup or a squeeze of fresh lemon juice. You can also roll the pancakes up and stick a cube of cooked sausage in between for that traditional English breakfast taste. For a sweet twist, you can top your pancakes with sweetcorn and a sprinkle of granulated sugar.
Here is a step-by-step method for making the perfect Dutch pancakes. Start by mixing together 250g of flour, 2 beaten eggs, and 500ml of water in a large bowl. Heat a nonstick frying pan or a cast iron skillet over medium heat and pour in a small ladleful of the batter. Cook the pancake for about 2 minutes on each side, or until it is slightly golden brown. Repeat this process until all the batter is used, making sure to oil the pan slightly before each pancake.
Ingredients
Makes
Preparation time
Cooking time
250g flour
8 pancakes
10 minutes
Less than 15 minutes
2 beaten eggs
500ml water
Canola oil for cooking
Sausages
Sweetcorn
Brown syrup or lemon juice
Granulated sugar
Serve your Dutch pancakes with sausages and sweetcorn for breakfast, lunch, or dinner. They are a versatile dish that can be enjoyed any time of the day. You can also serve them with a side of fresh fruit or a dollop of whipped cream. Don't forget to share your tips and links to other delicious pancake recipes!
Method
To make Dutch pancakes with sausages and sweetcorn, start by making the crepe batter. In a large bowl, whisk together the fresh eggs and some milk until well combined. Then, slowly add in the all-purpose flour, sugar, salt, and melted butter, and mix until smooth.
Next, heat a nonstick skillet over medium heat and add a small cube of butter. Once the butter has melted, pour a ladleful of the crepe batter into the skillet, tilting it to spread the batter evenly. Cook the crepe for about 1-2 minutes on each side, or until golden brown and cooked through.
While the crepes are cooking, you can start preparing the sausages and sweetcorn. Cook the sausages in a pan until they are brown and heated through. Drain any excess fat and set them aside.
In a separate pan, melt a teaspoon of butter and add the sweetcorn. Stir-fry the sweetcorn until slightly cooked and tender. Set it aside.
Once the crepes are cooked, you can start assembling the Dutch pancakes. Place a cooked crepe on a plate and spoon some sweetcorn overtop. Add a few slices of cooked sausage, and then roll up the pancake into a neat cylinder shape.
Continue making the Dutch pancakes with the remaining crepes until all the ingredients have been used. You can serve the pancakes as is, or you can add a drizzle of maple syrup or lemon juice for extra flavor.
For a traditional Dutch breakfast, Dutch pancakes are usually served with a side of bacon or links, and some butter or syrup. You can also add some fresh fruit, such as berries or sliced banana, for a fruity twist.
Here are some tips to ensure your Dutch pancakes turn out perfect:
1.
Use a nonstick skillet or a well-seasoned cast iron pan to prevent the crepes from sticking.
2.
Make sure the batter is thin enough to spread easily. If it's too thick, you can add a bit of water or milk to thin it out.
3.
Cook the crepes on medium-low heat to ensure they cook evenly and don't burn.
4.
Don't overcrowd the skillet - cook the crepes in batches to ensure they cook properly.
5.
If you're making a large batch of crepes, you can keep them warm by stacking them between sheets of wax paper and gently reheating them in a low oven before serving.
Enjoy your delicious Dutch pancakes with sausages and sweetcorn!
You may also like
Looking for more delicious breakfast recipes? Here are some options that you might enjoy:
- English Yorkshire Pudding: Made with the same method as Dutch pancakes, Yorkshire pudding is a traditional English dish that is often served with roast beef. It is usually made with a mixture of flour, eggs, and milk, and then baked until it puffs up and turns golden brown. It can be served as a side dish or filled with gravy for a hearty meal.
- Traditional French Crepes: Similar to Dutch pancakes, traditional French crepes are thin, delicate pancakes that can be rolled or folded and filled with various sweet or savory ingredients. They are made using a simple batter of flour, eggs, milk, and a touch of sugar and salt. Serve them with fresh lemon juice and granulated sugar or with Nutella and fresh berries for a decadent breakfast treat.
- American Pancakes: These fluffy and slightly sweet pancakes are a staple in American breakfasts. They are made with a batter that usually includes flour, eggs, milk, and a leavening agent like baking powder. Cook them on a nonstick pan or griddle until golden brown, and serve them with butter and maple syrup for a classic American breakfast.
- Belgian Waffles: Similar to pancakes, Belgian waffles are a popular breakfast dish that are known for their light and crispy texture. The batter is made with a combination of flour, eggs, milk, and yeast, which gives the waffles a slightly sweet and yeasty flavor. Cooked in a waffle iron, these waffles are best served with fresh fruit, whipped cream, and a drizzle of maple syrup.
These are just a few delicious breakfast options to try. Whether you're a fan of pancakes, crepes, or waffles, there's a breakfast dish out there for everyone. So why not leave the usual breakfast routine behind and start your day with something new and tasty?
Be the first to comment
If you love traditional Dutch pancakes, this recipe is for you. These delicious pancakes are made with sausages and sweetcorn, giving them a savory and sweet twist. They are perfect for a hearty breakfast or brunch.
To make these tasty pancakes, start by adding canola oil to a nonstick pan and heating it over medium heat. In a large mixing bowl, combine flour, salt, and baking powder. In a separate bowl, whisk together milk and beaten eggs. Slowly add the wet ingredients to the dry ingredients and mix until well combined.
Next, heat a nonstick pan over medium-high heat. Pour a ladle full of batter into the pan, making sure it spreads into a thin, even layer. Cook the pancake for about 2-3 minutes or until the edges start to slightly brown. Flip the pancake and cook for another 1-2 minutes. Repeat this process for the remaining batter.
While the pancakes are cooking, you can start preparing the sausages and sweetcorn. Cook the sausages according to package instructions until they are browned and cooked through. Cut the sausages into small cubes and set them aside. In a separate pan, melt butter and add sweetcorn. Cook the corn for a few minutes until it becomes tender and slightly caramelized.
Once the pancakes are cooked, you can start assembling the dish. Take a pancake and place a few cubes of sausage and a spoonful of sweetcorn in the center. Roll the pancake into a cylinder and place it on a serving plate. Repeat this process for the remaining pancakes.
To finish the dish, drizzle some maple syrup or brown sugar syrup over the pancakes. You can also sprinkle some granulated sugar or squeeze some fresh lemon juice overtop for added flavor. Serve the pancakes warm and enjoy!
Here are some tips for making the perfect Dutch pancakes with sausages and sweetcorn:
- Make sure to use a nonstick pan to prevent the pancakes from sticking.
- For thinner pancakes, use less batter and spread it out thinly in the pan.
- If you prefer a sweeter taste, you can add some brown sugar or cinnamon to the batter.
- Feel free to experiment with different fillings, such as cooked bacon or sliced fruits.
- These pancakes can also be served as crepes, which are usually rolled up and served with a dusting of powdered sugar.
With its savory and sweet combination, Dutch pancakes with sausages and sweetcorn are sure to be a hit with people of all ages. Try this delicious breakfast dish today and start your day off right!
Sausage Pancakes-on-Sticks
If you're looking for a fun and delicious twist on traditional pancakes, these Sausage Pancakes-on-Sticks are the perfect breakfast treat for you! Made with your choice of fresh sausages, these pancake sticks are a portable and easy-to-eat version of the classic breakfast dish.
To start, you'll need the following ingredients:
- 1 cup all-purpose flour
- 2 tablespoons granulated sugar
- 1 teaspoon baking powder
- 1/2 teaspoon salt
- 1 cup milk
- 1 large egg, beaten
- 2 tablespoons canola oil
- 4 cooked sausage links
- Maple syrup for serving
Here's the method:
- In a large bowl, whisk together the flour, sugar, baking powder, and salt.
- In a separate bowl, mix together the milk, beaten egg, and canola oil.
- Pour the wet ingredients into the dry ingredients and stir until just combined.
- Heat a nonstick or crepe pan over medium heat.
- Using a small ladle or spoon, pour about 1/4 cup of the pancake batter onto the hot pan.
- Quickly place a cooked sausage link onto the middle of the pancake batter and gently roll the pancake around the sausage, slightly overlapping the edges with the batter.
- Cook for about 2-3 minutes on each side, or until the pancakes are golden brown and cooked through.
- Repeat with the remaining batter and sausages.
- Once the pancake sticks are cooked, serve them warm with maple syrup for dipping.
These Sausage Pancakes-on-Sticks can be enjoyed by both kids and adults alike. They make a great on-the-go breakfast option or a fun addition to a brunch spread. The combination of the fluffy pancakes and savory sausages is sure to satisfy even the pickiest of eaters.
For a twist, you can even try adding a sprinkle of lemon zest or a cube of cooked sweetcorn to the pancake batter before cooking. The possibilities are endless with this versatile recipe.
So next time you're craving pancakes, why not give these Sausage Pancakes-on-Sticks a try? They're quick, easy, and guaranteed to be a hit with your family and friends!
Directions
To start making your Dutch pancakes with sausages and sweetcorn, follow these easy steps:
- In a large bowl, whisk together the flour, baking powder, salt, and sugar.
- Add the beaten eggs and slowly pour in the milk while whisking continuously until the batter is smooth.
- Heat a nonstick pan or cast iron skillet over medium heat and add a cube of butter or a small amount of canola oil.
- Spoon the pancake batter onto the pan, making one large or several smaller pancakes, depending on your preference.
- Cook the pancake until small bubbles start to appear on the surface, then flip it over and cook for a few seconds more until lightly browned.
- Repeat this process with the remaining batter, adding more butter or oil as needed.
- While the pancakes are cooking, prepare the sausages according to the instructions on the package, which usually involves pan-frying or grilling.
- Once the pancakes and sausages are both cooked, you can start assembling the dish. Place one pancake on a plate, followed by a few sausages and a spoonful of sweetcorn.
- Continue layering the pancakes, sausages, and sweetcorn until you have used up all the ingredients.
- If desired, you can squeeze fresh lemon juice overtop and drizzle some maple syrup or brown syrup for added flavor.
- Serve the Dutch pancakes with sausages and sweetcorn hot and enjoy!
These pancakes are a traditional Dutch dish that is loved by both Dutch and non-Dutch people alike. The thin crepes are slightly thicker than the English pancake and can be enjoyed at any meal of the day, not just breakfast. You're only limited by your imagination when it comes to toppings and fillings for these delicious pancakes. So go ahead and experiment with different ingredients and flavors to create your own unique Dutch pancake dishes!
Here are a few tips to ensure your Dutch pancakes turn out perfect:
- Make sure to use a nonstick pan or a well-seasoned cast iron skillet to avoid the pancakes sticking.
- When cooking the pancakes, use less batter than you might think. A thin layer is all you need to create those perfectly round and even pancakes.
- For a lighter texture, you can substitute some of the water with club soda or sparkling water.
- If you prefer a savory pancake, try adding some savory fillings like cooked bacon, cheese, or diced vegetables between the layers.
- Feel free to get creative with your toppings. Aside from sausages and sweetcorn, you can also try adding sliced fruit, whipped cream, or even ice cream if you want to turn these pancakes into a decadent dessert!
English Pancakes
If you're a fan of thin, delicate pancakes that are quick and easy to make, then English pancakes are the perfect breakfast dish for you. These pancakes, also known as crepes, are cooked using a nonstick pan or crepe pan and require only a few simple ingredients.
To make English pancakes, start by whisking together a cup of flour, two large beaten eggs, a tablespoon of granulated sugar, and a pinch of salt. Slowly add in a cup of milk, whisking continuously to avoid any lumps. You can also add a tablespoon of melted butter for extra flavor.
Heat a nonstick or crepe pan over medium heat and lightly grease it with some canola oil or cooking spray. Pour a small ladleful of the batter into the hot pan, swirling it around to create a thin, even layer. Cook the pancake for about 1-2 minutes, until the edges start to brown slightly and the pancake easily lifts from the pan. Flip the pancake with a spatula and cook for an additional 30 seconds to 1 minute on the other side.
Once cooked, remove the pancake from the pan and repeat the process with the remaining batter. You can stack the pancakes on a plate as you go, placing a piece of parchment paper between each pancake to prevent them from sticking together.
English pancakes can be served in a variety of ways. Traditionally, they are rolled up and drizzled with fresh lemon juice and sprinkled with granulated sugar. You can also add a spoonful of your favorite syrup or even spread some Nutella or jam over the pancake before rolling it up. If you prefer a savory option, you can fill the pancake with cooked bacon, scrambled eggs, or sautéed mushrooms.
English pancakes are incredibly versatile and can be enjoyed for breakfast, brunch, or even as a dessert. They are quick to make, easy to customize, and can be stacked high for a delicious and impressive presentation. Whether you prefer sweet or savory, English pancakes are sure to satisfy your cravings.
So why wait? Get your frying pan, whisk, and spatula ready and start making some delicious English pancakes today!
Why This Recipe Works
- The combination of Dutch pancakes, sausages, and sweetcorn creates a delicious and savory flavor that is perfect for breakfast.
- Using a canola oil spray instead of butter or oil to cook the pancakes ensures they are light and crispy, without adding extra calories.
- Rolling the pancakes with the sausages and sweetcorn inside makes them easy to eat on the go, perfect for busy mornings.
- The use of a cast iron skillet provides even heat distribution, resulting in perfectly cooked pancakes that are golden brown on the outside and fluffy on the inside.
- Serving the pancakes with maple syrup and a sprinkle of powdered sugar adds a touch of sweetness to balance out the savory flavors of the sausages and sweetcorn.
Read the full article
0 notes
Note
Dear CB,
I am happy to hear you appreciated my last letter.
Your words are always kind and warm my soul in these dreadful days of deadlines and indecisive weather still not sure if the first blossom of summer is here or if the ice will return in our homes. It also made me rest easier in my bed to learn you are now better, after the sickly days subsequent to the medicine administration.
You are now free of the burden of the heavy cloud of sickness still cover our cities, and it make me happy.
You told me you would have liked to receive the recipe of the pie i told you about last time, so i will write it down in a paper to put in the same envelope of this one. I already excuse my persona for the verbosity i will submit you, but the power of synthesis is not something the sky gifted me.
Hope my letter will find you in good health and sweet mood,
With love,
Soupy.
Dear Soup, I'm writing this with the greatest of joys after receiving your recipe. It sounds heavenly, and am quite excited to enjoy it to the fullest.
Just as you say my words warmed you, so did your words keep me through those pale and cool spring days. I reread your most kind letter while in my illness, it helped greatly with recovery, I assure you.
If it's alright with you, I shall attach the recipe underneath my goodbyes, as I tend to lose things with great ease and it would pain me to lose such a gem as this. And never worry that chatter while baking would ever bother me, I find it quite lovely.
I hope this letter will find you far across the waters between us, and that it will bring a smile to your face and joy to your heart.
All love,
CB
Lemon pie recipe.
This doses are for a 22 cm diameter mold.
It is but a simple recipe, not so different from every other lemon pie you can probably find everywhere, but is the pie we always eat in my family, since sour lemons is something everyone of my affections love the taste. You can picture how much it make me silly laugh when i think about how my taste for the citrus extend also to my leisure reading times, but there are things we cannot tell properly in public, and i confide in the secrecy of our reading club.
The structure is the classic one, composed by a crust, a lemon cream and a sweet meringue.
For the base i am biased in using shortcrust, that better adapt to the type of cream and is quite easy to prepare, surely more than complex french pastry. Is of course understandable is a lack of time and desire to cook made you go instead for a modern storebought puff pastry.
For the crust you will need:
250g of all purpose flour
125 g of butter
1 egg
100 g of powdered sugar (also normal crystal sugar is good, it you prefer a more rough feeling)
A bit of lemon zest for taste.
Cut the butter and mix it with the flour, crumbling it till it reach a sable consistency. Add then the sugar, the egg and the lemon zest, and work with your hands till is smooth and workable. Is better to not strain it too much, or the gluten would form and instead of a crispy crust we would find ourself with an hard chewy bread. Let it rest in the fridge for at least an half hour. When rested, and remember to rest also yourself, work it in a flat disc or your preferred thickness and put it in an already buttered and floured mold. Cover with cooking paper and chickpeas to not let it rise in the oven.
The recipe would ask to cook it at a static 170 C° for 15 minutes, but experience always teach ovens are what of most similar exist in this world of hell work, so judge your oven history and control every couple of minutes so not to burn it to a crisp.
For the cream you will need:
5 to 8 lemons (and if your taste require it more)
3 eggs
150 g of flour and potato starch (usually i make half and half, but it can function even with all flour or all starch. All starch is advised if you will want to put the pie in the oven later to roast the meringue, since all flour will liquify the cream at strong temperature)
Sugar to taste
Separate the whites from the yolks. The yolks can be put in a pot, while the whites are to be put in another bowl to use for the meringue later.
Add the zest of all your lemons to the yolks (if you can find not treated lemon, if not this passage will be sadly skipped). Juice your lemons and add water till you reach 1 liter of liquid. Mix your lemon zested yolks, flour and starch and liquid, bit by bit, to have a smooth cream. Add sugar to taste, i personally add only two spoon, but i know the sour taste is not to everyone taste. Put the pot on low fire and mix till the cream become heavy and smooth and dense. Put it in the pastry shell. You can wait for the cream to cool a little, but be attentive at not waiting too much or it will solidify.
For the meringue you will need:
The whites of the cream eggs
200 g of sugar
I strongly prefer Italian meringue, being it faster to make and being myself in a strong enmity with the frenchs. Also, for a real french meringue it would be needed to whisk the whites with sugar and cook them for 12 hours at low temperatures. I know the latest kitchen programs make it seem like something faisable in a short time, and i will always resent them for this, but what they are serving in real is just raw meringue made with raw eggs, and for how much the raw eggs part can be solved with pasteurized whites, it would make for a more expensive ingredient.
For an Italian meringue, you have to put in a small pot 200g of sugar and a bit of water, just enough to wet it. It then have to be cooked till it make a boiling syrup. Be attentive at not making caramel instead, that would risk ruining the eggs. While the syrup simmer, start whisking the whites. When they start to be whipped add, while still whisking, the hot syrup. The boiling syrup will cook the eggs and give a nice shiny finish at the meringue, while the whisking will assure the sugar is distributed heavenly and the whites continue to whip.
When they are whipped enough to not fall out of the bowl if turned, distribuite the meringue over the pie.
If you like a golden finish it is possible to put in in the oven for some minutes, to toast the meringue, or pass it with a blowtorch.
My verbosity could make seem the recipe long and complex, but i can assure is quite easy to make, even in absence of big space. I do not live in a big estate like the ones of the nobles we are sometimes invited for a ball, as my preparing myself the sweet cakes instead of giving the order to a cook probably already made clear, and last time i prepared it i did it in a chopping board above my sink, and it come out quite good.
Hope you will find it as delicious as i find It myself.
With love,
Soupy
#asks#personal asks#soups letter#I’m so fhcking excited to make this pie#never made one of these#lil scary#but it sounds soooooo good#dhsjskskakaka I forgot that ur from like#the uk???#somewhere around there I think u said#my brain didn’t read ur voice w an accent until I saw grams#then I was like ohhhh yeahhhhhhh#I do love a good lemon dessert
16 notes
·
View notes
Text
A Bit Like Julie Andrews

A loathsome guest at a dinner party I once attended announced you can make anything taste good with fat. She said this as I was serving up a chocolate pecan tart promised to the host, and my first instinct was to divert it into her face. I didn’t of course, because violence and whip-smart retorts only ever live in my head. Later on, she invited me into the bathroom to see her new labia piercing. So, mixed messages.
That said, she had a point about fat. I’ve been writing this blog for eight years now and the most shared and liked recipes have lashings of fat and/or sugar in common. No surprises here - as we all aspire to cleaner, increasingly plant based virtue-signalling, how many of us are squirrelling away six pineapple Jaffa Cakes when we think no-one’s looking? Right this minute I am staring longingly across the coffee table at a box of Divine Mint Thins while a sweet potato bakes in the oven. And the rate at which we get through sea salt butter in our house (yep, the one with the extra crunchy salt crystals) is not something I am ever going to admit to my GP.
But if you all want fat and sugar, then I am here to please. Not necessarily with animal fat, and not always with proper sugar. One of the most versatile oils in my kitchen is coconut, sunflower oil always produces moist and springy sponge cakes and I could almost drink extra virgin olive. And I sometimes supplement no-carb Splenda for sugar in some recipes with zero difference noticed. None of this interferes with the popularity of the finished dish, sometimes it even enhances it - and I am often asked for recipes for dishes I photograph with abandon but haven’t got around to writing up.
So what follows then is only a bit like Julie Andrews: rather than a selection of my favourite things, it’s a revisiting of some of yours - a Top 4 of those recipes most often requested or dishes shared, fats or sugar included, with a couple of twists thrown in.
Perfect Roast Pork Belly

For my money the supreme leader of pork joints is belly - roasted long and slow until those layers of fat melt and the hide turns to the guiltiest pleasure of all: cracking. I used to subscribe to the belief that anything this good was proportionately difficult to achieve - but after many years and attempts, I have found a way as fool-proof and leave-it-alone succulent as you can get.
My advice is to serve this with creamed corn - fresh corn shucked and simmered in a little butter and cream. Pork and corn are a less-travelled match made in heaven. Cowboys kind of got the hang of it but were seduced into flatulence by the baked bean before the corn craze could really take off. But what the wild west discarded, the barbecue warriors picked up. OK I’m taking The Crown approach to history but you get the picture. Serves 4-6.
Ingredients
One 2 kg pork belly joint, bone in ideally but not necessary( get your butcher to score the rind)
1 tbsp. each fennel seeds and cumin seeds
1 tbsp, chilli flakes
2 tbsp. Kosher salt
2 onions, cut into wedges
2 carrots cut into chunks
1 leek cut into chunks
200ml sherry or white wine
100ml water
For the creamed corn:
3 fresh ears of corn
50g butter
150ml double cream
Kosher Salt and freshly ground black pepper
How to make.
The night before you aim to roast the pork, get rid of any covering, pat the skin dry, pop it onto a dish and put in the fridge. This will dry out the skin and ultimately product better crackling.
Heat the oven to 220C (or 210C Fan) and take your belly out of the fridge at least 30 mins before roasting. Pulverise the fennel seeds, cumin seeds, salt and a and chilli flakes in a pestle and mortar. Rub the mix into the scores in the pork rind, then pop into the oven for 25 mins to get the crackling going.
After 25 mins,remove from the oven and transfer the pork onto a board and reduce the oven to 180C or 175C fan. Working quickly, toss the onions, carrots and leek into the roasting pan and then put the belly joint on top. Pour the sherry or white wine into the roasting pan around, not on, the pork. Return the pork to the oven and roast for two and a half - 3 hours.
Check the pork at 2 and a half hours - if you can wiggle the rib bone easily, great, if not, return to the oven for another 30 mins. Remove from the oven again and transfer the roast veg to a bowl and keep warm. Crank the oven back up to 220C and return the joint one last time to crisp up the crackling.

Remove from the oven and leave to rest for 20 mins before carving
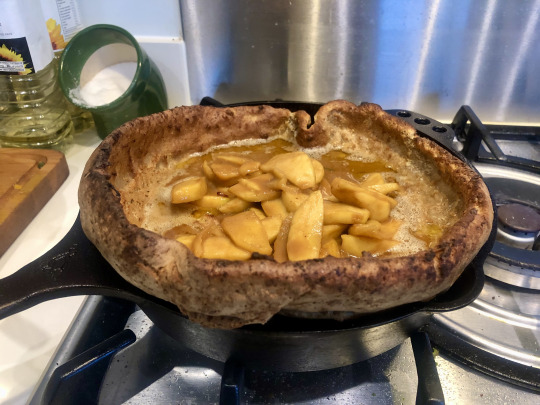
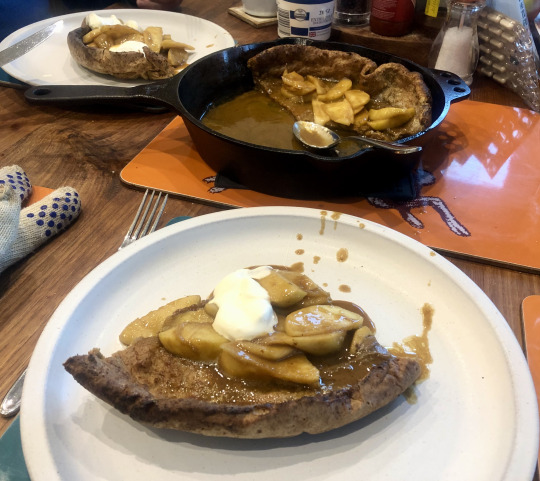
Dutch pancake with caramel apples
Leave It Alone is the best mantra for an easy life in the kitchen. Some dishes were made to be fussed over - risotto, caramel and of course pancakes. But a dutch pancake gives you both time to yourself and a whomping great wow factor when you bring it out of the oven. Thanks to Erin Jeanne McDowell at the New York Times for this little number. (Serves 3-4)
Ingredients
(100 g) plain flour
3 Tbsp. dark muscovado sugar
½ tsp salt
½ tsp cinnamon
½ tsp kosher salt
Pinch ground nutmeg
50g unsalted butter
3 eggs
100ml cashew nut milk (or milk of your choice)
1 tsp vanilla extract
For the caramel apples:
40g butter
75 ml double cream
110g dark muscovado sugar
3-4 apples (granny smiths are good)
Juice of 1 lemon
1 tsp vanilla essence
Pinch of ground cinnamon
How to make
Heat the oven to 200C fan (210C). Put the butter in a frying pan or skillet that you can use on the hob and in the oven. When the oven is hot, pop the skillet in to melt the butter.
Mix all the dry ingredients together. Break up the eggs with the milk and vanilla essence then add to the dry ingredients and mix until smooth.
Peel and core the apples then cut into thin slices and toss in the lemon juice.
Take the skillet out of the oven (the butter should have melte by now) and pour in the pancake batter. Put back in the oven and set your timer for 20 minutes.
While the pancake is doing its thing, make the caramel apples. Melt the butter in a saucepan then add the sugar and cream and mix again. Add the apples, stir to coat the apples in the caramel mix, then simmer gently for 5 minutes until the apples soften. Take the pan off the heat and stir in the vanilla essence and cinnamon.
After 20 minutes, and using protective gloves or oven mitts, remove the skillet from the oven. The pancakes should be all puffed around the edges like a dramatic Yorkshire pudding.

Pour the caramel apples into the centre, bring to the table and drizzle with double cream while everyone round the table gasps. DO NOT FORGET that the handle is hot so use your oven mitts while handling at the table.
Stuffed Courgette flowers
This is a romantic dish for me as it reminds me of my first trip to Rome. At the same time it’s tempura on steroids. Cook the whole (usually tiny) courgette with the flowers attached - it may not look as pretty but there is more flavour and nutrition (always handy when you are taking a bath in carbs). Like the Dutch pancake, this dish gives good gasp when it arrives on the table. (Serves 4).
Ingredients
8 courgettes with flowers attached
250g ricotta cheese, soft goat’s cheese or goat’s curd
6 anchovies, finely chopped
1 tbsp each finely chopped mint and parsley
Salt and freshly ground black pepper
For the batter:
70g cornflour
30g plain flour
80ml ice-cold sparkling water or lager
400ml sunflower oil for frying
How to make:
Mix the cheese, anchovies, herbs and seasoning in a bowl.
Taking each courgette, gently splay the petals of the flower and remove the stamens with a small knife. Using a teaspoon, stuff each flower with the filling then twist the tips of the petals to seal.

In another bowl mix the batter ingredients and leave to stand for 5 minutes.
Heat the oil in a deep pan or flat-bottomed wok. Line a serving dish with kitchen paper. Once the oil is hot, take each courgette in turn, dip it in the batter (courgette and flower) and then carefully lay it in the oil and deep fry for a couple of minutes, until the batter turns golden and crisp. Try not to crowd the pan, you can probably fry three at a time. Remove each courgette and flower from the oil and onto the paper lined dish. When all the courgettes have been cooked, remove the kitchen paper and serve while hot, with some quick pickled red onion slices on the side.

Sweet potato Gnocchi with pesto
Anything a potato can do, a sweet potato can do as well if not better. Plus it’s packed with antioxidants (not red for nothing) and lower in the demon carbs. When in Buenos Aires, gnocchi is traditionally eaten on a Thursday (a ritual they share with Rome) and it’s my niece Luli’s favourite dish. Wonder what she will think of this version? The gnocchi is based on a recipe by Jonny Rhodes (Serves 4)

Ingredients
1 large sweet potato
1 cup plain flour
½ cup wholemeal flour
1 tsp. Ground cumin
½ tsp cinnamon
¼ tsp allspice
½ tsp kosher salt
1 egg
50g butter
2 tsp apple cider vinegar
For the pesto:
1 large bunch basil
1 tbsp, pinenuts
2 fat cloves garlic
25g grated parmesan
½ cup - ¾ cup extra virgin olive oil
How to make.
Heat the oven to 190C fan and roast the sweet potato for 1-11/4 hours (the potato should be soft inside and give when you insert a knife). Cool, skin and mash.
In a bowl, mix the flours, potato mash, spices, salt and egg. Roll into a ball then cover with cling film and pop into the fridge for an hour to firm up.
After an hour, remove from the fridge and cut into six portions. Dust your work surface with flour then taking each portion in turn, roll into a long sausage and cut 18-20 portions. You can either leave the portions like this or roll each portion over a gnocchi paddle to give it ridges, then place on an floured baking sheet. Repeat with each portion, then cover all the gnocchi and refrigerate until ready to cook.

Bring a pan of salted water to the boil, working in small batches, add the gnocchi to the pan and continue to boil. As the gnocchi float to the surface, remove with a slotted spoon and transfer to a greased baking sheet.
Make your pesto, put all ingredients except the olive oil into the food processor and pulse until chopped small. Keep the motor running and gradually add the olive oil until the mixture thickens. Turn off the motor and leave to one side while you saute the gnocchi.
Heat a large frying pan and add the butter. when melted and sizzling add the gnocchi in a single layer and cook undisturbed for 2 or 3 minutes, until the bottoms are light brown (you may need to do this in batches). Then add 2 tbsp butter, 3 tbsp water and the apple cider vinegar and swirl around the gnocchi.
Serve immediately in pasta bowls and drizzle the pesto over the top. Grate over some parmesan.

1 note
·
View note
Text
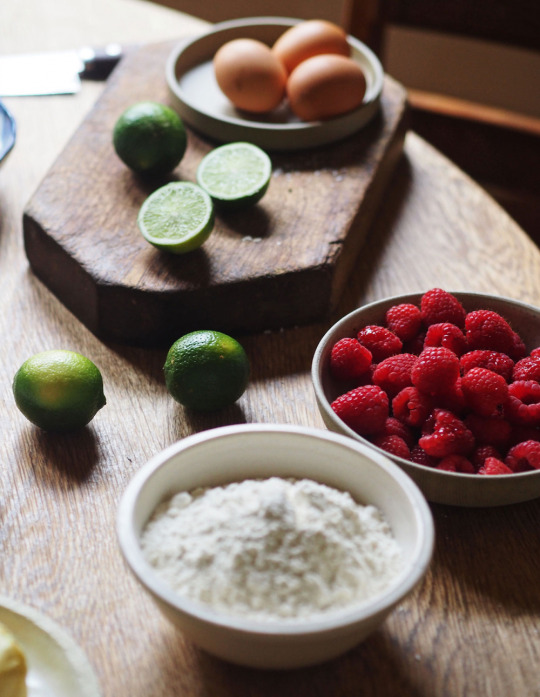
Julia’s Raspberry, Coconut And Lime Cake
Julia’s Raspberry, Coconut And Lime Cake
Food
Julia Busuttil Nishimura
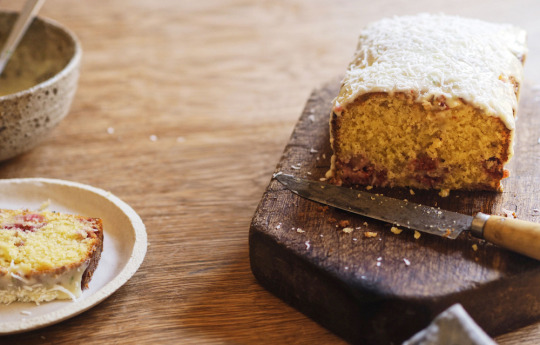
The perfect cake for sharing with friends. Photo – Julia Busuttil Nishimura.
Lime, coconut and raspberries are a tropical triple-threat, and we are here for it! Photo – Julia Busuttil Nishimura.
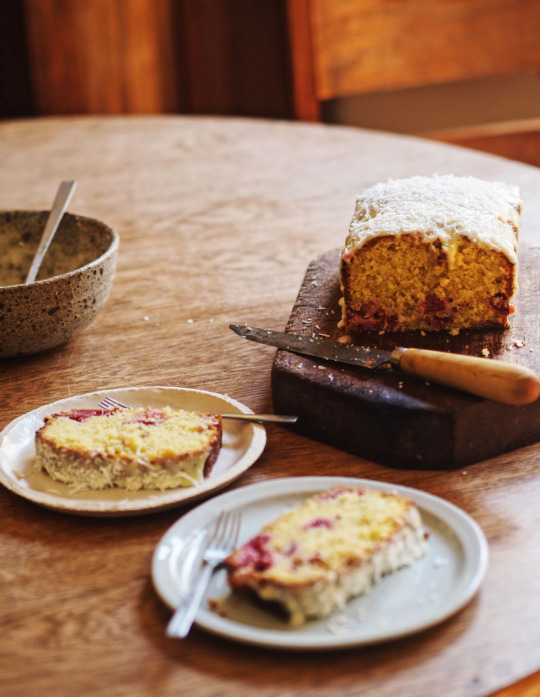
The lime glaze is inspired by the towering chiffon cakes at Beatrix Bakes. Photo – Julia Busuttil Nishimura.
Julia’s Raspberry, Coconut and Lime Cake
Coming into high spring, berries are noticeably more affordable and tasting as they should. Every time I go grocery shopping, I can’t help but pack punnets and punnets into my basket. They’re often eaten even before we make it home (anyone with a small child knows their love for berries knows no bounds). But sometimes they last long enough to make it into a cake. Here bright raspberries are folded through a coconut and lime cake batter and baked into a loaf cake. It’s perfect for afternoon tea or to pack for a picnic, now that we can!
The glaze is inspired by the sour cream glaze which graces the tall chiffon cakes at Beatrix Bakes. It just sets and isn’t too sweet. I’ve mixed in some lime zest to bring out even more lime flavour from the cake, and topped it with some shredded coconut. While a dusting of icing sugar would do, the glaze turns it into a rather special loaf. While I used fresh, frozen raspberries are also perfectly fine to use, which makes this cake a great all year-rounder. Other berries like blueberries and blackberries would work in this cake wonderfully too.
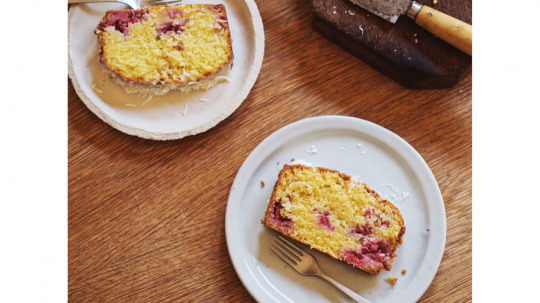
Soft, sweet and buttery, this pillowy delight is a cloud of cake! Photo – Julia Busuttil Nishimura.
Ingredients
(Serves 8)
200g unsalted butter, softened
200g caster sugar
3 eggs
Juice and zest of two limes
150g sour cream or crème fraîche
100g desiccated coconut
250g self raising flour
125g raspberries, plus extra to serve
Lime sour cream glaze
70g sour cream or crème fraîche
150g Icing sugar, sifted
Zest of a lime and juice, if needed
Shredded coconut, to serve
Method
Preheat oven to 180C. Grease and line a 23 x 13x 8cm loaf pan.
Cream the butter and sugar with a wooden spoon or in a stand mixer fitted with a paddle attachment until light and fluffy (around 3 minutes). Beat in the eggs, one at a time, followed by the zest and juice of the limes. Mix in the sour cream then the coconut. Finally sift in the flour and stir until just combined. Gently fold in the raspberries and spoon the batter into the prepared cake tin and bake for 50-60 minutes until a skewer is clean when inserted or the top of the cake bounces back when pressed. Allow to cool in the tin briefly then complete cooling on a wire rack.
Make the glaze by combining the sour cream in a medium bowl with the icing sugar and lime zest. The glaze should be pouring consistency, but not too thick. Add in a little lime juice if needed. If it is too thin, add some more icing sugar. Pour the glaze over the cake and allow it to drip down the sides. Scatter with some shredded coconut and serve with extra raspberries, if desired.
What else I’m cooking with…
Asparagus, broad beans and peas! It’s all about new spring greens right now, and one of my favourite ways to enjoy them is in a risotto. I make a light stock with the asparagus ends and pea pods for that maximum green flavour.
What else I’m eating…
Ricotta cannoli from T. Cavallaro and Sons in Footscray. They make the BEST cannoli in Melbourne – piped to order for maximum crispness and a not-too-sweet ricotta filling. Gerald’s Bar in North Carlton were recently selling them which means we could enjoy them safely inside our 5km zone! It’s the little things!

Click here to download recipe printout
0 notes
Text
Butternut Squash and Sage Risotto
Today I thought I would share a different style of recipe with you - I'm going to share many of my secrets and top tips on probably my favourite meal! Italy is definitely the place that has won my heart! If I could afford to go on holiday abroad more often, I would love to keep going there. Right now...nobody is going there though which is a good reason to brush up on your Italian cooking skills! After your first spoonful of risotto, you'll be taken there even if momentarily! I just love this dish - it's romantic, easy to cook, so flavoursome and doesn't require too many pots or pans which is a huge bonus!
Here are my tips - some of them might surprise you but read on and take note!

Use the best quality ingredients:
- Rice, it's the main ingredient. I recommend buying Carnaroli rice over Arborio everytime! Carnaroli is often described as the "king of rices". It has a higher starch content and firmer texture helping to give that bite and texture which is really important for the method of cooking risotto.
-Stock - my preferred brand is Swiss Vegetable Bouillon Powder. You can add further flavour to your stock by boiling it in advance with other vegetables to take on their flavour, such as an onion, leeks, celery etc.
-Parmesan - pleeeease don't be the pre-grated, powdery stuff! Risotto wants your respect! Get a proper block and grate it yourself! Also note, if you are a veggie/cooking for a veggie, sadly Parmesan is NOT vegetarian. Sad times, I do miss it! Italian Hard Style Cheese is vegetarian but lacks a good flavour punch. Tesco's Pecorino is vegetarian (not many others are!). Use other hard style cheeses. On our holiday, there was hard smoked ricotta as a topping and it was absolutely delightful!
-Herbs - keep them fresh and keep the dried ones in the cupboard! ....embrace the garlic (and cheese, nom nom!)
Flavours and Textures - be creative!
-Toasted nuts. I almost always add toasted pine nuts into risotto. They add a really wonderful texture as well as flavour. Toasted Hazelnuts are also a good option but they do have a more distinctive flavour - pair with a saffron or mushroom risotto, for example
-Fresh herbs. Mix these into your actual dish but also add to the top of the dish. It helps create a beautiful presentation but adds fresh burst of flavour. With Basil, I would tear it up and top with smaller leaves. For sage, I would recommend a quick roast in the oven so that they crisp up and top each dish with about three small-medium leaves.
-The main flavour - so I chose butternut squash here. I roast it for 40 minutes, adding some cloves of garlic half way through. Then add it to a blender with fresh herbs. I makes it so creamy, flavoursome and adds colour throughout the dish. I have sometimes also blitzed in soft goats cheese with this too, I recommend!
-Cheese as a topping. Always reserve some Parmesan as a topping to spoon over the top. As your friends gather round, no doubt that little bowl will too! And you'll feel quite sophisticated too! Even more so, did you know you can make Parmesan crisps?! The flavour is so strong, they are lacey in appearance and add great texture
-Don't be afraid to get creative. I haven't pictured it below but with this risotto I love Salty meets Sweet. For a Butternut Squash and Sage risotto, I'd recommend buying a bag of Amaretti biscuits from the supermarkets (the hard ones work best). Crush them, stir a little in just before serving and also top with the small biscuit crumbs.
Luxury and Volume! (Sounds like I'm taking about shampoo...) For something luxurious - towards the very end, once the stock has gone and the rice has cooked, add a generous teaspoon of butter and beat it very vigorously. You could also use cream. When ready to serve, add a ladleful or so of risotto in the bowl and smack the bottom of it!
My hand looks so large here!
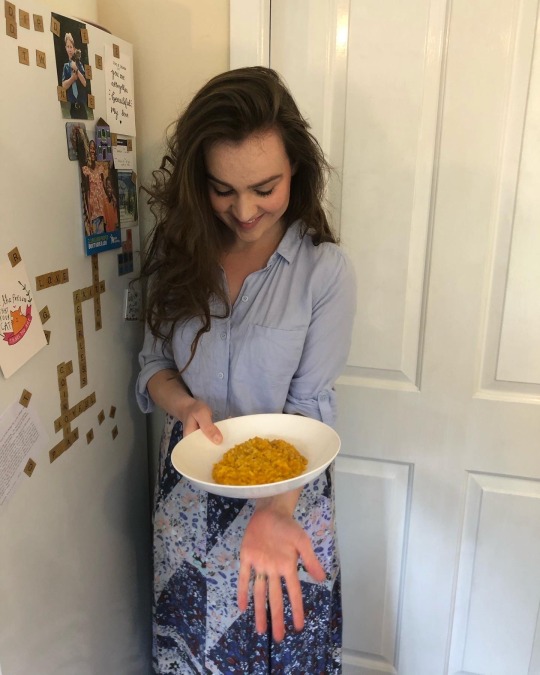
Method & Finishing touches
I thought I made quite a good risotto before our Italian cooking class but there was something our chef was adamant about it! You know what...I didn't like her method and you won't like it either! I loved the pause of staying in front of the hob, adding a ladleful of stock at a time. She said this was not the way and it was completely the wrong way! Once I tried a bite of her risotto, I knew she was right. The trick is to make sure your flavoursome stock is boiling and add almost all of it in, all in one go! Just try it! But if you find at the end, if looks too thick, add 60ml or so hot stock and stir again.
A good risotto will only take up to 20 minutes to come together (obviously longer for preparation).
Toasting the rice - this is a really crucial step. In your pan, heat the rice, stirring constantly for about 3 minutes or so until the rice is hot and fragrant. If you don't smell it, keep toasting! (Otherwise....you may have a symptom for something else. Just saying).
Finally, make plenty so you can turn leftovers into super tasty arancini!

If you make this, please let me know!
Love from Ruthie x
My Butternut Squash and Sage Risotto
Ingredients:
1 teaspoon butter
1 white onion, finely diced
3 large garlic cloves, crushed
250g Carnaroli rice
850ml stock (I used 3 teaspoons of Bouillon powder), boiling (plus extra vegetables for taste)
1 medium-large Butternut squash, cut into quarters
4 garlic cloves, to roast (skins on)
Handful of fresh sage leaves
Optional: soft goats cheese, to taste
40g pine nuts
-170g block of Parmesan/Veggie Hard Cheese (you may not need it all - this gets 'shared' across the risotto itself, making parmesan crisps and as topping).
Sea Salt, pepper to taste (I add smoked sea salt to this dish)
Method:
1. First, prepare vegetables and have everything else all measured out. Pre-heat your oven to 185 oC. Lay your prepared butternut squash on a tray, cut side up. Roasting time can vary but will be around 40 minutes. You can tell it is cooked by putting a fork through it and that it is starting to go nice and brown around the edges. Add garlic cloves 15 minutes before end of roasting time.
2. Meanwhile, boil the stock. Once your roasted vegetables are nearly done, prepare the risotto. In a large pan, melt the butter until fully melted and is bubbling. Add the onion and garlic until soft and translucent.
3. Once the onion is cooked, toast the rice for a good 3-5 minutes until hot and fragrant. Then add almost all of the stock, reserving a ladleful in case needed. Stir and then prepare other things, like pureed vegetables. Occasionally stir your risotto.
4. Once the squash has cooked, allow to cool for a few minutes. Then scoop it and place into a blender with the roasted garlic, fresh sage leaves (about 4-6 large leaves), salt and pepper and goats cheese if adding. Blitz until smooth and taste, adding herbs, pepper and cheese if needed.
5. Once you can see the risotto is nearly cooked, stir in the pureed vegetables and several tablespoons of grated parmesan. Taste, add more stock, cheese etc if needed.
6. Whilst the risotto is cooking, make the parmesan crisps/sage leaves/toasted pine nuts. Mix in freshly ground pepper into the grated cheese and prepare a flat tray with parchment paper. Use a teaspoon per disc. Oven bake for about 5-7 minutes until all melted and beginning to harden. Allow to cool so they crisp. Also, rub a little olive oil into some small sage leaves and roast on the tray until they harden. On a separate tray, roast the pine nuts for 7 minutes.
7. Add butter or cream if using, to the risotto, mix in pine nuts. Give your risotto a good stir with a wooden spoon (or even 'lift up' with a ladle).
8. Ladle into bowls, smacking the bowl before serving! Top with parmesan, amaretti if using, roasted sage and parmesan crisps. Serve and enjoy!
0 notes
Text
I try to cook!
This is going to come as a huge disappointment to the Tiktok community, but no I don’t do the cooking, no I don’t do the cleaning—kind of surprising for someone who eats so much! I mean, it’s not like I never tried. I did learn how to make nilagang manok and instant noodles over my five month long summer vacation before the start of college (and threw in the towel shortly afterward), and also expressed interest in being the cook whenever my friends and I go out for samgyup. But yeah, that’s about as far as I would go. Until today!
After almost two months indoors, I’ve been craving certain food that are either unavailable at restaurants for pick-up, or offered in branches that don’t deliver to my house. My love for them ultimately trumped my deep-seated aversion to anything that requires me to leave my seat, so I decided to take matters into my own hands. After collecting recipes, buying ingredients, and experimenting with flavors, I was able to come up with three decent dupes for some of my favorite dishes!
Kko Kko cheese fondue

This is a really simple, no-frills recipe but I still had to make some variations here and there: it’s common knowledge that [1] I don’t like bread (my friends have already interrogated me about it multiple times—I am a rice kinda woman!), and [2] there are barely any frozen finger foods in stock at the groceries. Thankfully, my mom was able to find a fitting substitute! Although it tasted mostly of breading, it went well with the dip anyway.
INGREDIENTS
Cheez Whiz, 110g
Fresh milk, 100ml
Shrimp poppers, 200g
French fries, 450g
Basil leaves
STEPS
Slowly pour the cheese in a pan, over low heat.
Add milk into the mixture and immediately turn off the stove so it doesn’t curdle. Although it’s relatively safe to eat, it doesn’t look appetizing and it can’t be reversed once done: you’ll be left with little lumps suspended in the sauce.
Stir thoroughly, until it reaches a pale yellow-orange color
Set aside and sprinkle with dried basil leaves before serving
For both shrimp poppers and French fries, just deep-fry them until golden brown. The former is a bit more difficult because they’re several spherical pieces, so it’s hard to ensure they’re all evenly cooked. (Don’t forget to wash your hands before you do any dipping!)

Pancake House corned beef hash

I remember being in Pancake House with my friends on my last day in the outside world and I deliberately chose not to order this even if it’s my go-to comfort food—for what reason, I have no idea why! I have beat myself up for it ever since. Thankfully, my version is almost as good as the real thing: I was able to base it off a recipe for croquettes! Although the breading used makes a significant difference, the generous filling surely makes up for it.
INGREDIENTS
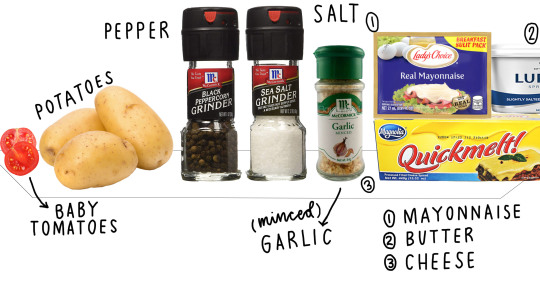
HASH
Corned beef, two 380g cans
Eggs, four pieces
Bread crumbs, 500g
Potatoes, four pieces
Mayonnaise, two 2ml packs
Salt, to taste
Minced garlic
RICE
Butter
Cheese, as much as you want
Baby tomatoes
STEPS
Slice the potatoes into squares, then boil; season with salt to taste
Set aside in a bowl and mash into smaller squares with a fork
Saute the corned beef with minced garlic (life hack for those who don’t feel like picking up a knife—tastes just the same!): keep stirring until it has dried up. Set aside and let cool.
Mix the corned beef, potatoes, and two egg yolks in a bowl thoroughly.
Prepare two separate containers: one with two cracked and beaten eggs, and another with breadcrumbs. This is where the magic happens!
You can opt to do this next step with your hands or with the aid of a spoon, in case you happen to be growing your nails out too. Scoop a portion of the corned beef mixture and dip it in the egg mix, before rolling all sides evenly with breadcrumbs.
This recipe yields 12 pieces of hash, so repeat the previous step for as many times as necessary. You can also mold them into different sizes, but it’s advisable that you keep them small so it’s easier to fit many of them in the pan when we get to the next step.
Deep fry over medium heat for five to 10 minutes each side, depending on how well done you want it. Check on it regularly though, because it could burn easily because of the egg. Once done, set aside to cool, then drizzle a generous amount of mayonnaise on top.
To prepare the rice, melt a teaspoon of butter and grated cheese in a pan over low heat before adding a cup of rice into the mixture. Serve topped with halved baby tomatoes.

Koomi Mango Moo
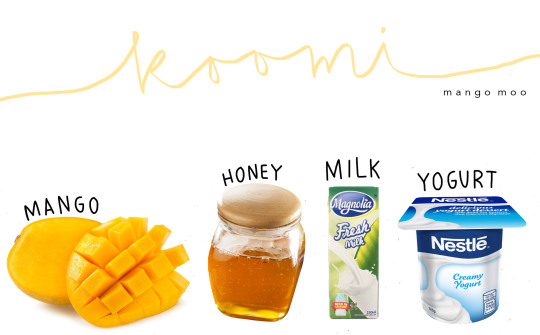
I visited Koomi’s Instagram page to double-check the spelling of my order, and was met with the initially devastating news that their Robinsons Magnolia branch has been open for a week now. I easily could have asked my parents to buy me a cup when they went to the supermarket there last weekend. But now I have no regrets since I can replicate it any time I want without having to leave the comfort of my own home!
INGREDIENTS + STEPS
Mango, one half cup, sliced
Plain yogurt, 250g
Fresh milk, 100ml
Honey, three tablespoons
Literally the easiest recipe in the book: put all contents into a blender, and let it do the magic! 10 seconds was enough for me to get the frothy consistency I wanted.
VERDICT: SUCCESS!
Overall, I’m really satisfied with how I did: not only were the results pretty damn delicious (and I’m speaking from a completely objective point of view), but I also partially fulfilled my childhood dreams of being on Masterchef—minus the heart-stopping time limit and the British chef screaming curse words in my face.

Of course, I wouldn’t have been able to accomplish this without my mom, who served as both sous chef and crash course instructor: had she not stepped in at key moments of the procedure to check on my progress, there is a likely chance that I would have burned down my house. My dad was also kind enough to shower me with compliments while he was eating what I made for dinner: it definitely makes the backache I got from hunching over both the dining table and stove top for three hours very worth it!
If you guys end up trying out any of these recipes and want to share the outcome, I welcome accounts of both disastrous and successful attempts in my messages! Hope everyone is keeping safe and sane during this quarantine, especially because the lockdown period has been extended another two weeks as per our Pr*sident’s most recent statement.
Love and light always,
Angel
0 notes
Text
// I SEE, I LEARN, I TRY, I COOK, I BAKE (ii) //*
A few years ago, I found a coffee capsule in my possesion, you know, the ones coffee fanatics pop into their trusty coffee machines which then turn the capsule into what people deem as heavenly black liquid? Yep, one of those. I’d picked it up from the apartment my family had rented for a few days in Milan that summer.
Perhpas I decided to take it along with me as a souvenir to remind me of the fun times we had together as family. Perhaps I’m a terrible hoarder. You decide.
That capsule found its way into my kitchen in Exeter as I unpacked at a new flat I rented for a few months in the autumn and winter after the above summer in Milan. Its contents were soon diluted with water and added to a cake batter I whipped up one faithful day, and the resulting cake and coffee buttercream were simply divine. I decided to reinvent the dessert yesterday as – you probably guessed – I had another coffee capsule in my kitchen cupboard (looks like I’ve made a habit out of it…).The ingredients used were:
About 250g plain flour
4 eggs
Approx. 250g butter
Approx. 250g soft brown sugar
A teeny bit of salt
Several dashes of baking powder, because I’m terrible when it comes to measuring baking powder as I always add more after all is mixed just for good measure
Some vanilla flavouring
Half of a Nescafe espresso deccafeinato capsule diluted in water
A few dollops of custard
Several dollops of yoghurt with Valencia orange and cream
I followed the steps laid out by BBC Good Food‘s trusty recipe for a classic Victoria sponge and just added the extra ingredients as I went along.
Cake batter mixed, oven heated, baking dish set with greased greasing paper meant the cake went in shortly after all was mixed.
At first, it did not seem promising…
And then, the top of the cake baked faster than the middle as it generally does, so I left the cake in the oven for a little longer than intended. It turns out I soon forgot about the cake and leaped from my desk chair at some point in the afternoon with the fear that all my hard work and experimenting had gone to waste, and the cake was burnt.
Thankfully, it had occurred to me to turn down the heat from about 190°C to about 100°C, which meant the cake had baked slowly and thoroughly. The top wasn’t stiff like I was expecting it to be and the centre was just right, as I dipped a knife in and brought out clean, silver sides.
My flatmate was curious as to how it had turned out, and as I was too, we soon found ourselves rounding our main meals with a reasonable serving of my “Coffee-Vanilla Orange-Yoghurt-and-Custard” cake topped up with more custard.
Guys, it was delicious! It hit all the right spots, although I think I’ll add the whole capsule next time instead of the half. It is more dense than your standard vanilla, fully cake, but it is certainly moist, and my having a second round, my landlady’s warm welcome of a cake offer and my flatmate exclaiming, “It’s good!” three good times, comes to prove that yesterday’s bake was a success!
If you decide to give this recipe a try, or even put your own twist on it, let me know how it turns out for you!
Till the next cooking post in this series,

*This is the third post in the I See, I Learn, I Try, I Cook, I Bake series. You can read up on posts 1 and 2 here and here, respectively.
Coffee-Vanilla Orange-Yoghurt-and-Custard Cake // I SEE, I LEARN, I TRY, I COOK, I BAKE (ii) //* A few years ago, I found a coffee capsule in my possesion, you know, the ones coffee fanatics pop into their trusty coffee machines which then turn the capsule into what people deem as heavenly black liquid?
#bake#baking#cake#cakes#coffee#coffee capsules#cook#cooking#cooking 101#desserts#dishes#dolce#experiment#experimenting#food#kitchen#kitchen trials#learn#learning#learning to bake#learning to cook#Nespresso#recipe#recipes
0 notes
Text
Tomorrow is the last brunch of 2017 for the Glasgow Chapter of Geek Girl Brunch! Our theme is Christmas Films, and tonight I’ve been putting the final touch to brunch activities. So how can I not write today’s Christmas Feast blogpost about the food in Christmas films? I’ve already written one post on the four food groups in Elf, so today I thought I would look at something grittier, if you can imagine that adjective been applied to a Christmas film, but still funny. Hello, Trading Places (1983)! If you haven’t seen it, it’s very funny, rather clever, but also difficult to watch in places. To avoid potential spoilers, here’s the film poster to provide a buffer.

Source: Vintage Movie Posters
The film takes a good look at racism, and some scenes are genuinely horrifying. Having watched the film again a few days ago – it’s on the Sky Christmas film channel a lot at the moment – the rich white men in their members’ only club, refusing to help the homeless Billy Ray Valentine as one of their own falsely accuses him of theft, as police surround him and point their guns at him, could easily happen now, and could easily become a murder, in Trump’s America. Such scenes make Dan Akroyd’s blackface disguise on the train a really strange choice, at best. While disguises chosen by the other characters are inexplicable, and Jamie Lee Curtis’s ridiculous Austrian/Swedish ‘milkmaid gone backpacking’ outfit almost as infuriating, the blackface is the worst, and is completely unjustified by the plot. There’s no excuse (or for the aforementioned milkmaid, to be clear). I recommend reading Hadley Freeman’s discussion of Trading Places as her guilty pleasure.
Having just written that paragraph, I feel incredibly superficial in returning to my original theme. Is the more serious issue trivialised by my continuing to write about delicious food? The latter was all I initially intended to discuss today. I will try to get back to that thread, and hope that it is not too jarring.
I’ve created a Trading Places feast using recipes from the BBC’s excellent collection. If you are stuck with an odd assortment of food, and don’t quite know what to make with them, use the Ingredients A to Z to see what comes up.
Coleman will bring hors d’oeuvres and mimosas (made from champagne and orange juice, popular drinks for different reasons in the story), as you settle down in front of a roaring fire. Then, given that the stock market value of different foods and drinks is also an important part of the plot, the meal proper will start with ‘Christmas Pâté with Pistachios’, which contains pork belly and liver (not that of cattle or hog, unfortunately, merely that of the humble chicken, but we must endure).
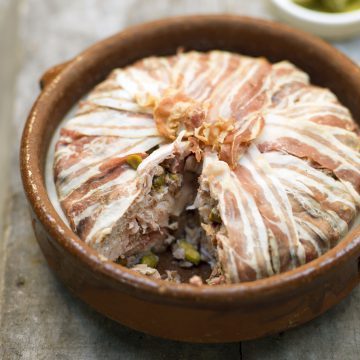
Christmas pâté with pistachios. Source: Four Magazine
Christmas pâté with pistachios
Preparation time: less than 30 mins
Cooking time: 1 to 2 hours
Serves 8
A rich make-ahead pâté that’s perfect party food or makes a great starter – delicious with pickled onions, toast and salad. By Michel Roux Jr, from Christmas Kitchen with James Martin
Equipment: You will need a 1.5 litres/2½ pints terrine mould.
Ingredients
3 corn fed chicken breasts, skin removed
100g/3½oz chicken livers
180g/6oz pork belly, minced
1 tsp salt
2 tsp freshly ground black pepper
1 unwaxed lemon, zest only
2 shallots, finely sliced
2 sprigs lemon thyme, leaves picked
50g/1¾oz pistachios, blanched
20 thin slices streaky bacon
Method
Preheat the oven to 180C/350F/Gas 4.
Cut each chicken breast into three big slices and set aside.
Mix the chicken livers into the minced pork and season with the salt and pepper. Add the lemon zest, shallots, thyme leaves and pistachios.
Line a terrine mould or loaf tin with the bacon, leaving enough overhanging to cover the top when filled. Press in the mince and chicken pieces and cover completely with the bacon.
Place the mould in a roasting tin filled with enough water to reach half way up the side of the mould.
Bake in the preheated oven for 1 hour 15 minutes.
Allow to cool for 24 hours in the fridge then slice. Serve with pickled onions or gherkins, toast and salad leaves.
The main course in a Trading Places feast has to be created around a whole salmon.
Source: A Dash of Cinema
If you wish to steal yours from your former employer’s staff Christmas party, then eat it on the bus, more power to you, but I’m looking to create a fancier dish as befits a proper feast. Roasting the whole salmon seemed like a wonderful idea.

Whole roast salmon. Source: BBC Good Food.
Preparation time: less than 30 mins
Cooking time: 30 mins to 1 hour
Serves 12
A classic dish good at buffets and for large number of guests. Can be prepared in advance.
Ingredients
1 whole salmon, 3-4kg/6.5-10lb in weight, gutted and cleaned
4 sprigs fresh parsley
½ lemon, sliced
2 bay leaves
150ml/5fl oz dry white wine
2 tbsp vegetable oil
Method
Heat the oven to 190C/375F/Gas 5.
Take 2 large sheets of foil and place on top of each other in a roasting tin. Spread the oil on the foil and place the salmon on top.
Put the parsley, lemon slices and bay leaves into the body cavity. Fold the edges of the foil together but just before sealing, pour in the wine.
Bake the fish for 50-60 minutes.
Serve hot or cold. If you want to serve it cold, allow the fish to cool in the parcel and then gently peel off the skin and garnish with thinly sliced cucumber and watercress.
I would choose to serve it with charred asparagus tips and baked potatoes with wonderfully crispy skins. Doesn’t that sound fantastic?
In the film, Coleman prepares crêpes Suzette at the dinner table as Winthorp and Penelope are eating their main course. I couldn’t resist using James Martin’s recipe which involves a “sticky orange sauce and a creamy citrus syllabub”, once again because of frozen orange juice’s starring role.

Clementine syllabub and crêpes Suzette. Source: BBC Recipes.
Ingredients
For the syllabub
250g/9oz mascarpone
1 heaped tbsp icing sugar
400ml/14fl oz double cream
2 clementines, 1 juiced, 1 sliced
200g/7oz ready-made orange or passion fruit curd
2 sprigs fresh mint
For the crêpes
125g/4½oz plain flour
1 free-range egg
300ml/10½fl oz milk
25g/1oz butter
For the sauce
75g/2¾oz caster sugar
50ml/2fl oz brandy
4 clementines
1 lemon, juice only
25g/1oz unsalted butter
Method
For the syllabub, whisk the mascarpone and icing sugar together in a large bowl until smooth. Gradually pour in the double cream, whisking continuously until the mixture is pale and thick.
Fold in the clementine juice and orange or passion fruit curd to create a ripple effect.
Spoon the syllabub mixture into a piping bag and pipe it into glass serving dishes. Top each with a slice of clementine and a sprig of mint. Chill in the fridge until ready to serve – the syllabubs will keep in the fridge for 3-4 days, covered.
For the crêpes, whisk the flour and egg together in a large bowl. Gradually add the milk to form a smooth batter with the consistency of double cream.
Heat a little of the butter in a frying pan over a medium heat. Add a ladleful of the crêpe batter to the pan and swirl to coat the bottom evenly. Fry for 1-2 minutes, then flip the pancake and cook for a further minute, or until golden-brown on both sides. Remove the crêpe from the pan and place on a sheet of greaseproof paper. Keep warm.
Repeat the process with the remaining butter and crêpe batter, stacking the crêpes between layers of greaseproof paper.
For the sauce, heat the sugar in a frying pan over a medium heat until the sugar melts and caramelises. Add the brandy and set alight with a match. Allow the flames to flare up and die down. (Caution: Keep the flames away from your eyes and face and make sure the extractor fan is not turned on). Stir in the juice from 2 of the clementines, the lemon juice, and the zest from 1 clementine, then segment the last 2 clementines and add them to the pan. Finally, stir in the butter until it has melted and the sauce has thickened.
To serve, fold the crêpes into quarters and arrange on serving plates. Spoon over the warm orange sauce. Serve the syllabub alongside.
Would you like a coffee and eggnog, back in front of the roaring fire, to finish your evening?
This post is brought to you by BBC2’s The Sweetmakers at Christmas, which was on in the background while I was writing. Even with only one eye on the TV, it was fascinating, and very timely for my Christmas Feast blogging series. Quick! To the iPlayer!
15 December 2017: Christmas film feasts Tomorrow is the last brunch of 2017 for the Glasgow Chapter of Geek Girl Brunch! Our theme is Christmas Films, and tonight I've been putting the final touch to brunch activities.
2 notes
·
View notes
Text
Easy Chili Mac & Cheese
Well, I guess the count-down is on now, only four more days until Christmas Eve. Are things feeling pretty crazy yet? I can remember how busy those last few days would be when I was raising my children. It was always a panic to get all the things done that I would need to have done!
Cooking supper was just another chore in a long list of things to do, so I relied on quick and easy favourites, that I knew the family would enjoy, but that wouldn't take a lot of work. Simple dishes like this Easy Chili Mac & Cheese.
It might seem like a bit of a cheat, and yes it is. But "needs must" as they say. There are times for recipes like this, and these hectic busy last few days before Christmas certainly qualify as one of them!
It uses store cupboard ingredients. In the main boxed Macaroni and Cheese dinner. Over here you can find it in the shops and its called Cheesy Mac, in North America you can use Kraft Mac and Cheese, or the equivalent. One box will do.
You will prepare it exactly as it says on the box. Easy peasy. With the milk and the butter and the packet of cheese powder. Simple.
Then it is just a matter of stirring in some tomato salsa. I use the mild, but you can use as hot or as mild as your family enjoys. I also stir in a can of beef chili con carne. I use Stag brand because that is what we get over here and I use the one with beans.
You can use whatever kind of chili con carne you have. ( Its the 425g/14 oz tin size.) Just stir it into the mix of mac and cheese and salsa.
I also like to add some chili powder, but by that I don't mean the full strength chili powder that is sold over here in the UK, I mean the milder North American kind of chili powder which is mixed with other things so that it is not quite as hot. (I give you the equivalent in the recipe if you are living over here in the UK.)
The chili powder you buy over here is just ground dried chilies and it would blow your head off. It is not as mild as the North American stuff, which I learnt very early on after arriving here when I made my chili fries for Todd. YOU COULD NOT EAT THEM! They were that spicy. Don't make the same mistake! Trust me.
That is basically it. You have your casserole mix now. You can use chili without beans if you like, or vegetarian chili . . . its your choice.
This gets layered in a buttered baking dish with some four blend cheese. You can use the Mexican blend if you want hot, or you can use a milder blend if you want to play it safe.
I like to play it safe. I like a bit of spice, but I don't like a lotta heat in things. My older tummy can't take it! Funny how things like that change as you get older!
In any case this is delicious. Simple. Quick and easy to make. A real family pleaser. All you need is a salad on the side and maybe some crusty bread!
Yield: 4Author: Marie RaynerPrint Recipe
With ImageWithout Image
Easy Chili Mac & Cheese
prep time: 10 minscook time: 40 minstotal time: 50 mins
This is quick, easy and really delicious. Its a store cupboard meal that is a bit of a cheat, but nobody seems to mind!
ingredients:
1 package of macaroni and cheese dinner mix (Here in the UK, I use
Cheesy Mac, in North American use Kraft Mac and Cheese or the equivalent)
1 tin of Chili Con Carne (I use Stag)
1 small jar of tomato salsa (I use mild, about 1 cup)
1/2 TBS mild chili North American style powder (or to taste)
(Over here I would use 1/4 tsp chili powder,
blended with 1/2 tsp each oregano, ground cumin, onion and garlic powder)
250g four cheese blend (2 cups)
instructions:
Prepare the mac and cheese as per the package
directions, using the butter and milk required. Stir in the can of
chili. the tomato salsa, and the chili powder.
Preheat
the oven to 180*C/350*F/ gas mark 4. Butter a casserole dish. Spread
half the macaroni mixture in the dish. Sprinkle with half the cheese.
Top with the remaining half of the macaroni mixture and sprinkle the
remaining cheese on top.
Bake in the preheated
oven for 35 to 40 minutes, until bubbling and the cheese has melted and
is lightly golden brown on top. Let stand for about 5 minutes prior to
serving.
Any leftovers can be reheated in a skillet the next day (If there are only two of you like there is in our house, there will probably be leftovers.) I have always thought the leftovers taste even better than the casserole does on the first day. Also if you are feeding a crowd, the recipe is very easily doubled! Olé!!!
Source: https://theenglishkitchen.blogspot.com/2018/12/easy-chili-mac-cheese.html

0 notes
Text
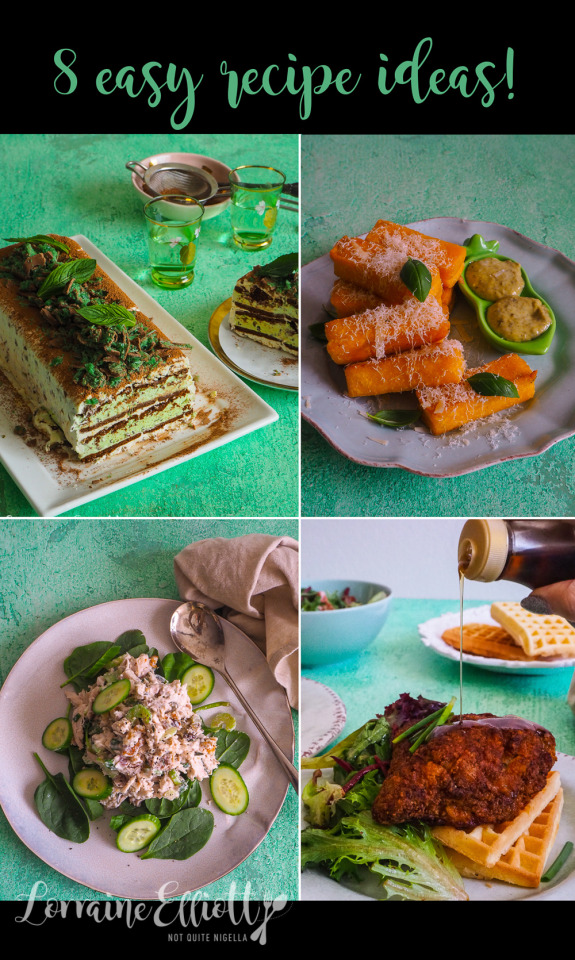
8 Amazingly Easy Summer Recipe Ideas With 10 Minutes Prep!
These recipes are brought to you by Woolworths.
Want to make the most of summer? These 8 easy recipe ideas will have you enjoying your time outside the house but still eating well. Think a crowd pleasing 6 layer salad; refreshing Limeade; polenta & parmesan fries with pesto aioli; my favourite ever chicken salad (and I mean it, pinky swear); Nashville Hot Chicken with maple and waffles and to finish a quick freeze Chocolate Peppermint Ice Cream Cake! Best of all these take between 5-15 minutes prep thanks to some smart shopping!
For me, while I love to cook, you may have noticed that my summer recipes are simpler. That's because I don't want to spend too long in the kitchen. I'd rather be out with friends. Winter is another matter where I braise and roast for hours and stay indoors reading or watching movies while waiting for summer to reappear. But summer is really an outdoor season.

6 layer salad to feed a party!
That’s why I’ve come up with some quick and easy Summer recipe ideas using Woolworths’ ready made products. Because sometimes you want to cook something that takes 10 minutes prep but you know me, I like to fiddle with things. And you shouldn't have to sacrifice flavour or taste in order to save time. And here I show that you can use ready made items to come up with canny shortcuts to make a yummy dish!

My favourite ever chicken salad
If I could do one thing it would be to be able to control time. Because I feel like I'm in a constant battle to do things while fighting time. By the time the end of the day rolls around I really wonder where the time went.

Quick Freeze Chocolate Peppermint Ice Cream Cake
The other night I was up late-much later than I wanted to be. You know those times where you just wish you were home in bed? I was out at dinner and I was bone tired and they had cleared out dessert plates. And sometimes when I am tired I get sort of tired tipsy. I'm not actually tipsy but I feel like it. I get sort of delirious.

Refreshing Limeade
We were all eager to leave but one guy had gone to the bathroom and been gone for so long we had almost forgotten about him. And I think I almost dozed off and when I woke up I was thinking, "What are we waiting for???"

DIY Peanut Butter and Salted Chocolate Chip Ice Cream Sandwiches
Except I blurted it out loud. Like very loud. I only realised that I had actually spoken out loud when everyone turned to me. I honestly try and be polite most times but when I get tired, things fly out of my mouth.
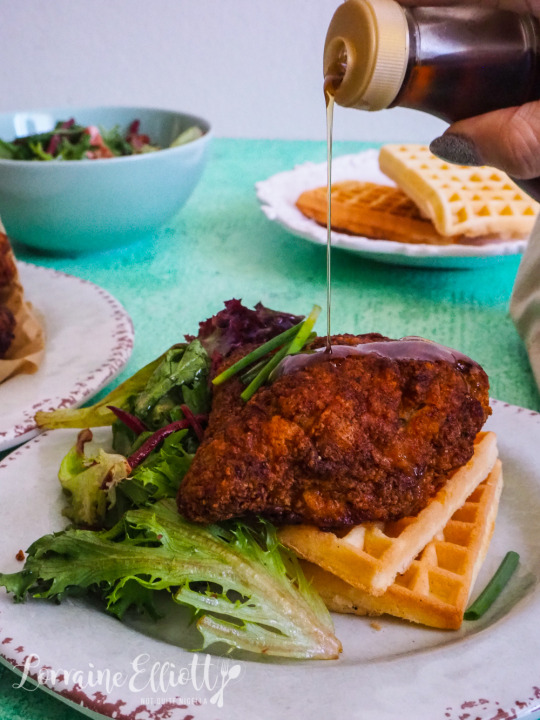
Nashville Hot Chicken & Waffles with Maple Syrup
"Did I say that out loud?" I whispered to my seat mate. She nodded laughing. Thankfully our host didn't take offence as I think he too was wondering where he had gone and he too wanted to be home in bed too.
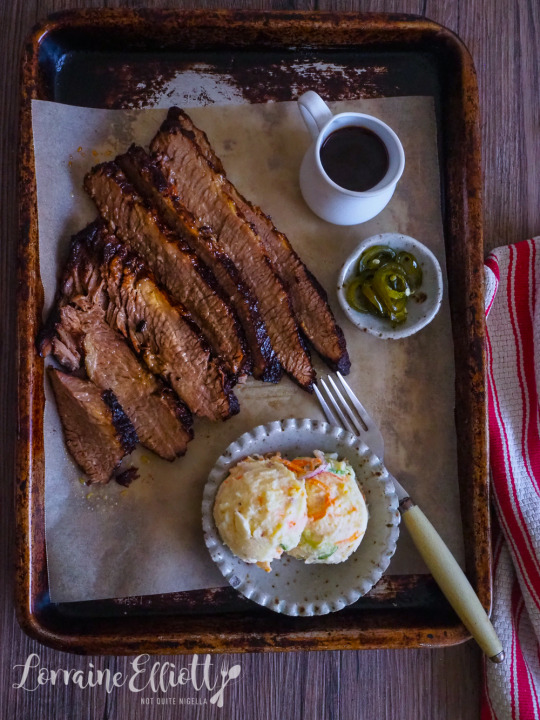
Smoked Beef Brisket with quick Japanese Potato Salad
So while I usually offer you from scratch recipes there are times when shortcuts and time savings helps. Sometimes you just don't have the motivation or means to smoke an entire beef brisket and sometimes you do. But save these recipes for when you are short of time. And don't get delirious tired like me ;)
So tell me Dear Reader, do you ever blurt out things? Do you get a bit delirious when you are tired? And do you ever wish you could control time?

Polenta and Parmesan Chips with Pesto Aioli
My Favourite Ever Chicken Salad
All Original Recipe ideas by Lorraine Elliott
This is one of my favourite salads and a real crowd pleaser if you're taking it to a picnic or a gathering. Even though I'm not a huge celery fan, it earns its place in this salad by adding a fantastic crunch along with the walnuts.
Preparation time: 15 minutes
Cooking time: 0 minutes
Serves: 6-8 (perfect for a crowd)
1 Woolworths Macro free range roast chicken
1 green shallot, sliced
3/4 cup mayonnaise
1/2 cup walnuts, chopped
1-2 sticks celery, chopped
1/4 cup chopped sweet pickles
3 tablespoons chopped fresh tarragon
2 tablespoons sesame seeds toasted
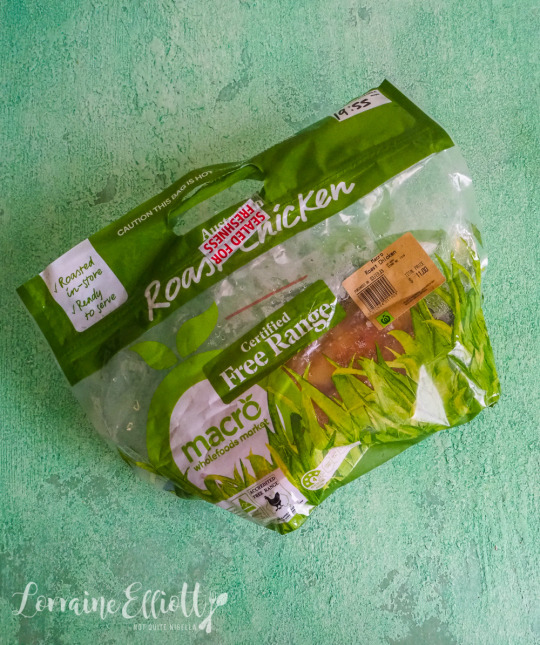
Step 1 - Remove the meat from the chicken-you should get around 3.5-4 cups of chicken meat. Mix this along with the rest of the ingredients together in a large bowl. Serve with greens or on its own.
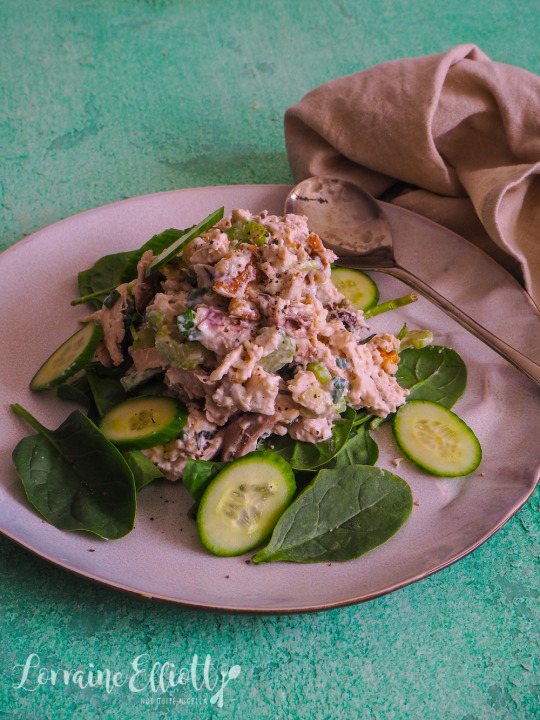
Refreshing Limeade
If you've ever baulked at the cost of limes but love citrus drinks like limeade these frozen lime slices are perfect to keep in your freezer. They come already sliced up so all you do is muddle them in a light sugar syrup. This is utterly refreshing and perfect for a hot day!
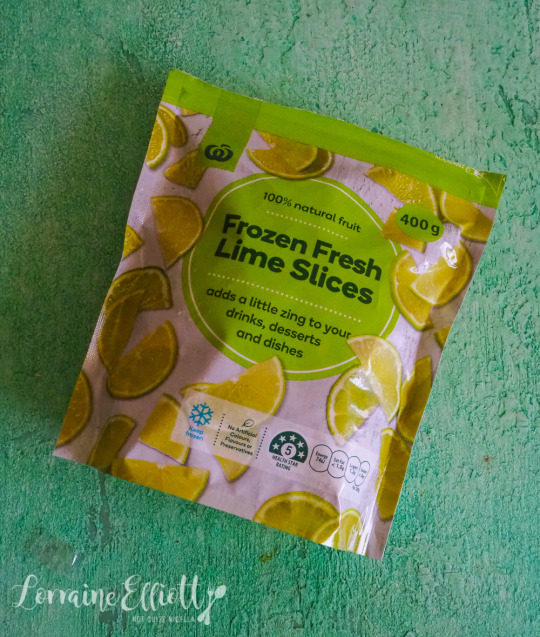
Makes 1 litre Limeade
Preparation time: 7 minutes
Cooking time: 7 minutes
1 cup water
1/2-2/3 cup white sugar (depending on how sweet you want it)
1.5 cups Woolworths Frozen Lime Slices (freezer section)
Caviar beads from 2 finger limes
750ml soda water, chilled
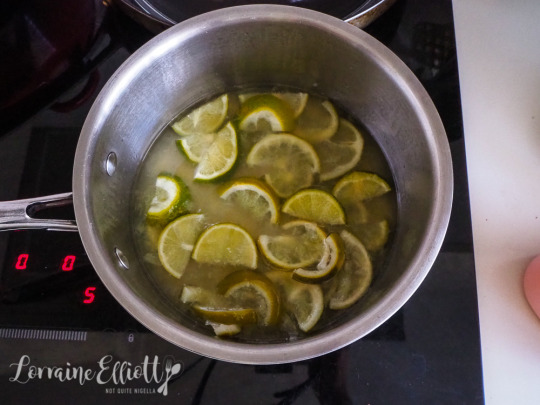
Step 1 - Boil the water with the sugar until the sugar has dissolved. Add the lime slices and cook for 3-4 minutes. Remove from heat and muddle using a French rolling pin or end of a thick wooden spoon. Allow to cool completely.

Step 2 - Pour into a large 1 litre jug along with finger lime caviar and top up with soda water.
Polenta & Parmesan Chips with Pesto Aioli
Like a lower fat version of hot chips, these polenta and parmesan chips are just like at your favourite restaurant. Baked rather than fried they are crispy on the outside and soft on the inside. I'd even suggest making double for a crowd they're that good.

Preparation time: 3 minutes
Cooking time: 15 minutes
Woolworths Polenta & Parmesan Chips (250g, freezer section)
1/4 cup Woolworths Garlic Aioli
1 tablespoons Woolworths Select Pesto Basil
Parmesan cheese for sprinkling
Basil leaves for decoration
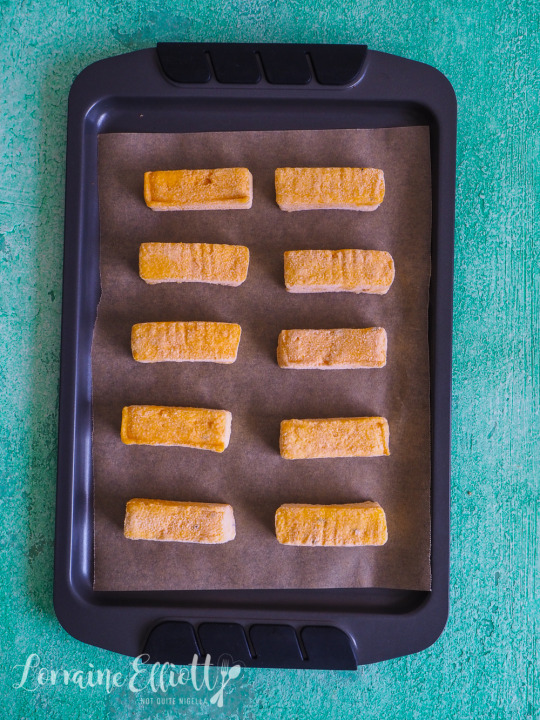
Step 1 - Preheat oven to 200C/400F and line a baking tray with parchment. Place chips in a single layer and bake for 15 minutes or until crispy.

Step 2 - Meanwhile mix the pesto and aioli and place in a small side dish. Grate parmesan cheese on top, add basil leaves and serve with the pesto aioli.
Six Layer Salad

The perfect entertaining salad, this six layer salad melds fresh vegetables and potato, quinoa and bean and pasta salads. This is a real time saver and can feed up to a dozen people as part of a spread.
Preparation time: 15-20 minutes
Cooking time: 0 minutes
800g Woolworths Potato Egg And Bacon Salad
2 avocados, skin and pit removed and chopped
800g Woolworths Ancient Grain Salad
2x200g punnets Solanato Tomato, 3/4 of them quartered, 1/4 halved
2x350g Woolworths Basil Pesto Pasta Salad
300g corn, drained
1/4 cup chives, chopped

Step 1 - Take a trifle bowl and layer the bottom with potato, egg and bacon salad. Add the diced avocado. Then layer with ancient grain salad pressing down gently to create a smooth surface.
Step 2 - Then add the tomatoes-I put a layer of the halved tomatoes cut side facing out and then placed the quartered tomatoes in the centre. Add the basil pesto pasta salad on top of this. Then add the corn on top and then sprinkle with chives.
Nashville Hot Chicken With Maple & Waffles
Now Nashville hot chicken is an entirely different beast than chicken and waffles. Usually Nashville hot chicken is served with a piece of white supermarket bread and not with maple syrup and waffles. But hear me out Dear Reader, sweet goes so well with spicy (think sweet chilli sauce) and while this was delicious without the maple, once I drizzled maple syrup on the chicken it became one of those things that I could not stop eating!
Preparation time: 10 minutes
Cooking time: 45 minutes
850g Woolworths Southern Style Crumbed Chicken Pieces (freezer section)
2 teaspoons smoked hot paprika
2 tablespoons rice bran oil
1/2 teaspoon cayenne pepper (or to taste)
130g packet English waffles (6 pieces)
250g Woolworths Maple & Bacon Salad Kit or American slaw

Step 1 - Preheat oven to 200C/400F and line a baking tray with parchment. Lay out chicken pieces in a single layer and sprinkle with hot paprika. Combine oil and cayenne pepper and brush it over the pieces. Bake for 40-45 minutes or until done.

Step 2 - Make the salad by adding the cranberries and bacon bits and then add dressing and toss. Just before serving toast the waffles and add the salad and chicken. Serve with maple syrup (it may sound odd but trust me, it's delicious!).

Beef Brisket & Quick Potato Salad
This recipe saves so much time but the end result doesn't show it (honestly you have to try this!). Beef brisket is a big deal. It takes ages to make and you need a smoker as well. This beef brisket is super soft and tender and tastes like it came from Texas. All you have to do is heat it up in the oven for 30 minutes. For the true Texas experience, eat it with your hands, unadorned without sauce.

Japanese potato salad is definitely not on the menu at a bbq restaurant but hear me out. Most of us have probably tried potato salad but have you ever tried a Japanese potato salad? It's amazing! A Japanese potato salad is mostly made up of soft mashed potato with boiled eggs, mayonnaise, onion, carrot and cucumber. It too can be quite a production but I found a fun use for the Woolworths roasted garlic mash. All I had to do was add the mix ins and condiments and I had a divine Japanese potato salad to go with my beef brisket!
Preparation time: 15-20 minutes
Cooking time: 35 minutes
Serves 4-6
2x 750g Woolworths Simply Heat Smoked Beef Brisket
2x 475g Woolworths Roasted Garlic Mash
3 boiled eggs
1 small red onion, finely diced
3/4 Lebanese cucumber, thinly sliced
1 small carrot, shredded
3/4 cup kewpie mayonnaise
1 tablespoon rice vinegar
2 teaspoons sugar
Salt and pepper to season
Step 1 - Heat BBQ with the lid on to medium heat. Cook the brisket for 30 minutes per 500g of meat. OR cover with oiled foil and roast in a 210C oven for 25 minutes per 500g. Remove foil and cook for 5 minutes. Rest for 10 minutes then slice.

Step 2 - Make the potato salad while the meat is cooking. I find it easiest to have all the ingredients measured out and then you just mix it all up together (don't heat the mash). Season with salt and pepper.

Quick Chocolate Peppermint Ice Cream Cake
Ice Cream cakes usually require freezing for a few hours or overnight to set the entire thing. This one sets in an hour as it uses ice cream sandwiches wedged with some peppermint chocolate cream so freezing time is a lot shorter! The decoration is a cinch too!
2 packets Woolworths Peppermint Chocolate Flakes Ice Cream Sandwich (8 in total freezer section)
600ml cream
4 tablespoons honey or sugar
5 Peppermint crisp bars
1 tablespoon cocoa powder
Fresh mint leaves to decorate

Step 1 - Line a long loaf tin on the base and sides with parchment. Smash up 2 of the peppermint crisp bars and set aside. Whip the cream with honey or sugar until soft peaks form and then mix in the smashed chocolate bars.

Step 2 - Spread some on the base and sides of the lined tin. Line with the ice cream sandwiches and the smooth some more cream to fill in the gaps and make another layer of ice cream sandwiches. Cover with some more of the peppermint cream and cover and freeze. It should be set in about an hour or so since the inside is made up of frozen ice cream sandwiches.
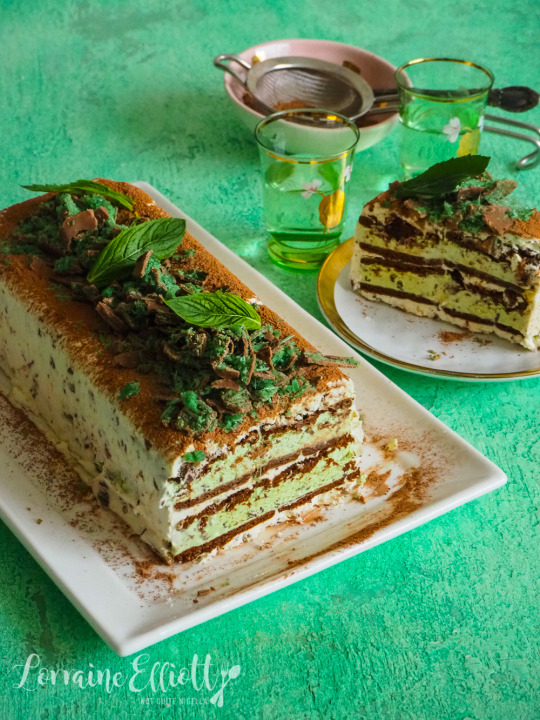
Step 3 - Dust with cocoa powder and then the remaining smashed peppermint bars.
Peanut Butter Salted Chocolate Chip Ice Cream Sandwiches
These peanut butter salted chocolate chip ice cream sandwiches are the ultimate easy dessert. Sometimes biscuits can get soft in the freezer but these King of Chunky Chocolate Chip Cookies stay crisp as you make them fresh every time!
Preparation time: 5 minutes
Cooking time: 0 minutes
1 litre tub of Woolworths Peanut Butter and Salted chocolate Ice Cream
1/2 cup creamy or chunky peanut butter
310g box Woolworths The King Of Chunky Chocolate Chip Cookies
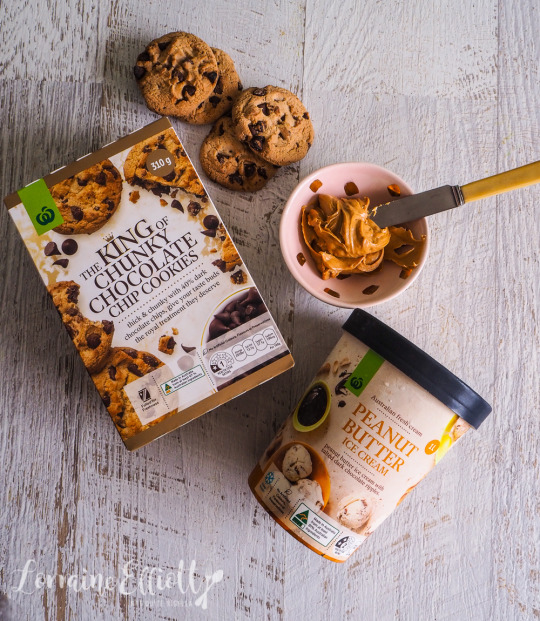
Step 1 - Leave ice cream out for 5 minutes to soften a bit. Spread peanut butter on the inside of one cookie. Scoop some ice cream on top and press down with another cookie. Freeze until needed.


Source: https://www.notquitenigella.com/2019/02/12/easy-summer-recipes-10-minutes/
0 notes
Text
NUT MILK CITY LIMITS

This should have been my Boston blog. And I will write one, someday soon.
But limited as we are to four walls, dodging pavement cyclists and the kindness of delivery folk, let’s settle for a tale of lockdown invention.
That said, my story does start in Boston - or rather, leaving it. It was the real start of The Weird, around early-mid March, when I still took the tube into work and was looking forward to a visit to the hairdresser (lockdown was announced the day before my appointment in case you were wondering. So there will be no selfies here). We managed to head off to the US the day that Trump banned the rest of Europe from flying and I won’t lie, we felt lucky. I sat next to a Canadian student on the flight who explained, as she coughed, that she had traded her study trip around Europe for a £2,000 ticket-chance of getting home.
We got to our faintly Psycho- throwback hotel that night, where we seemed to be the only guests. And for three days we toured the (mostly shut) sites of Boston with the streets all but empty.

At one stage, as we strolled past a CVS store, two young women emerged, insanely juggling 4x16 pack toilet roll bags. How we laughed. The way those pesky kids laugh as the Scooby-ghoul looms behind them. On the Sunday, any holiday vibe had been replaced with low level anxiety, counting down the hours to our flight leaving the US on time and as planned.
And since we landed back in London, that’s been it. Travel now means taking the car for a weekly local drive to keep the battery ticking over, and let’s not dwell on the cancelled trip to Vietnam. The Supermarket Sweep race as you grab random packs off shelves before the personal space invader twats sneak up behind you is now replaced by the delivery time lotto of Amazon Fresh. Got a formula for that, Dale Winton?
But there have been new things to smile about: neighbourhoods coming together every Thursday evening to Clap for Carers; the bravery of NHS workers and a whole army of people I hope we’ll never take for granted again; friends and family checking in on each other much more than ever usual. And the travel buzz achieved by changing our backgrounds on Zoom. Don’t knock it, the endorphin kick is real.
And dare I say there have been pleasures too: delicious meat, fish and vegetables delivered from local suppliers, and weekends full of invention possibilities. “ Are we all fucking bakers now??” Twitter ranted in week 2 of lockdown as flour and eggs became the New Disappeared. Cashew milk, the one nut milk I enjoy, became similarly scarce for a short while, but I discovered the eye-wateringly expensive delights of Milkadamia until sanity returned.
Faced with the random nature of vegetable boxes, half used packs of speciality flours otherwise doomed to outlive their sell by date and the excitement of what you can achieve with a carton of buttermilk and bicarb of soda - life in the kitchen is nothing short of a blast right now. Just like wartime? We have no rationing and plenty of Chipotle paste so, er, no.
Breaking my veg box virginity has been liberating. There are the highs of high-sheen aubergines and those creamy new potatoes of the season, and the occasional low of celery on three consecutive weeks. But the thrill of anticipation when we open the door to a new box is palpable. And finding specialist suppliers for everything from sumac to burrata has made me realise that up until the pandemic I’d been shopping all wrong and wasting far too much money. With the simple elimination of impulse purchase I have hit my notional monthly food budget for the first time ever.
So here are a bunch of recipes for what I consider my best lockdown experiments. Stock up on your store cupboard essentials and you can use whatever basics are available that week. And by store cupboard essentials I mean: Olive and coconut oils, smoked paprika, cumin, turmeric, chilli flakes, soy sauce, baking powder and bicarbonate of soda (you don’t need yeast for soda bread or flat breads). And whatever flour you can find, you’ll be able to do something with it.
Bolli-cauli biryani with camargue rice
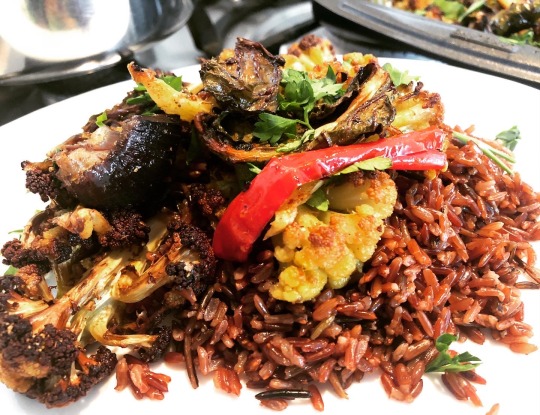
Forget boiling cauliflower ever again. Chop florets, toss them in spice and oil and roast to crispy, caramelised deliciousness every time. Serves 2-3.
Ingredients
1 medium cauliflower, cut into florets, then cut each floret in half to create bite size pieces
The cauliflower leaves, pulled from the fibrous stalks
2 medium red onions, quartered
1-2 large red chillies, split from top to bottom but kept intact
2 tsp. Sumac
2 tsp ground cumin
1 tsp kosher salt
Generous grind of black pepper
1 tsp chilli flakes
3 tbsp. Olive oil
300g camargue red rice (1 small mug)
25g salted butter
Plan yoghurt to serve
How to make:
Heat the oven to 190C.
In a large bowl, toss the cauliflower, cauliflower leaves, chillies and onion (and any other chunky vegetable you hav in the fridge eg.squash, aubergine or courgettes) with the spices and olive oil. Spread out onto a large roasting pan and pop into the oven for 40-45 mins, turning everything half way through. The edges of the vegetables will caramelise and the leaves will crisp up.
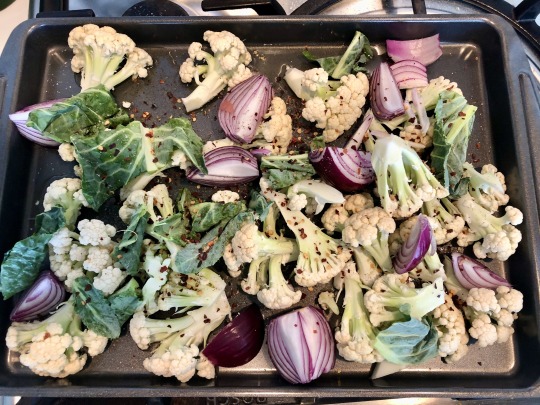
Meanwhile, heat the butter in a saucepan until it bubbles then add the rice and toss until you get a toasty aroma. If you used a small cup, then now add a small cup and an extra quarter cup (or if you measured 300g then add 400ml water) and a generous pinch of salt. Bring to the boil, stirring once and then simmer on a medium heat until the water is all but absorbed (about 15-20 mins). At this point, cover with a lid, turn the heat to low and cook for a further 10-15 mins. Turn off the heat and leave covered for a further 10 minutes before fluffing the rice up.
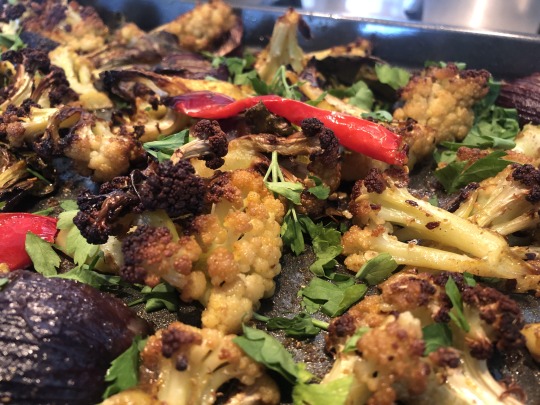
When the bolli-cauli is ready, remove from the oven and serve over a generous scoop of the toasty, chewy buttery camargue rice. Add a dollop of yoghurt on the side and some mango chutney to serve. And treat yourself to some poppadoms for the crunch factor.
Beer and Buttermilk Soda Bread
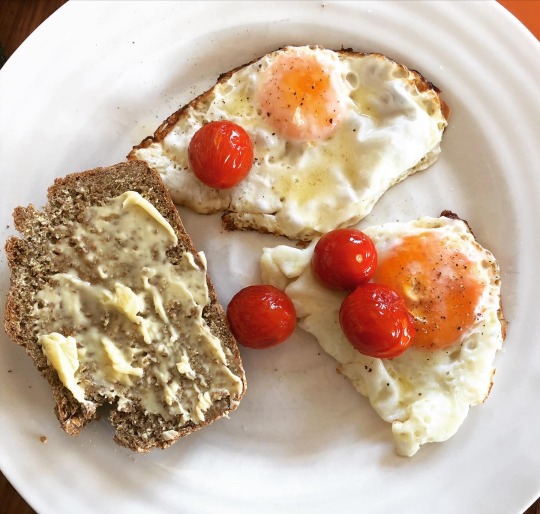
My favourite bread of the lockdown - and no yeast required. Based on a Paul Hollywood recipe, mine replaces stout with any old beer or lager you may have in the fridge, and a range of ‘bin end flours: Wholemeal, basic brown, spelt and strong white.
Ingredients:
500g wholemeal flour (or a mix of any brown or grain flours you have)
250g strong white flour
280ml buttermilk
300ml bottle of beer or lager
2 tsp salt
2 Tbsp. bicarbonate of soda
How to make:
Mix the flours, bicarbonate of soda and salt in a large bowl.
Make a well in the centre and add the buttermilk and beer.
Mix until everything comes together then knead gently until you have a cohesive ball.
Pop into a 2lb loaf tin and press slightly into the corners.
Leave to rest for 30 mins.
Heat the oven to 210C. Bake the loaf for 10 minutes, then turn the oven down to 180C and bake for a further 25-30 minutes. Cool in the tin for 10 minutes then turn out onto a wire rack. The base should sound hollow when you tap it.
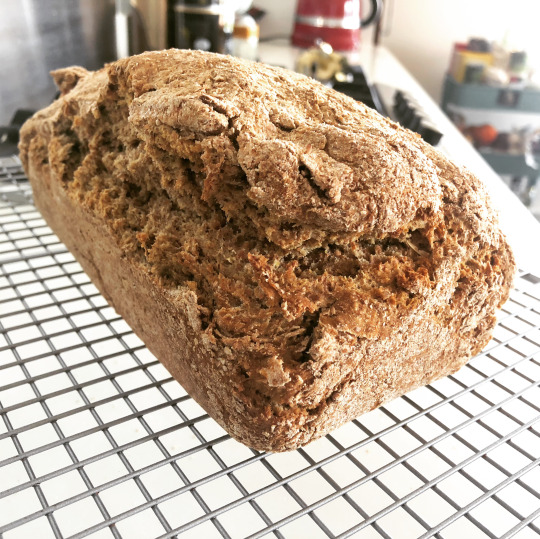
Cool then slice and slather with butter. This bread is also excellent toasted.
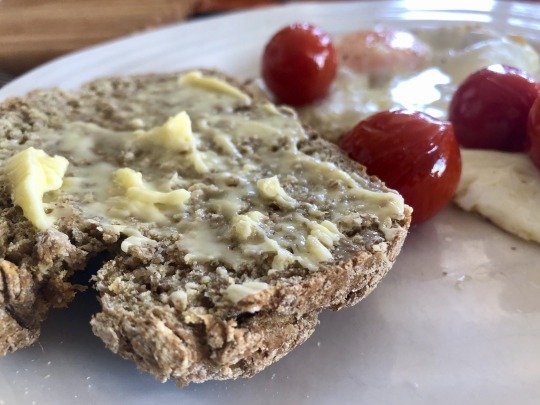
Spinach, Ricotta and Feta Pie
The superstar look of this pie as it emerges from the oven belies a super-easy method. If you can’t get hold of ricotta, just use cream cheese. Serves 4.
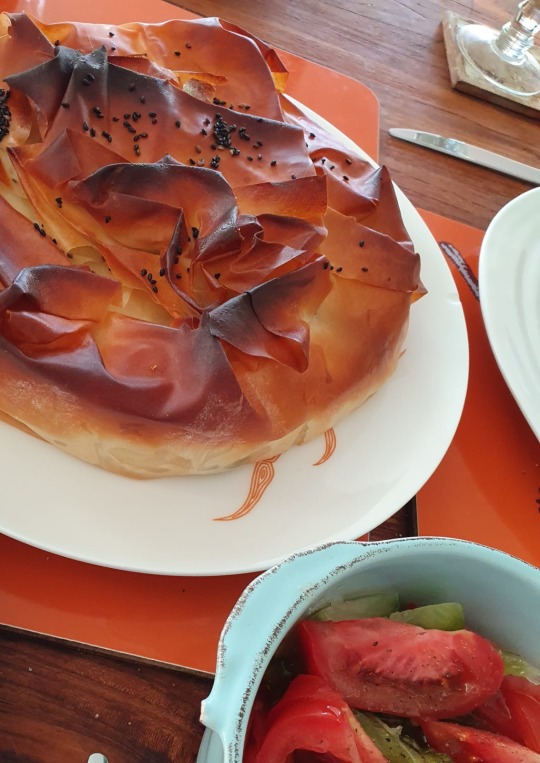
Ingredients
7 sheets filo pastry
2 garlic cloves, chopped finely
1 medium onion, finely chopped
250g spinach
1 large egg
1 tsp. Grated nutmeg
250g ricotta, mascarpone or cream cheese.
125g feta cheese, crumbled
Handful of fresh oregano leaves, chopped finely.
100ml olive oil.
1 tsp. Nigella seeds
How to make:
Heat the oven to 200C.
Heat 1 tbsp. Olive oil in a frying pan then saute the onion and garlic on a low heat until soft. Add the spinach and cook gently until wilted - about 5 minutes. Turn into a sieve or colander and squeeze out as much liquid as you can. Season with salt and freshly ground black pepper and put to one side.
Beat the egg with the ricotta and nutmeg then season. Crumble in the feta, then add the spinach and onion mixture.
Brush a 22cm loose bottomed cake tin with olive oil and lay a sheet of filo pastry along the bottom and the sides. Brush again with oil, then add a second sheet at an angle to the first. Keep brushing each sheet with oil, then adding the next layers at an angle until you have used six sheets and they are lining the tin in a flower petal formation.
Tip the spinach and cheese mix into the tin then fold each ‘petal’ of filo on top to form a lid to the tart. Brush with more oil then scrunch up the seventh sheet of filo, perch it on top of the pie and brush with the remaining oil. Scatter over the nigella seeds.

Pop into the oven for 25-30 minutes (watch the top so it doesn’t turn from golden to burnt).
Remove from the oven, cool slightly, before releasing the sides of the tin and transferring the pie to a plate to serve.

Carrot cake muffins with mandarin frosting

Not really the season for carrot-eating, but grated three carrots into this cake mix and you have a winner. And the frosting is a great way to use up mandarins. Makes 6 Large muffins.
Ingredients
1.5 cups plain flour
1.5 tsp. Bicarb of soda
¾ cup demarara sugar
½ tsp. salt
½ tsp. Cinnamon
1 cup cashew nut milk
2 eggs, beaten
½ cup sunflower oil
1 tsp. Vanilla Extract
3 carrots, shredded
50g pecan nuts, roughly chopped.
For the frosting:
Juice of 1 mandarin
1.5 cups icing sugar
How to make
Heat the oven to 180C.
In a large mixing bowl, combine the flour, bicarb. Of soda, sugar, cinnamon and salt. Add the eggs, oil, vanilla and cashew nut milk and mix again until a smooth batter. Fold in the carrots and the pecans.
In a muffin tin with 6 cases (or double the recipe and use 12). Fill each paper cup with the muffin batter until ¾ full then pop into the oven and bake for 20-25 minutes, until they are fully risen.
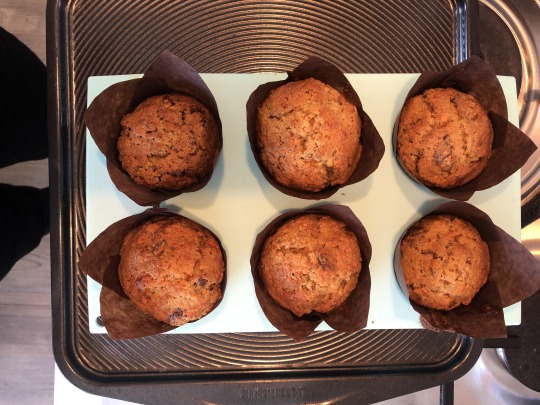
Remove from the oven and cool in the tin before removing each muffin and placing on a cooling rack to cool completely.
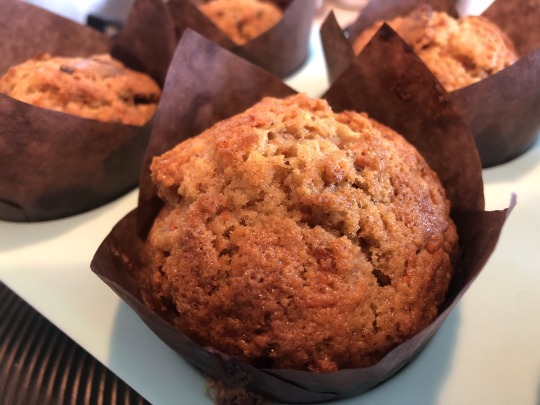
When the muffins are cool, mix the mandarin juice with the icing sugar until you have a smooth and sluggish paste. Ice each muffin and serve.

1 note
·
View note
Text
Hiiii!
Today I woke up super late, so instead of pressuring myself to hurry into the day I just took it slow. I had a coffee, a slice of toast and a banana for breakfast. I got dressed in some summery clothes and that made me feel good & I've made Australian crunch! Just waiting for it to cool down so I can pour all the chocolate on top 😋.
Goal today is to sort out our family garden, cleaning chairs and the table and were making a little garden planter for my mum at the end of the garden, just to make it a little nicer. Were also rearranging where my sisters toys are going to go so it all looks neat out there.
My mum works in waitrose so she's a key worker, hopefully when she comes back she'll be happy to have a clean garden and some nice pudding 🤣 but its so hot out, i just want to sunbathe forever and ever.
I made a new instagram post today, showing the difference between a posed photo and a resting photo, just to show that although your favourite models/celebs/influencers may show off this perfect body & life (which is okay! Anyone can share the parts they want to share of their lives) its not always that smooth running, when they sit down they are a lot more natural and have insecurities just like us! They might not want to share them, but that doesn't mean they're perfect 24/7! That was kind of a ramble but hopefully my point got across 😅.
I've almost finished the book im currently reading, Normal People by Sally Rooney, i know its become a BBC 3 series but i really wanted to read the book first, as the characters can form in your own imagination and you create or own interpretation of the story! I will watch the series after I've finished the book just to compare and see how they cast the characters and their lives, also how well they capture the 2010s in a 2020 series, i think its so interesting to see the difference in interpretation from your head to people who actually transfer the words from the page into TV.
I havent been out much recently, for the first 6/7 weeks of lockdown in England i mainly stayed inside, when the rules relaxed to unlimited exercise and meeting with 1 person outside my household with a 2 metre distance about 3 weeks ago, ive been seeing my boyfriend once a week on a Wednesday for a walk round the fields as I live in the countryside. Its hard not being able to be near him but in a global pandemic I think just seeing his face is good for me! Just need to remember all the people who can't even see their families right now or have been affected by the virus!
This was quite a long one 🤣 oops. But just remember we are all strong and beautiful, whether you could only get up today and sit around or you got up and did loads of things, you still did something, this isn't a productivity contest and different things help the boredom for different people :) were all going to come out of this stronger & hopefully we will all be a lot more grateful for the things we had around us that we didn't notice properly before!
Stay positive & remember im always here to chat.
Jess x
(Heres the Australian crunch recipe...
INGREDIENTS:
200g of margarine or butter
140g of caster sugar
85g dessicated coconut
75g of cornflakes crushed up
1 heaped tablespoon of cocoa powder
140g of self raising flour
And 250g of chocolate for topping
METHOD:
Melt butter or margarine in the microwave till melted
Mix all the dry ingredients together (not the chocolate topping)
Pour in the butter or margarine into the dry ingredients and mix!
Once mixed, pour into a baking tray, big enough for a Swiss roll, then flaten down to the corners to avoid any burnt edges
Put in the oven for 35 minutes at 180c / fab 160 / gas 4 and when done let completely cool.
Once completely cool, pour over melted chocolate (i would advise to keep it in the baking tray for now) and pop in the fridge to set. Once set, take out 30 minutes before you plan to cut it & eat it, it'll be so much easier to serve at room temperature!
And done!! )
#motivation#gardening#home & lifestyle#ootd#mental heath support#positive mental attitude#mental help#mentalstrength#mental health#i love you#love your life#love your flaws#love yourself#self love#love quotes#lovers#loveyourself#books#authors#recommendation#cooking#community#communication#instagram#social media#fun#food
0 notes
Text
Since we’ve got all that time on our hands these days, dear friends, we might as well try out some of those wonderfully tasty slow cooking recipes in the oven – those really filling, mostly Mediterranean creations with oodles of melted cheese on top that we usually eat only at the restaurant because most of them take so long to get ready. We mustn’t forget, though, that most of the time is taken up by the actual baking process, and not all of these recipes take a lot of preparation time – some do, though, like stuffed peppers or moussaka…
So, I’ve put together here my favourite ‘al forno’ recipes for you; some take longer than others, some are quicker, some are very easy to do, and some are vegetarian, so I hope you’ll all find something here to try out yourself!
Stuffed peppers and tomatoes
4 tomatoes, 4 peppers, 1 onion, 4 potatoes, 250g mincemeat (optional), 250-300g rice (round grain), 50g breadcrumbs, 250g passata, olive oil, salt, pepper, sugar, parsley, mint
Allow me to start with some recipes from Greece, dear friends, which was my adopted home country for 20 years; it’s got one of the tastiest and most famous cuisines in the world, and I learned a lot about cooking there!
Stuffed peppers and tomatoes have become very trendy lately, though admittedly they involve quite a lot of work and also a bit of care: you’ve got to scoop out the tomatoes carefully in order not to get a hole into them. It’s fun, though, when you’ve got nothing else to do! You can do this as a vegetarian dish if you like, leaving out the mincemeat and adding more rice instead.
Cut the tops off the tomatoes and peppers and scoop out the tomatoes with a spoon (carefully!); put them all into a big baking tin and put salt and pepper on all of them and also a bit of sugar on the tomatoes.
Chop the onion and fry it with the mincemeat (optional) in oil; add the chopped flesh from the tomatoes, the passata, the rice and 100ml water. Season with salt, pepper, parsley and mint and let simmer for 15-20 minutes. (You may have to add some more water in the process.)
Fill the tomatoes and peppers with the mixture, put breadcrumbs on top and then the tops of the vegetables. Cut the potatoes into 4-8 pieces and add them to the tray in between the vegetables; preheat the oven to 180°C.
Add salt, pepper, passata, olive oil and water and bake in the oven for about 2 hours; you’ll have to keep an eye on it and add more water regularly (about every 20 minutes, towards the end more frequently). Make sure to take them out of the oven before the tops get burned!
(This photo is of my special Halloween stuffed peppers – you can really get creative with the peppers if you like, carving funny faces into them!)
Stuffed aubergines
2 big aubergines, 1 onion, 2 tomatoes, 250g mincemeat, 1 egg, 50g breadcrumbs, 250g grated cheese, 50g butter, 500ml milk, 250ml passata, 2-3tsp lemon juice, 2tbsp flour, salt, pepper, cloves, allspice, nutmeg, parsley, olive oil
Another Greek favourite are stuffed aubergines – literally one of the most delicious recipes in the whole world! Like stuffed peppers and tomatoes, it’s a bit difficult to do, but it most certainly is worth it…
Fry the whole aubergines in a pan with oil for 8-10 minutes, turning them around regularly. Let them cool down a bit, then cut off the end bit and cut them in half; carefully scoop them out with the help of a knife and a spoon – be sure not to hurt the outer part of the skin, which will be soft by now! Put the aubergine halves in a big baking tin.
Chop the onions and fry them in oil with the mincemeat, chop the aubergine flesh and the tomatoes and add them together with the passata, salt, pepper, cloves and allspice (those two indispensable ingredients of Greek cuisine!) and let simmer for 5 minutes. Then, add the parsley, the breadcrumbs and 50g cheese.
Heat up the butter in a pot, add the flour and then the milk while whisking, bring to boil and let simmer for 5 minutes. Add salt, pepper, nutmeg, lemon juice, the egg and 50g cheese and keep stirring; after about 5 more minutes, your bechamel sauce will be ready – you can also use a packet with ready bechamel sauce powder, of course, but it won’t be quite as tasty as a homemade one!
Fill the aubergines with the mincemeat mixture and pour the bechamel sauce on top, then add the rest of the cheese. Bake in the oven at 180°C for 40 minutes, and you’ll have one of the greatest Mediterranean meals you’ve ever tasted! By the way, in Greek they’re called ‘melitzanes papoutsakia’ (little aubergine shoes) because they look a bit like that…
Moussaka
2 aubergines, 4 courgettes, 4 potatoes, 2 onions, 2 tomatoes, 500g mincemeat, 3 eggs, 100g breadcrumbs, 50g butter, 250g grated cheese, 3-4tsp lemon juice, 1l milk, 500ml passata, 4tbsp flour, 100ml white wine, olive oil, salt, pepper, cloves, allspice, cinnamon, oregano, parsley, nutmeg
And here’s the most famous of all Greek oven baked dishes: moussaka. It takes even more preparation than the previous two recipes, but it’s easier to do; what you have to do is basically just a lot of vegetable slicing…
Slice the aubergines, the courgettes and the potatoes and fry them one by one in oil, then put them on 3 different plates with kitchen paper at the bottom so that it can soak up the surplus oil.
Chop the onions and fry them in oil with the mincemeat, meanwhile chop the tomatoes as well. Add them to the mincemeat together with the passata, cloves and allspice, salt, pepper, cinnamon, oregano and parsley and the wine and cook for 15-20 minutes. Then, add the breadcrumbs, 50g cheese and one egg and let simmer on a low flame while you do the bechamel sauce.
Heat up the butter in a pot, add the flour and then the milk while whisking, bring to the boil and simmer for 3 minutes. Then, add salt, pepper, nutmeg, lemon juice and 50g cheese and 2 eggs and let simmer on a low flame for 5-6 more minutes.
Oil a big baking tin and put the slices of potatoes, aubergines and courgettes on it in a nice array. Then, add the mincemeat and top with the bechamel sauce and the rest of the cheese. Bake in the oven at 180°C for 1 hour at least until the top looks a nice golden brown.
Pastitsio
500g macaroni (bucatini), 500g mincemeat, 2 tomatoes, 1 onion, 3 eggs, 250g grated cheese, 1l milk, 50g butter, 500ml passata, 2-3tsp lemon juice, 2tbsp flour, olive oil, salt, pepper, parsley, cloves, allspice, cinnamon, nutmeg
And here’s another Greek family favourite, which is much easier to do than the other three: a maraconi gratin similar to an Italian lasagne! First, cook the bucatini (the long variant of macaroni, with a hole in the middle) for 15 minutes; chop the onion and the tomatoes, fry the onion with the mincemeat, then add the tomato and the passata together with salt, pepper, parsley, cloves, allspice and cinnamon and simmer for 10 minutes.
In a pot, prepare your bechamel sauce: heat up the butter and add the flour and then the milk while whisking; bring to boil and simmer for 3 minutes, then add salt, pepper, nutmeg, lemon juice, 2 eggs and 50g cheese and keep simmering, stirring very regularly. Meanwhile, add the other egg and 50g cheese to the mincemeat and keep simmering for 5 more minutes.
Put the macaroni in a big round or square baking tin, add the mincemeat and top with the bechamel sauce and the rest of the cheese; bake in the oven at 180° for 40-50 minutes – ready!
Courgettes au gratin
1 kilo courgettes, 250g pasta or 4 big potatoes, 100g flour, 1 packet bechamel powder, 250g grated cheese, 50g breadcrumbs, butter, oil
The French also are very good at oven baked dishes – it’s no coincidence that the ‘English’ word for a casserole dish baked in the oven is ‘gratin’… And this one’s quite easy to do, and it’s vegetarian, too!
Slice the courgettes and turn the slices in flour on a plate, then fry them in oil with salt. Meanwhile, cook the pasta of your choice or the potatoes, whichever you prefer.
Now, in my previous recipes from Greece I’ve told you how to do a homemade bechamel sauce; since most French housewives prefer a ready mixture nowadays, though, you might do the same because it’s a lot easier. Just prepare the sauce according to the instructions on the packet!
Put half of the bechamel sauce in a big baking tin, then add the courgette slices and the pasta or the sliced potatoes and the breadcrumbs. Top with the other half of the bechamel sauce, the cheese and flakes of butter and bake in the oven at 220°C for 20 minutes. A tip: you can also do this with broccoli instead of courgettes!
Spinach souffle
1,5kg spinach, 4 eggs, 1 packet bechamel powder, 200g grated cheese, 50g butter, salt, pepper
Another famous French dish, also vegetarian and also easy to do: wash the spinach, tear it into pieces and cook it in salted water for 15-20 minutes. Meanwhile, prepare the bechamel sauce according to the instructions on the packet. Beat the eggs in a bowl with a whisk.
Drain the spinach and mix it with the bechamel sauce, then add the eggs and half of the cheese and stir well. Put the mixture in a baking tin and top with the rest of the cheese and butter flakes. Bake in the oven at 220°C for 20 minutes, and you’ll have a wonderfully creamy and also very healthy vegetarian family dinner!
Lasagne al forno
6-8 sheets lasagne, 250g mincemeat, 500ml milk, 1 tomato, 250ml passata, 1 onion, 3 eggs, 300g grated cheese, 50g butter, 2-3tsp lemon juice, 2tbsp flour, olive oil, salt, pepper, parsley, cinnamon, nutmeg
The probably most famous ‘al forno‘ dish of them all comes – of course – from Italy: lasagne. Not only Garfield, but all the world loves it, and you can find it in US diners, British pubs and Australian kitchens. And it’s not difficult to do, either! And just in case you’re wondering: no, there’s absolutely no need to cook the lasagne sheets first…
Chop the onion and fry it in oil with the mincemeat; add the chopped tomato, the passata, salt, pepper, parsley and cinnamon and simmer for 10 minutes. Add some water if necessary.
Heat up the butter and add the flour and then the milk while whisking, bring to boil and simmer for 3 minutes; then add 2 eggs, salt, pepper, nutmeg, lemon juice and 50g cheese and simmer for 5-6 more minutes; don’t forget to keep stirring! Meanwhile, add the other egg and 50g cheese to the mincemeat and keep simmering.
Put a thin layer of mincemeat in a rectangular baking tin, then a lasagne sheet, then a thin layer of bechamel sauce, then another lasagne sheet, then a thin layer of cheese, then another layer of mincemeat, another lasagne sheet, another layer of bechamel sauce, another lasagne sheet and another handful of cheese; repeat this procedure until you’ve used up all the ingredients, and top with the last bit of cheese. Bake in the oven at 180° for 40 minutes – fantastico!
Tortellini al forno
500g tortellini, 300g ham or bacon, 200ml cream, 250g grated cheese, salt, pepper, olive oil
Even simpler and faster than lasagne, you can do tortellini in the oven with a cream sauce: first, cook the tortellini for 15 minutes. Meanwhile, cut or cube the ham or bacon.
Put the tortellini in an oiled baking tin together with the ham or bacon, add the cream, salt and pepper and top with the cheese, and bake in the oven at 220° for 20 minutes – simple as that!
Shepherd’s Pie
500g mincemeat (lamb), 2 onions, 1kg mashed potatoes, 2 carrots, 200g peas (tinned or frozen), 200ml passata, 30g butter, 2tsp Worcestershire sauce, ½ vegetable stock cube, salt, pepper, oil
Here’s an old British oven favourite beloved by young and old, and quite easy to do, too. If you can’t find any minced lamb, you can do it with minced beef instead, which will turn it into a cottage pie!
Chop the onions and slice the carrots and fry them in oil with the peas, then add the mincemeat. Season with salt and pepper, add the passata, the Worcestershire sauce (if you haven’t got any, the best substitute is vinegar), 100ml water and the stock cube and let simmer for 15-20 minutes; add some more water if necessary. You can buy your mashed potatoes ready, or use powder to prepare it while the mincemeat is simmering.
Put the mincemeat in a big oiled baking tin, top with the mashed potatoes and butter flakes, and bake in the oven at 180°C for 35-40 minutes.
Welsh Rarebits
8 slices white bread, 200g grated cheese, 100ml milk, 150ml beer (preferably Guinness), 1tsp Worcestershire sauce, 2tsp mustard, salt, pepper
Yes, the Welsh have got a very famous oven dish, too! It’s easy to do, and it makes a great brunch or snack or even a light dinner.
Heat up the milk in a medium pot, then add the cheese and stir well; add salt, pepper, mustard and Worcestershire sauce (again, if you haven’t got any, use vinegar as a substitute) and the beer and let simmer on a low flame for 8-10 minutes until it’s really nice and creamy; don’t forget to keep stirring! Preheat the oven to 220°.
Toast the bread slices and put them on a baking tray laid out with baking foil (you can also use fresh bread that doesn’t need to be toasted); pour the sauce on top of them and bake in the oven for 5-6 minutes. Serve with some more beer!
I hope you’ve all found something here that aroused your interest, dear friends; happy cooking, and take care, till next time!
Roberta’s Recipes: All things Al Forno Since we’ve got all that time on our hands these days, dear friends, we might as well try out some of those wonderfully tasty slow cooking recipes in the oven – those really filling, mostly Mediterranean creations with oodles of melted cheese on top that we usually eat only at the restaurant because most of them take so long to get ready.
#British Cuisine#Cooking#Food#French Cuisine#Greek Cuisine#Home#International Cuisine#Italian Cuisine#Lockdown#Oven#Recipes#Slow cooking#Stay Home
0 notes
Last Seen Blogs

raackete
Club Raack.ete

juniemunie
a square peg in a round hole

elliehopaunt
Treat each other like poets and geniuses...

npczoey
NPCZoey

thatdeadaquarius
lower ur expectations!!