#Sharpening
Text

SHARPENING ACTION for Photoshop
It's a small thing we don't always think about when editing a picture, but sharpening really does create a difference in your final edit!
DOWNLOAD THE ACTION HERE
You may like or reblog this post, no need to credit me if you use this resource!
Consider supporting me on Ko-Fi if you can ♡
#sharpening#sharpening actions#photoshop action#pshelp#photoshop resources#resources#actions#free#free misc
194 notes
·
View notes
Text


SHINE ON ME . ATN
by clicking the SOURCE LINK you will find the "shine on me" action. It comes in three versions. It can look too sharp and might need editing the opacity of the gaussian blur or last sharpen filter. This action was made from scratch. You can edit this as you like for personal use. Don't use this action for commissions or paid content! Don't claim as your own or redistribute. Please reblog if you found this helpful.
Important: for this atn to work, your gif must be in video timeline format and converted into a smart object.
#sharpen action#sharpen#sharpening#sharpen atn#gif sharpen#gif sharpen action#atn#yeahps#rpc#rph#gif pack
158 notes
·
View notes
Note
how do you sharpen your gifs???? they're insanely high quality!
Hello, Anon dearest, and thank you so much! ✨ To answer your question properly, I would first have to know which gifset(s) of mine you're referring to because I've made a lot over the years and I often change my sharpening settings, too. It totally depends on what I'm working with at the moment, to be honest. 😅
But, as for the last few sets of mine (this, this, and this in particular), I used these settings:
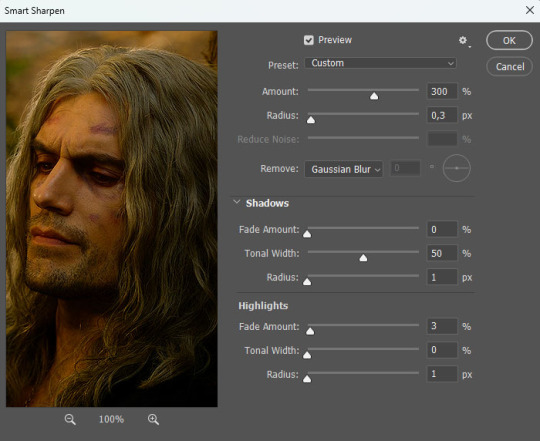
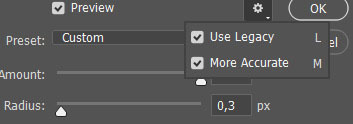
After converting my frames/layers into a smart object, I applied the settings above. Remember to click on the gear icon in the upper right corner and check both 'Use Legacy' and 'More Accurate' as well. This will make your sharpening look more 'natural' and less cakey imo.
Below is a comparison of before and after:


Note: This Geralt screenshot was taken from a 4K (2160p) video. Most videos I work with are at least 1080p or 720p because quality matters.

And here's the final result: colored, brightened, and sharpened.
—
I hope this answers your question. If not, feel free to send me more questions about this kind of stuff. I'm always happy to help out :)
#replies#anon#photoshop#tutorial#resources#ps help#sharpening#gifs#giffing#completeresources#allresources#chaoticresources#my gifs#my tutorials
145 notes
·
View notes
Text

CUPID.ATN *
╰ * clicking on the source link you will find the “ cupid ” action . it can look too sharp so you might need to edit the opacity . this action was made by me from scratch , you can edit this as you like but only for personal use , so don’t claim as your own or redistribute . if you found this helpful consider giving this a like / reblog and follow me for more of my resources .
206 notes
·
View notes
Photo
Camera Raw filter for gifmaking - a Camera Raw tutorial
Camera Raw is one of the many filters available on Photoshop that can enhance how your gifs looks. If you’ve seen gifs on Tumblr that look hyper realistic and you can see the pores and nonexistent imperfections on the subjects face, it is probably because of the Camera Raw filter. Follow the steps below to use the filter if you’d like for your gifs to look like the one above:
Since this is an intermediate level gif making skill, I will assume that you know how to import videos to frame animation. Once you have your frame animation timeline, you’ll follow the steps below.
1. Select All Frames and then Select All Layers. Make sure the first frame and first layer are selected before selecting all frames/layers.
2. Convert your frame animation to video timeline by pressing this button:

3. Convert your selected layers to one Smart Layer for Filter by clicking Filter > Convert for Smart Filters
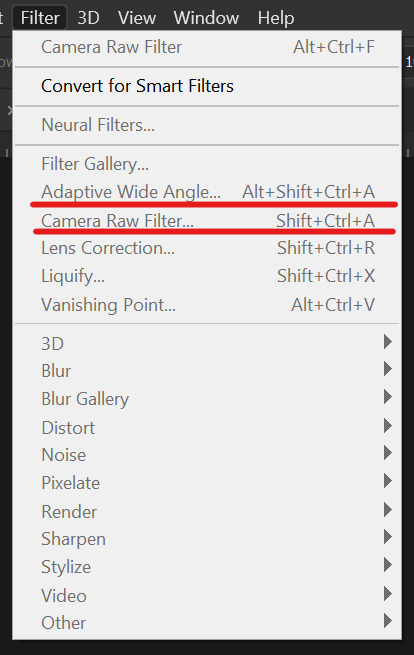
4. Click Camera Raw Filter here:
5. This window will open up for you:

It seems like a complicated system but all you need to focus on is the Texture and Clarity settings. Play around with these setting till you find the right combination you like. The picture above has my own personal settings so feel free to start using the filter with these!
Texture: Brings out the real skin texture and texture of inanimate objects
Clarity: Bumps up the quality of the surroundings of the main subject matter and makes the subject stand out.
6. (Optional) You can add more filters like Smart Sharpen or Gaussian Blur as it fits your liking.
7. Convert the video timeline back to frames and enjoy your new pretty hyper realistic gif!
NOTE: If you’d like to use Camera Raw with an action to try it out, feel free to download my Camera Raw action here. Just load your frames, select your first frame and layer, press play and sit back! Join us at userdramas for more tutorials like this! Apply here!
#tutorial#resource#allresources#chaoticresources#itsphotoshop#photoshop#photoshop resources#admin post#gifmaking#sharpening
860 notes
·
View notes
Text


@usernare sharpen action
by clicking on the source of this post you'll be able to purchase this sharpen action. it's a very basic action and you can edit it as you see fit at the smart sharpen and noise settings. like or reblog if you find this action useful, and don't share it as your own. my inbox is open for all questions about it.
#sharpen action#sharpen#sharpening#rpc#rph#action#atn#yeahps#usermina#dont know what to tag#nares version
126 notes
·
View notes
Text


♡ heldis.atn
by clicking the source link below you'll be able to purchase my sharpen actions [3in1]. all of the actions were made by me, so please do not redistribute or claim them as your own. please reblog post if you found these useful.
#sharpen action#sharpen#sharpening#rpc#rph#action#atn#yeahps#itsphotoshop#sharpen actions#photoshop atn#sharpen atn#♡
59 notes
·
View notes
Note
hello! im a newby gimaker and i want to follow your tutorial on sharpening but i dont know how you got to the photoshop page you started from where it looks like a video timeline. can you tell me how you got there? <3
Hey!!
Welcome to the wonderful world of gifmaking <3 yes i can lead you through to that point. I have a mac so this might look different for you, but all the steps stay the same - I just shifted from windows to mac so i know this xD
I'm going to show you how to do this on this gif:
I prefer to use screenshots for my gifs (I also don't know how else to make them), so I use Mplayer for that. I used to use MPV player but that stopped working with my new computer system.
First, you want to make sure that you're using a high-quality file. If 1080p is available to you, use 1080p at the very least. This will make sure your gifs are crisp and sharp.
Open your file with Mplayer. Then find the bit that you want to gif. I sometimes search forward by frame by using the ">" key. Once you're at the start point of your desired gif, pause the video. Then, Cmd/Ctrl + Shift + S to start screenshotting. The video will start to play slowly as the screenshots are captured. (They go to the desktop automatically but you can change that in interface settings).
The rest of the tutorial is under a cut:
Once you get your screenshots, you're going to go Photoshop. File > Scripts > Load Files Into Stack.

You're going to get a dialogue box. Click Browse and load the screenshots that you want. This is what that looks like when you finish:
Next, you're going to crop your gif, using the crop tool. You can press C on your keyboard for this or use the tool with this icon in the sidebar.

For this, I'm using an aspect ratio of 540 x 400:

Click that checkmark to crop. Once you do, we're going to resize the image. Use the Cmd/Ctrl + I function to bring up this box. For tumblr gifs, you want to change the width. The height doesn't really matter but if the width doesn't match up, Tumblr is going to fix it for you and it'll look funky. Per row:
1 gif , we use 540px
2 gifs, 268px each
3 gifs, 177, 178, 177 px
We're just doing one, so I'm using 540px.

Now, you want to make sure you can add the timeline. In the top bar, go to Window > Timeline
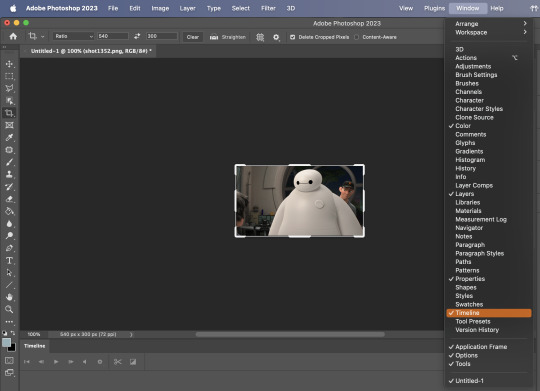
This will bring up the timeline.

From there, click "Create Frame Animation" (you might have to press the arrow in the timeline bar first.)
It's going to look like this:

We're going to use those three lines in the corner of the picture above. The first option we'll select is "Make Frames From Layers"
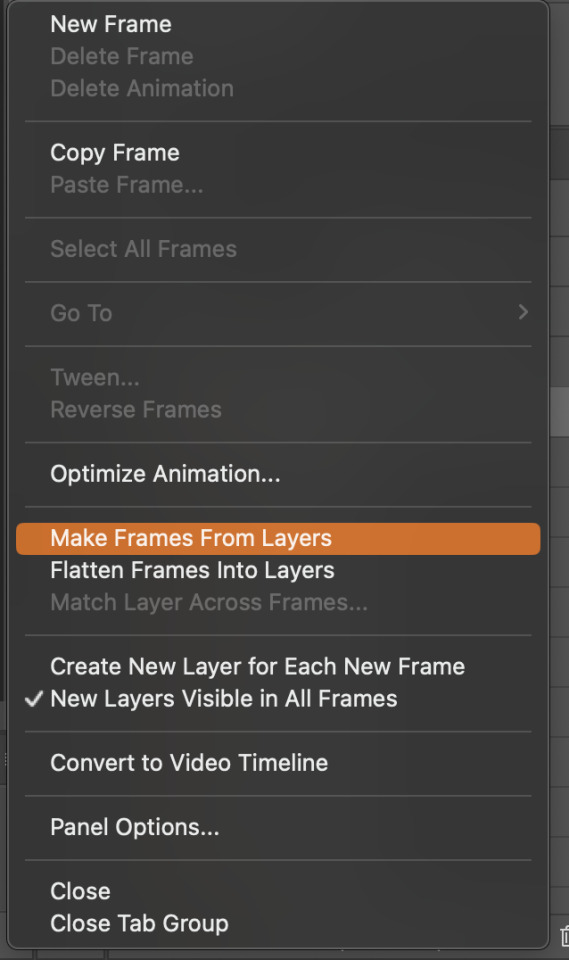
That looks like this:

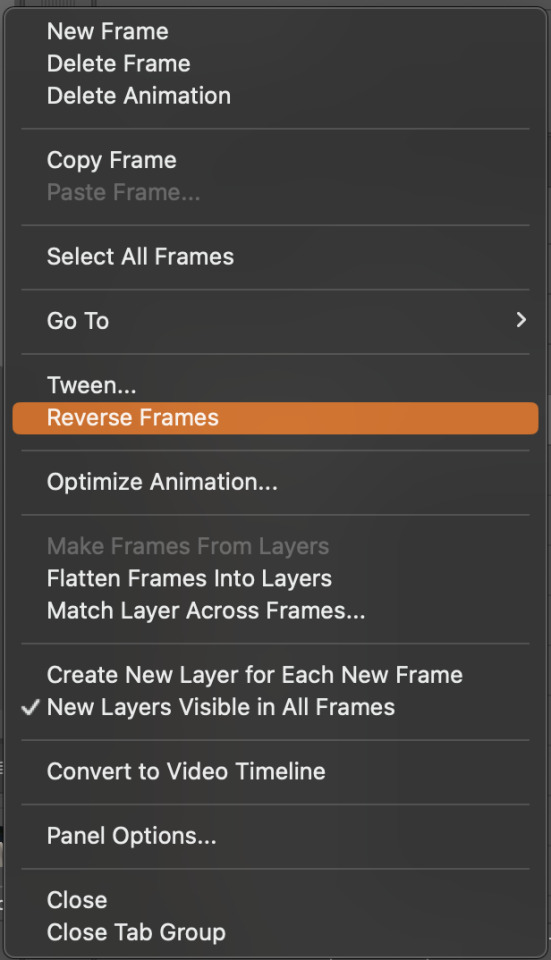
Now, when these load in, you may notice that they're all in reverse. To make them go back in order, we're going to go back to that menu and click "Reverse Frames."
Then, in that same menu, click "Select all Frames." We're going to change the animation speed. You want to make sure you have the first frame selected. We're going to click the arrow next to the "0 sec"
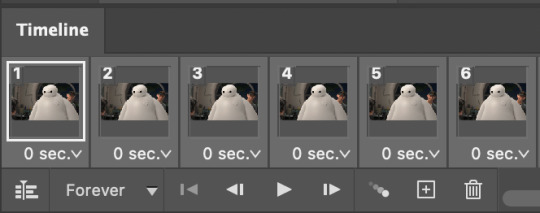
When you click that, it will give you a menu. Click, "other..." You should get a dialogue box that says "Set Frame Delay", just like the one below.
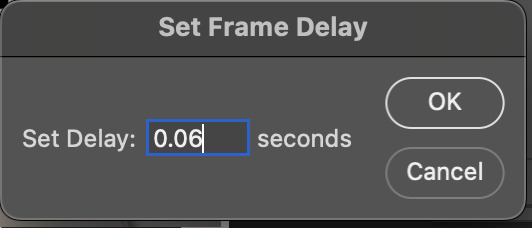
You want to use anywhere between 0.05-0.1 seconds. I find that anymore more is just too slow, so I prefer 0.06. This is fully changeable at the end of my sharpening tutorial, and you can use what you want, but that's what I prefer.
When you do that, it'll change the frame speed of all the gifs.
Now, go back into that little menu, and click, "Convert to Video Timeline."
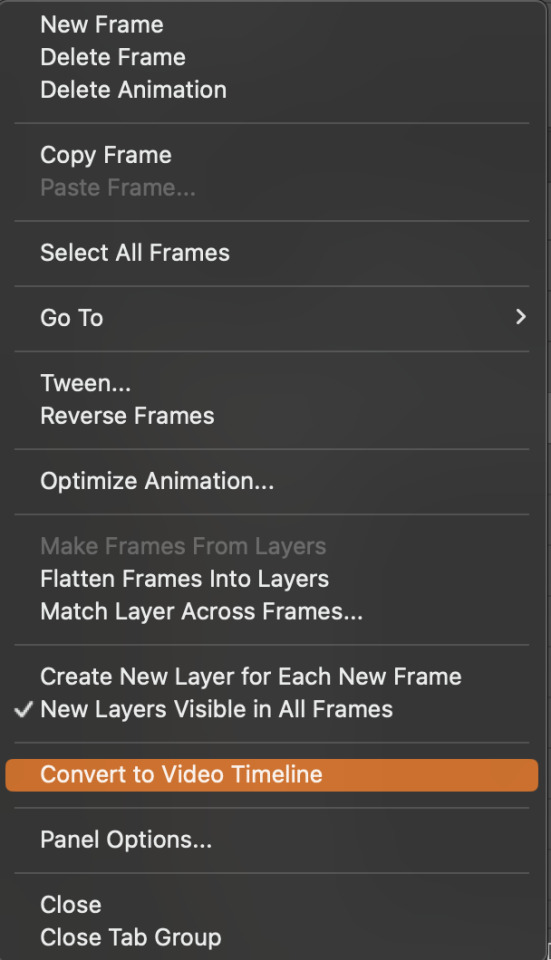
This is what it'll look like:

Now we're going to select all the layers in the right-hand pane. Once we do that, right-click and select, "Convert to Smart Object."
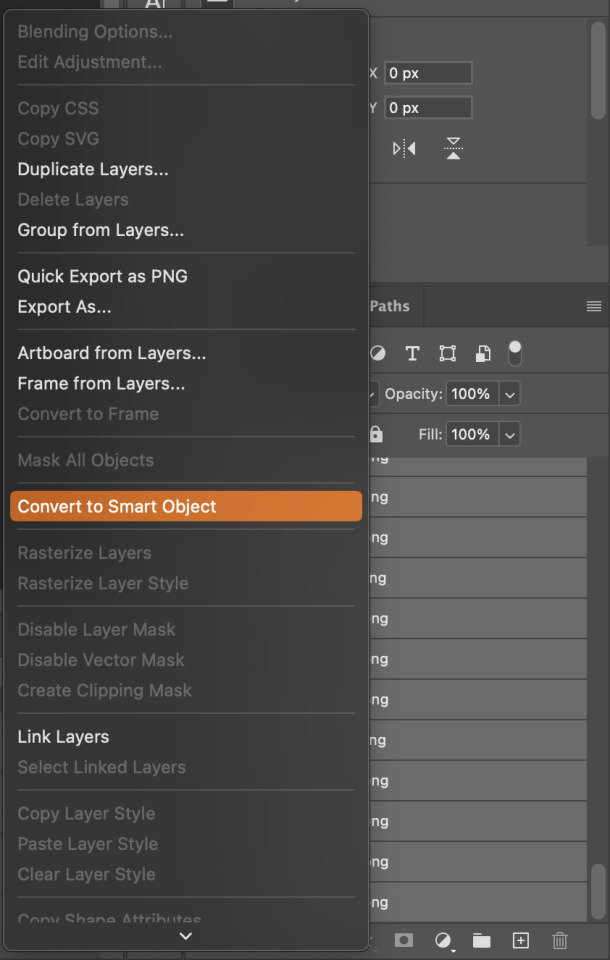
And you're there! Now you can use the sharpening tutorial to your liking.
Pro tip: Make an action with all these steps so you don't have to do them by hand with every single gif you make.
Hope this helps and it wasn't super long winded. Let me know if you have any questions <3 Happy giffing!
#zee answers#zee's tutorials#sharpening#gif creation#tutorials#gif tutorial#photoshop tutorial#resources#ps help#dailyresources#userphotoshop#completeresources
20 notes
·
View notes
Text


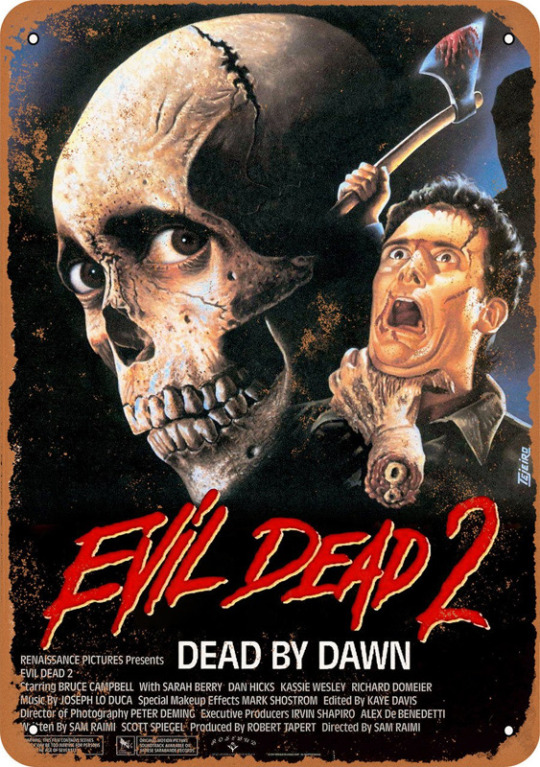


Evil Dead 2
for @ashyslashyy (chainsaws, blood, tape recorder)
X - X - X
X - X - X
X - X - X
#red#gray#black#white#evil dead 2#ash williams#blood#fake blood#tape recorder#chainsaw#sharpening#electronics#analogue#horror#scary#stim#stimmy#stimming#stimblr#sensory#stimboard#soda boards#horror stim#movie stim#sharp objects#hands
62 notes
·
View notes
Text
Here's a short video of how I use the plane tapping out tool. Hopefully this will give a better sense of how hard I'm hitting the blade with the hammer part of the tool. This corresponds to about how hard I hit the blade with a hammer if I'm tapping out that way.
if it looks like the tapping out tool is placed at an awkward angle, it is. This was so I could get a good camera angle. Normally it would be sitting directly in front of me on the bench.
At 27 seconds long, this video is worth 810,000 words.
16 notes
·
View notes
Text


1909 Leslie Lawn Mower Razor Blade Sharpener (SOURCE)
#tw hands#tw sharps#tw razors#vintage#vintage stim#fav#sharpening#sharpening stim#1900s#silver#rolling#razors#razor stim#silver stim#metallic#metallic stim#grey#black#white#stim#stims#stimmy#my gifs#mimiqueue
44 notes
·
View notes
Text


fotocopia. atn
by clicking the SOURCE LINK you will find the "fotocopia" action. It comes in three versions. It can look too sharp and might need editing. This action was made from scratch. You can edit this as you like for personal use. Don't use this action for commissions or paid content! Don't claim as your own or redistribute. Please reblog if you found this helpful.
Important: for this atn to work, your gif must be in video timeline format and converted into a smart object.
#sharpen atn#sharpen action#gif sharpen#gif sharpen action#sharpening#gif pack#rph#rpc#indie rp#finally releasing the winner sharpen action of my poll#thank you for over 600 followers!#a little something before my vacation starts :)
89 notes
·
View notes
Text
Been working on a bunch of random projects recently and haven't really finished any of them... Got a nice make your own backsaw kit, been trying to get decent at saw sharpening, working on some jigs for making some stakes furniture, and been working on improving my hand cut dovetails. Also been reading some great books from Lost Art Press, the Anarchist Design Book and the Joiner and Cabinet maker have been adding tons of fun ideas of things to make.
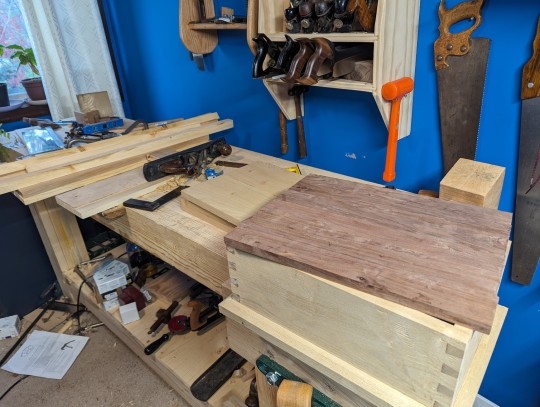
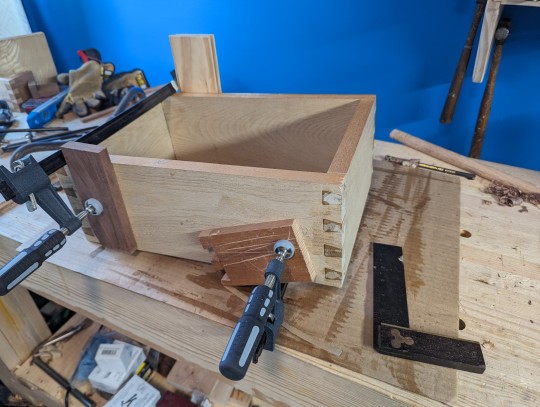
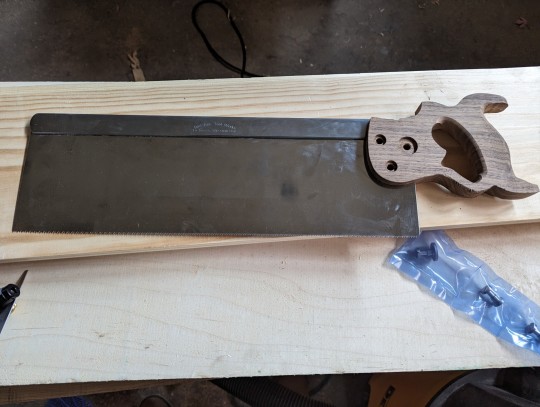

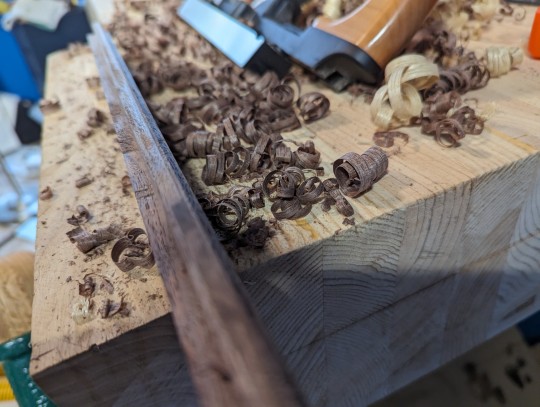
Oh and I got a new tongue and groove plane, it's super fun.
#woodworking#hobby#crafts#hand tools#messy shop#messy bench#too many projects#anarchist design book#the joiner and cabinet maker#dovetails#joinery#jigs#furniture#tools#saws#saw sharpening#sharpening#messy
19 notes
·
View notes
Photo


DELIGHT.ATN *
╰ * clicking on the source link you will find the “ delight ” action . it can look too sharp so you might need to edit the opacity . this action was made by me from scratch , you can edit this as you like but only for personal use , so don’t claim as your own or redistribute . if you found this helpful consider giving this a like / reblog and follow me for more of my resources .
409 notes
·
View notes
Text
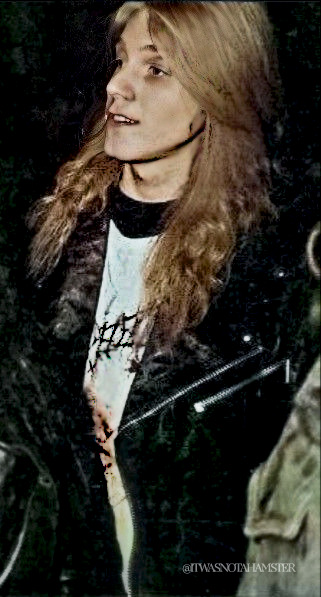
Per “Pelle” Yngve Ohlin (a.k.a., Dead) | Edit: @itwasnotahamster
if anyone knows exactly who took this photo, since I wish to give credit, please let me know.
#edit#sharpening#metal#metal music#black metal#music#Pelle Ohlin#Dead#Per “Dead” Ohlin#Per Ohlin#Per Yngve Ohlin#Swedish musician#Swedish black metal#Norwegian black metal#Swedish black metal artist#80s/90s#I think I am improving#itwasnotahamster
27 notes
·
View notes
Photo


source
121 notes
·
View notes
Last Seen Blogs

ladykendalsims
Lady Kendal Sims

paraguayanwood
analógicas

mari-mtt
yikes
xiamenspa
无标题

fabulous-emma-com
FABULOUS-EMMA-COM