#anyway anyway anyway take this all with like 3 tablespoons of salt
Note
what's your take on odasaku and dazai's idealization of him?
also any takes you want to share about bsd/bsd in general?
(If you don't mind, I'm also interested in your thoughts about verlaine if thats ok 😭) tyty
who's your fave bsd character and whose the character from bsd you want to have more screen time?
i think its another case of projecting onto someone and it fucking things up. like notably how kouyou projects her own feelings abt light & dark onto kyouka. we just dont often see it that way because what oda does is like. stereotypically good? he uses his dying words to push a friend out of the dark. a death motivating others to act and furthering their character development is classic storytelling. you go into bsd knowing dazai is on the "good guys" side (not that the ada are "bad" but obviously reading bsd as a good guys vs bad guys story is. wrong), so clearly it worked out. so you kind of overlook the surrounding events yk? plus dazais own idolization of oda hammers that in. dazai tells atsushi that "He was a friend of mine (...) He’s the reason I quit the Port Mafia and joined the
agency. I’d probably still be killing people for the mafia if it
wasn’t for him" in dead apple (the lightnovel. im not going to go through pulling up the movie for this fhfhtndj). and so aside from previous bias people are going to take what dazai says at face value. hes thankful oda showed him the "side that saves people" and of course we're going to agree with that. the thing is. again. projection. now i havent actually finished dark era (i am working through it) but a lot of the time it feels like oda is just shoveling off all his feelings about being "someone meant for the darkness" onto dazai when thats something thats not going to be true for. well. anyone really? and his final conversation with dazai is very influenced by that. he says "You told me if you put yourself in a world
of violence and bloodshed, you might be able to find a
reason to live... (...) You won’t find it (...) You should know that. Whether you’re on the side that
takes lives or the side that saves them, nothing beyond
your own expectations will happen. Nothing in this world
can fill the hole that is your loneliness. You will wander the
darkness for eternity". now the thing is this is kind of a fucked up thing to say to an 18 year old with suicidal tendencies, but odas view of dazai makes it seem like a well needed wake up call. he obviously had good intentions. hes trying to "step into that solitude" but because of his flawed view of dazai he kind of. stumbles. dazai up to this point has been clinging onto the hope that he'd find a reason to live by observing the entire human experience. now oda comes along and dazai thinks hes found someone who understands him better than anyone, and oda tells him hes not going to find that. ever. so he should become a better person and make the world a good place. and also he's dying. so dazai, as we've seen, takes these words to heart. so hes not going to find a reason to live but he should also make the world a better place. good cool got that. so i think he gets a bit too comfortable being collateral for a good cause. and hes already convinced hes not going to find anything here, so of course hes not going to find anything. does that make sense.
i dont think ive phrased anything correctly here but like anyway i think with all his other friends around he'll be able to sort things out there. i cant see bsd ending without any sort of resolution for him in this regard yk.
#i cant say much on verlaine since ive read barely anything of stormbringer#like up to meeting shirase i think#flags death just fucked with me#from what i know hes also got projection issues. very common bsd theme#as for my favorite character... well you all dont know this but my favorite is actually Dazai#big shocker ik#as for screentime like..idk i miss everyone#i just want normal agency bullshit back#actually ykw i desperately want to see ranpo kyouka and atsushi as a trio#ranpos weird little siblings sweep gogogogogogo#aethers asks#swearing cw#longer post#anyway anyway anyway take this all with like 3 tablespoons of salt#i obviously havent read or watched as much bsd as i should have to be making these takes fhdhhsjs
85 notes
·
View notes
Text
Cooking/Baking
How each of the sides react to baking or cooking something. Headcannons :3
Patton can cook and bake very well. He makes the majority of the meals for all of the sides. He adds in a little too much sugar in his baking perhaps, but everything turns out perfect and just delicious. If Logan reminds him, he'll take special care to make similar meals that don't upset anyone stomach (Roman needs something lactose free if at all possible).
Logan cannot work the kitchen to save his life. Microwaves and a pot of soup is about the extent of his talents. Gets very frustrated why after following the EXACT DIRECTIONS he still ends up with food to salty or too bland or burnt. Constantly reminds Patton of Roman's dietary needs (and if he could please make a dish of something spicy for himself, Patton and Virgil, no two drops of hot sauce is not too spicy, yes six tablespoons of chili pepper flakes is too much).
Roman can barely function the microwave. Is the sort of person to accidentally put metal into said microwave and panic about the fire until Logan throws some baking soda on it. His redemption is that he can make a MEAN coffee. If Roman is in a good mood, then he'll make Janus a fancy cup of something. He conjured an espresso machine years ago and it is now the most used appliance in the kitchen.
Virgil cannot cook much beyond a box of Kraft Dinner, but can bake surprisingly well. He learned most of his baking skills by following recipes that Remus sent him omitting the cup of chili powder or swapping the amount of salt and sugar with each other, inadvertently becoming amazing at tweaking a recipe so it turns out better than the original. Makes more bitter and more tart desserts. Logan and Janus prefer Virgils baking over Patton.
Janus refuses to bake, but will cook instead of Patton from time to time. Is most likely to remember favourite dishes of the others. Will always work wine into his dishes somehow (which is why he most famously makes excellent steak and stir-fry). He doesn't usually eat in front of the others on a day-to-day basis. Despite Patton's MANY attempts to get his recipes for his meals, he never tells him.
Remus is banned from the kitchen. Has the set the microwave on fire multiple times on purpose. He will occasionally bake anyway, primarily cookies, but he never has an objectively good recipe. His cookies will either have a cup of salt and a pinch of sugar, or an unhealthy amount of hot sauce, or shrimp mixed into the dough.
#sanders sides#headcanon#logan sanders#patton sanders#roman sanders#virgil sanders#remus sanders#janus sanders#cooking#baking#headcannons#long post#apologies#ts logan#ts remus#ts virgil#ts patton#ts roman#ts janus
37 notes
·
View notes
Text
anyways New Recipe Time
Dog food for your dad
aka easy to eat and digest mush for people who think vegetables are for girls and don't have teeth.
ingredients, the quantities are suggestions, follow your heart.
6 potatoes.
2 lbs of chicken
an equal amount of broccoli to potatoes.
2 cups rice
vegetable oil
an stick of butter
corn starch
garlic salt
Paprika
oregano
like, an entire bottle of barbecue sauce. just the most barbecue ass barbecue sauce you can find. It doesn't matter, it's mostly for color.
Step 1: cut the potatoes into like, Roughly one inch sections, you want them bite sized but not like, tiny. add a few tablespoons of oil, and then use vibes to determine the paprika oregano and garlic salt.mix that all together and set them up on a baking sheet in a single layer.
Step 2: preheat the oven to 425°f and slap them in. cook for roughly 45 minutes to an hour. you want them softened but still firm enough to hold their shape
Step 3: cut the chicken into one inch cubes, coat in a light layer of corn starch.
Step 4: drop the butter into a big ass pot over medium high heat, toss the broccoli in while you're waiting for the butter to melt. once it is melted add paprika and garlic salt,stir that all together then add the chicken cubes. make sure all chicken is touching the bottom of the pan.
Step 5: fuck off for like 5 minutes, until the underside of the chicken is crispy. This is for texture not for food safety so don't worry about cooking it all the way.
Step 6: un fuck off, take the pot off the heat wait for like. idk. a "vampire" by the Orion Experience length of time. Dump the 2 cups of rice over the chicken and broccoli, then slowly add 4 cups water to the pot. put it back on medium heat. mix it together, and cover until the rice is done, like 20 minutes.
Step 7: the potatoes should be done around now. take them out of the oven and let them sit while you find the barbecue sauce and check the rice.
Step 8: if everything is done cooking, add the potatoes and barbecue sauce to the rice. stir it together and serve hot.
note: this makes a fuck ton and keeps pretty well. package what's left and nuke it when you next want some daddy doggy food.
26 notes
·
View notes
Text
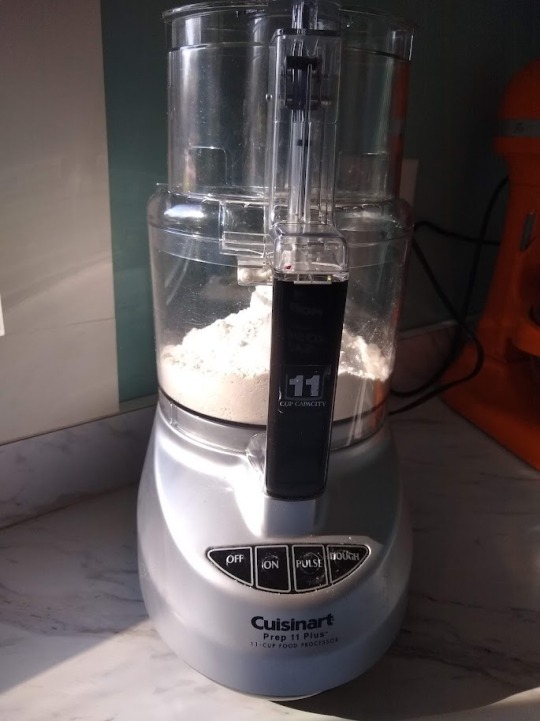
@fluffnflightillustrations is always asking me for pie crust tips and I never know what to do say because I just..do it. I am there and the food processor is there, and then it is pie crust. Anyway, I was making a pie today and I decided to document the process for posterity.
This recipe is based on J. Kenji Lopez-Alt's food processor piecrust recipe. (he was the same guy who invented the vodka pie crust method but doesn't own the copyright to it, so he can't ever talk about it. Anyway, this one is fine). I've made it a couple of times a year for, I don't know, over a decade.
Here are some facts about pie crust to keep in mind:
Flakiness is caused by pockets of butter surrounded by flour. That's the goal here.
Every pie crust recipe in existence includes dire warnings about how it will turn into particle board if you put in too much water. In one sense, yes, the goal is to use as little water as possible. On the other hand, if you're having trouble getting it to come together, just add some damn water. Every homemade pie crust I have ever made was a million times better than a store-bought pie crust, even if I did add 2T.
If your pie crust comes out bad or you don't notice a difference between store bought and homemade, there is no shame in store bought pie crusts! Life is about figuring out what is worth it to do from scratch and what isn't and that varies from person to person.
I am not a baking expert, I am just a girl who tries stuff s
HERE'S MY METHOD:
Ingredients:
2 1/2 cups (12.5 ounces; 350 grams) all-purpose flour
2 tablespoons (25 grams) sugar
1 teaspoon (5 grams) kosher salt
2 1/2 sticks (10 ounces; 280 grams) unsalted butter (kept in fridge), cut into 1/4-inch pats
6 tablespoons (3 ounces; 85 milliliters) cold water
tl; dr version:
1. Combine two thirds of flour with sugar and salt in the bowl of a food processor. Pulse twice to incorporate. Spread butter chunks evenly over surface. Pulse until no dry flour remains and dough just begins to collect in clumps, about 25 short pulses. Use a rubber spatula to spread the dough evenly around the bowl of the food processor. Sprinkle with remaining flour and pulse until dough is just barely broken up, about 5 short pulses. Transfer dough to a large bowl.
2. Sprinkle with water then using a rubber spatula, fold and press dough until it comes together into a ball. Divide ball in half. Form each half into a 4-inch disk. Wrap tightly in plastic and refrigerate for at least 2 hours before rolling and baking.
✨Verbose Version✨:
Getting Ready to Get Ready
The first thing I do is measure out the water in a glass measuring cup and stick it in the freezer.
Next, I cut my butter my butter into pats and spread them out on a plate and stick those in the freezer, too.\

You're just trying to get everything cold, not freeze it. This should probably take about 10 minutes? I take this opportunity to clean up my work area and get out my food processor.
Okay, Let's Do It
Here's my food processor. It is big and beautiful and I got it for free because a friend of mine who liked to buy himself things moved across the country and didn't want to take it. I think fondly of him whenever I use it.
Combine two thirds of flour (I did 9.5 oz) with sugar and salt in the bowl of a food processor. Pulse a few times to mix it all up. Did I mention that I always bake by weight? You should always bake by weight.
Spread butter chunks evenly over surface, and pulse. I do this in a 3-4 rounds because I want the butter to get evenly covered in flour and not stick to other butter chunks. I toss a few in, pulse a few times, toss a few more, until they're all in there.

At this point, the recipe says "Pulse until no dry flour remains and dough just begins to collect in clumps, about 25 short pulses." First off, it takes a lot more than 25 for me. Second, it never really begins to collect in clumps, it just gets kinda sandy. It doesn't matter, just move on.

Use a rubber spatula to spread the dough evenly around the bowl of the food processor. Sprinkle with remaining flour and pulse until dough is just barely broken up, about 5 short pulses. Transfer dough to a large bowl.
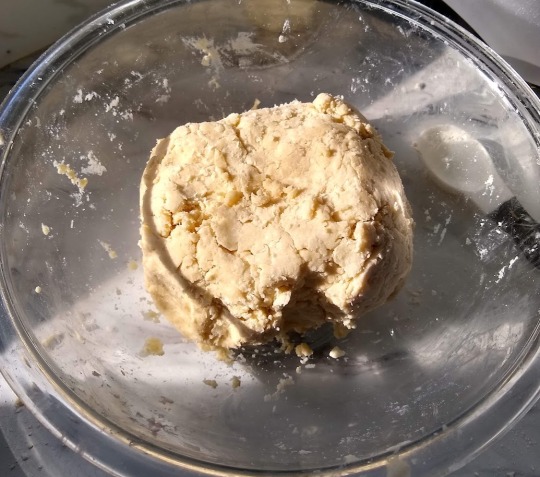
Sprinkle with water then using a rubber spatula, fold and press dough until it comes together into a ball. I drip in some water, fold and press for a bit, drip in some more, fold and press again, etc. At first, I try to use the spatula (and not my hands) as much as possible. Towards the end I switch over to using your hands. It takes a while to start sticking together, but it will! Just keep pushing on it!

According to Kenji, you should not need to add any more water. I almost always need to add more water. You can put additional water in the freezer, if you want, but I just use room-temp. Today, it took 1 extra T. To be honest, I probably didn't need to, but ¯\_(ツ)_/¯
Divide ball into two. If I am making a double pie crust, I split them unevenly, because the bottom crust needs to be bigger than the top. Today, I'm making a pecan pie, which just needs a single crust, so I'm dividing it into half and saving one of the halves for later.
Form it into a rough circle and flatten. I wrap it loosely in plastic, and then roll it on the edge like a wheel, and flatten it further so I get a nice disk.
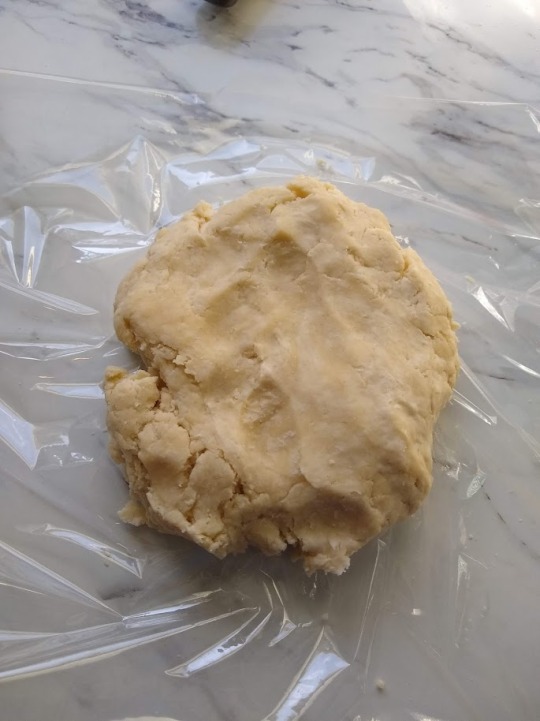

Refrigerate at least 2 hrs and up to 3 days. (or you can freeze for up to 3 months)
That's the end of part one, part two will continue after the chilling.
24 notes
·
View notes
Text
How I make chocolate oatmeal
This recipe makes enough oatmeal to keep me going until lunch, or two smaller servings if you don't have my appetite. It can also be halved (half a tablespoon is 1 and 1/2 teaspoons).
What you need:

2 quart saucepan (this stuff bubbles up high and fast, and you don't want it on your stove OR your skin)
stirring spoon or spoonula
1 cup dry measuring cup
1 wet measuring cup
measuring spoons
bowl
eating spoon
butter knife
stove top burner
You can use a metal or silicon or wood spoon to stir this. I use this spoon/spatula I stole when I moved because I was the only person using it anyway. Do NOT use one of those cheap plastic mixing spoons they sell in bags of 4 at Dollar Tree, because this is what will happen:

Ingredients:

1 tablespoon brown sugar, no need to pack it--I use light and dark interchangeably, whatever you got
1 cup cold water
1 cup quick oats
1 tablespoon cocoa powder
scant 1/4 teaspoon salt (I forgot to put it in the shot, but it's hiding behind the coffee pot)
1 pat butter (not shown)
toppings (optional, up to you)
You are going to want to remember the salt, the oatmeal will be bland without it.
Pour the water into your pot and put the pot on the burner you'll use. Once you get this down to a science, you can start the water boiling and get everything ready before it does, but on a first try you'd better measure everything first and then wait the two or so minutes it takes a cup of water to boil.
I always measure the brown sugar into the bottom of the bowl I will be eating out of first, because I'd rather get sugar in the cocoa than cocoa in the sugar. But do what you want.
Measure 1 cup of oats (I used to scoop and sweep this, but it's easier to just dip the cup in the oats, and accuracy is not a big deal here), and add 1 tablespoon of cocoa. You can mix these in a separate bowl if you want, but I always do this:

Dump the cocoa on top of the oats in the measuring cup.
Which can get messy if you're not careful, but is, once again, easy and fast. The less time I spend on my feet, the better.
Start the water boiling on high, and when it starts to boil, add the salt. Once the boil really gets going, reduce the heat (in my experience it's the 4 or 3 on an electric stove and the lowest setting you can fucking get on a gas stove), and pour in the oats and cocoa. Start stirring IMMEDIATELY! You need to stir constantly so that the mixture all gets wet, cooks evenly, and doesn't stick or burn to the bottom of the pan. Once the mixture thickens, which takes about a minute, maybe less, take the pan off the heat and remember to turn off the burner.
Scoop the oatmeal into your bowl or bowls. If a chunk falls on the counter or over the rim of the pan, you may get an urge to put it in your mouth. Do not. At this point, unsweetened, the oatmeal will only taste bitter and salty.
You have to let the oatmeal sit for about a minute to finish cooking. I like to wash the utensils and such and leave the pot to soak while this goes on. If you want just plain chocolate oatmeal, add your butter and there you go. I like to add toppings, though. My favorites are a big spoonful of peanut butter from a large jar of processed store brand and a handful of chocolate chips. Mini chips melt better, but you get 2 ounces less per bag. You can add whatever you want--flavored peanut butter, other nut butters, flavored baking chips.. though I have tried cinnamon chips and would rather just add cinnamon, and the only mint ones I could find are Andes and they are VERY strong. Just be sure not to add anything cold to the oatmeal until after it's sat for the whole minute.
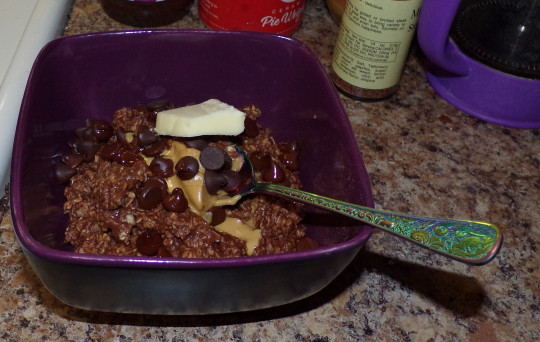
Stir vigorously (did you remember the sugar?) and enjoy.
This is over-explained and probably posted at the very worst time, but I hope it's useful too.
16 notes
·
View notes
Text
Hollandaise is not just for chefs! You can make it too!
For @theweathermellon and also the rest of you. Beware though. Once you know how to do this, you're gonna want to make eggs benedict at home ALL the time.
These instructions are VERY detailed so that you understand the process! You'll the get hang of it if you practice. Recipe under the cut!
OKAY so first: your basic measurements. The numbers below are to make enough hollandaise to cover ONE serving of eggs benedict. If you're making this for two people, double it. Three people? You might be able to get away with two egg yolks still, depends on how much hollandaise people like. I like to drown my eggs benny soo that's me.
READ THE DIRECTIONS IN FULL BEFORE YOU START MAKING THIS OR YOU'RE GONNA WASTE EGGS
INGREDIENTS
1 egg yolk from a large egg (if you're using an extra large egg, you might need a little more of the other liquid ingredients. I don't recommend using smaller than a large egg)
1/2 tablespoon milk (I use half & half a lot of the time bc I have that more often)
lemon juice to taste (start with a very light teaspoon and work your way up or you're going to have a VERY lemony hollandaise. I recommend squeezing a real lemon, because bottled lemon juice has lemon oil added to it and it changes the taste a bit.)
salt & pepper to taste (go easy on the salt. you can always add more, but you can't take it out)
1/2 cup SALTED butter (you can sub unsalted if you must, but you'll have to add more salt anyway, and it's just not the same. trust me)
AND NOW HOW TO MAKE IT. I'm going to give you TWO ways to make it. The first is the way I do it when I'm just making it for myself, because the measurements are so small, and it's just easier with less cleanup. The second is the way I do it when I'm making enough for several people, as it feels more worth it. Here we go.
THE MICROWAVE WAY
Melt your butter in a measuring cup you can pour from. Don't let it pop or overheat! Just enough so that there's nothing solid left in the cup. If your butter is too hot, it'll cook your egg yolk, and you'll have to start over.
Whisk together the egg yolk, lemon juice, salt, and pepper in a small microwaveable bowl. Don't do the milk and the lemon juice at the same time, or your milk will curdle.
Whisk in the milk. Stirring is not an alternative. Whisk it.
SLOWLY pour a thin stream of butter into your egg yolk mixture as you continue to whisk it. Don't pour it all in at once! You're making an emulsion, which is when you combine two ingredients that don't usually want to combine. You have to do it slowly so that they actually mix!
Pop that baby in the microwave at 50% power (or power level 5) for 1-3 minutes, taking it out to re-whisk every 15-30 seconds. This is where it gets tricky! The less you're making, the less time it needs, and the more often you need to whisk it. This is not the time to multitask. Watch your sauce.
Your hollandaise is done when it's shiny and JUST thick enough where you can see lines from where you've whisked it. Any thinner and it'll just be slop on your plate. Any thicker, and - well, it'll become thin again. Because it'll be too hot and it'll break. You'll know you've broken your sauce when you just have a yellow oil with tiny, whispy egg bits floating in it. If this happens, well - we'll talk about that in a minute.
Taste your sauce. Add in extra salt, pepper, or lemon juice as you need until it tastes the way you want!
THE FANCY WAY (ON THE STOVE)
Do steps 1-4 above, but instead of whisking the egg yolks in a bowl, you're gonna do it in a double boiler. That's the pot that has another pot that fits right on top of it. If you don't have one, you can put a glass or metal bowl over a pot of water - you'll want one big enough to sit on top without touching the water at all. You only need about an inch of water in the bottom pot. THE STOVE SHOULD BE OFF TO START.
Put your double boiler on the stove and turn on the burner to medium-high or high heat. How high the heat needs to be depends on what kind of stove you have. I have a gas stove, so I don't need it on full blast. If you have an electric stove, crank that baby all the way up. Your goal is to boil the water in your bottom pot.
As soon as the water starts to heat up, start whisking your sauce and do not stop. What you're doing now is emulsifying your sauce over heat without applying the heat directly to the sauce. If you stop, your sauce may start to boil and break on the sides, so keep going.
Your hollandaise is done when it's shiny and JUST thick enough where you can see lines from where you've whisked it. This is the same as #6 above. If you catch yourself thinking, "Oh, I just want it a LITTLE bit thicker," and it's already starting to stick to the whisk, stop yourself. Repent for your hubris before the food gods break your hollandaise.
Taste your sauce. Add in extra salt, pepper, or lemon juice as you need until it tastes the way you want!
OH NO! I BROKE MY HOLLANDAISE :(
It happens! Even I still do it sometimes, and I make it all the time. SOMETIMES, you can save it! What you'll want to do is take a small spoonful of HOT water, nearly boiling (if you're poaching eggs at the same time, the water from that pot is perfect) and drop it into your sauce. Then whisk for your life and pray for mercy. If it forms back together into a nice, smooth, shiny yellow sauce, the food gods have answered your prayer.
If you try that and it doesn't work, then you'll have to start over. Sorry :(
AND THAT'S HOW YOU MAKE HOLLANDAISE. And an additional tip for poaching eggs: Add a little bit of vinegar to your water - just like a teaspoon or so. Your water should be a nice, rolling boil - not boiling out of control. And stir your water into a lazy whirlpool and drop your egg into the middle of it, from as close to the water as you can manage without burning your fingers. You're welcome.
26 notes
·
View notes
Text
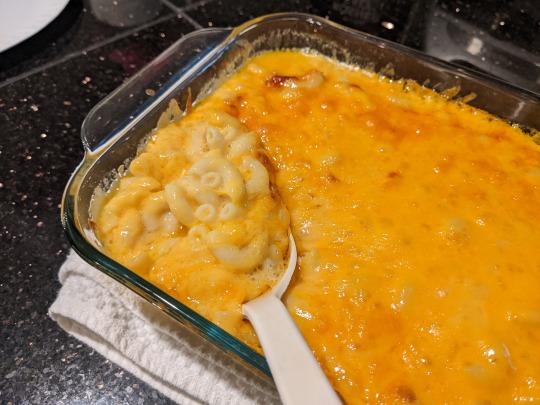
I saw this macaroni and cheese TikTok uploaded on Tumblr late last year and it looked so good. Like watch it, isn't it the most delicious thing you've ever seen?
Did you watch? Okay, I made it. Went to her website and followed the directions exactly. My advice is to not make it.
The reasons are simple: One, it's just. Too much cheese. Like it looks good in a video, but if you put that much of those kinds of cheeses into something there's going to be. So much oil. Just everywhere. Even if you take care not to overbake, it's going to be overflowing over the sides of your casserole dish. Did you see in the video that at some point she had a pan under it? Like she put it in the oven filled to the top (which is asking for spill over anyway) and then we cut back and there's an oily pan for a second? Yeah, you eat this and you will be on the toilet for days. Did it taste good once you blotted up some cheese oil with paper towels? Yes. Was it worth it? No.
The second reason is that it's stupid expensive to make this recipe. The cream and cheese add up, it's going to cost like 30+ dollars depending on cheese brand and availability. Macaroni and cheese should be affordable, this recipe isn't.
My hunch is that this was made to be a video first, and I wasn't supposed to take it seriously.
I have spent the last couple of months fueled by something akin to vengeance, trying to make a good mac just to spite the video, and after talking to my dad who used to manage several Luby's Cafeterias and searching online and stealing the chicken bouillon in the noodle water idea from the video, this is the cheapest and best version I have after making it and fiddling around several times. And you will not die of cheese grease. Probably.
---
Macaroni and Cheese Recipe
You will need:
11/7 casserole dish, aluminum foil, a cheese grater, a little oil for the dish
2 cups of small dry elbow macaroni
4 tablespoons of nonfat dry milk
2 tablespoons of all purpose flour
1 teaspoon of kosher salt
1 teaspoon of chicken bouillon powder
1/2 teaspoon of garlic powder
1/4 teaspoon of white pepper
1 and 1/4 cup of boiling water
1 tablespoon of butter
1 pound block (16 oz) of sharp cheddar cheese
1/2 pound block (8 oz) of american cheese (check the deli counter for this one, you need to be able to grate it. And yes it's worth it, the way it breaks down in hot water is important to getting creamy sauce.)
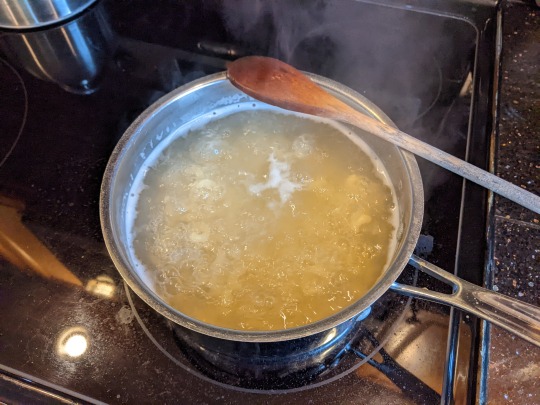
Roughly 6 hours before eating boil water for macaroni in a medium sized pot, and put the bouillon and salt in the water. Cook according to package directions, then set aside in the water to cool. Stir the noodles once in a while to break them up. Make sure they stay just covered in water. Once lukewarm put in the fridge with a lid. Noodles should get big but not mushy.
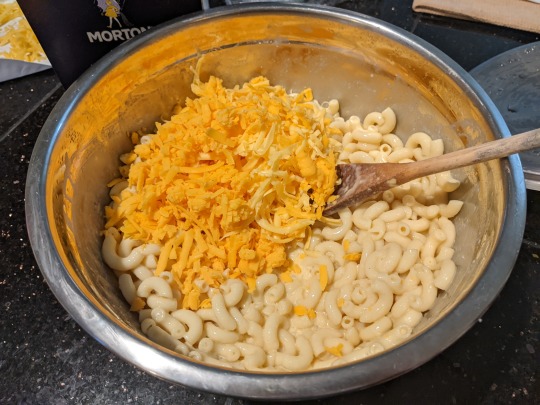
Also roughly six hours before you will start the cheese sauce. Grate all of your cheese. Add the milk powder, flour, white pepper, garlic powder, and butter to a large bowl. You can optionally add another 1/4 teaspoon of kosher salt here. Pour in boiling water and whisk together. Then add half a cup of shredded american cheese and half a cup of shredded sharp cheddar. Whisk them together until smooth, about 2-3 minutes. Then let it cool, then cover with plastic wrap or a lid and put it in the fridge. This will help it thicken up. Mix the rest of your shredded cheese together and put it in the fridge until it's time to bake.
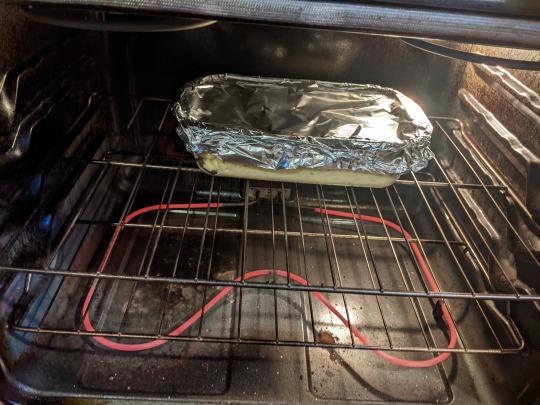
When it is time to bake set the oven to 350 degrees. Oil the bottom and inner sides of your casserole dish and set aside. Drain your noodles thoroughly, water likes to hide in them and it can cause your mac to become watery. Then put the noodles in the bowl with the sauce and combine. Then add another cup of the mixed cheese and stir. Put the mixture in the casserole dish and cover it with foil. Bake for 30 minutes.
Then take the foil off and cover the top with the rest of your shredded cheese mixture. Bake until the cheese melts. You can broil it until brown spots appear but that will separate out some of the cheese grease so be aware.
Let the dish rest for 10-15 minutes. Enjoy!


(Costs about 12 dollars a dish too.)
#macaroni and cheese#recipe#Macaroni and cheese recipe#I accidentally did that thing where I told my life story before getting to the recipe#It wasn't for copyright reasons it was in memory of that week I had to eat so much oily macaroni and died in the bathroom about it#PSA I guess
6 notes
·
View notes
Text
Gluten-Free Bread (1 spoon)
Things are a little depressing on the wet little island I currently call home. Okay, by "a little", I mean "this country's government is publicly struggling to find loopholes in human rights law". So as you can probably guess, the whole situation is significantly testing all the coping mechanisms for clinical depression that I learned in therapy.
Therefore, sublimation time - sublimation being where you take all that grief, rage, depression, whatever, and you stuff all that energy into doing something positive and constructive. Now, when I got my fibromyalgia diagnosis, gardening was my primary sublimation activity, but we're into mid-November now and the garden's kind of sleepy right now. That means baking is my primary option. I mean, I need gluten-free bread anyway because I need bread crumbs for various recipes I want to try, and gluten-free bread is expensive, so why not just make my own? Particularly when I might get bread that isn't about 35% air bubble if I make it myself?
I'll say this for those of you who can eat gluten - the consistency of the loaf I baked last night (recipe courtesy the Dish By Dish website) is not the same as your bog-standard supermarket loaf. The results of this recipe are softer, spongier, and somewhere on the texture scale between cornbread and cake. That's not to say it's bad, but if you've got issues with the texture of foods, it's a fair warning. Now, here's the thing that gluten-free bread has over regular bread for those of us with more physical disabilities - no kneading required. Hell, it wasn't even all that hard to mix by hand (though I probably still should have used the hand mixer; still, I was sublimating).
So! Here's what you'll need:
2 1/2 cups gluten-free all-purpose flour
1 teaspoon xanthan gum (unless your flour blend already contains it)
1 teaspoon gluten-free baking powder
2 1/4 teaspoons instant yeast
2 tablespoons sugar
1 teaspoon salt
1/3 cup neutral-tasting oil (vegetable, sunflower, etc) or melted butter
1 teaspoon apple cider vinegar
1 1/2 cups warm milk or milk substitute (110 F / 40 C)
2 large eggs, room temperature, beaten
Having made regular bread with actual gluten in it, this is an unusual combination of ingredients, and is probably why the consistency is closer to cake / cornbread than actual bread. Still, I figure things like the egg and milk are helping to bind the bread dough in same way the gluten molecules ordinarily would.
Anyway, here's what you do:
Combine all dry ingredients, whisk until well-blended
Add oil, vinegar, and milk, mix for 1 minute or until fully combined
Add beaten eggs, mix for 1 minute or until fully combined (consistency should be close to cake batter)
Add dough to greased 8" by 4" loaf pan, cover with a cloth, let rise in a warm place for about 30 minutes, or until it's about doubled in size
Once dough has risen, preheat oven to 350 F (175 C), then bake loaf for 50 minutes, until top is golden brown and the loaf sounds hollow when tapped.
Let cool in the pan for about 10 minutes before transferring to a cooling rack and cooling the rest of the way.
No kneading, remarkably little aggravation, and the only real issue is the number of things to wash up. The result is the sort of bread that probably works best toasted, or as the base for French toast, or turned into bread crumbs for breading things. Then again, almost all gluten-free bread needs toasting or similar to be palatable, and this was nice with butter and jam (in a cakey sort of way) when it was just out of the oven. So all that to say that it was a reasonable sublimation activity that left me feeling a little more accomplished and less helpless in general.
Now I have to go out for the ingredients for cornbread.
6 notes
·
View notes
Text
Castletown Café Episode 25: Darkburger
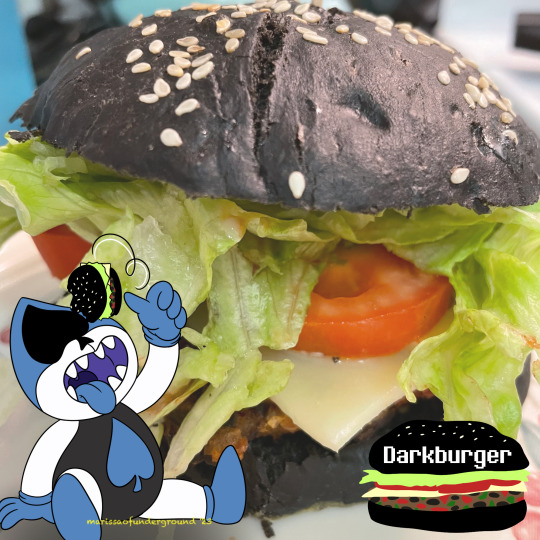
This recipe has been a long time coming. A whole year, in fact. I didn’t get around to it last summer, but this summer, it’s finally here. Lots of work went into these as both the buns AND patties were made from scratch, meaning this is another double recipe episode!
Although the Darkburger is, according to Ralsei, a little on the burnt side, these vegetarian burgers are a different kind of dark. Black beans are an essential ingredient to these flavorful patties, and squid ink is used to make the buns pitch black.
Using squid ink to dye food black is not that unheard of in many parts of the world, from Japan to the Mediterranean. I knew from the get-go that I wanted to try this out to make these burgers look like they came from the Dark World.
The ink doesn’t really change the flavors of the buns much, although it may give them a slight umami taste. I didn’t find it all that noticeable, however, especially when combined with the burger’s fillings: the black bean burger patty, the creamy Kewpie mayonnaise, the crunchy lettuce, juicy tomato and the sharpness of the Swiss cheese.
Since I ventured into new territory with burger buns and black bean burgers, both things I’d never made before prior to making this episode, the recipes are not mine at all and I take no credit, even if I did take liberties with Sally’s Baking Addiction’s black bean burger recipe (I omitted the Worcestershire and feta cheese, while adding jalapeno, a little ground cayenne pepper, and a tablespoon of Kewpie mayonnaise).
Now I just mentioned Kewpie mayo twice. It’s my favorite mayonnaise brand. This Japanese mayo comes in a squeezable bottle and uses only the egg yolks as opposed to the whole egg. It’s so flavorful! It may not be easy to find at your local grocery store, however, so you may have to go online for it, or look for it at an import store.
I even found a recipe for squid ink burger buns, and I’m glad I did, because it wouldn’t have been fun or easy to figure that out myself! Baking is an exact science and requires every measurement, technique, and ingredient to be just right! One mistake and the whole thing can come out wrong. Especially with yeast!
Fill these burgers up with whatever condiments you like. Ketchup? Mustard? Pickle? Onion? Go wild. Personally, I’ll only take onion if it’s caramelized or pickled...anyway, my fillings of choice will be featured here in this recipe, but you add what you prefer!
What I did was make the black bean burger patties first, then stored a couple in the refrigerator while freezing the others. The next day, I made the buns, and froze most of them. This way I can always thaw some buns and patties whenever I feel like fixing one for dinner! And also because I wasn’t making them for a party.
When it’s time to fix em, I just reheat the patties over the stove, or even in the microwave. It’s amazing how well they take in the microwave...because the beans are dry, they don’t explode!
DARKBURGER BUNS
Based on: Squid Ink Burger Buns by Alpha Foodie*
1/2 cup warm milk
3/4 cup warm water
1 tablespoon squid ink
2 tablespoons sugar
1 & 1/2 teaspoons active dry yeast
3 cups bread flour
1 & 1/2 tsp salt
2 eggs
100 grams softened butter (a little over 7 tablespoons)
Sesame seeds, for topping
*This recipe also called for 1 & 1/2 tsp star anise powder, but I omitted that.
Heat up the milk and water until warm, but not too hot. If it hurts a little to touch, that’s too hot. Combine your milk and water in a bowl and add the sugar, squid ink, and yeast. Give it 10 minutes to bubble and ferment. It’s fun to watch!
Combine the flour and salt in a large mixing bowl, then add in ONE of the eggs plus the squid ink mixture, and keep mixing until a dough begins to form.
Stir in the butter, a little at a time, until fully incorporated. Your black dough will now be slightly glossy.
Grease another large mixing bowl with softened butter and place your black dough in it. Cover with a tea towel or cheesecloth and set aside in a warm place for about an hour and a half.
Once your dough has finished proofing, divide it up into 8 to 12 balls. It’s recommended to weigh them with a kitchen scale to get a desired weight to keep them all the same size. I divided them into 8 balls and ended up with humongous buns - but unfortunately I didn’t write down the weight and so I don’t remember what the weight was....I suggest about 100 grams, though.
Place these balls on a parchment-paper covered baking sheet and cover again, leaving them for another 30 minutes.
Preheat your oven to about 392 degrees Fahrenheit or 200 degrees Celsius (my oven is colder by a few degrees so I rounded up to 400 degrees F), and beat the remaining egg with some water. Brush the egg wash over each bun so it’ll be nice and glossy, then top with sesame seeds.
Bake for about 15 minutes, depending on the size of the buns. While you won’t be able to see any browning as they’re pitch black, it’s a good idea to check anywhere after 10 or 12 minutes have passed.
Once the buns have coole, place in the freezer for later use, or enjoy right away. These don’t have a long shelf life, but the freezer preserves them well, and they should thaw just fine.
DARKBURGER PATTIES:
Based on: Sally’s Baking Addiction’s Black Bean Burgers*
*I made a few slight modifications from the original recipe!
2 cans canned black beans, oven-dried
3 cloves garlic, minced
1/2 yellow onion diced
1/2 to 3/4 bell pepper, diced and finely chopped
1 jalapeño, minced
1 & 1/2 tsp cumin
1 tsp chili powder
1/4 tsp paprika
1/4 tsp cayenne pepper
2 eggs
1/2 cup panko
1 tbsp Kewpie mayonnaise
1 tbsp barbeque sauce
1/2 tbsp ketchup
1 heaping spoonful flour
Salt and pepper, to taste
Preheat oven to 325 degrees Fahrenheit, open cans of black beans and drain (easiest by pouring the beans into a spaghetti strainer). Spread on a baking sheet. Bake for 15 minutes or until dry. Let cool.
Chop garlic, onion, pepper, and jalapeño. Sautee in some olive oil over medium heat until soft, about 6-7 minutes. Let cool.
With paper towels, blot out excess moisture and oil from the veggies. Add veggies, spices, condiments, panko and eggs, stir to combine. Mix in the black beans, mashing with a potato masher but not thoroughly smashing EVERY bean. Stir in flour.
Form patties using 1/3 cup of mixture on a parchment-paper lined baking sheet and bake at 375 degrees F for 20 minutes: 10 minutes on one side, flip burgers, and bake for another 10. Serve, refrigerate, or freeze once done.
DARKBURGERS:
Squid ink burger buns
Black bean burger patty
Iceberg lettuce, washed and dried
Thinly sliced Roma tomato
Pre-sliced Swiss cheese
Kewpie mayonnaise
Ketchup
Heat up black bean patties however you’d like. For the stove I recommend medium heat, with a touch of olive oil for moisture. Trap in heat by placing a lid over your pan, which will assist in the re-heating process. I suggest giving it at least 10 minutes. Give it another 5 if it’s still not hot enough! At the last minute, top your patties with the cheese to get it nice and melty.
Slice bun in half horizontally. Spread insides with a mixture of ketchup and Kewpie mayonnaise. Place the patty with melted cheese on the bottom bun and top with lettuce and tomato.
Top with the top bun and enjoy!
Sources:
Samira, Alphafoodie, “Natural Squid Ink Black Burger Buns - Alphafoodie”. Link: https://www.alphafoodie.com/natural-squid-ink-black-burger-buns/
McKenney, Sally, Sally’s Baking Addiction, “The Best Black Bean Burgers I’ve Ever Had - Sally’s Baking Addiction”. Link: https://sallysbakingaddiction.com/best-black-bean-burgers/
#castletown cafe#deltarune#darkburger#darkburgers#lancer#lancer deltarune#deltarune lancer#long post#very long post#deltarune food#deltarune inspired recipe#deltarune chapter one#deltarune chapter 1#deltarune fanart#cw food#my art#recipe
18 notes
·
View notes
Photo

RECIPE: Gooey Triple-Chocolate Cookies (from What’s Gaby Cooking: Take It Easy by Gaby Dalkin)
If you’ve ever been torn between making cookies and brownies, this recipe is for you. The dense chocolate dough with semisweet chunks and extra chocolate chunks on top, plus a sprinkling of flaky salt, are the things of your cookie-brownie-mashup dreams. Dad, I made these for you. And I expect them stocked anytime we come visit!
Makes 14 cookies
2½ cups (350 g) all-purpose flour, scooped and leveled
½ cup (50 g) Dutch-process cocoa powder
1 teaspoon baking powder
1 teaspoon baking soda
1½ teaspoons kosher salt
1 teaspoon espresso powder
1 cup (225 g/2 sticks) plus
2 tablespoons unsalted butter, at room temperature
¾ cup (150 g) plus 2 tablespoons granulated sugar
1 cup (220 g) packed dark brown sugar
2 large eggs, at room temperature
1 tablespoon vanilla extract
2 cups (12 ounces/340 g) semisweet chocolate, roughly chopped, plus ½ cup (4 ounces/85 g)
more for topping
Flaky salt, for topping
In a bowl, combine the flour, cocoa powder, baking powder, baking soda, salt, and espresso powder.
In the bowl of an electric mixer, beat the butter, granulated sugar, and brown sugar on medium speed until light and fluffy, about 3 minutes, scraping down the sides of the bowl as needed.
Add the eggs, one at a time, beating until incorporated. Add the vanilla and beat to combine.
In three additions, add the flour mixture, beating on low between each addition until no dry streaks remain.
Beat in the chopped chocolate. Cover and chill the dough for 30 minutes.
Preheat the oven to 350°F (175°C). Line two sheet pans with parchment paper. Scoop and roll the dough into 2½-inch (6 cm) balls. Place on the prepared sheet pans, spacing at least 2 inches (5 cm) apart. Top each ball with a piece of the remaining chocolate chunks, pressing down slightly, then sprinkle with flaky salt.
Bake the cookies for 12 minutes, then remove from the oven and lightly bang the tray on the counter to deflate them slightly. Return to the oven and continue to bake until the cookies are set and the chocolate is very melty, 2 to 3 minutes longer.
NOTE: There are a couple different techniques you can use when measuring flour for making cookies. I’m a scoop-and-level kind of girl and highly recommend that you do it that way too but we put in the weighted measurement in grams to be the most PRECISE.

Bestselling author Gaby Dalkin is back with What's Gaby Cooking: Take It Easy, sharing 100 recipes that put ease, flavor, and adaptability first
In her new book, Gaby Dalkin returns with her signature approach: Enjoy your life by eating the food you love. But this time around, she also emphasizes a no-fuss attitude. What's Gaby Cooking: Take It Easy offers 100 new delicious and stress-free recipes, suited for any and all occasions.
Everything we cook right now—whether it’s for a potluck picnic with friends or a solo night in binge-watching reality TV—needs to be crazy simple, easily pulled together from those lasting pantry items, still shockingly delicious at room temperature, and not requiring that one random ingredient you drove 45 minutes to get and will never use again. We want food that tastes like it took hours to prepare but doesn’t actually require anything too exact. Give us the forgiving recipes: Out of shallots? Try an onion. The more fail-proof, the better. If this low-maintenance approach sounds like your kinda thing, Dalkin has got your back. With 100 easy ideas for dishes to serve wherever you go (or don't go!), make-ahead dressings and sauces for lazy last-minute dinners, and of course—give the people what they want!—big, crunchy, fresh salads and rich, chocolatey, you’re-in-sweatpants-anyway desserts, Take It Easy is Dalkin’s first book bringing her tasty, crowd-pleasing concepts to quicker, simpler meals.
For more information, click here.
#abramsbooks#abrams books#gaby dalkin#whats gaby cooking#whats gaby cookin#whats gaby cooking take it easy#take it easy cookbook#weeknight recipes#weeknight meals#quick meals#recipe#free recipe
40 notes
·
View notes
Text

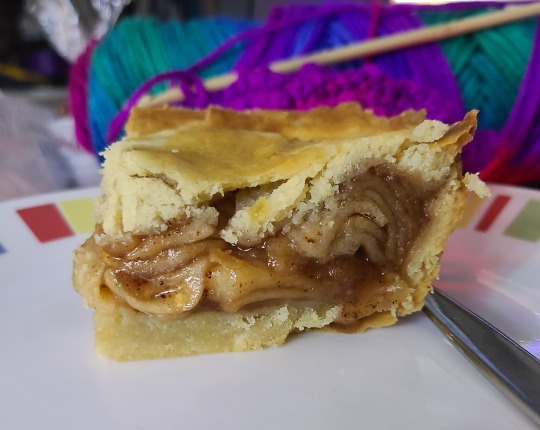
For the third week in a row I'm making jablecznik/szarlotka (Polish apple pie) and I think I got it this time! It took probing my parent's minds, using a recipe from the back of a szarlotka spice blend as a starting point, and some tweaks along the way.
Anyways, Time To Share! Measurements are in grams bc that's what I had. I'll 'translate' them but non-gram recipe mileage may vary.
Polish Szarlotka (apple pie)
DOUGH:
400 grams flour (3 1/3 cups-ish) (you can chill it if you want)
85-125 grams Powdered/Confectioners sugar (3/4 cups should be just fine)
250 grams VERY COLD butter (i don't know the conversion here it was about 3 and 1/3 regular sticks? ish?) CHOP INTO LITTLE BITTY SQUARES unless you're using a food processor or mixer in which case just slice it
3 egg yolks (just the yolks not the whites! save the whites to brush on top)
Pinch of salt
Like a half teaspoon of baking powder? Maybe a touch more? I eyeballe dit
APPLE FILLING:
1.5 kilograms of apples, pre coring (if your grocery has produce weights that'll be helpful) err on the side of MORE rather than LESS
What types of apples? We like slightly tart and firm apples in our szarlotka so we go with Granny Smith here in the USA. I think that's more 'traditional'. You can go with sweeter apples if you like but don't go too sweet. Also, I recommend firmer apples bc we're gonna be cooking them first.
100-150 grams sugar (3/4 to 1 cups ish?)
AT LEAST a tablespoon of Cinnamon. You can add more if you want.
If you have ground cardamom and cloves you can add some too. Whatever floats your boat. I'd probably do at least 1-2 tablespoons of cinnamon, 1/2 tablespoon each of cardamom and cloves (ground). Smell it. That might help.
Lemon uh crystals? NO. CITRIC ACID. Ok, take like a teaspoon, no more, and put it in the apples if you want delightfully delicately tart apple pie.
2 tablespoons of water
ALSO: keep some butter and flour to butter the baking dish and flour it. I use a 9x13 glass backing dish so make your best guess on what you want to use based on that
WHAT YOU'RE GONNA DO:
First the dough - you want your butter cold, your flour can be chilled too. You're gonna mix the flour, sugar, salt, and baking powder and give it a stir.
Then you're going to add the 3 egg yolks. No need to stir.
Then you're going to take the butter and add it in. Now the fun begins.
If you have a food processor : PULSE for like a minute until its coming together but not fully mixed. You don't want it creamy
If you have a standing mixer : similarly only mix it until its come together into a dough consistency
If you want to show the dough dominance and wreck your hands in the process : knead the hell outta it. Just squeeze it in your hands and roll everything around and push it into the bowl and keep doing it until it's a dough. It'll happen pretty fast once it does.
once your dough is doughy, put it in a plastic bag or plastic wrap, whatever you want, and toss it in the fridge. It's going to need a while - recipes say "30 minutes" but they suck and you should plan at least 1 hour if not 4.
When your dough is getting nice and hard in the fridge you're going to switch your attention to the filling!
FILLING TIME:
Apples - peeled, cored and quartered.
If you have a mandolin slicer this next part is gonna be easy. If you don't, i'm sorry. Do your best. Anyways, you want to slice the apples thin, like, 1/8 inch thin? No thicker than two quarters stacked on each other. Though, I think you can get away with thicker slices, or small chunks, because we're cooking them and that should soften them for the most part.
Next - mix your apples with all the apple filling things. The spices, the citric acid, the sugar, the water. Take a taste test - if its too sour add a bit of sugar. Too sweet, add more citric acid. Not enough cinnamon? Add it now. The flavor will deepen after baking but the taste here will definitely help gauge the taste when its done.
Now, take a pan large enough to hold all of the apple stuff and a lid for it. Put the apples in, put them on a medium heat, put the lid on. Stir every now and then, try them every now and then, and cook them for no longer than 20-30 minutes. You still want them to be firm when you bite into them, not mushy.
Great! While they're cooking set your oven to preheat to 400 F
BACK TO THE DOUGH:
As the apples near the correct texture you want, pull the dough out and portion it into a 2/3 piece and a 1/3 piece. Put the 1/3 back in the fridge, that's the top. Roll the 2/3 of the dough out on a floured board. You want to do this as quick as you are able to because the more it warms up, the stickier it gets.
Once it's rolled to the thickness you want (I go with 1/3 of an inch just about) transfer it to the baking dish, making sure it's wide enough to go up the sides to the top of the dish as well.
Poke the bottom with a fork and pop it in the over for 15 minutes until the edges are brown.
Great! Pull it out, let it sit for a second while the apples cool just the tiniest bit and you handle the rest of the dough.
TURN THE OVER DOWN TO 350 F!!
TOP OF THE SZARLOTKA:
Now, you have a couple ways of topping the pie. We tend to like a full cover, so we roll the dough out and pop it on top, pinching the edges down, then poke holes in the top.
HOWEVER you can also take the hunk of dough and using a grate, grate it on top of the pie, trying to get somewhat even coverage.
Anyways, once you decide on what you're doing, put the apples into the pie crust and then top it with the top you want. Slather that top with egg whites so it comes out flaky and golden!
Done? Good. Pop it back in the oven (that you should've turned down to 350F!) and set your timer for 30 mins. Check after the 20 min mark if you remember, but 30 mins should be just right. You want it to be nicely browned.
Take it out. Set it to cool. Wait like an hour if you can resist before cutting into it.
ENJOY
23 notes
·
View notes
Text
Gina's Mac and cheese (ish) recipe
*2-3 cups of shredded cheese. Combo, all one, more than that, less than that I don't care. How cheesy you want it?(tn I used like half marbe half extra old white ched)
*milk (2 cups? I just poured it's gonna be a consistency thing anyway)
*butter (the real shit if you wanna do this RIGHT. And also salted duh)
*flour (again this is an eyeball thing for me. If you really want you can look up a basic roux recipe that's all this is it's the base to a bechamel sauce fancy words for fat and flour) idk ill talk about this more when we get there. Trust.
*flavouring accoutrements (garlic powder, mustard, chipotle powder, salt, pep. This is your world I'm just teaching you how to live in it)
*parmesan of choice
*small onion
*half a pack of bacon
*bread heels, like. 2 or 3, whatever you have. (unless you own your own breadcrumbs already. If not imma teach you to make em right here right now)
*noodles of choice. No I won't tell you how much because we all know nobody actually knows that shit.
STEP ONE: MISE EN PLACE
Prep time, baby. First off, oven on 300, and a pot of water on to boil the noods. Onion? Dice it tiny as fuck. Bacon? Fry it up, crispness is At your discretion. Bread? Slap it on a cookie sheet and throw it in that hot oven for like. 5 ish minutes. You're not toasting it you're just drying it out. (if you plan this in advance you can simply leave them out to dry morning of but I don't roll like that). Once your bacon is cooked, take it out and drain the grease out of the pan. Pop in some butter (garlic butter if you're really vibin) and those diced onions. Cook that shit on like medium low until they're a good golden colour, almost starting to crisp up. Take the pan off the heat and let it be.
STEP TWO: MAKE THE TOPPING
(but first put your noodles in the boiling water if you haven't already. Also salt and some oil in there pls) In a food processor or a blender (if you don't have these, use a knife and go the fuck to town) blitz your dried bread, a good spoonful of your fried onion, and your cooled and degreased bacon strips until pulverized. Dump in the amount of parm you feel is correct and blitz again. You're gonna use this as topping. If you feel you've made too much don't worry. I have a solution later to come. Now put the oven up to 350.
-at this point I recommend you go no further until your noodles are cooked, drained, and run under cold water to STOP THEM COOKING.
STEP THREE: GET DAT SAUCE
Alright now for the only really intimidating part. The roux. First off you're gonna take like 2 cups of milk and pour it into the pan with your onion and put that on about a 5. You wanna get your milk warming up and this way you get all the pan goodies. If you're using mustard, throw about a tablespoon or two into that pan too while you're at it.
Now in a good saucepan, (Big Pot) throw in like. 2/3 cup of butter at least. At least. Use more than you think you need that's the thing here. Melt it up. Once it's melted and started to bubble, toss in flour. Start with like. Less than half a cup? While you do this, whisk like a madman. Don't add more flour till your flour you have is combined. If it gets to look doughy and thick you've added too much flour. Easy fix, more butter. This isn't healthy it's Mac and cheese. Whisk it up and it should be less of a dough and more like a batter consistency. Continue to cook and whisk on medium high until this turns a nice golden colour and thickens to a paste. Now take that pan of milk and onion and stuff and throw that in the pot, along with any spices or seasonings now. (I used chipotle powder and seasoning salt, and garlic powder). Now WHISK SOME MORE we don't want no flour lumps. It's gonna get thick. You're fine. Add more milk if you're worried, and also turn it to low.
Once that's smooth, you get that cheese in there. Get it melted. Fuck yeah.
STEP FOUR: AVENGERS ASSEMBLE.
Now. Once your cheese is melted, we are at prime time. Remember when I said I had a solution if you had too many breadcrumbs made? Throw all the extra in here, leave enough to coat the top before baking. Now you combine your noodles. Take your time, be thorough, and Fold don't STIR, dammit. From the bottom. Be patient. Once it's fully combined and beautful, you pour that shit into a buttered baking dish. Size determined by how much you made, I used a tall 9*9 pan. Spread your crumb topping on top evenly and bake on a low rack for 20 minutes or until topping is golden brown.
#recipe#mac and cheese#Macaroni and cheese#Easy#Go nuts#Have fun#This was my ADHD going NUTS after cooking it#Maizy you did this
2 notes
·
View notes
Text
Bo’s Favorite Pumpkin Bread
In my Bo Sinclair fic “Didn’t Your Momma Ever Tell you not to Talk to Strangers?” The Reader bakes him a special pumpkin bread that he sort of fixates on. If anyone’s actually curious about the recipe, here it is.

Dry Ingredients
• 2 Cups All Purpose Flour (240grams)
• 1/2 Teaspoon Salt
• 1 Teaspoon Baking Soda
• 1/2 Teaspoon Baking Powder
• 2 Teaspoons Cinnamon
• 1 Teaspoon Ginger
Wet Ingredients
• 1/2 Cup Butter (One Stick)
• 1/4 Cup Applesauce
• 1 Cup Brown Sugar (200grams), I prefer dark. If using light, replace all sugar in recipe with light brown sugar.
• 1/2 Cup Sugar (100grams)
• 2 Large Eggs
• 1 Tablespoon Vanilla
• 1 (15oz) Can of Pumpkin. If using fresh pumpkin, blot away some of the moisture before weighing it out.
Add Ins/Toppings
• At least 1/2 Cup of Mini Semisweet/Dark Chocolate Chips. Must be Mini, measure with your heart. They WILL stay Melty—I was not kidding when I write that in the fic—this is one of my signature baked goods for a REASON.
• If you’re baking these as muffins or divided into two loaf pans, sprinkle the top with cinnamon sugar for a pretty and tasty crust. If you’re baking them in a Bundt pan don’t bother, because you’ll be turning the cake out anyway.
Instructions (Alternate Cooking instructions if making Muffins—mixing instructions are the same)
• Preheat oven to 325(F)
• Line or Spray your pan of choice (Two Loaf Pans, One Bundt Pan, or Cupcake tins are my favorite)
• Whisk dry ingredients together in a medium bowl, set aside
• Cream butter and sugar together in a large bowl
• Beat in applesauce and vanilla
• Beat in one egg at a time
• Beat in pumpkin(it WILL look gritty and weird, this is normal)
• Gradually mix dry ingredients into wet until uniform (Batter will taste weirdly like toasted marshmallows at this point)
• Fold in chocolate chips
• Pour batter into pan and bake
• Should take at least an hour, but I’ve had apartments with ovens with WILDLY varying temperatures over the years, so I always check after the first 30 minutes and check every ten until it starts getting close to done (it’s done when a toothpick/knife/whatever you test with comes out with crumbs sticking to it, but no batter. If it comes out completely clean you have overbaked—it will continue to bake slightly from its own heat even after you remove it from the oven, so you want that crumb)
• Give it at least a half an hour to cool before cutting.

Muffin Baking Instructions
This will ensure that you have the nice bakery style muffins with the big fluffy tops.
• Preheat oven to 425(f)
• fill muffin tins 3/4 of the way full
• refrigerate loaded muffin pan for at least 30 minutes before baking
• put a pan of water in the oven on a rack below your muffins if possible (to create steam)
• bake for 13 minutes before reducing the oven temp to 350(f) and DO NOT OPEN THE OVEN
• bake 7 minutes longer before checking—they may be done now
#recipe#pumpkin bread#Bo Sinclair’s Favorite Pumpkin Bread#as shown in my fic DYMETYNTTTS#enjoy#it’s so good#mypost
18 notes
·
View notes
Text
✰ My Summer Drank ✰
Heiiii All…
It’s Pulari ❀ and I am going to share a drink that I have been obsessed w/ this summer ☼
It’s called സംഭാരം (sambharam, pronounced sum-bhaa-rum)!!
It’s a buttermilk drink that’s popular in Kerala, the state in India where my family’s from.
Some background first:
Soooo my mom made me go to the dermatologist and I was prescribed some medicines to take … One is a pill antibiotic that can be hard on your body so it’s recommended to take probiotics with it…
I mentioned it to my mom and she made sambharam for me… needless to say I was hooked as fuque 💕🤗
It basically has a lot of probiotics and is a healthy beverage in general … Also it’s savory n I feel like most drinks are sweet. Yk?
Ingredients:
This drink is supessss easy to make!! There’s only 4 ingredients, n takes about 5 min
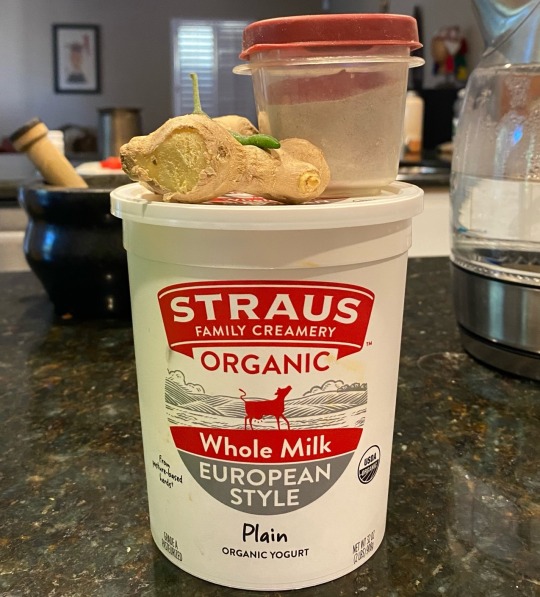
Yogurt: source of probiotics! Not all brands of yogurt have live cultures so make sure you buy one that does. The yogurt I used is my fave one ever 🤗🤗
Fresh Ginger
Chopped Green Chilli: I used a full one but if you don’t like spice you can use either half of one or a third of one
2-3 pinches Black Salt
How To:
Okay soooo….
Take about a penny’s size of ginger root, peel it, and grate it into your glass. Chop up your green chilli into small, thin slices, and add that to your glass as well. Lastly, take your pinch or two of black salt and add that to your glass as well!!
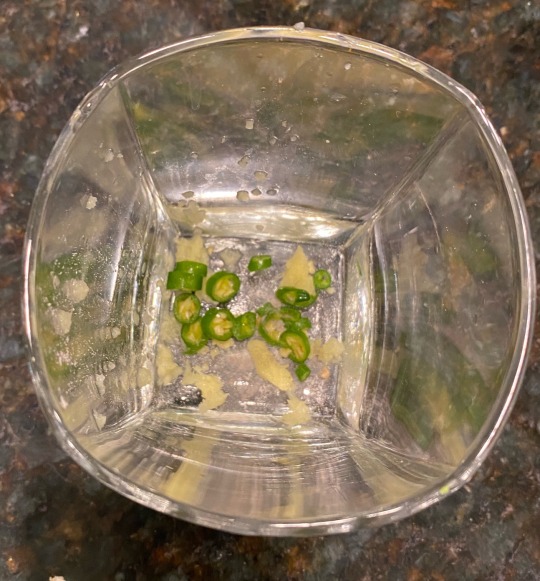
Now, take 3-4 tablespoons of yogurt (I used 4 because I like my sambharam to be creamy), and add about 2/3 cup of water to it in a separate cup
You can also add more water depending on if you are not as much of a fan of the yogurty taste… 👅
Pour your yogurt and water mixture into the cup with the spices:

Mix, then Add one more pinch of black salt to your finished drink
And Voila 😍 Ur sambharam is ready and your stool is firm, and your gut is thanking you 🥰🥰
I’m fuckin obsessed with this drink rn. I give it like a solid 8/10… I read that some people add curry leaves and minced onion to sambharam as well… which would defo elevate it …
Anyways peace!! Thanks 4 reading 💕💕🤗💕
5 notes
·
View notes
Text
Recipe: The Greatest Rhubarb Cake in the World
Ingredients:
All-Purpose Flour – 1 cup
Brown Sugar – 5/8 cup (you always halve the recipe because you don’t have a 9x13” pan)
Baking Soda – ½ teaspoon
Salt – ¼ teaspoon
1 Egg (last one of the week, taken from today’s breakfast), beaten
Sour Cream – ½ cup
Rhubarb – Five bucks from the Farmer’s Markets’ worth, with the caveat being that I have no idea if that’s a good deal or not, washed and diced*
*Tip: when you take the rhubarb out of the fridge, take a moment to try to recall how many weeks ago it was that you bought it, and briefly consider looking up how to tell if rhubarb’s gone bad, but ultimately decide against it because it looks and smells fine enough. Once it’s baked into a cake, no-one will be able to tell that it went a little squishy.
Directions:
Step 1: Preheat the oven to 350degrees. Realize that you have too much rhubarb. You always just use whatever you’ve got, and it usually works out to a half-cup more than the scaled-down recipe suggests, but that’s fine, you like it extra rhubarb-y. You could always freeze some for later, but you find the texture always turns out a little weird when you use frozen vs. fresh. Besides, there’s not enough for a whole other cake anyway.
Step 2: Revise the scale of the recipe. Bring it up to 2/3 of the original instead of just half. This invites its own problems, though, because you now need another 1/3 of an egg. The only other egg in the kitchen is in a 10” cast-iron skillet on the top-left burner of the stove, its split yolk already turning pale yellow. Look up egg substitutes on your phone. Find a listacle on a cooking blog that is mostly filled with things you don’t have, but two entries catch your attention.
The First: vinegar and baking soda, two things that you do have, though a lack of chemical reaction from the baking soda would confirm that you’ve had that box in your fridge for way to long,
And the Second: Applesauce.
Step 3: Okay. You can make this work. Now, you don’t have any applesauce on hand, but you do have a lot of rhubarb. Now, you’re pretty sure you have to boil the apples to make apple sauce and you don’t really have that kind of time, but applesauce is basically just liquefied apples with a bit of extra fruit pulp. Use the weird little analog food-processor that you got at the liquidation warehouse to shred the extra rhubarb into a sort of paste. Okay, this might work.
Step 3.1: Your bagel is finished in the toaster, slather on the last 6th of cream-cheese and make a little sandwich with the fried egg. You didn’t realize how hungry you were until now – you forgot dinner last night – but you can’t get too greedy. Take a bite whenever you have a spare moment.
Step 4: Mix the flour (now 1 1/3 cup), sugar (now 5/6 cup), baking soda (now 2/3 teaspoon) and salt (now 1/3 teaspoon) in a large bowl. Make sure to break apart any clumps with a fork, and there will be a lot of them. You’ve had this same bag of brown sugar for how long, exactly? At least you had the good sense to soak that little clay teddy-bear and stick it in there overnight.
Step 5: Mix in the egg (still 1 egg), sour cream (now 2/3 cup), and rhubarb pulp (1 tablespoon) until crumbly. It’ll end up looking more like a dough than a cake batter. At some point it’ll become clear that the wooden spoon you’re using just isn’t going to cut it. Take an extra-big bite from your bagel – you’ll need all the extra energy you can get, and it’ll be a while before your hands are clean. Stick your hands right in there, you filthy animal.
Step 6: Realize there still isn’t enough moisture. Add a 1-2 tablespoons of water.
Step 7: It still doesn’t feel quite right. Throw in the rest of the rhubarb pulp (approx. 3-4 tablespoons)
Step 8: Fold in the diced rhubarb. The texture doesn’t seem too bad, and it tastes decent as well. Eat the last couple bites of your bagel. It’ll be cold by now.
Step 9: Butter the cake pan since you haven’t already, and pour the dough/batter into it. Bake for 45 minutes and check with a toothpick. It comes out clean but you still don’t quite trust it. Give it another five in the oven. Cover with a dishtowel.
Step 10: Remember you’re meeting a friend to go on a hike soon. Message them and say you might be a little late. It’s okay though, they slept in anyway. Invite them over for cake afterwards.
Serve slightly warm, with chiselled slivers of vanilla ice cream and good company.
2 notes
·
View notes
Text

I posted 1,406 times in 2022
That's 645 more posts than 2021!
96 posts created (7%)
1,310 posts reblogged (93%)
Blogs I reblogged the most:
@catgirlwheels
@vaspider
@zypiris
@woolen-feathers
@hockpock
I tagged 295 of my posts in 2022
#faepunk - 21 posts
#food - 8 posts
#chronic pain - 8 posts
#chronic fatigue - 7 posts
#fibro - 5 posts
#disability - 5 posts
#game dev - 4 posts
#medical - 4 posts
#fibromyalgia - 4 posts
#minecraft - 4 posts
Longest Tag: 139 characters
#he went on to tell me that i'm not allowed to work on sprites or anything today because i'm running myself into the ground mentally over it
My Top Posts in 2022:
#5
I just dreamed the newest Tumblr meme was posting pictures of baroque art with your estimation of how long it would take you to destroy said piece of art, frequently along with very aggressive assertions that your guess was exactly right down to the second...what the fuck, sleeping me?
29 notes - Posted June 16, 2022
#4
Psst. Do you like white mochas? Do you not want to give Starbucks money right now because they're a bunch of union busting assholes? 'Cause I got something special just for you.
I have reverse engineered the ingredient list I remember off their white mocha bottles from when I worked there, and made it about ten times better, and it is mad easy to make at home.
YOU'RE GONNA WANT:
A bar of good quality white chocolate; Ghirardelli's baking bars are fantastic for this. Look for something that's mostly cocoa butter.
About 3-4 tablespoons of sweetened condensed milk
About a tablespoon of heavy cream
About a tablespoon of boiling water
A dash of salt
Break the white chocolate up and put it into a small microwave-safe container. Microwave it on high for 30 second intervals, stirring between each one, until it's good and melted.
Drop 3 or 4 tablespoons of sweetened condensed milk in there. It's not an exact measurement because let's be honest, that stuff's hard to measure.
Start mixing.
It will immediately seize into a solid mass and you'll think I'm fucking with you after all. This is normal. Chocolate is an incredibly weird emulsion and this is just how the chocolate do when it sees a water molecule! Stir until it's at least a uniform solid mass, and then add a tablespoon of boiling water. The hotter the better.
After a little bit it'll unseize and abruptly turn smooth again. If it doesn't, hit it with another teaspoon of boiling water and it will.
Add that tablespoon of heavy cream and mix in. You can even make it two tablespoons if you want. I'm not the boss of you.
Add a dash of salt to taste. I'm a two-dash kinda person myself, because it counters how much sugar is in it. Which is a lot.
And boom. That's it. You now have white mocha sauce comparable to any coffee chain's brand except actually it's way better. Store it covered in the fridge, it'll keep a while but it's probably best to use it within the week since it's got fresh dairy ingredients.
Can it be made vegan? Probably but you'd have to find white chocolate with no dairy additives to start with, and then sweetened condensed non-dairy milk if that exists, and probably use coconut cream, and I dunno I haven't tried at all so you're on your own for that if you want to experiment.
Anyway, enjoy your white mocha sauce, fuck Starbucks, union strong. ✊🏻
65 notes - Posted July 15, 2022
#3
Annual petition to put thorn and eth back in the alphabet. Icelandic gets ðem, why can't we have nice þings too.
92 notes - Posted September 27, 2022
#2
Feminist spaces are currently pretty hostile to men, particularly those who want to talk about what they face under patriarchy, and who want to participate without being pressured to self-flagellate or allow themselves to be a target for other people's unrelated frustrations.
Oh, there it is. There's why I hate it so much when someone's like "all men are dogs" or whatever right to my face, and even more angry when they say, "shut up and don't argue with me because you should know I don't mean you, but you're being part of the problem now."
If they so obviously don't mean to include me, are they saying then that I'm not a man? I'll fucking fight. And it is NEVER, EVER "part of the problem" for a trans person to deny someone the ability to talk shit about them on the basis of their gender.
It's not my job to be a punching bag for shit I didn't do. There's certainly things I'll accept that I've been complicit in, even if it was through ignorance. That, however, is not one of them.
(Emphasis mine, text from a post by nothorses that I didn't want to hijack just to make a personal point on.)
97 notes - Posted May 16, 2022
My #1 post of 2022

516 notes - Posted May 23, 2022
Get your Tumblr 2022 Year in Review →
4 notes
·
View notes
Last Seen Blogs

lavativarios
Lavativarios

findhomesforsalesite-blog
Homes For Sale


daportalpractitioner
da portal practitioner

staystrongtoday
It's ok, to be not ok!