#diy dice
Text


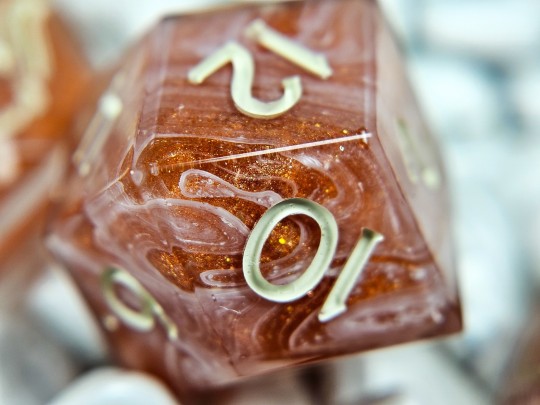
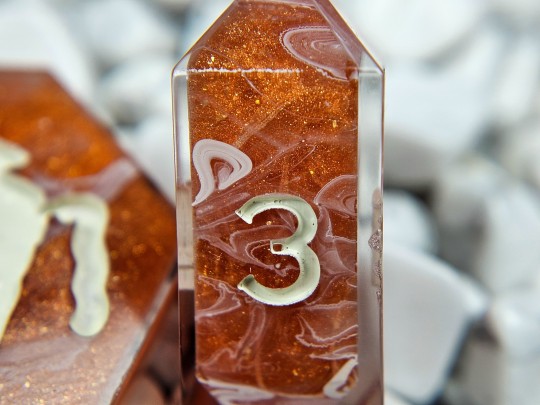
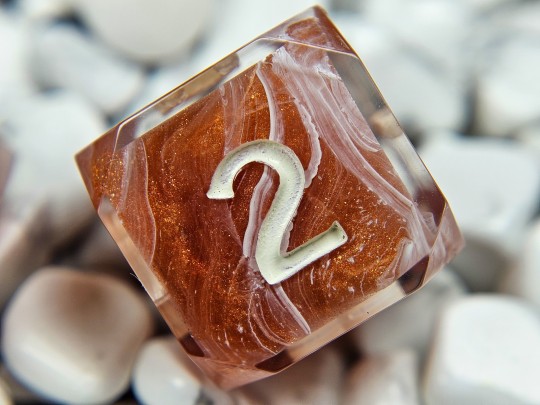

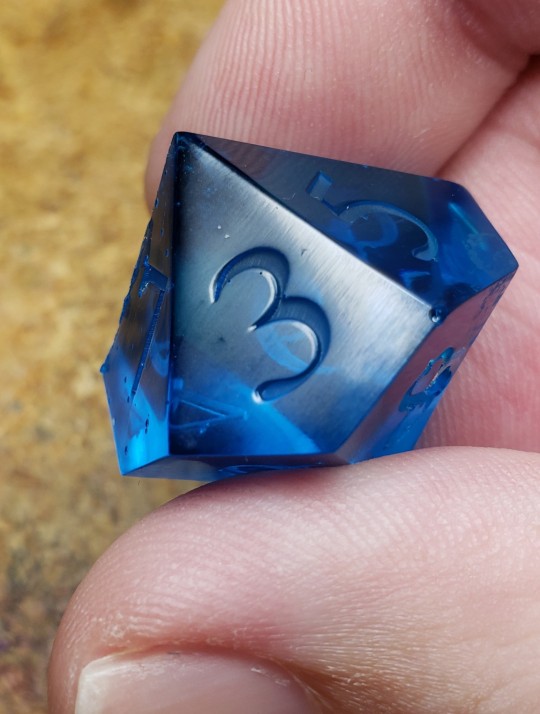
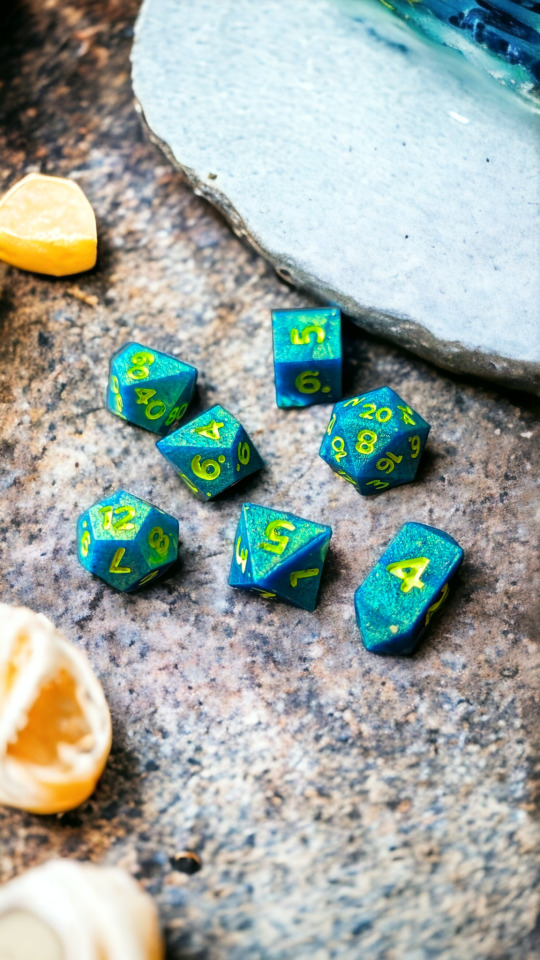
Does it snow on Mars?
Martian Tundra
Swirls of translucent white pummel rich, shiny copper inserts in this set. It's what I imagine the aftermath of a snowstorm would look like on Mars
#dice#d20#dice set#dice maker#dnd dice#dungeons and dragons#handmade#rpg dice#ttrpg#dice goblin#mars#space#snowstorm#resin art#resin artist#diy#art#swirls
151 notes
·
View notes
Text
Potion bottle dice kit! You can get one for yourself here
63 notes
·
View notes
Text
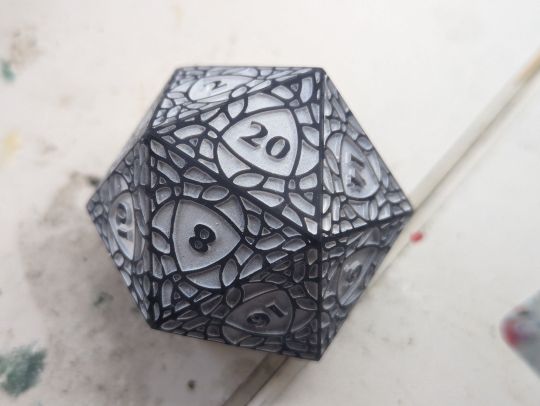
Been working on a cloisonne -style d20 and it's just so pretty 😍
62 notes
·
View notes
Text

Made a D&D dice tower for my brother for his Christmas gift.
It's almost completely made out of trash I had lying around my house. The tower itself is a Pringles can with cardboard cones for the roof base, and the bricks and shingles are cut out of styrofoam plates. The texture is done with paper towel and Mod Podge, which I papier machèd over the entire thing. This also improves the structural integrity.
You can't see them in this pic, but there's also a couple ledges on the inside of the tower. They make the dice tumble and bounce around inside instead of just dropping straight to the bottom.
It's a little plain (I tried to use dried moss for climbing vines, but couldn't get them to stick), but I think it's pretty decent for a first attempt. Maybe I'll try adding windows to my next one. 😁
#dnd#d&d#dice tower#handmade#upcycled#craft#diy#critical role#dimension 20#dungeons and dragons#dnd dice#dice
74 notes
·
View notes
Text
"send your kids [dice] to camp" when one of the players has a big damage roll they need a lot of extraneous dice for is my favorite running cross-campaign d20 bit. maybe ever. I loved it so much in my first ever d20 campaign tuc (Emily and lou sitting next to each other talking about how their "kids" rolled) and its still going now in fantasy high junior year. the world is so beautiful
#SEND UR KIDS TO CAMP!!!!!#underrated t shirt idea: send ur kids to camp little front pocket logo and then a big thing w like. dice and smth about damage totals on#the back. Sam do u see my vision??? I'll give you my idea for free just send me a shirt in a good color (white w green lettering?)#god. I wish I knew how to graphic design I would just diy the shirt myself. anyone wanna make a design and I'll get my mom to criket print#the decals and send us all shirts ???? /not a joke#d20#d20 spoilers#fh3
28 notes
·
View notes
Text
#crochet#crafts#handmade#creative#diy#fiber arts#yarn#crocheters of tumblr#hobby#hobbies#cute#weird#crocheting#grandmacore#cozycore#arts and crafts#yarn life#handcrafted#dnd#dice bag#dic goblin#clickety clacks
470 notes
·
View notes
Text

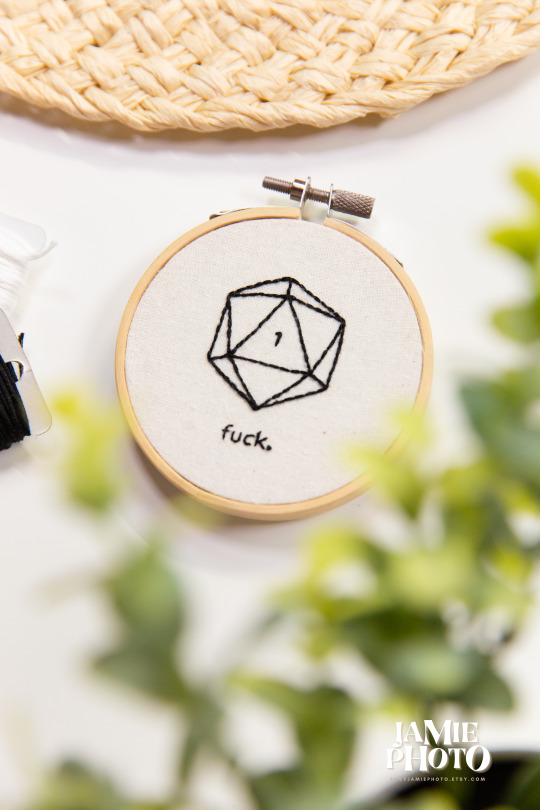
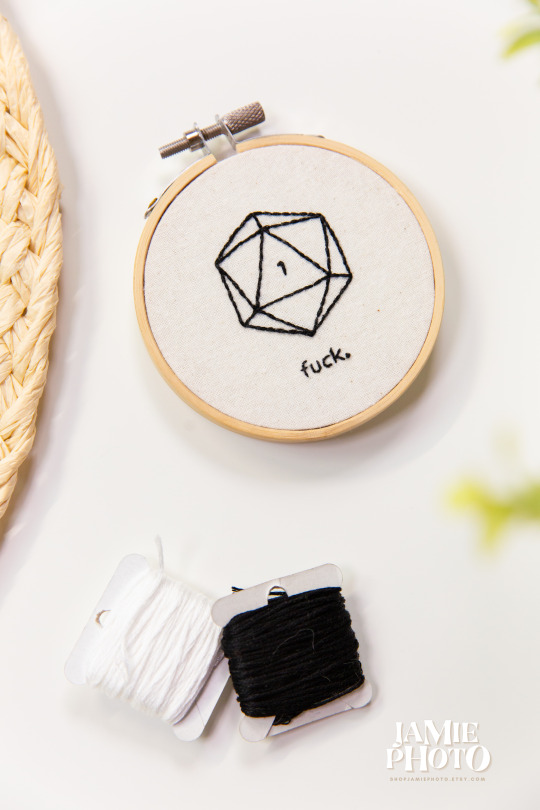
My very first embroidery work was a christmas gift! ♡
I'm still very proud of it.
▹ instagram ◃
#dungeons and dragons#dnd dice#upcycle#embroidery#diy fashion#clothes#diy#diy ideas#diy art#diy projects#diy craft#sewing#style#fashion#cottagecore#naturecore#fairycore#forestcore#nature aesthetic#light aesthetic#fall aesthetic#fall#autumn#autumn style#autumn season#cottage aesthetic#d&d#d&d art#dnd#dnd art
47 notes
·
View notes
Text
Project: crocheted D20 plushie
Introduction:
I've been learning how to crochet, as mentioned before. Once I got the basic stitches down I figured it was time to learn how to make shapes.
I took one look at the first triangle I made, then promptly decided to make 19 more. The result was a D20 plushie: a worthy addition to my partner's novelty dice collection.
The project:
I followed this Happily Hooked Crochet Magazine tutorial to learn how to crochet triangles. There are multiple ways to make triangles, but I'm still learning so I wanted to keep it simple.
Once I'd made 20 of them, I embroidered a number ranging from 1 to 20 on each of them using the backstitch.
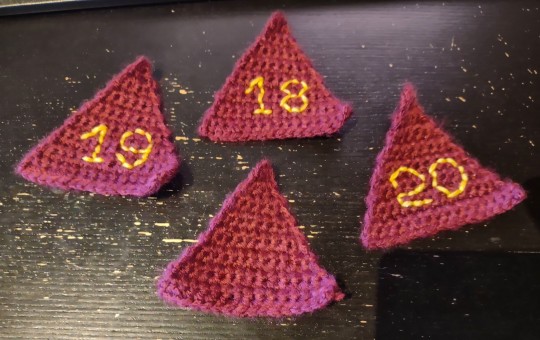
[ID: four red crochet triangles lying on a black surface. One of the triangles is blank. The other three have the numbers 20, 19, and 18 embroidered on them with a backstitch in yellow yarn.]
A D20 is an isocahedron. If you make one out of fabric and stuff it, it will turn into a ball. That's fine if that's what your project needs of course, but I wanted mine to look a bit more pointy.
After a bit of Googling, I found Ravelry-user Highresmess's take on the D20. They had used felt to shape their dice. I decided to follow their example.
I cut out 20 felt triangles that were slightly smaller than my crocheted triangles, then basted them onto the backs of my crocheted ones.
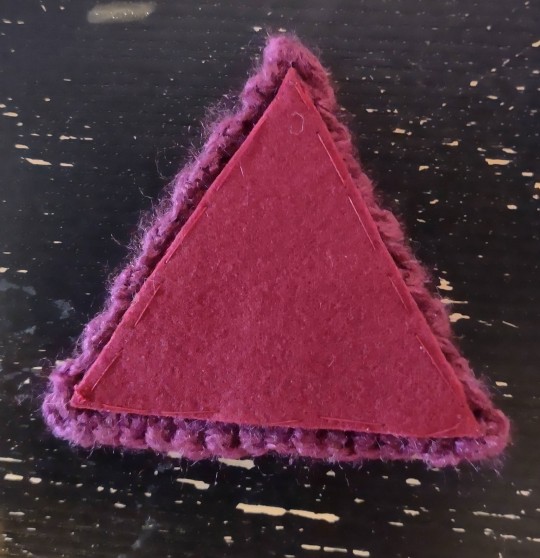
[ID: a red crocheted triangle lying on a black background. A slightly smaller red triangle made of felt has been basted onto the crocheted triangle with a matching red thread.]
I then started attaching my triangles to each other with a single crochet join, following this D20 3D model by Armor and Rum as a reference which uses the classic Chessex D20 number placement.
I picked the single crochet join because I wanted a ridge along the sides of my triangle to break up the inevitable roundness of the plushie.

[ID: five red crocheted triangles have been joined with a single crochet join. They each have a yellow number embroidered onto them: 2, 20, 8, 10, and 12.]
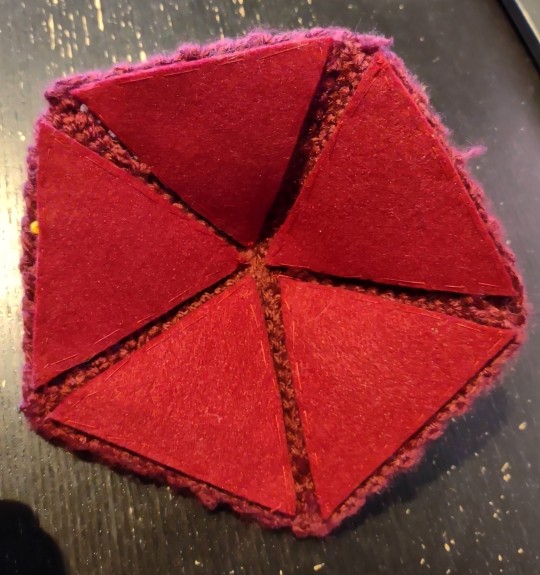
[ID: five red crocheted triangles have been joined with a single crochet join. A red felt triangle has been basted to the back of each of them.]
I kept attaching my pieces until I had one big flat shape consisting of 20 triangles.
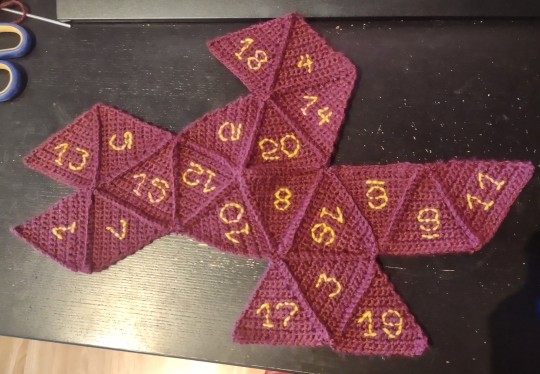
[ID: 20 red crocheted triangles have been attached to each other with a single crochet join. Yellow numbers ranging from 1 to 20 have been embroidered on each of them with a backstitch.]
I then continued joining the leftover triangle edges, slowly building the 3D shape of my isocahedron.
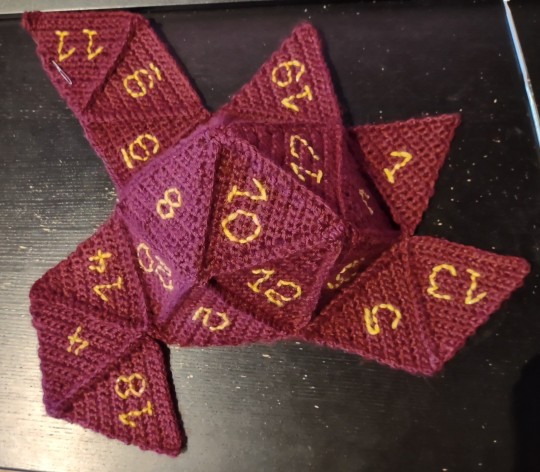
[ID: 20 red crocheted triangles have been attached to each other with a single crochet join, forming part of an isocahedron. Yellow numbers ranging from 1 to 20 have been embroidered on each of them with a backstitch.]
I left the two final flaps of my plushie open, then proceeded to stuff it with light-weight scraps of fabric and yarn cut into small pieces.
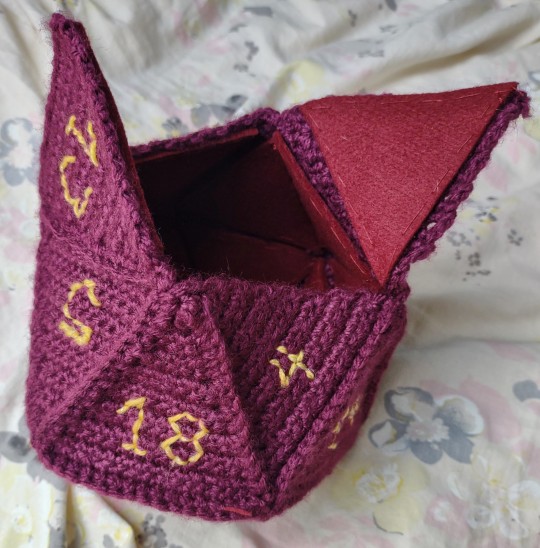
[ID: a red crocheted isocahedron lying on top of white floral bedsheets. Each triangle has a yellow number embroidered on it in backstitch, ranging from 1 to 20. The two upper most triangles haven't been joined shut yet. Red felt triangles have been basted to the insides of each triangle.]
When using fabric scraps to stuff a plushie, the fabric weight of your scraps is a useful way to control the weight of your plushie. I used light-weight scraps because I wanted my dice to be light, but you could also experiment with heavier scraps if you're making a pressure-based stimtoy or something.
I also made sure to cut my scraps into small pieces because larger scraps can make a plushie feel lumpy.

[ID: a red crocheted isocahedron lying on top of white floral bedsheets. The two upper most triangles haven't been joined shut yet. The plushie has been stuffed with a variety of small fabric and yarn scraps.]
I then closed up my plushie and weaved in any remaining loose ends. The resulting plushie is pretty round, but has some shaping to it thanks to the felt and the raised ridges.

[ID: a hand holding a large crocheted plushie of a red 20-sided die with yellow numbers. The top-facing number is 20.]
The die rolls pretty well. I wouldn't exactly call it balanced, but technically it could be used to play with.
Conclusion:
I really enjoyed this project. I learned how to make triangles and how to use the single crochet join, and I got a cool gift for my partner out of it. I also learned how to use the grid-like structure of the single crochet stitch as a canvas for embroidery, which opens up a lot of fun options for future projects.
Most of the things I make have some practical use, like clothes or utility items. It was nice to make something silly for once. I ought to do more projects like these.
#wasteless crafts#project#crochet#yarn crafts#diy#how to#tutorial#d20#isocahedron#dice#dungeons & dragons#pathfinder#crafts#d&d#amigurumi#embroidery#yarn#novelty dice#backstitch#single crochet join#single crochet#plushie#stuffed toy#felt#I really want to try cross stitch on a future crochet project now
462 notes
·
View notes
Text
Would anyone like to see my home-made paper dice?
Before I got actual dice for DND, I made my own dice out of paper.
(Hand is for comparison)

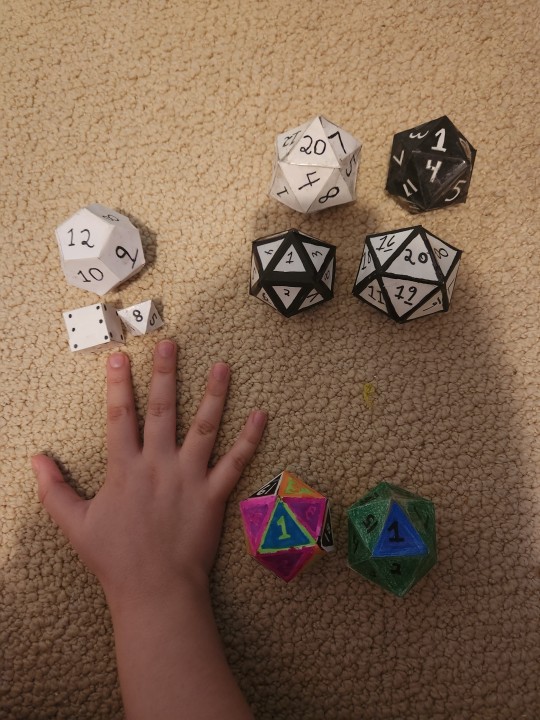
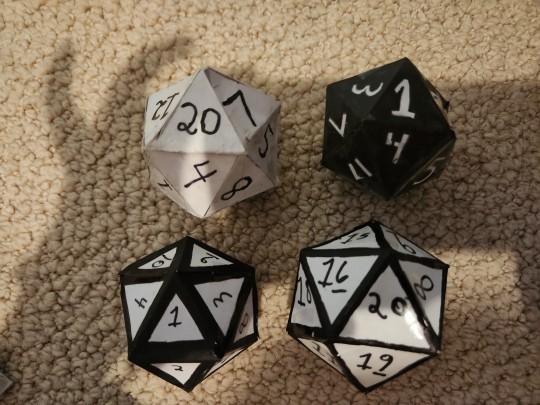
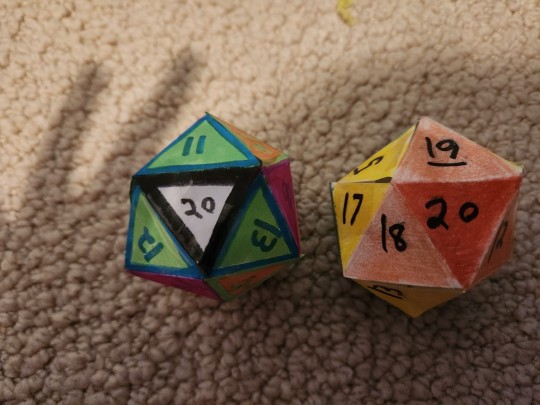

Top left: all my monochrome d20s
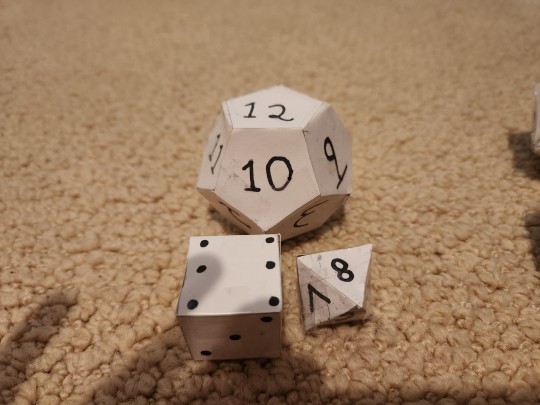
Top right: my non d20s, which include a d12, a d6, and a d8
Bottom row: my pair of LSDice, which are intentionally a mess of colors intended to cause pain to eyeballs
29 notes
·
View notes
Text
Making a shit ton of dice for the convention my partner and I are going to be selling at and I'm finally getting the hang of it I think. This last batch had minimal surface bubbles! It was barely noticeable this time and I'm v happy with it!
For reference I make gaming (D&D/7pc) dice sets! A few examples below lol


#dice#D&D#dnd#dnd dice#D&D dice#goblincore#aesthetic#diy#rpg dice#resin dice#handmade dice#dice maker#polyhedral dice#resin#resin work#small business#queer owned business#gaming#handmade gifts
11 notes
·
View notes
Text
#D20#DND#Dice#Embroidery pattern#Tabletop games#Board games#RPG#Dungeons and Dragons#Handmade#DIY crafts#Needlework#Digital download#Cross-stitch#Embroidery design#Gaming decor#Geek culture#Whimsical#Artistic#Home decor#Craft project#Gaming enthusiasts#Stitching#Thread#Hoop art#Gift idea#Craft supplies#Crafters#Creative expression#Decorative stitching#Sewing enthusiasts
51 notes
·
View notes
Text
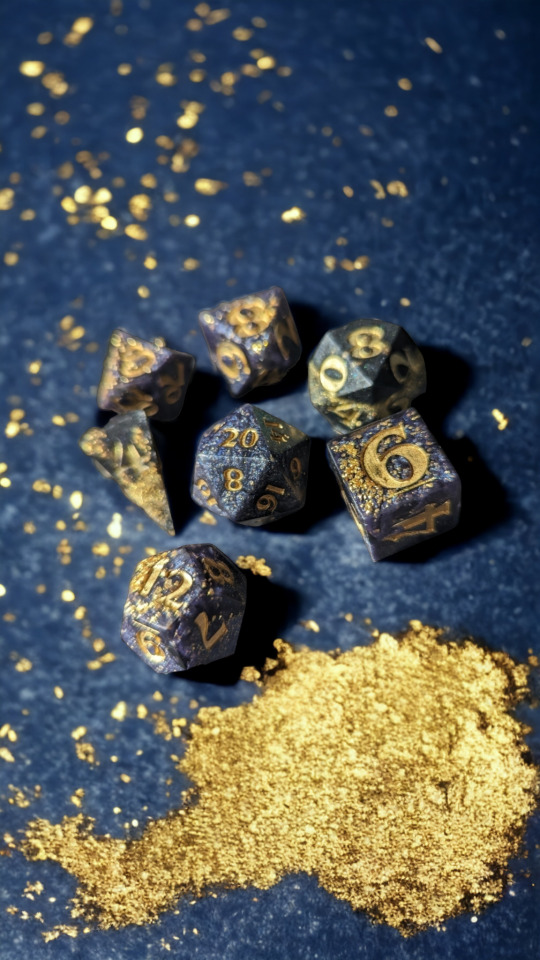
My sister gave me a resin dice mold for Xmas.
This is the results of my first attempt.
More than a few defects, but damnit, they're MY dice!
I'm going to paint the numbers silver.
17 notes
·
View notes
Text
Been just plowing through updating my photos for my handmade stuff, here's some tiny dice and jumbo dice I made long ago


37 notes
·
View notes
Text

psychedelic crochet dice bags are available now in the shop :3
7 notes
·
View notes
Text
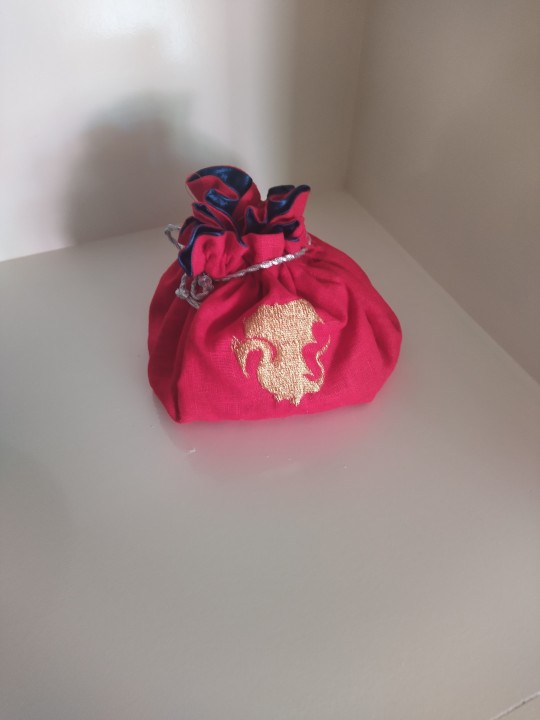
Pov: you're mentally still not over a show that ended a decade ago, but you're also really into ttrpg.
Made this Dice Bag for myself a little while ago. It has 7 pockets to fit my dice and a patted bottom.

22 notes
·
View notes
Photo
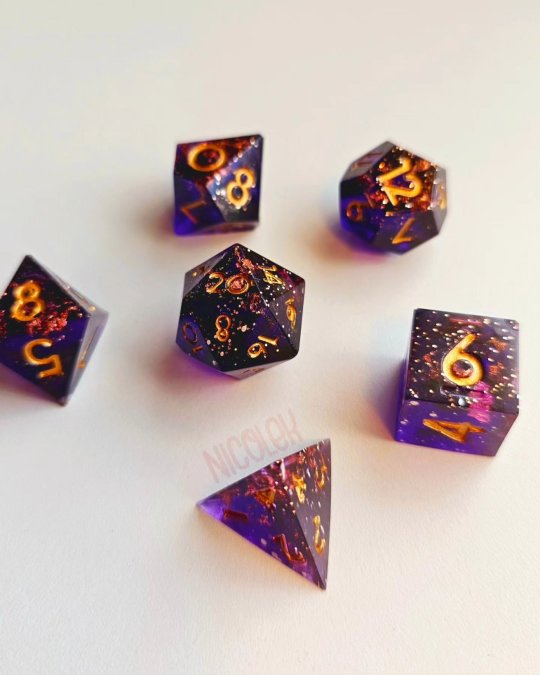

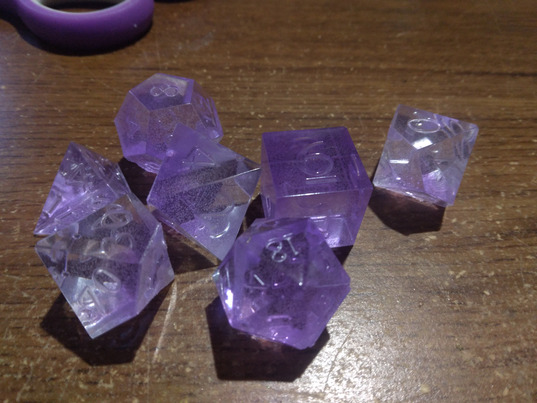
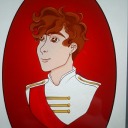
The second attempt to dice making… this time Essek inspired set
#my art#art craft#epoxy resin art#epoxy resin dice#handmade dice#RPG dice#dice goblin#purple and gold#critical role art#traditional art#diy#essek thelyss#nicolekart
47 notes
·
View notes
Last Seen Blogs

10number5star
AUCUNE IDEE

recycledcactus
1 million ring doorbells

oh-hi-im-nathaniel-blog1
Moved To:
centaurs-should-be-real
Art is what I do

owlish-owlhouse
The Owl House X Reader