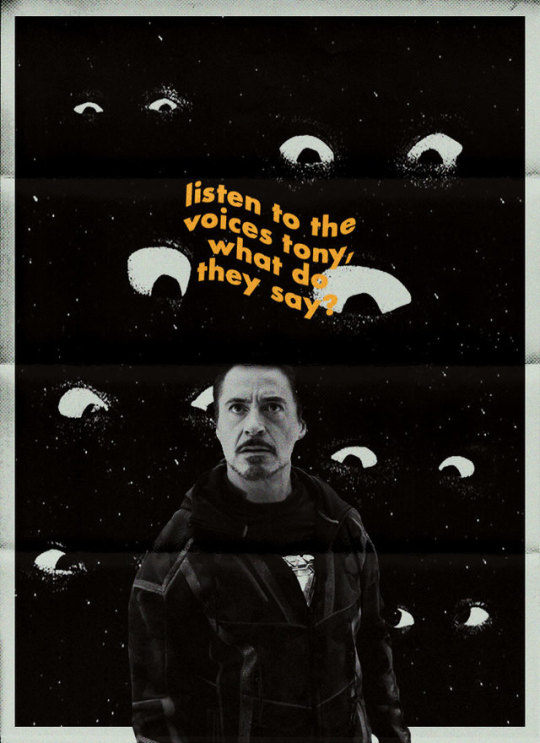
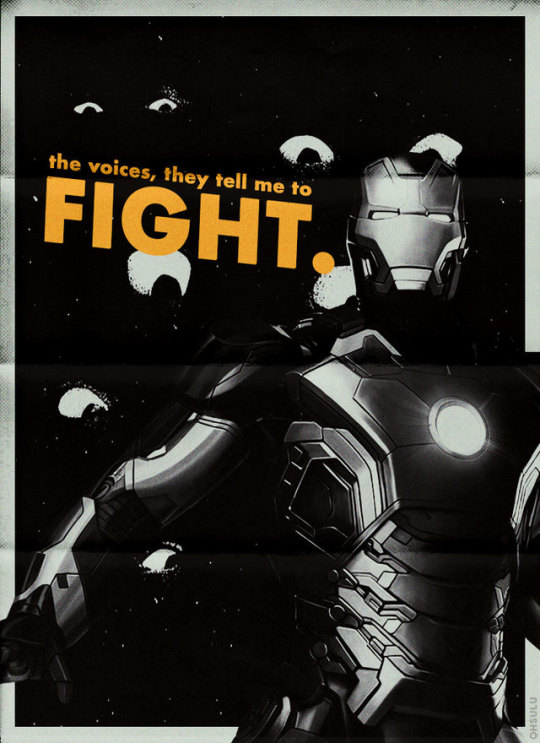
#shutupnet
Photo
url graphics
↳ If you gave someone your heart and they died, did they take it with them? (for @deceasedtony)
#mine#url graphics#deceasedtony#tv and film#film: avengers: endgame#a:e#avengers: endgame#avengers#endgame#iron man#tony stark#stark#thespidermannet#petermaximoffnet#graphicsquad#metalarmsquad#shutupnet#marveladdicts#marveledits#mcugraphics#dailyteammarvel#mcufam#dailyavengers#100#500#1k
3K notes
·
View notes
Photo

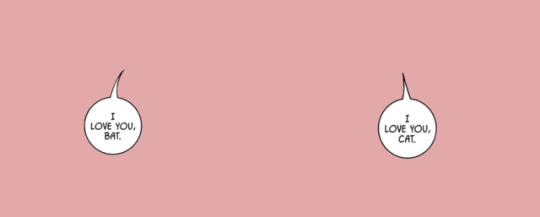

batman rebirth #15
“hey, pretty boy…catch me.”
#bruce wayne#selina kyle#batcat#bruce/selina#brucewayneedit#selinakyleedit#dcedit#dc comics#comicedit#shutupnet#jlnet#my graphics
384 notes
·
View notes
Text
mightycaptainamerica is now jonesjessicca
Mutuals please spred the word. And now I track #userpetra
#i just love this new jj url#i am so happy because of it#and if you make some edit feel free to tag ne#petra speaks#shutupnet
27 notes
·
View notes
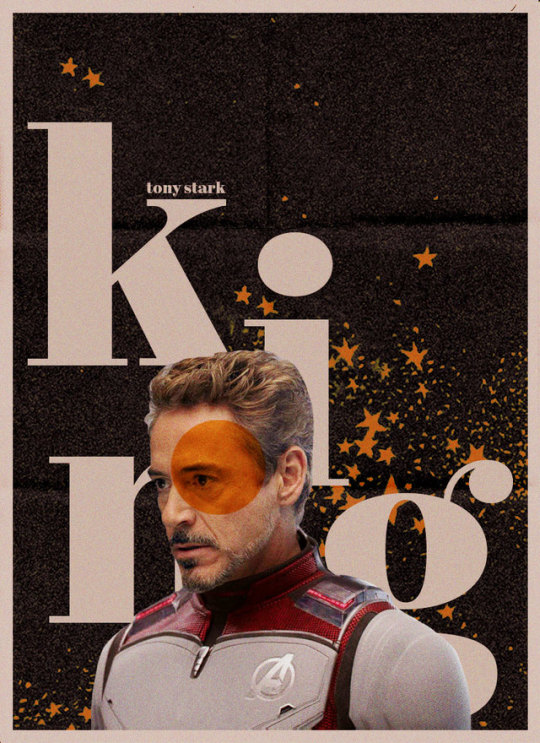
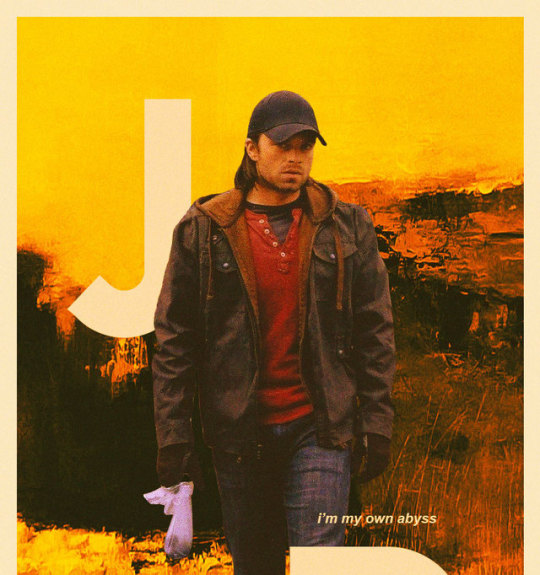
Photo
url graphics
↳ Nothing’s been the same since New York. (for @starkarium)
#mine#url graphics#starkarium#tv and film#film: avengers: iw#tony stark#iron man#stark#thespidermannet#petermaximoffnet#graphicsquad#metalarmsquad#shutupnet#marveledits#marveladdicts#mcugraphics#mcufam#dailyavengers#marvel edit#mcu edit#tony stark edit#iron man edit#100#500
2K notes
·
View notes
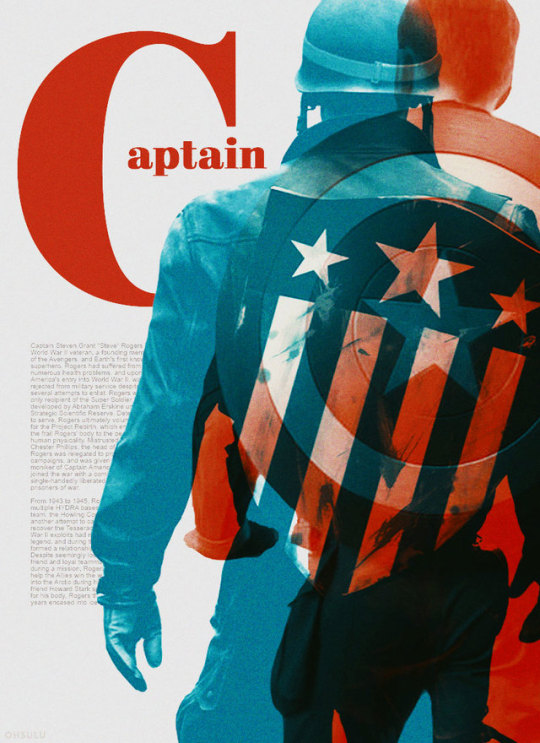
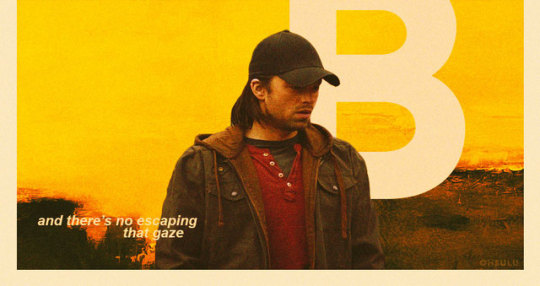
Photo
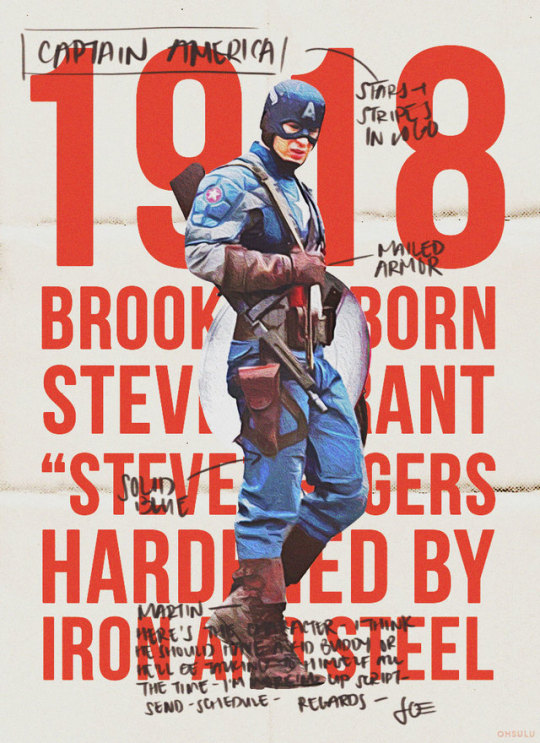
url graphics
↳ Captain America fact-sheet featuring Joe Simon’s original notes on Steve from 1940. (for @cptsteven)
#THIS HAS TO BE MY FAV EDIT I'VE EVER MADE#mine#url graphics#cptsteven#tv and film#film: captain america: tfa#ca:tfa#captain america: the first avenger#steve rogers#rogers#thespidermannet#petermaximoffnet#graphicsquad#shutupnet#metalarmsquad#marveladdicts#marveledits#mcufam#dailyteamcap#dailyavengers#mcugraphics#steve rogers edit#captain america edit#marvel edit#100#500#1k
1K notes
·
View notes
Photo

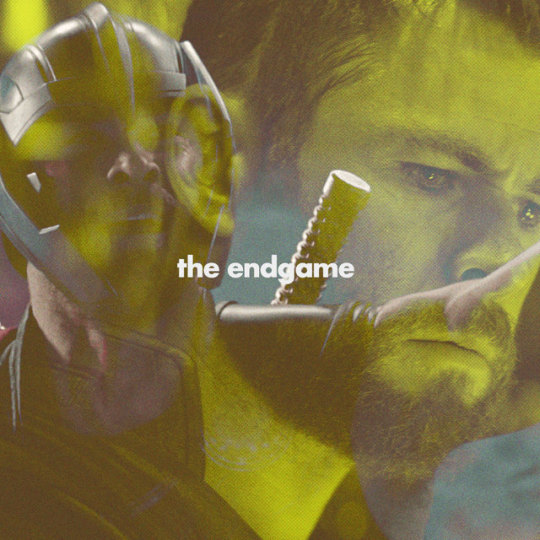
Whatever it takes… [click for high res!]
#mine#tv and film#film: avengers: endgame#avengers#avengers: endgame#endgame#a:e#marvel#mcu#tony stark#steve rogers#thor odinson#iron man#captain america#thor#mcugraphics#thespidermannet#graphicsquad#metalarmsquad#dailyteamcap#marveladdicts#dailychrisevans#dailysteverogers#marvel graphics#endgame graphics#endgame edit#100#300#500#1k
2K notes
·
View notes
Photo
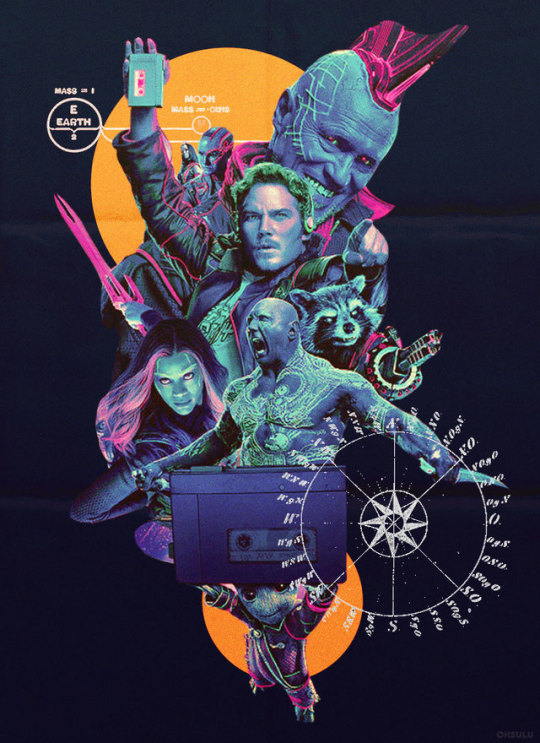
url graphics
↳ Losers watch it happen, winners make it happen. (for @gotgavengers)
#mine#url graphics#gotgavengers#tv and film#film: guardians of the galaxy vol.2#thespidermannet#graphicsquad#petermaximoffnet#metalarmsquad#shutupnet#marveledits#marveladdicts#mcugraphics#dailyavengers#mcu#marvel#mcu edit#marvel edit#gotg edit#gotg vol.2#gotg#100#500
698 notes
·
View notes
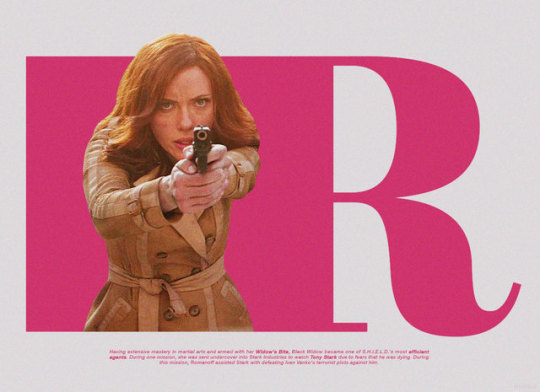
Photo
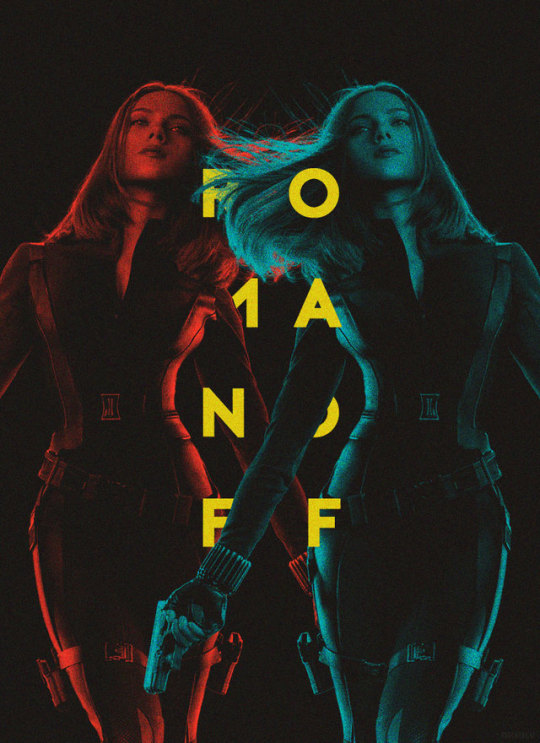
url graphics
↳ I’m sorry, did I step on your moment? (for @bi-romanoff)
#mine#url graphics#bi-romanoff#tv and film#film: captain america: tws#romanoff#thespidermannet#petermaximoffnet#graphicsquad#metalarmsquad#shutupnet#marveladdicts#marveledits#mcugraphics#dailyteamcap#dailyavengers#mcu edit#marvel edit#mcu graphic#marvel graphic#natasha romanoff#black widow#100
604 notes
·
View notes
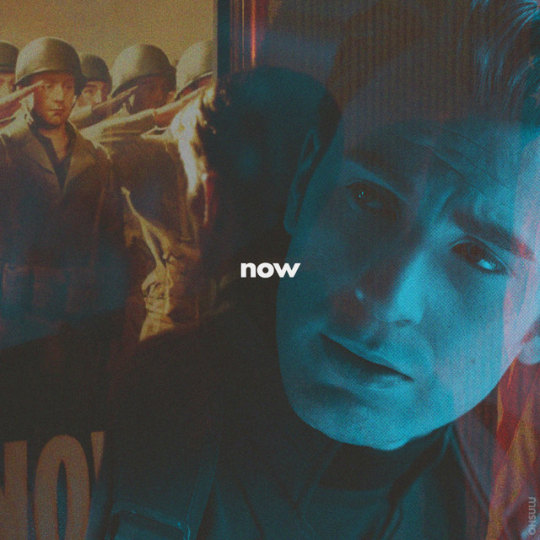
Photo
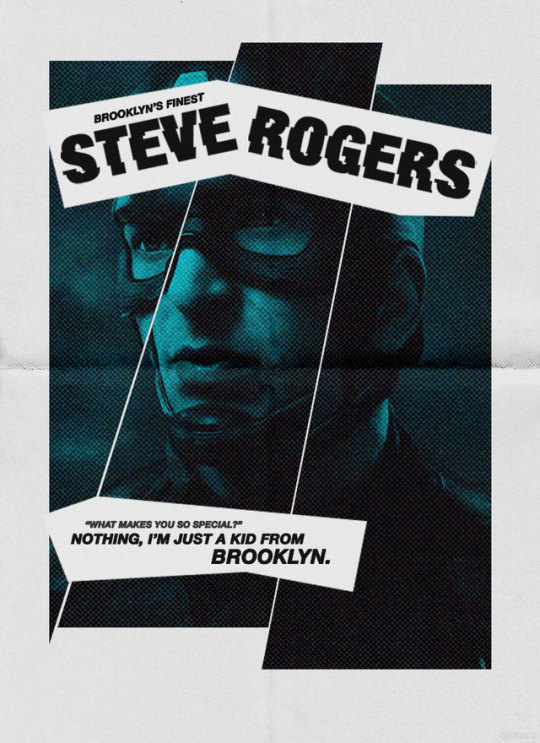
url graphics
↳ Nothing, I’m just a kid from Brooklyn. (for @oldbrooklynsoul)
#mine#url graphics#oldbrooklynsoul#tv and film#film: captain america: tfa#captain america#steve rogers#rogers#ca:tfa#captain america: the first avenger#graphic#edit#thespidermannet#petermaximoffnet#graphicsquad#metalarmsquad#shutupnet#marveledits#marveladdicts#mcugraphics#dailyteamcap#dailyavengers#mcu#marvel#100#500
664 notes
·
View notes
Photo
url graphics
↳ You start running they'll never let you stop. You stand up, push back... Can't say no forever right? (for @bicaptain)
#mine#url graphics#bicaptain#tv and film#film: captain america: tfa#film: captain america: tws#rogers#steve rogers#captain america#catfa#catws#thespidermannet#petermaximoffnet#graphicsquad#metalarmsquad#shutupnet#marveledits#marveladdicts#mcugraphics#dailyteamcap#dailymarvel#dailyavengers#steve rogers edit#captain america edit#marvel edit#mcu edit#100
523 notes
·
View notes
Photo
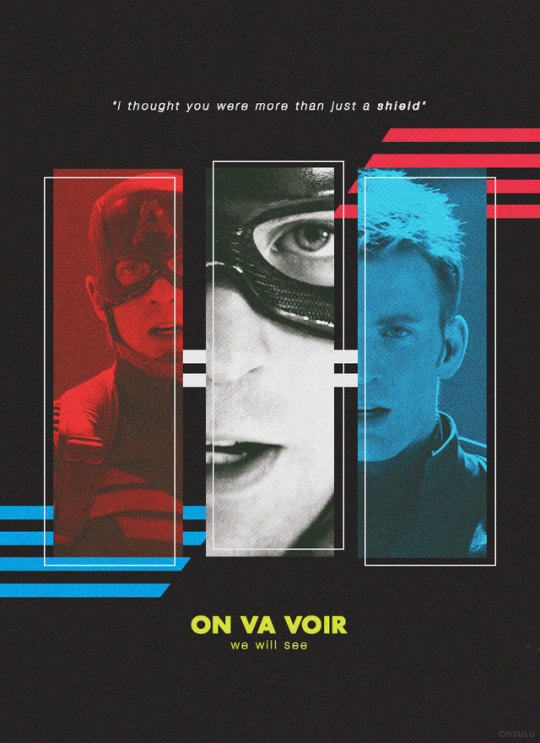
url graphics
↳ I thought you were more than just a shield. (for @on-va--voir)
#mine#url graphics#on-va--voir#tv and film#film: captain america: tws#ca:tws#catws#captain america: the winter soldier#steve rogers#captain america#rogers#thespidermannet#petermaximoffnet#graphicsquad#metalarmsquad#shutupnet#marveledits#marveladdicts#mcugraphics#mcufam#dailyavengers#dailyteamcap#captain america edit#steve rogers edit#mcu edit#marvel edit#100
477 notes
·
View notes
Photo
url graphics
↳ Then suddenly the sun has gone and left again and everything is quiet. (for @bbarnes)
#mine#url graphics#bbarnes#tv and film#film: captain america: cw#thespidermannet#petermaximoffnet#graphicsquad#metalarmsquad#shutupnet#marveladdicts#marveledits#mcugraphics#mcuedit#marveledit#dailyteamcap#dailyavengers#bucky barnes#barnes#the winter soldier#cacw#captain america: civil war#100
336 notes
·
View notes
Photo

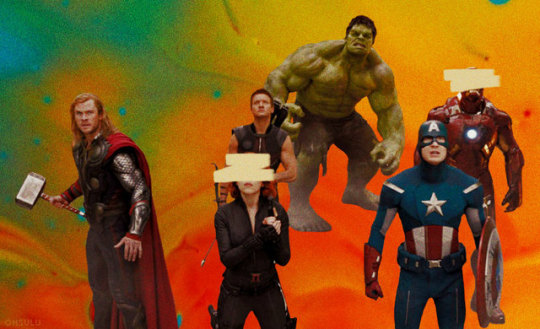
url graphics
↳ Earth’s mightiest heroes. (for @avengher)
#mine#tv and film#film: the avengers#url graphics#avengher#thespidermannet#petermaximoffnet#graphicsquad#metalarmsquad#shutupnet#marveladdicts#marveledits#mcugraphics#dailyteamcap#dailyavengers#dailymcu#mcu edit#marvel edit#mcu graphic#rogers#stark#thor#romanoff#hulk#barton#avengers#100
267 notes
·
View notes
Photo

url graphics
↳ I only act like I know everything. (for @umromanov)
#mine#url graphics#umromanov#thespidermannet#petermaximoffnet#graphicsquad#metalarmsquad#shutupnet#marveladdicts#marveledits#mcugraphics#dailyavengers#widowsource#tv and film#film: captain america: cw#romanoff#natasha romanoff#mcu edit#marvel edit#graphic#100
281 notes
·
View notes
Photo
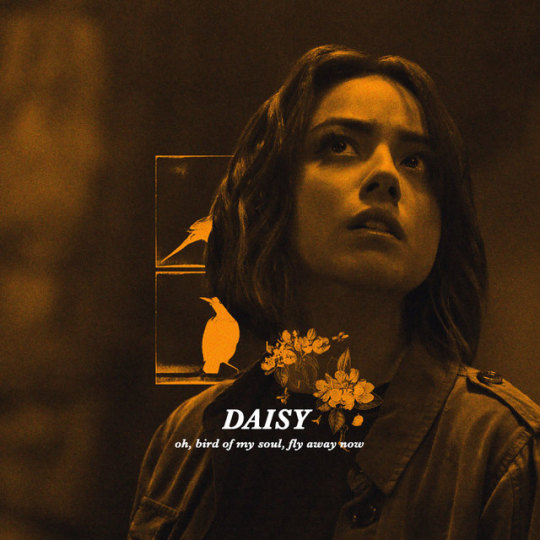
url graphics
↳ Bird of my soul. (for @agent-084)
#mine#url graphics#agent-084#tv and film#tv: agents of shield#daisy johnson#agents of shield#aos#aos edit#thespidermannet#petermaximoffnet#graphicsquad#metalarmsquad#shutupnet#marveladdicts#marveledits#mcugraphics#dailyavengers#dailymcuedits#mcu edit#marvel edit#100
347 notes
·
View notes
Text
JULIE DOES GRAPHIC TUTORIALS – VOL.1
Last week I received an ask requesting a tutorial on this graphic so here she be! I’ve never done a tutorial on graphic-making before so forgive me if this isn’t the most in-depth tutorial/best example.
Tutorial below the cut.
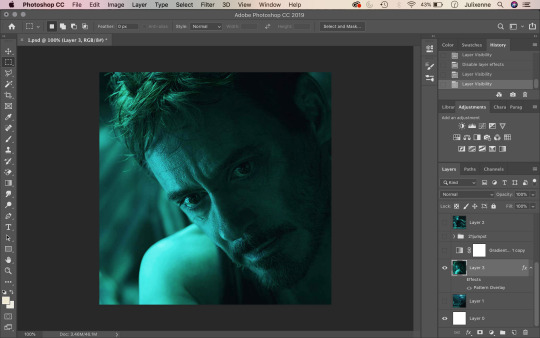
1. Start by opening your base image on Photoshop – crop to your liking. I usually size my square edits 1100 x 1100 pixels to maximise quality!
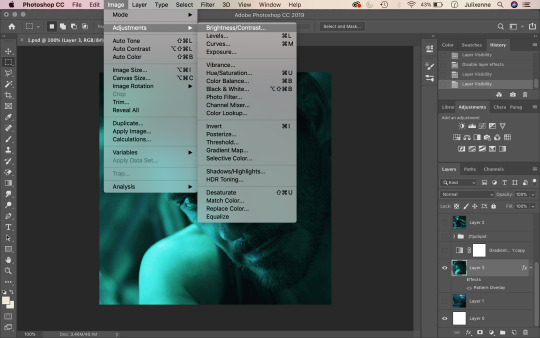
2. Up above where all your tabs are, click on Image and hover over the Adjustments section.
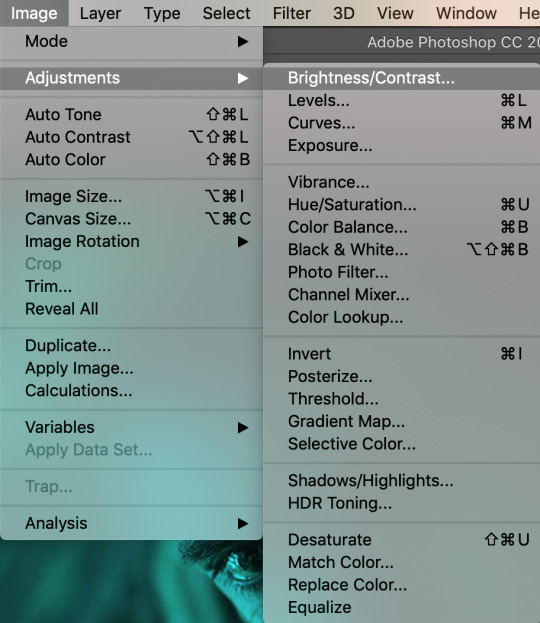
3. From here, you will find settings such as Brightness/Contrast, Vibrance, Hue/Saturation, and Shadows/Highlights. When making graphics, these are the settings I frequently mess around with. Using the aforementioned settings, adjust the sliders accordingly to fix the brightness and overall look of your base image to your liking.
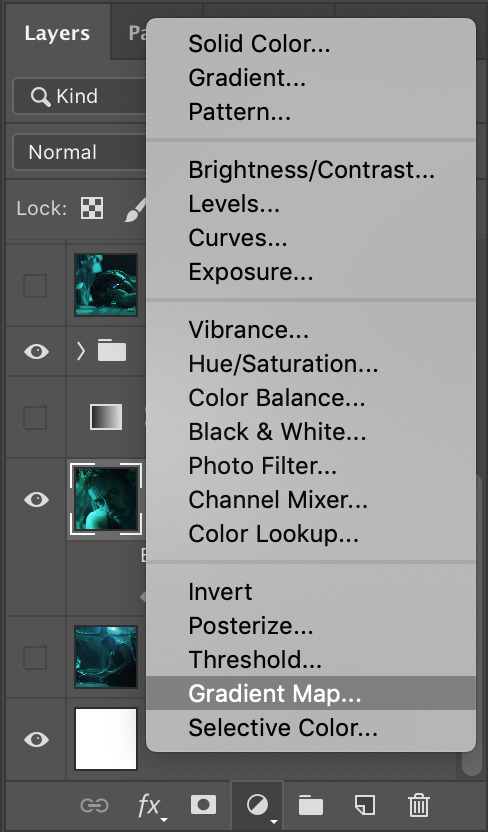
4. After adjusting your base image’s look, head over to the bottom right of your screen, where the layers panel is. At the very bottom, you will see a circle that is half empty and half filled. Click this, and find Gradient Map.
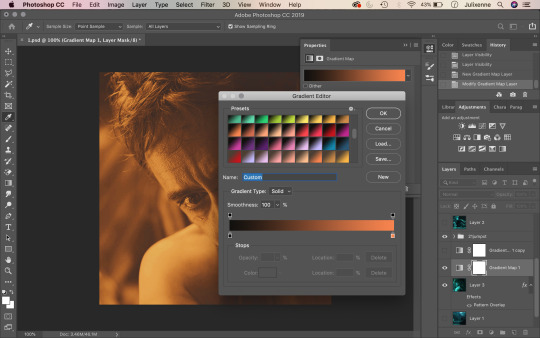
5. Click on the gradient bar and this window should open up. The gradients you see on my screenshot have been pre-installed. You can find these same gradients (and more) on DeviantArt and install them to your own computer! Pick a gradient duo you like (in this scenario, black and a warm, vibrant tone works best). I ended up using #151311 and #CD5517 as my two colours for the gradient.
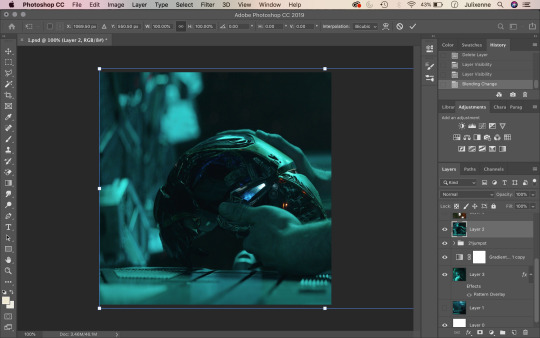
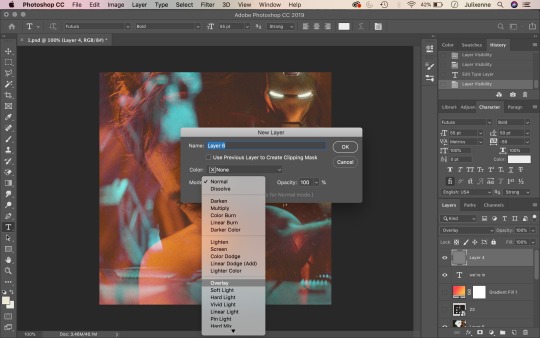
6. Press enter and minimise your gradient adjustment window. After this, find your second image which will be your “overlay image”. Paste it on top of your base image layer (drag upwards if it is underneath your base image layer) and adjust its position to your liking like so.

7. Make sure your “overlay image” layer is selected. Under your layers panel, there is a search bar that says “Kind” with a magnifying glass next to it. Click the drop-down button that says “Normal” on it. Here you will find different blending settings for your overlay image. Choose “Lighten”.
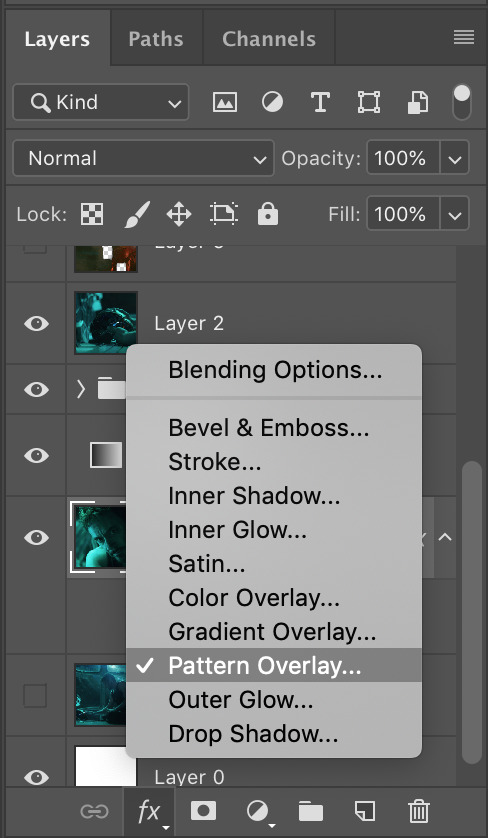
8. To add a little more styling to your edit, click back and make sure that your base image layer is selected. On the bottom-most selection of buttons (bottom right corner), click on the “FX” button and then “Pattern Overlay”.
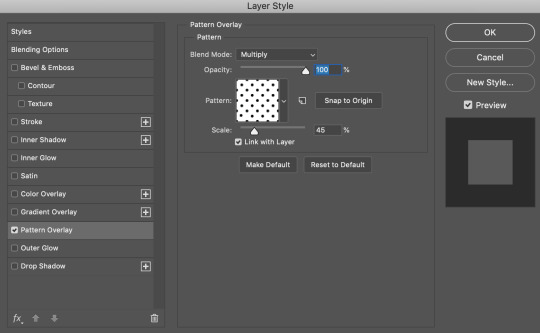
9. You will see the Pattern Overlay adjustment window on your screen. Ensure the blend mode is set to multiply, opacity at 100%, and that your pattern is the polka-dot-looking option. Scale your pattern to 45% (or not – adjust to your liking!)
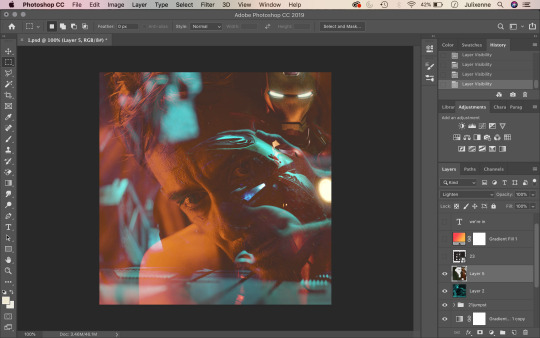
10. Your edit should start to look like this now! (Except I added a third image of Iron Man on the top right corner so disregard that – I was just trying to make things a little more fun hehe – you can add as many images you want on top of your base image. Making edits is all about trial and error and going nuts.)

11. Assuming that you are on the “Essentials” mode of Photoshop, the text tool should be on the left-hand side of your screen as it is on mine. Click the gigantic “T” and drag a text box on your image like so. Type whatever text you wish. (In this tutorial, I used the font Futura and centred my text to the image.)
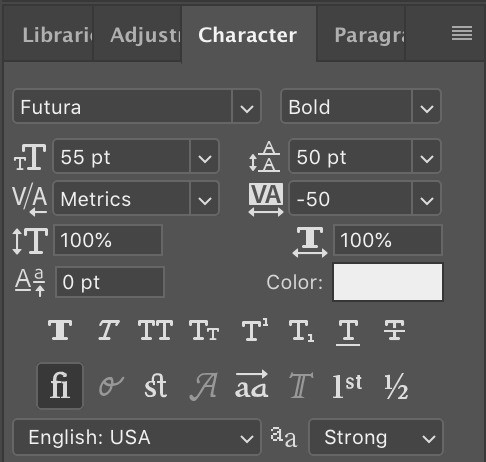
12. Bonus! If anyone wants the full settings of my text for this edit, here they are! Follow if you wish.
13. In classic Julie graphic-making tradition, we have to add a layer of noise to top things off. From the bottom right corner of your screen, next to the folder, there is a page button. Click this while holding down option (mac, windows: alt) and a “new layer” window should open. Under mode, select overlay.
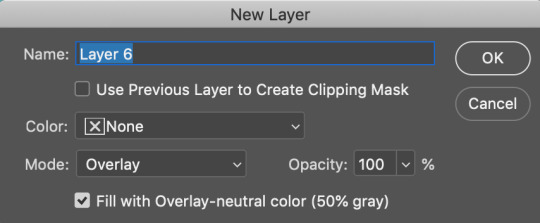
14. After selecting overlay as your blending mode, tick the box that says “Fill with Overlay-neutral colour (50% grey)”.
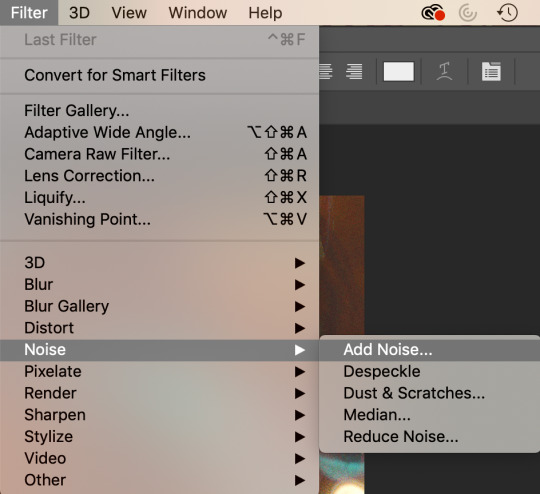
15. Above where all the main Photoshop tabs are, click on “Filter”. Hover your cursor all the way down to “Noise” and select “Add Noise”.
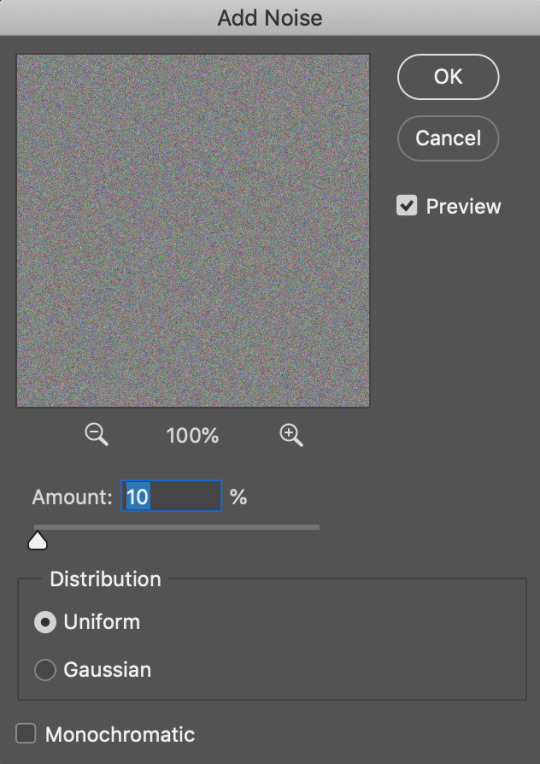
16. Change the amount to 10 (or something else that will suit your taste), set distribution to uniform and click OK!

17. And there you have it, folks! Save as a JPEG and you’ve got yourself an edit. ✨
#julie does graphic tutorials#thespidermannet#petermaximoffnet#graphicsquad#metalarmsquad#shutupnet#graphic tutorial#edit tutorial#iron man#tony stark#iron man edit#tony stark edit
150 notes
·
View notes
Last Seen Blogs