
handsybaindaid-blog
× Robin ×
* bad cosplayer and a pretty bad artist *
small birb irl / taken by my bby yuuri 💕 /
17 posts
Don't wanna be here? Send us removal request.
Last Seen Blogs

228renea86
|- R e n e a -|

drpriyatiwari
Dr Priya Tiwari | Medical Oncologist | Delhi
otome-corner-cafe
Serving Up Romantic Topics
urluckyimtrash
ur lucky im trash @ art
flowerhloe
angelina
Text
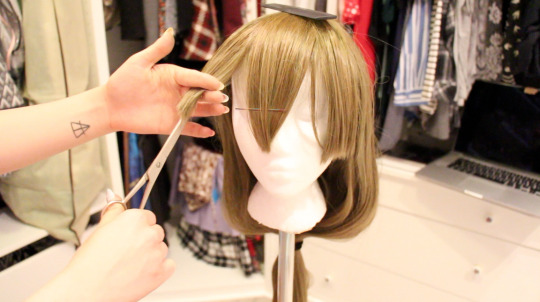
Creating a Italy/Romano/Canada Curl
This tutorial was supposed to be a video tutorial, but thanks to my camera only recording my chest. It’s not. Anywho, I hope this is at least somewhat helpful in your many adventures on making cosplay curls ^^
Excuse the bad photos
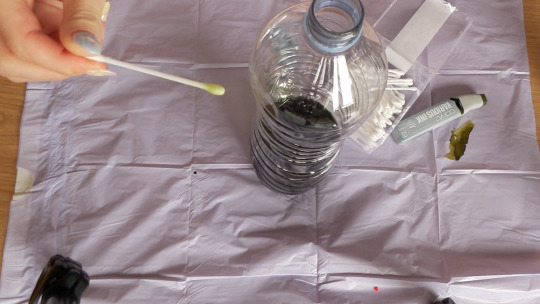
Things you will need:
Scissors
Tape (Just regular scotch tape)
Hairspray (A non-scented strong kind preferably)
Super glue (A small squeeze bottle with a nozzle, do NOT use a glue pen)
A stack of paper plates (Or something that’s not newspaper so you can hold your curl in place while hairspraying)
Large and small bobby pins (Small so they wont poke out of your wig)
Beading/Jewelry wire (Bendy wire that holds it shape, can be found at Walmart)
Hair extension in the color that you need (Hair extensions can be bought at various hair salons/supply stores, make sure you get a color that you wont mind getting slightly darker due to hairspray and a length that you know will cover the entire wire)
1. Get our your scissors, plate, and hair extension. Find a good place in your extension to cut and cut out a 1 in or a ½ inch of the extension out. (Anymore and it’d be too huge for the curl) The width of the extension is just based on your preference. After cutting, tug at the hair extension to pull off any of the stray hairs. You can throw away the hairs that fall off during cutting.
2. Get out your wire and pull out enough you think will make the base of your curl. You can edit the wire once done, but not very much, so remember that whatever wire you cut will most likely be the wire you have at the end.
3. Bend the wire with your hands into the shape you need for the curl. Snip off excess if it is too long.
4. Then tape down or secure the end of the extension to the beginning of your wire someway. (Not to sound weird, but I simply used my mouth) Then carefully wrap the hair extension around the wire. This will give it a more natural look, instead of a braided curl. Also remember to wrap extremely tightly and to make sure none of the wire is showing. You should wrap til your about an inch from the tip of the wire or less.
5. You may need an extra pair of hands for this part, but pull out the bobby pins and slide them every few half inches along the curl. DO NOT use the bumpy end of the bobby pin as it will make the wire show, use the curled O end of the bobby pin. Then set the curl on the plates and tape down the ends of the bobby pins away from the curl. I recommend doing this extremely fast so the curl doesn’t unwind.
6. Get your hairspray and spray it all over the curl, then using your fingers (Yes you’ll get stick but its for a good cause) shape the end of the extension over the tip of the wire. I find its easier to affix the extension to the wire at the tip then wrapping because there too small of enough hair to wrap with. Trim off some of the wire if it’s too long or if its showing. (You may also need to trim the extension end too) Also, take your finger and pat down the white bubbles that will form on the hair so the curl will not look lumpy.
During this step, DO NOT mess with the loose hairs sticking from the curl. You can trim those later. Let them be for now.
7. You’ll basically want to repeat Step 6 for at least 7 or 8 coats of hairspray, if your curl still looks slightly weak, hairspray it some more! Also, you may want to flip after the 3rd coat and start spraying the other side as well. Even though this may sound completely silly using hairspray for glue, it actually works very efficiently.
8. Eventually after enough coats and your curl looks very sturdy, get out the super glue and a small bobby pin. Pinch the sides of the end of the hair extension and super glue them together if your hair extension is like mine. Then trim the excess wire that may stick out, and finally super glue the small bobby pin to the edge of the hair extension.
REMEMBER: The place you super glue your curl is very important because it determines where you will be pinning in your curl. I recommend testing where you need the bobby pin to face when pinning to your wig, then super gluing to the curl end.
After about 24 hours (Need to let the glue sit and bond well) your curl should be fully usuable. The unique thing about this type of curl is that it bends, if you used enough coats of hairspray, with the hair. Also its a much better alternative to those lousy looking braids you get with your wig.
If you have any questions please ask in my Ask box! ^^ I dont mind a bit.
270 notes
·
View notes
Photo
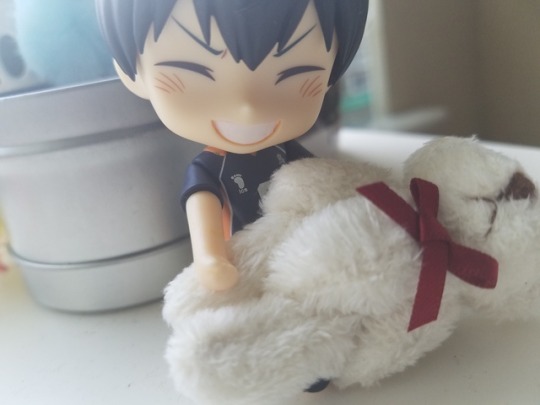
Bean ☆
#haikyuu!!#anime#manga#otaku#figure#doll#bjd#nendoroid#kageyama tobio#kagehina#kageyama#kageyama nendoroid#photo#photography#aesthetic#aestheitcs#bear#stuffed animals#teddy bear#soft#cuddle#blueberry
48 notes
·
View notes
Photo

Hey guys! Today I want to share with you how I made my fem!Makoto wig!
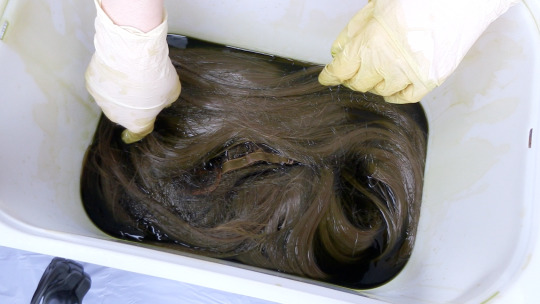
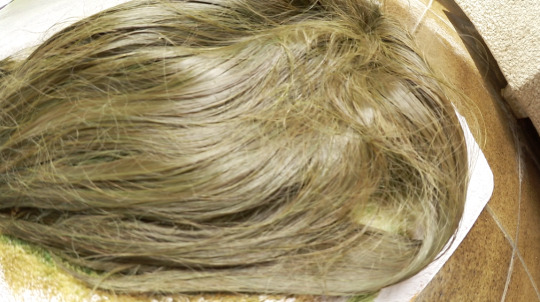
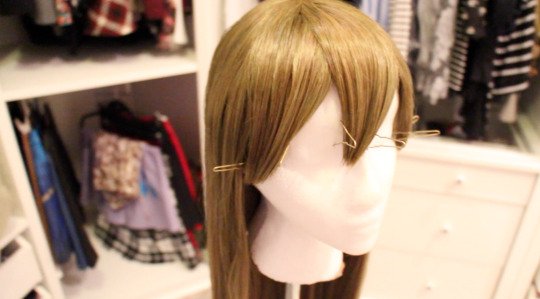
Makoto’s hair color is kind of confusing, a brownish olive color. A lot of people use a brown wig but I wanted the color to be as close as possible. So I bought a light brown/ dark blonde wig from wigisfashion.com and then dyed it. To dye the wig I mixed Copic Various Ink (shades: G99 olive and YG97 Spanish Olive) + rubbing alcohol. I left the wig with the ink for a few hours and then let that dry. Once it dried, I removed the excess ink with cold water. Then, once it was dry, I was able to style it!
Here you have a few photos of the process!
______________________________
Hola a todos! Hoy quiero compartir con vosotros como hice mi peluca de fem!Makoto!
El color de pelo de Makoto es algo confuso, entre oliva y marrón. Mucha gente usa una peluca marrón pero yo quería que el color fuera lo mas parecido posible. Es por eso que compré una peluca de color rubio oscuro/ marrón claro de wigisfashion.com y luego la teñí. Para teñirla mezclé Copic Various Ink (tonos: G99 olive and YG97 Spanish Olive) + alcohol. Deje la peluca en remojo con la tinta durante varias horas y dejé que se secara. Una vez seca la aclaré con agua fría para eliminar el exceso de tinta. Luego al secarse, ya estaba lista para ser peinada!
Aquí tenéis algunas fotos del proceso!
69 notes
·
View notes
Photo
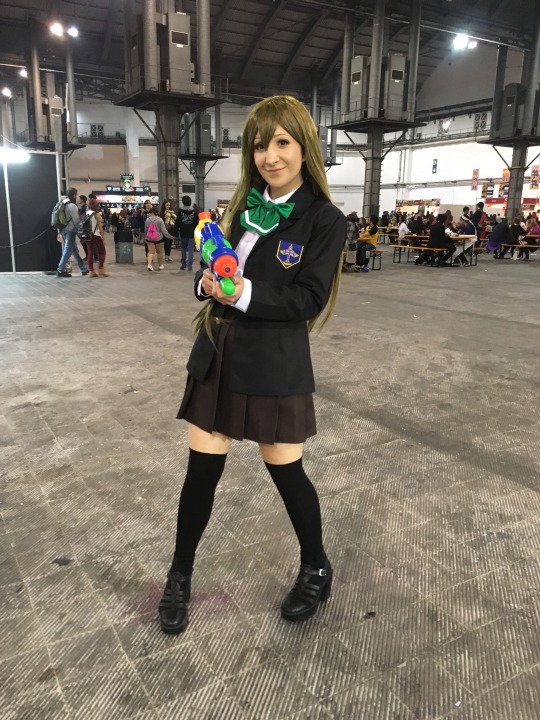
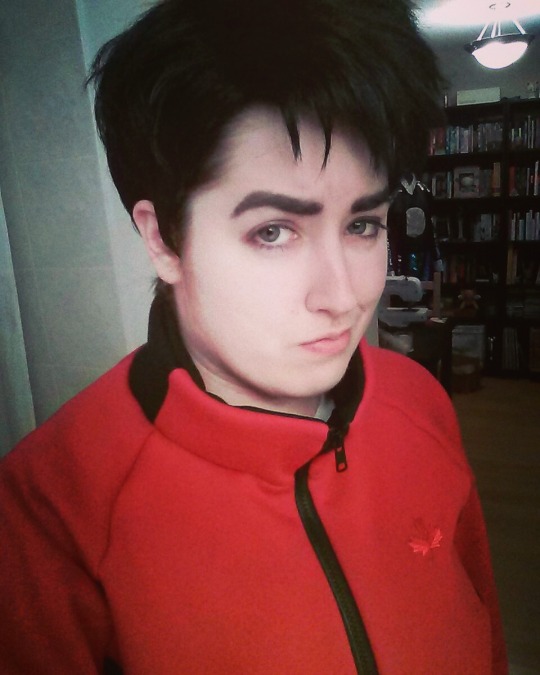
As many of you know, I’m Canadian. As many of you may or may not know, I’m also a fan of men’s figure skating (and even had the chance to attend a night of Skate Canada this year) so I was beyond stoked when Yuri On Ice announced a Canadian character. It only made sense for me to start planning a cosplay for Jean Jacques Leroy.
For this project I’m going to be trying out a new Canadian pattern brand, Jalie for athletic jackets. I’ll be sure to write up a review on the pattern once I’ve completed my jacket for anyone else looking to make their own jacket.
Also major props to Fabricville for always having ridiculously fast shipping. I’m talking 24-48 hours for most orders. SO FAST!
-Heather
36 notes
·
View notes
Photo
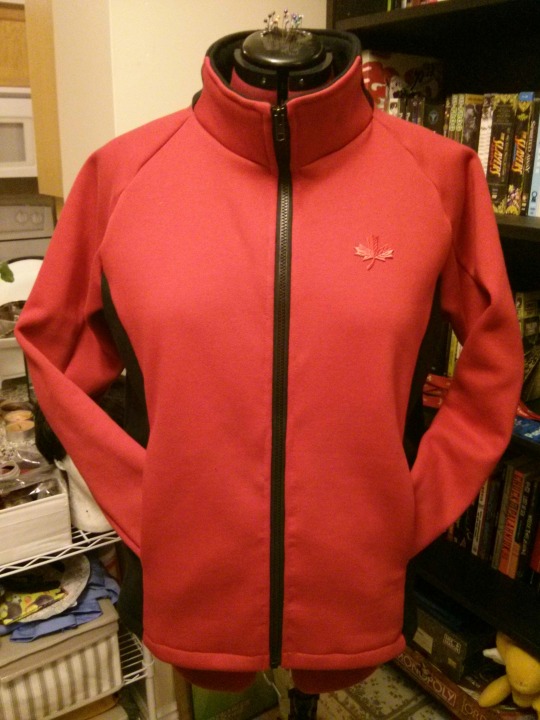
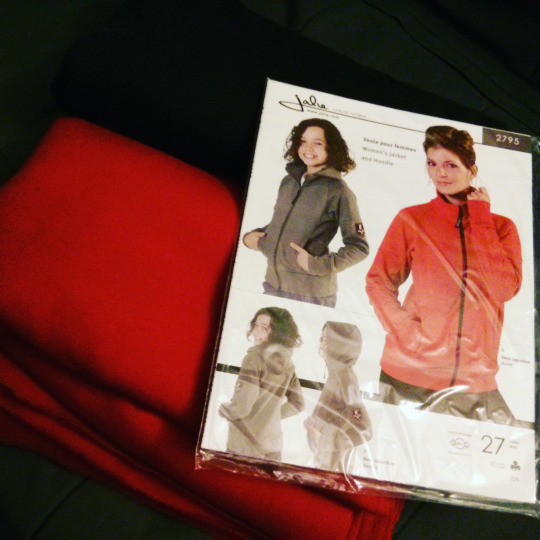
Mini Cosplay Tutorial: JJ from Yuri On Ice!!!
Materials:
2 yards red jogging fleece (from Fabricville.com)
1 yard black jogging fleece (from Fabricville.com)
1 red maple leaf patch (from Fabricland, other versions also available at Canadian Michael’s stores)
2 spools of thread at least (I went through an entire black spool of thread while zig-zag stitching all the edges)
Wig: Rufio from Arda Wigs in natural black
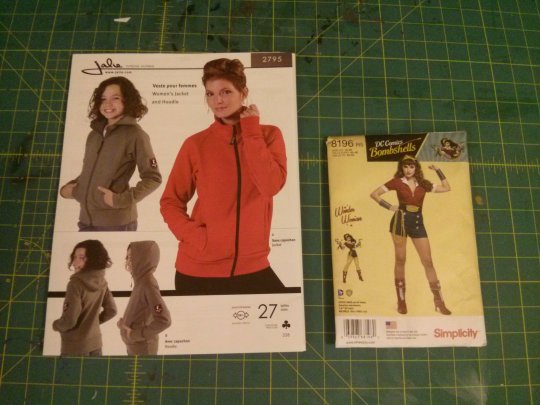
Pattern: Jalie 2795 (all sizes)
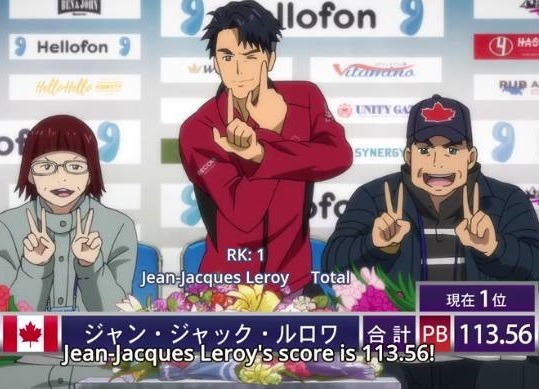
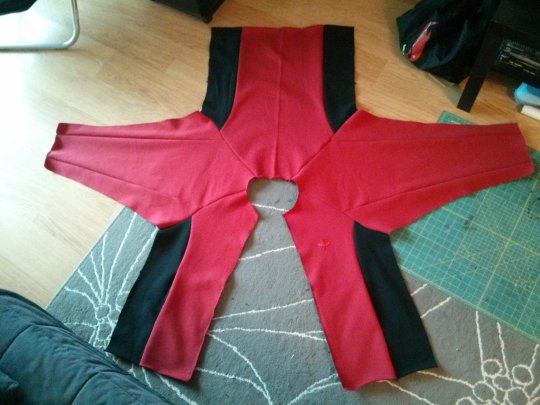
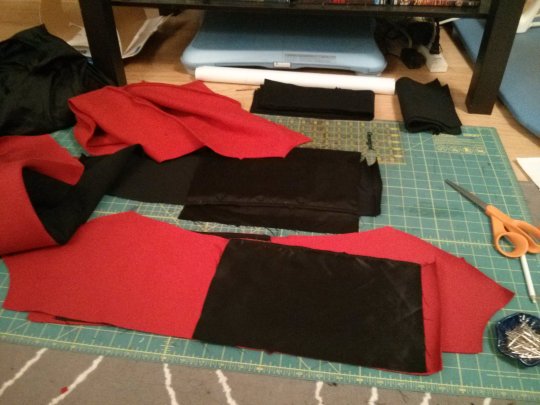
While I won’t provide an exact step-by-step method of how I sewed my Team Canada jacket, I will give a brief rundown of how I pieced things together.
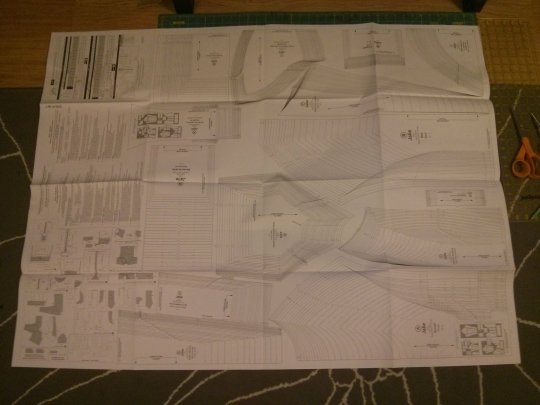
First off a quick review of the Jalie pattern. Jalie is a Canadian brand so it might be harder to find outside of Canada. It’s also printed in French first with English underneath so it can sometimes throw you off if you’re not paying attention. This pattern is not exactly for beginners as it was very brief in its instructions and just assumed you had a basic knowledge of sewing/stitches/fabrics already. It did mention how to finish edges which was nice. Also the pattern book is HUGE compared to normal patterns (pictured beside a Simplicity pattern) and also made of actual paper and not flimsy tissue. The only downside was that there was no envelope to keep pieces in after they were cut out. Otherwise the pattern was fairly simple to follow along (I don’t think I even really looked at the instructions half the time) and the sizing was amazingly accurate and the pieces fit together perfectly without having to ease anything.
Things modified from the pattern:
I made the 2 side panels out of contrasting black fabric.
I used black polyester lining for the pocket lining instead of jogging fleece to make it less bulky.
I removed the sleeve cuffs and lengthened the sleeves by 2.5″ and gave them a wide hem.
I removed the horizontal sleeve seam across the bicep.
I removed the pocket welts and just sewed straight pockets.
I removed the waistband and lengthened the jacket by 3.5″ and gave it a wide hem instead.
I added the red/black contrast fabric on the collar matching with the shoulder seams.
Overall it only took me about a day to sew so it shouldn’t be too bad to take on as a weekend project. The most time-consuming part was making the pattern adjustments for the sleeve seams and the waistband/cuffs/collar.
I’ll gladly answer any other construction questions anyone else might have. Just don’t ask “How much did X material cost?” because it’ll probably change every other week due to sales and promotions, shipping, location, available stock, and retailer and who knows how long this post will continue to circulate LOL.
Also yes, I know that the real Skate Canada jackets are a deeper red (I went with the Olympic Team red instead since that’s what was available at the time) and have black contrast fabric under the arms. Since they only show JJ with that black underarm contrast in literally 2 3 second scenes I decided to go with no underarm contrast like all the other scenes and because I’m lazy.
-Heather
272 notes
·
View notes
Photo
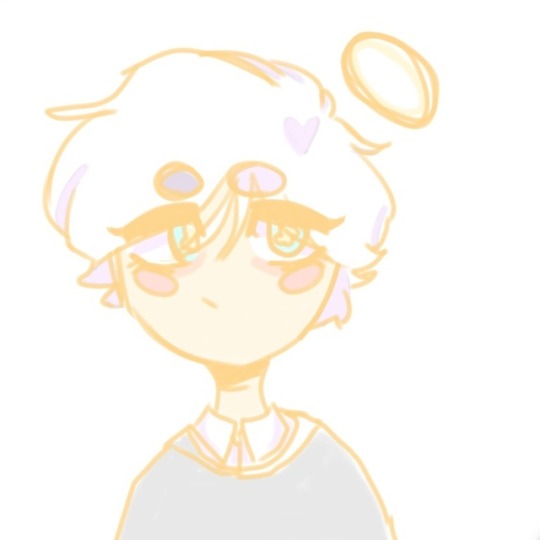
🕆 P U R E 💫 B E A N 🕆
#illustration#digital art#art#my art#anime#anime art#anime aesthetic#anime fan art#fan art#fanart#original character#anime character#angel#demon#supernatural#spn#drawing#artist#artists on tumblr#aesthetic#pure#gold#white#beautiful#anime boy
0 notes
Audio
Unknown
“The sweeter this moment is, the more painful it will be when it all comes crashing down.”
583 notes
·
View notes
Text
he remakes himself
in his own image
solid gold
and unbroken
and better
everyday
359 notes
·
View notes
Photo
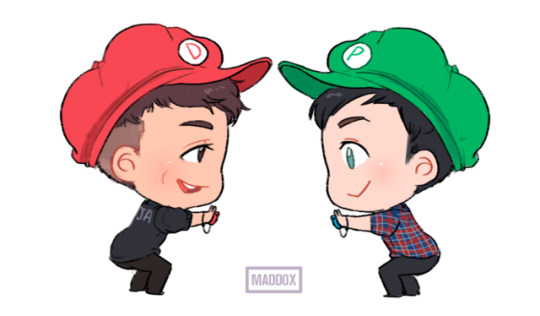
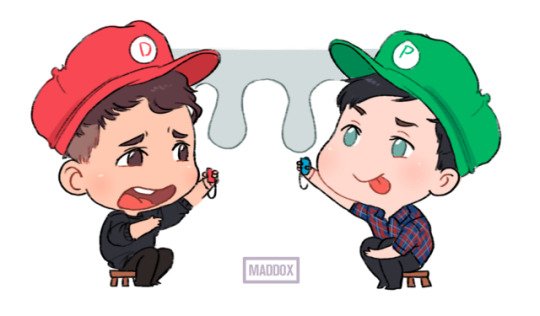


1-2-Switch with @danisnotonfire & @amazingphil was the most adorable yet disturbing thing ever :’)
limited sticker set available here
7K notes
·
View notes
Photo
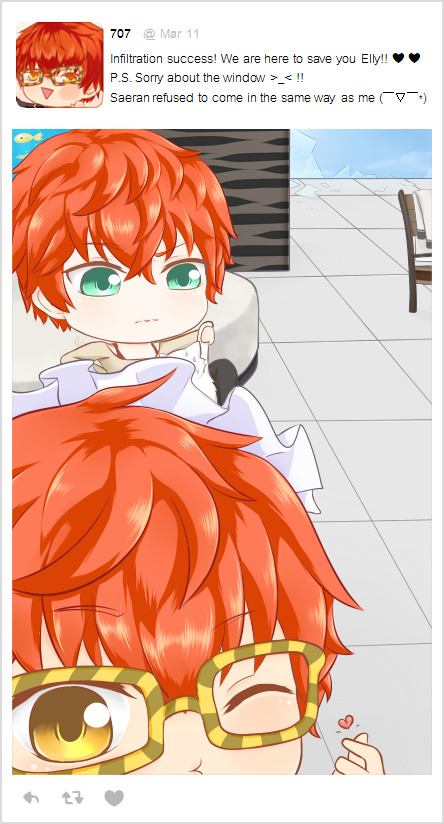
Finished the secret endings not too long ago and I cannot not draw Saeran. ❤
Good luck Elly… \(´∀`” )
1K notes
·
View notes
Photo
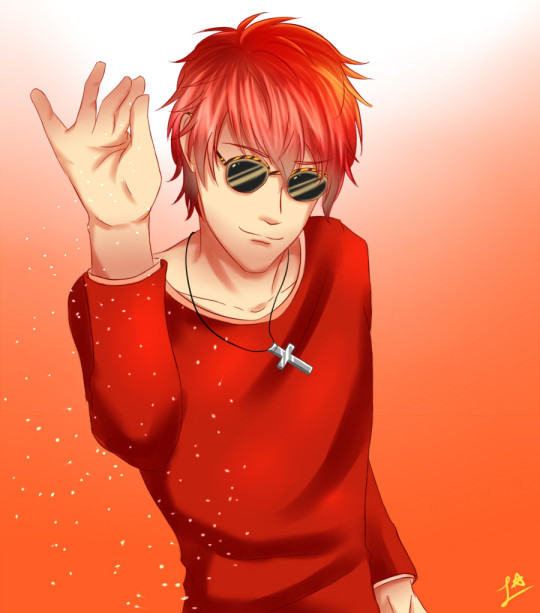
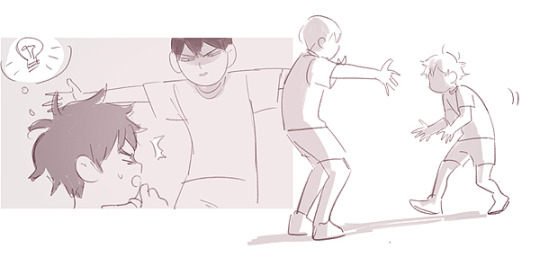
Nothing to draw atm–
Have an overused meme–
147 notes
·
View notes
Photo
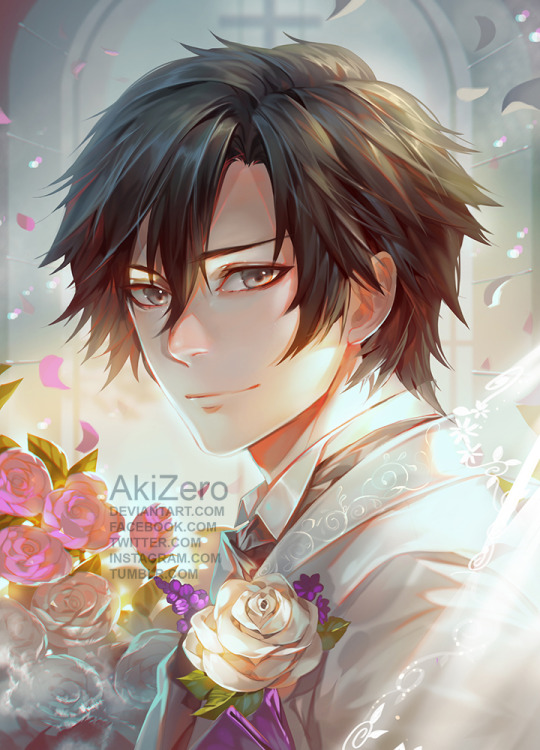
“Baby, I want to go far with you.”
#mysticmessenger #juminhan #wedding
7K notes
·
View notes
Photo
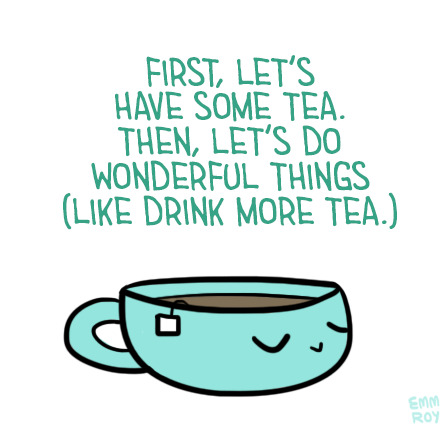
[Drawing of a green cup of tea under a caption that says “First, let’s have some tea. Then, let’s do wonderful things (like drink more tea.)”]
3K notes
·
View notes


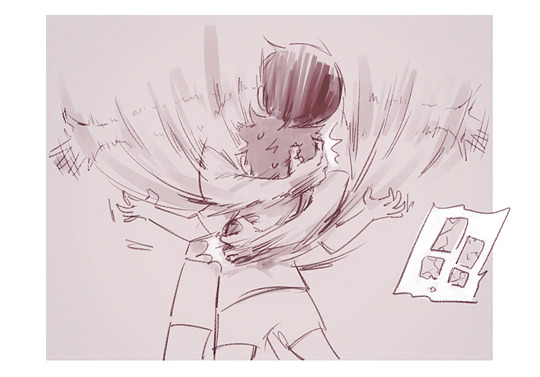

Photo
Picture quality is 👌
Late night doodle of my crazy bby !! (I suck at hands how ironic)
1 note
·
View note
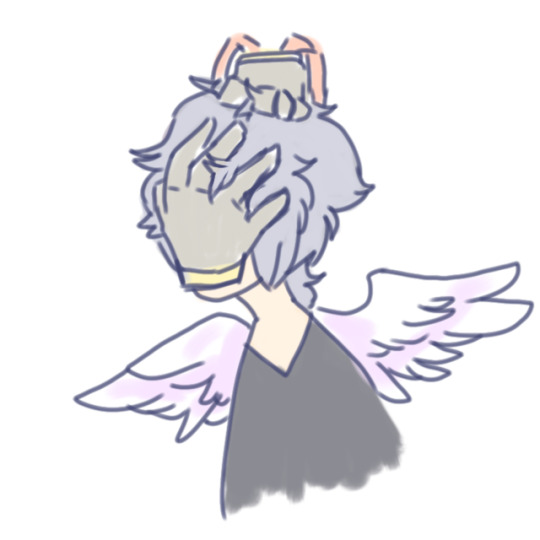
Photo
Late night doodle of my crazy bby !! (I suck at hands how ironic)
#anime#cute#fanart#illustration#my art#drawing#digital art#digital#my hero academia#bokuto no academia#Tomura Shigaraki#shigaraki tomura#bna#mha#character#anime boy#japan#japamese#angel#wings#angel wings#anime character
1 note
·
View note