#mine: tutorials
Text

per anon request, this very quick tutorial will go over how to add a ripped paper effect to images
ripped paper resources for this tutorial: (x)
give this tutorial a like/reblog if it helped you out
if questions should arise, feel free to send a message!
more tutorials
Chapters:
There are a few methods but I´ll be quickly going over only two.
easy png method
brush method
What you´ll need:
any version of photoshop (I use CS6, mine is in german because I bought it years ago in germany)
very basic photoshop knowledge
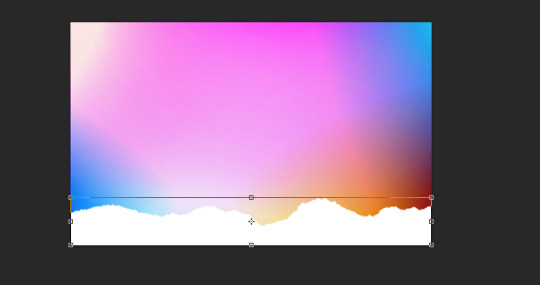
i. png method
Open the image you want to use and choose a ripped paper png, one of the transparent ones, like these ones I made.
Either drag the png over to the other window, or copy and paste it. Adjust it to the width of your image by pressting ctrl + T or strg + T.
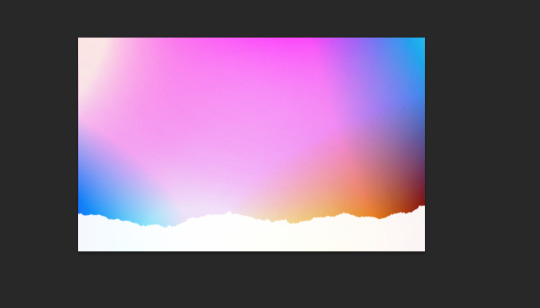
Once you´re done hit enter.
If your blog has any other color than white, you´d have to adjust the paper stripe to the color of your blog so it blends seamlessly
ii. brush method
find brushes you like, like these ones.
load the brushes you want to use into photoshop (as always google is your friend if you don´t know how to do it) Choose the color you want to use for the paper effect (preferably the one you use on your blog)
add a new layer to your document, and use the brush as big as you need it so it fits the whole width of your image.
Click once on the new layer as high or low as you want the paper effect to be. And that´s it!
#completeresources#dailyresources#ps tutorial#photshop tutorial#photoshop help#tutorial#my tutorials#mine: tutorials#I hope this helps anon#my resources
65 notes
·
View notes
Note
hello💐 sorry to bother you but I have a question. how do you make the images have the same size for the edits? and how can i make the text in the edit be in the same spot as the other image?. sometimes i try to do it but the text looks lower than the previous photo.
hiii, you're not bothering me at all! ✨
it's under the cut, hope it's useful. long story super short, you just duplicate your layer once you make the first one.
for the images, i usually just start a new canvas (so instead of opening the image you want to use directly in photoshop, you hit CTRL + N / or go to File -> New) and type the size i need. then drag the main picture in (or if you don't want to save the picture in your computer, you can go on pinterest or wherever you get your pictures from and click right -> copy image -> then back in photoshop hit CTRL + V to paste it).
note: i like the use the highest quality for my pictures, so i get them from pinterest, i usually do a reverse google search (drag the image into google images) and save the one with the highest resolution.
then you can drag it, rotate it, crop it etc. etc. to make sure it fits in the canvas the way you want it to. i suggest saving the picture and then dragging it into photoshop from your folders simply because once you let go of it, if you later decide to change it's dimension it will lose resolution.
for the text we have some options, and i just spent like an hour explaining the hardest one just to realize i could make it so much easier so... lemme re-write this real quick lol
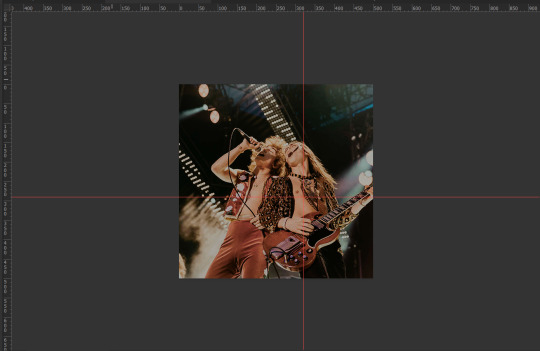
do your text however you want it (font, size, placement etc.) in your "main" panel / first panel.
note: i usually put all my text layers in one folder to make the next step easier if i have more than one line of text.
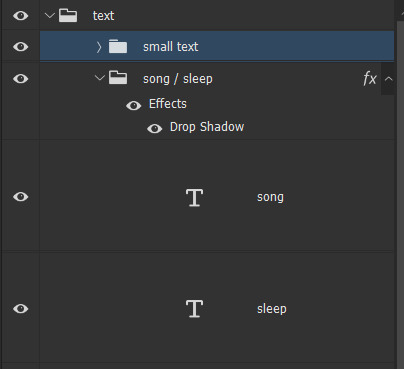
right now my text / panel looks like this:
and i'm very neat with my layers, but you don't have to be, really. just make sure everything's in one folder.
the next step is one of my most hated... guidelines (and you can skip it, really, you'll see why). make sure you have the ruler visible (CTRL + R).
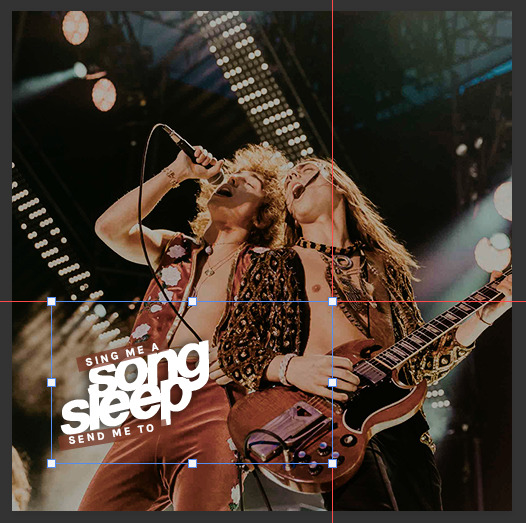
i know there's more than one way of doing this, but i just... drag them around. this is why it's super helpful to have your text all in one folder, for me at least, because you're gonna "guide" yourself after the corners of your layers (no idea how to explain this better, you'll see in the pictures). so drag two (or more) guidelines in your first panel, around where you want your text to be (you can move them around later, this is just to have an idea of what's gonna happen) (for better precision, hold SHIFT while you draw them). it will look like this:
then with your text folder selected, hit CTRL + T so you get the blue "border" around it. in order for this to work better, make sure each individual text layer is set to Paragraph Text (if it's not, right click it -> convert to paragraph text). you'll have this:
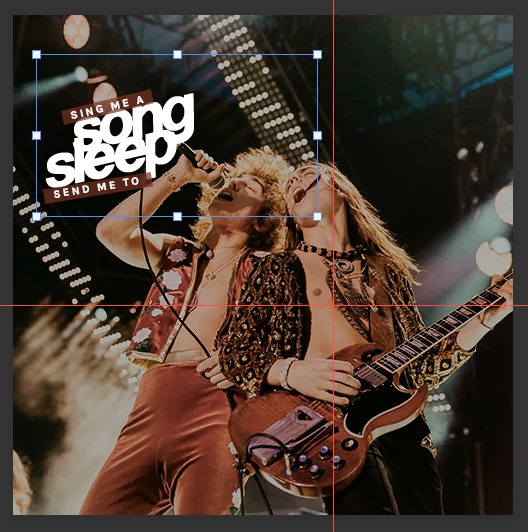
take your blue rectangle and make sure the sides are perfectly aligned with your guidelines. normally they should snap to the guidelines pretty easily, so that shouldn't be hard. if they don't snap perfectly, you can move the rectangle around with your arrow keys once you have it close to where it should be. eventually, it should look like this:
notice how the right side and the top are exactly on the guideline.
now, this is the easy part. go to Image -> Duplicate... and duplicate your current layer. this will create an entirely new panel exactly like the one you just made, with your guidelines in the same place and all your other layers. you can then drag another image instead of the one in your "main" panel. like this:
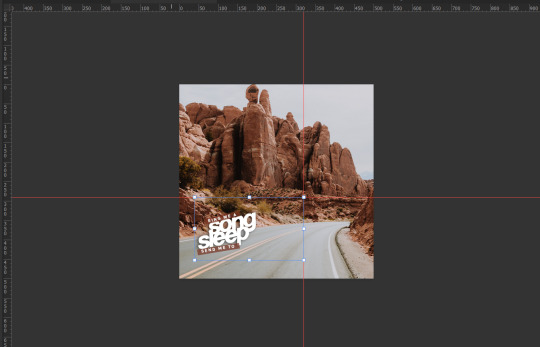
now, obviously, if you're gonna change the content of your text, it will move around slightly. so take into consideration if your text is different, it's impossible for it to be in the exact same place, so it's up to you later to move it as you please to make it look similar. at least, you'll have it in the same area.
to be fair, you don't really need the guidelines if you do it like this, but i found that it's easier for me to work if i have them... so i thought i'll give you this option as well. this is why i said you can skip the guidelines step.
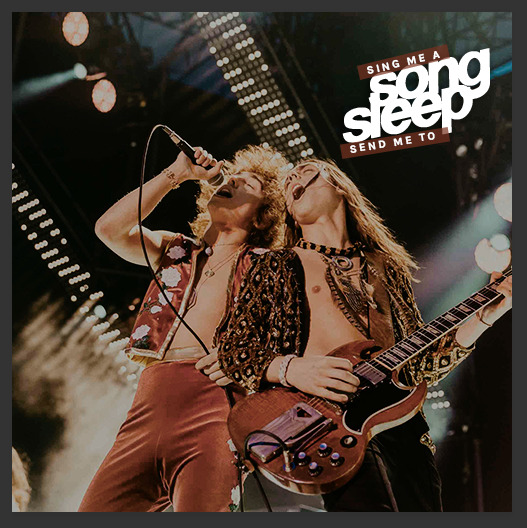
but let's say you decide to make some simple posters like these:
your text will be exactly the same, the placement will be exactly the same, all you need to do is duplicate your first panel and replace the picture.
as dumb as it might sound, i always go the harder way and do everything manually instead of duplicating my layers, but that's because i'm an idiot.
sorry this was so long, but i do hope it was useful!
10 notes
·
View notes
Text
New Mature Content Warning Overlay (And How to Get Rid of It)
More fun community label "features"! Unlike the new mandatory label for #NSFW, this one is a bigger deal to me because it affects my entire blog and it can't be avoided by just using a different tag.
Apparently on custom blog layouts, if you happen to post or reblog even a SINGLE post that's been flagged with the mature content community label, a full-page warning overlay will appear blurring out your entire blog that must be manually clicked through every single time the page is refreshed. At first I thought this was just a bug due to my older layout but I've come to realize it's not. It's a feature (as confirmed by this recent changes post) that affects all custom themes. The formatting will vary based on your own theme but here's what it looks like on my blog:

I don't know about you but I find this is stupid and annoying. If it could be dismissed once and never seen again that might be one thing, but that's not the case. The vast majority of my blog is not "mature" enough to warrant such an aggressive and invasive warning. I also think pop-ups are obnoxious in general and I'll be damned if tumblr's going to force me to have one on MY blog.
After some desperate googling for a known workaround and being unable to find even a single mention of it, I decided to take on the challenge myself. I'm not a theme coder, so apologies if there's a better way to do this, but luckily it only took me like 10 minutes to figure out a simple fix, which I'm now sharing with anyone else who may want it:
.community-label-cover__wrapper {display: none}
Just copypaste that somewhere in your CSS and goodbye pop-up!
If you're not sure how to access your theme code, check out this help article. You can also add the code via the Advanced Options menu, which is actually even better (if you can get it to work, it depends on how your theme was coded), because it will then automatically be reapplied to a lot of themes without having to remember to manually add it every time if you change your theme in the future.
Obviously this will only remove it from your own blog for anyone who may visit it. If you never want to see this warning again on other people's blogs you can also add this custom filter to your ad block:
tumblr.com##.community-label-cover__wrapper
Unfortunately I do not have an easy tutorial on hand for this one as the method will depend on your specific ad block app or extension.
Some additional notes:
After adding the theme code and saving the changes, give it a minute to update as it sometimes takes a little while for the page to refresh.
The warning overlay only seems to appear if a "mature" post is on the FIRST page of your blog, which is still annoying and makes the whole thing even more pointless and stupid because what if someone visits any other page of your blog, and oh no, happens to see "mature" content they weren't warned about?!
The warning also appears on direct links to "mature" posts.
This hack has NOTHING to do with entire blogs that have been flagged as NSFW. It only works for non-flagged blogs with custom themes that happen to have individual "mature" posts.
#I'm not letting my entire blog be penalized for a couple rare singular posts that may or may not even be 'mature' enough to warrant it#tumblr may force us to use community labels#and they may have full control over the new blogview#but MY custom blog layout has always been and always will be MINE to format and present however I want#that's the whole point#tumblr#psa#tutorial#my words#tumblr themes#wendy's help desk
17K notes
·
View notes
Text
haley sebastian wardrobe swap
#haley reminds me of that one youtube goth makeup tutorial that was like just winged eyeliner and hearts under the eyes😭😭😭😭😭😭#i did not stay true to their og outfits sowwy#they have sm potential to be friends to me…#stardew valley#haley#sebastian#mine
2K notes
·
View notes
Text

made this for oomf but you can have it too. a little breakdown of my process with bird wings if anyone finds it useful
#art#art tutorial#im suuuuure there's a million out there but idc#also the things in red are pet peeves of MINE idgaf if you wanna draw like that i just think it looks bad imho#ME PERSONALLY. DONT LET ME STOP YOU#and on the little articulation bend cross sea bird wings would be the exception there the joint bend IS very noticeable and sharp#as well as hummingbird wings since those twist the humerus close to the body#rather than flapping from the shoulder
453 notes
·
View notes
Note
how do you do/pick skin colors digitally? with skin tones i feel like mine often end up muddy or dull working on procreate
I LOVE THIS QUESTION AND HELPING WITH THIS GENERALLY.....SO HERES A BUNCH OF STUFF I GENERALLY TRY TO FOLLOW WHEN COLORING SKIN IN PROCREATE (but advice i think is applicable for all drawing ❤️)
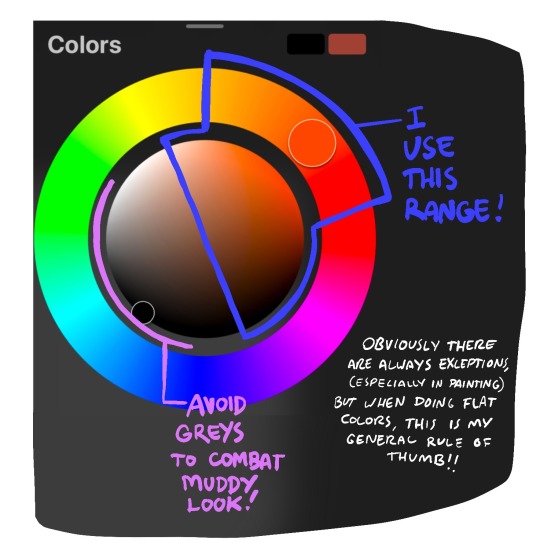


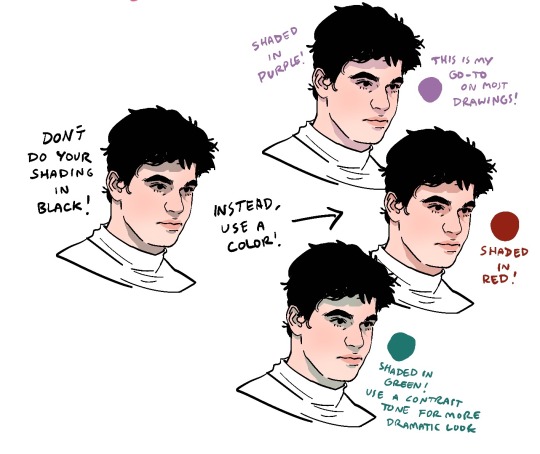
Look at references, work from observation, and don't be afraid to experiment!!! MORE color and MORE SATURATED COLOR is always better when drawing people than to wash them out and make them dull, color is full of LIFE! and life is full of color! Happy drawing and good luck❤️
665 notes
·
View notes
Photo


bowser and luigi face tutorials!
technically bowser’s muzzle has a few more bumps in it but this is a simpler version
you can also use this muzzle for bowser junior if you do it more like a bean or a heart with a round bottom part instead of an apple shape
#art mine#2022 art mine#digital art#shapeshiftinterest#games#mario#luigi#bowser#bowuigi#flowers#monsters#art references#tutorials#LGBTQA
7K notes
·
View notes
Text
So you just joined Tumblr?
Tumblr basics + Fandoms/Gifmaking
Congratulations, you just landed at Tumblr! This hellsite (affectionate) can seem intimidating and complicated at first, but once you grasp the basics of it it’ll quickly turn into your own personal little hut in the forest. Tumblr is a website where you and only you curate your dashboard, you’ll see the content that you seek on your own. In this post, I’ll explain the basics of Tumblr and the basics of how fandoms function here with the help of Bob. Okay, let’s get started.
1. Blog customization
The first thing you should do as soon as you land on Tumblr is add a profile picture and header before you interact with people. You want to be distinguishable from bots and therefore avoid getting blocked. You can also add anything to your bio, there's no character limit. Some folks add their name and pronouns, but there are no rules about that. There are also no rules about profile pictures. It can be a picture of you, a picture of your dog, a picture of a rock, or a picture of your favorite character. If you plan on staying on the fandom side, you might notice that a lot of fandom blogs have colorful-looking icons (a cutout of a character on a colorful background), for these icons and also headers I suggest checking out source blogs that make those icons. For starters, @iconheadersource is a goldmine where you definitely going to find something that’d suit you and your blog.
Tumblr on mobile and Tumblr on desktop are two different creatures when it comes to customization. On the desktop, you can customize your blog with coding (HTML + JS). Now Bob will demonstrate to us some examples of blogs on desktop.


If you want to customize your desktop blog, I suggest checking out @phantomcodes and @glenthemes for the codes.
Tutorial on how to install themes
Using javascript on Tumblr pages
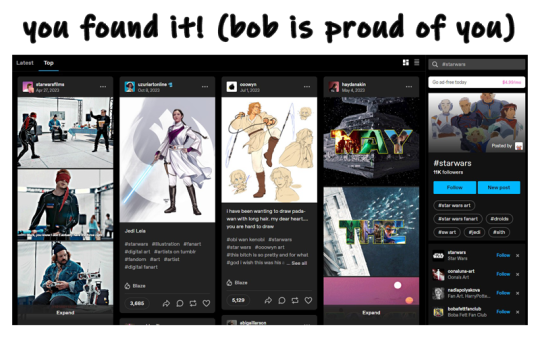
2. Search Engine
Nice! You've made your blog look pretty! Now, let's shift our focus to the search engine and ways to discover content. As mentioned earlier, you curate your dashboard by looking for things you enjoy and like. Search using hashtags or the names of your interests (TV shows, movies, birds, music, etc.) to find your piece of cake. For instance, folks who create posts about TV shows you like use tags to ensure their posts reach others interested in the same thing. So, let's go ahead and search for something right now.

Once you search for that specific tag, you are redirected to the corresponding tag page. Here, you can see that posts are sorted by "Latest" or "Top" (indicating posts with the most notes). On the right side, you will find related tags and blogs which are frequently using the searched tag. By following the tag, both the tag itself and the posts tagged with it will automatically appear on your dashboard in the "Your tags" section. You have the option to filter tags according to your preferences. In the settings, you can choose to block specific tags if you prefer not to see content related to some particular topics.
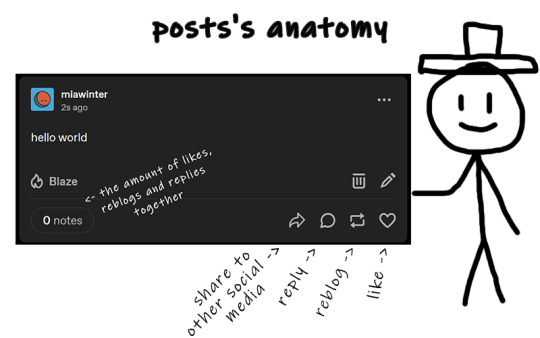
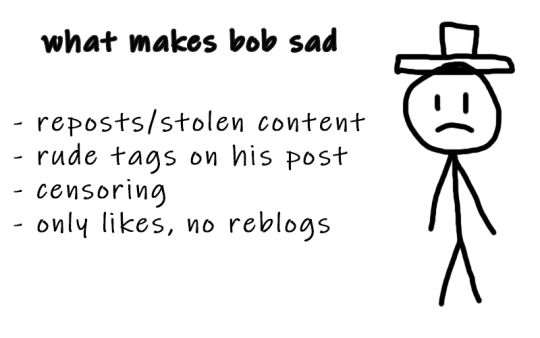
The only method for sharing posts and content on this website is through reblogging. On Tumblr, reposting others' content, including art, gifs, and fics, is not accepted. Reposting means downloading art, gifs, etc., creating your own post, and then sharing it. And that's a big no-no, strongly discouraged. Your likes essentially function as bookmarks, and you have the option to set them to be private. When you save something, it doesn't appear on your friends' dashboards.
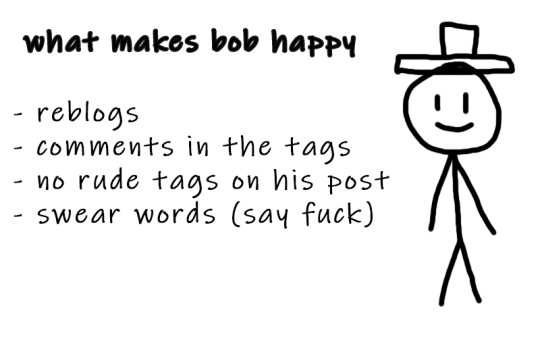
We don't censor things here, and I advise you not to do so too. If you need to mention a word that might be potentially triggering or could be flagged on another social media, feel free to say it. Many users have specific topics and tags filtered out, so if you use variations like "K!tKat" instead of "KitKat" in the tags, it can bypass the tag filter, potentially causing more harm as people will see content that triggers them. And remember to always tag posts that have flickering or flashing!!!
If you want to organize your reblogs or make comments on a reblog, use the tags section and not the comments section itself. This is called "#add tags." Feel free to type whatever you want, but keep in mind that the original poster receives notifications when someone reblogs their post and adds tags. Yes, all tags are visible to us.
Okay, so let's quickly recap this information with the help of our dear friend, Bob.
3. Social interactions
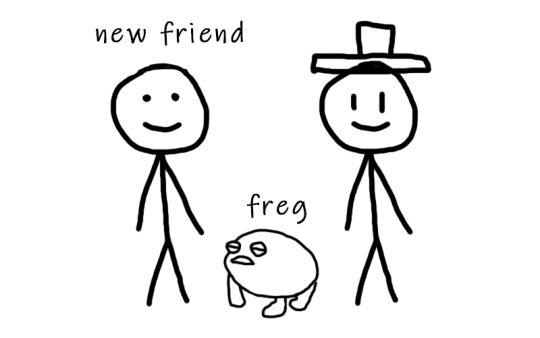
So let's move on to one of the crucial topics - how to make friends on Tumblr? Personally, I don't think there's one particular formula for that. Sometimes you just see a funny bloke posting about something as random as desert rain frogs, grab them, and go "You're my friend now" and that's how you become mutuals.
However, there are other, more common ways to become friends with someone. You can start by reblogging someone's post, adding tags to the reblog, and then following the person. Create your own posts, tag them to ensure they reach the folks who are interested in the same things as you, and participate in fandom events and challenges if you're into that. Interact with people you want to befriend, message them, send them asks. You will eventually find your crowd. You'll also find swifties, and fans of supernatural who never moved on from that destiel love confession four years ago, they also can be your friends, at some point, you will become friends and chill with each other. Be open to new interests to make sure your dashboard is not dull and boring.
Tumblr doesn't have the supposed hierarchy, and you don't have to listen to anyone who tells you otherwise, you curate your own experience and blocking is pretty normalized here. Notes and followers (which are private for everyone) don't really matter, stick to your beliefs and your vibe and you'll be fine. We're all equal losers here.
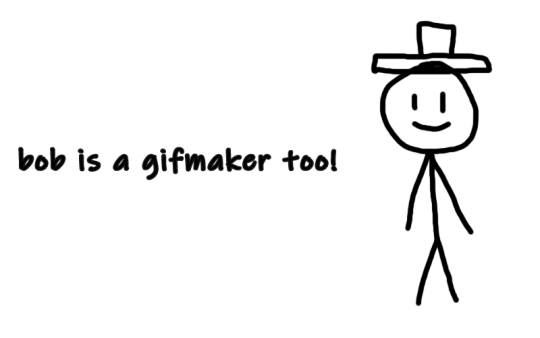
4. Fandom / Gifmaking
Fandoms play a significant role on Tumblr, they're closely tied with gifmaking. As a fellow creature of fandom, I'm adding this part because we don't gatekeep - more gifmakers and fandom enthusiasts mean a better fandom experience. As I mentioned earlier, everything has its tag, making it easy to find your favorite TV show fandom by searching for the tag. This is also how you can connect with people who share an interest in that specific TV show. Upon entering the tag, you'll stumble upon numerous moving pictures – these are GIFs. People create GIFs of everything, from their "blorbo" (the term for favorite character) to beloved ships and favorite moments. There are also plenty of creative GIFs with different coloring and complicated effects. And the best part? You can do it too!
There are a lot of ways to make GIFs. Some people use Photoshop, and some use Photopea which is an excellent accessible option. I'll be linking posts for Photoshop under this text. For Photopea tutorials and guides, please check out @photopeablr.
I've been making GIFs for three years at this point, and those are the tutorials I used when I was just starting out:
how to make a gif:
comprehensive guide 101
basic gif making tutorial + mvp player installation
gifmaking for beginners
how to install MVP player on a PC
film downloading & screen-capping tips
correct photoset dimensions
coloring
how to fix orange-washed characters
how to: coloring east & southeast asian celebs
channel mixer
colored background
color manipulation
vibrant coloring
how to brighten dark scenes
color isolation
effects
glitch effect
blending
crossfade transition
gradient effect in the text
gradient text
red colour accent on the b&w gifs
how to add a gif in a template
blurring gif backgrounds
using templates
text
text tutorial 1
font resources
understanding fonts and typefaces
split text
subtitles
other
icon tutorial
gif headers
For more tutorials, inspirations, and resources - please check out @usergif. It's a good source blog for all gifmakers.
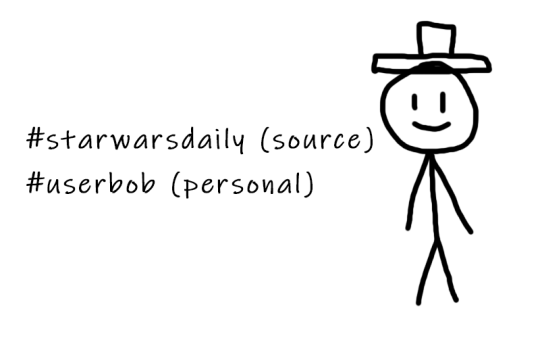
Wait but what's a source blog? These are blogs that center around a specific theme, creating content for a particular topic. They are managed by multiple editors, these blogs track their own tags to reblog content related to the theme. They can be source blogs dedicated to gifmaking (just like @usergif), a TV show, a movie, a character, a celebrity, a sports team, or literally anything else. Typically, these blogs incorporate terms like "network," "source," "central," "creators," "hub," or "daily" in their usernames, making them easily distinguishable from regular personal blogs. Examples of source blogs that come to my mind right now are @dailyanakin, @heartstoppercentral, and @nancywheelercentral.
Let's also talk about tracking tags, which are often included in blogs's bios, whether they're from source blogs or solo gifmakers. You can add these tags to your posts when creating a gifset related to a specific source blog or something you know a particular gifmaker would appreciate. Basically, the gifmaker can search their tracking tag, much like a regular Tumblr tag, and view the most recent sets in which someone used their tag.
The last thing I want to talk about are usernames, and main and side blogs. On Tumblr, we have two types of blogs: the main blog and the side blog. The main blog is the initial blog created when you sign up for your account. This blog has full functionality and all features, allowing you to follow other blogs, like posts, and send asks to other blogs. In addition to the main blog, you can create side blogs on your account. Side blogs lack some of the features of main blogs; you can't like posts, follow other blogs, or send asks from a side blog. They have slightly different functionality – a side blog can be password-protected, have multiple users, and allow you to send direct messages to people. Other users can follow your side blog, and you can receive asks from them.
Many people use side blogs as URL holders. For instance, when a new TV show is announced, someone might be the quickest to save all canonical character names. You can then message that empty side blog to inquire if they're willing to trade that specific URL or if it's available for a giveaway. Canonical URLs are often challenging to obtain, so many people add letters in between or at the end or use symbols like "-", and they also mix names and surnames of different characters.
5. The End
Okay, so we've just covered how Tumblr works, how fandoms operate, and how to get into gifmaking. I hope this guide by me and Bob has been helpful to you. If you have any questions, feel free to send them to my ask box or simply ask Bob. I hope you enjoy your stay here, and that your experience with this website will be a positive one.

#tumblr#welcome to tumblr#tumblr etiquette#how to tumblr#fandom community#fandom culture#photoshop tutorial#gif tutorial#gif resources#kas.txt#mine
475 notes
·
View notes
Text
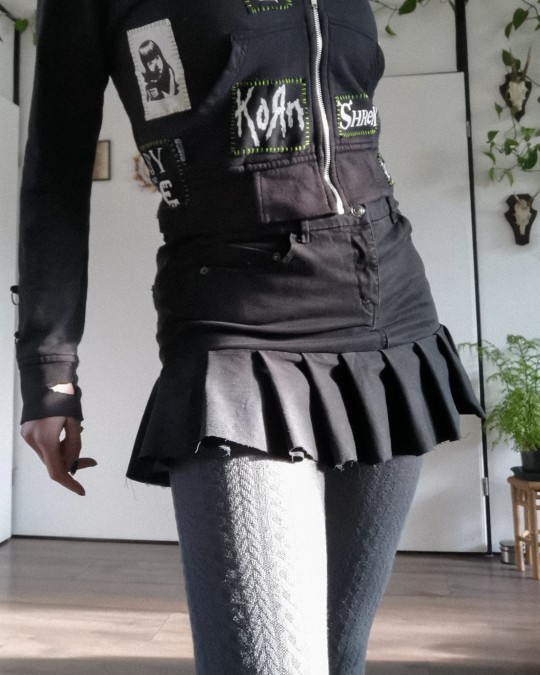
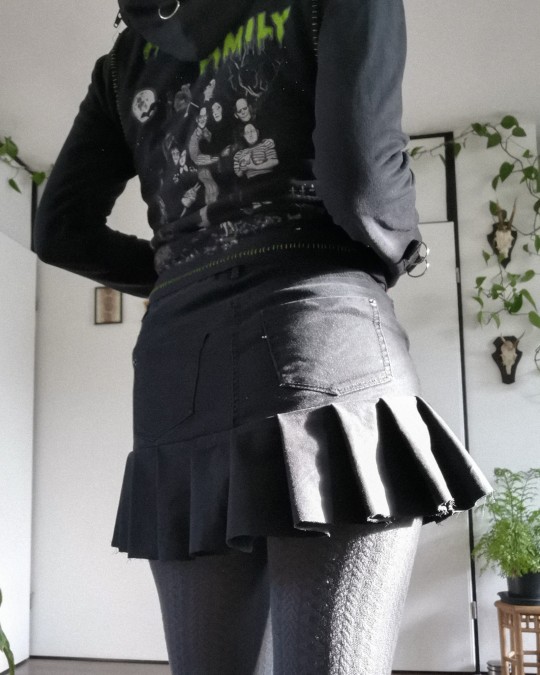
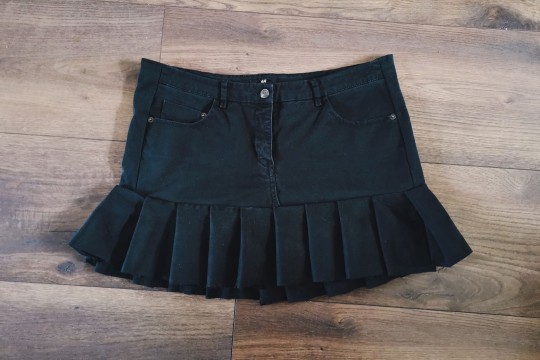
jeans to y2k/tripp inspired skirt ݁ ˖ִ ࣪✩₊ ⊹˚
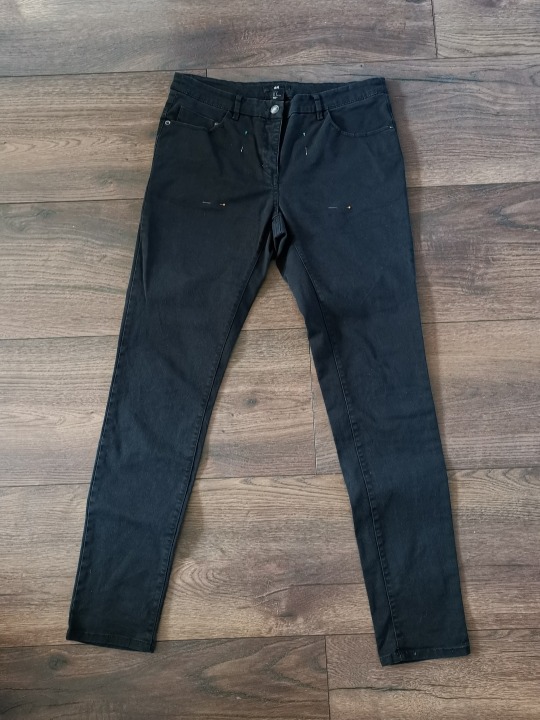
I thrifted some jeans recently, not knowing if they would fit me, but buying it anyway bc 1) it was €1 and 2) if it didn't fit I could surely make something with it.
turns out it was wayyy too small 😂 so I decided it would be perfect to make one of those tripp/y2k skirts with!

firstly I cut off the legs just above the crotch. I then tried it on, found it was too tight still, and added two strips of leftover fabric on either side. it fits perfectly now!
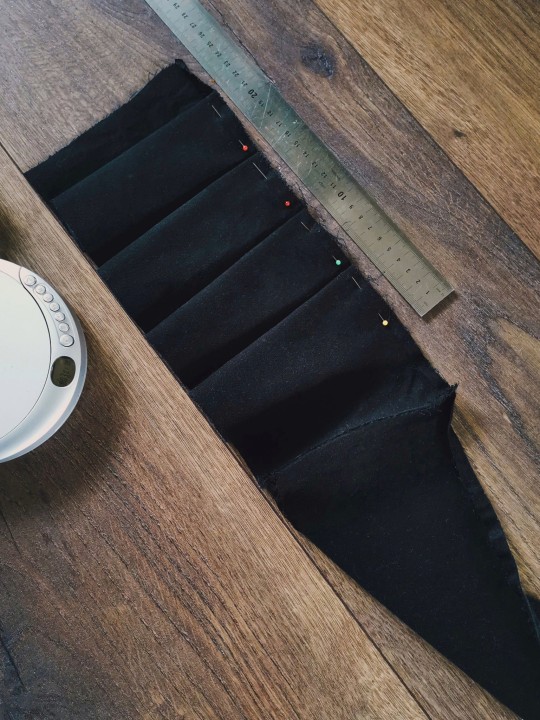
then I cut the remaining pant legs in even strips and connected them all to make one long strip. I folded ruffles of 5cm along the length, and sewed it in place before I sewed it onto the bottom of the skirt!
and just like that, I have a new skirt 𓆩♡𓆪 I might add some strips with d rings on it once I figure out the placement ^_^ but for now it's done
#mine#i showed it to my partner who immediately was like YOU HAVE SO MUCH TALENT#which was rly cool to hear actually#goth#alternative#diy#crafts#handmade#tripp#skirt#y2k#selfmade#tutorial? kinda???
304 notes
·
View notes
Text

#someone help these two idiots
#goodomensedit#goodomens2edit#good omens edit#good omens 2#aziracrow#azcrow#ineffable husbands#ineffable idiots#mine#this was inspired by someone who made gifs with text message boxes but for the life of me i can't remember who they were#and i couldn't find their tutorial#so alas#i made it up#it was v annoying making the text bubbles#bbut i think they look alright#also im unsure abt the scene choice but i couldn't think of another
609 notes
·
View notes
Text

Anthony Dwane Mackie 🎇
— born on September 23, 1978 in New Orleans, Louisiana
#mine#anthony mackie#anthonymackieedit#captain america#sam wilson#samwilsonedit#tfatws#mcu#dailymarvelstudios#dailyavengers#marvelgifs#mcuedit#mcupoc#marveladdicts#usersole#tagging you as a thanks for the tutorial
421 notes
·
View notes
Text
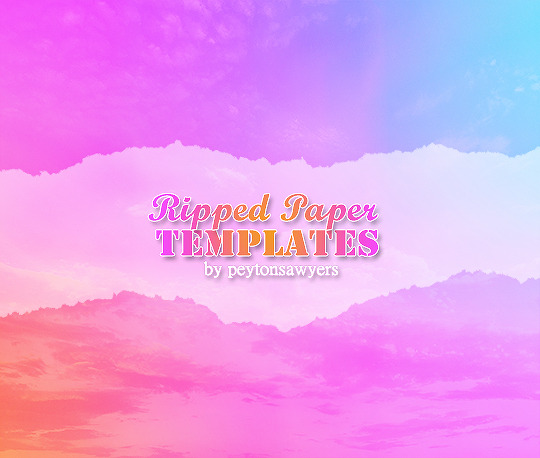
this pack contains 20 templates both transparent and with background, to use on headers, gifs etc.
like or reblog if you download
do not repost or claim as your own
preview under the cut
D O W N L O A D


#completeresources#dailyresources#templates#dividers#usernelly#userireland#ripped paper#resources#header template#header dividers#my resources#mine: resources#part of a tutorial for a lovely anon
557 notes
·
View notes
Note
is there any way you can show how you draw bird feet/hands like you do on grian? i think it’s super cool but i have difficulty drawing something similar :(
ANYTHING 4 U

THIS WAS MEANT TO BE SMALLER THAN IT ENDED UP but uhhhh yeah!!! here's how i do that!!! disclaimer that im not an expert and this is just my process and you can take from it whatever you want etc etc bird peets! they're cool!
#i usually base mine off raptors#mmmmmm big claws#long post#tutorial#art tips#grian#grian fanart#counts i guess#hermitcraft#seri's art process
2K notes
·
View notes
Note
Hii you're so talented!! i wonder if you could explain how you did this gif effect with the squares? and do you have any tips on colouring because yours is always top notch <3333
heyy thank you so much 🥹 and of course! i've never really done a tutorial before but i'll try my best to explain it in a way that makes sense 😅

so i start off with making my two gifs seperatly and colouring them as i normally would, once i've done that i load both gifs into the same project and once i've done all that i started on the grid part:
now go to view -> add guides and this window should pop up:
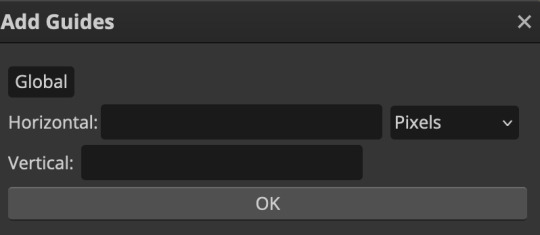
(it's was so daunting at first when i saw this i was like ????? and started putting in random numbers and was like oh that's how this works 🤣)
here's the settings i used for my gif which is 540px x 500px in size with 5 squares x 4 squares: (if you want more or less you just have to play around with it)
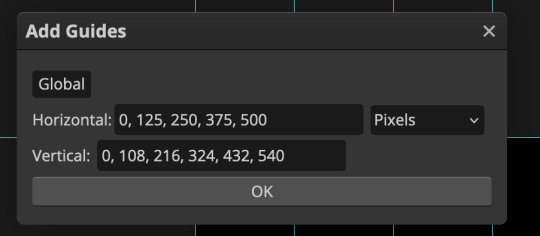
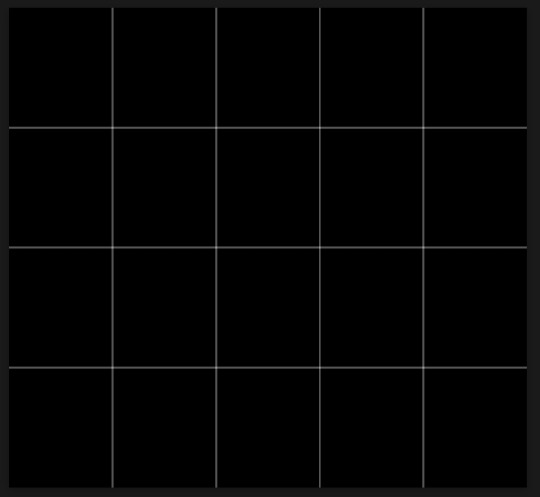
once you've done that it should look something like this:
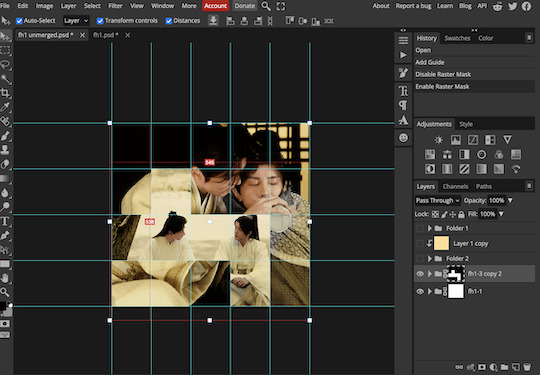
now the next part is really up to preference again: add a vector mask onto the gif that's above the other one like this: (ignore the name of my folder that is irrelevant 🤣)

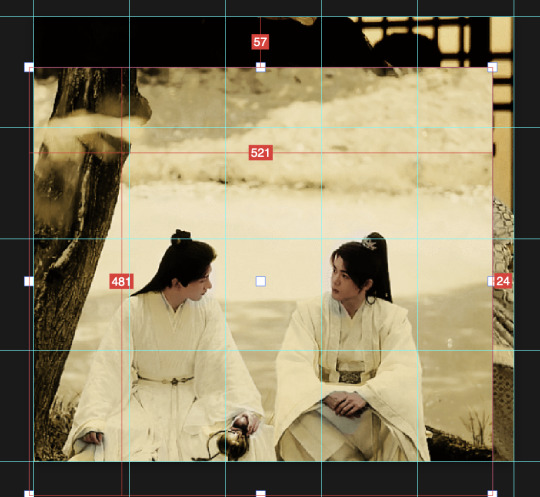
and then i used the rectangle select tool (this is because the rectangle select should lock onto the grid squares making it easier to erase certain sections) + a black brush tool to erase the squares to show the other gif that's underneath (you can reposition both gifs to your liking which is what i did)
before & after:

so my vector mask looks like this afterwards

(you don't have to do the squares so close together like i did it was just how i liked it & because of the scenes i had chosen that mine turned out this way)
now onto the grid lines: i used the line tool with these settings

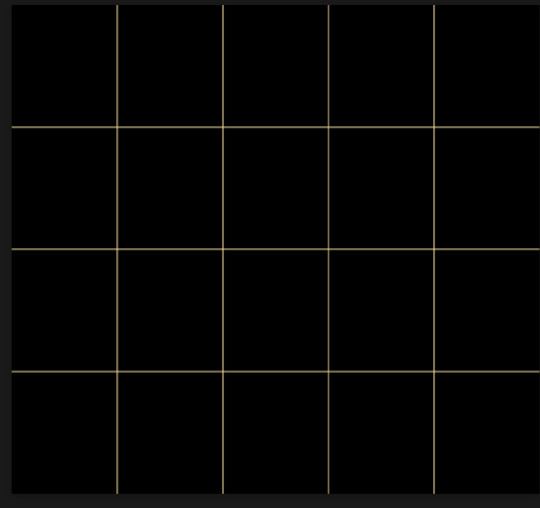
just like with the rectangle select tool the line tool should lock onto the grid line you want to redraw, do this for every line that you want/have for your grid & once you're done go to view -> clear guides and it should look something like this: (added a version with just a black background so it can be seen a little easier)

(i'm ngl idk why my lines ended up kinda faded and not white 🤣 i think it might be because i used a white fill instead of white stroke but it doesn't really matter to me because i got my ideal outcome anyway 🤣)
bonus step: you can stop here if you'd like but i wanted my lines to match my colouring & my intended typography so i put all my line layers into a folder and set the mode to difference & added a yellow fill layer with a clipping mask, like this:
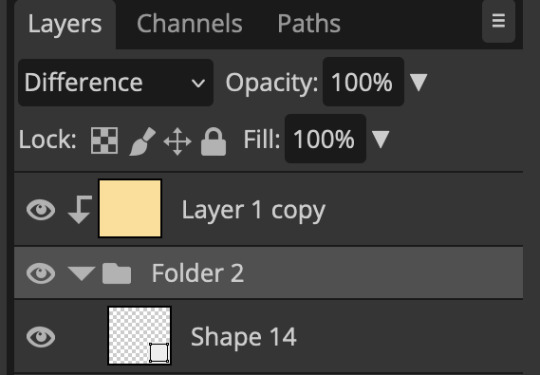
and it should look like this:
you can also play around with the opacity of the lines too which is what i tried out but i prefered for my set the lines being at 100% opacity but it's really up to you with what you want to play around with
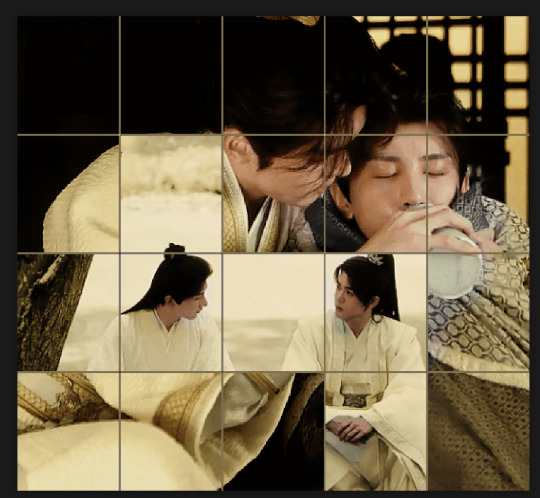
now once you're happy with everything merge those layers together (make sure they have the same amount of frames first before merging them) and either save as it is or add some typography like i did and you should end up with this:
for tips when it comes to colouring it really depends on what you're colouring, if you want to manipulate the colours as much as i do i recommend choosing a colour within the scene so you're not having to change too much, or finding scenes that have colours that can be manipulated more easy (any colour that aren't skin tones, unless you're working with red or yellow like i did here, i chose yellow because one of the outfits in the gif was yellow toned and it looked better with the gifset being yellow than my original colour which was blue), also looking for scenes were the people in it don't move as much also is a big help!
i hope this helps :) feel free to ask more questions if you didn't understand or want some more tips i honestly don't mind!
#replies#mrmalcolmslist#photopeablr#tutorials#photopea tutorials#completeresources#usergif#mine | tutorials#gif tutorial#photopea#resources#gif resources#gifmakerresource#i hope i didn't forget anything aksjdskds#photopea tutorial#tutorial#gif tutorials
123 notes
·
View notes
Text


The birth of a lacrosse legend, for @kirayukimuraappreciation week (in/sp)
#kira yukimura#kiraweek2023#let me please introduce you to the Vision : kira being a jock but comics style#kahtaras#thank you for the tutorial !#teen wolf#mine
169 notes
·
View notes
Text
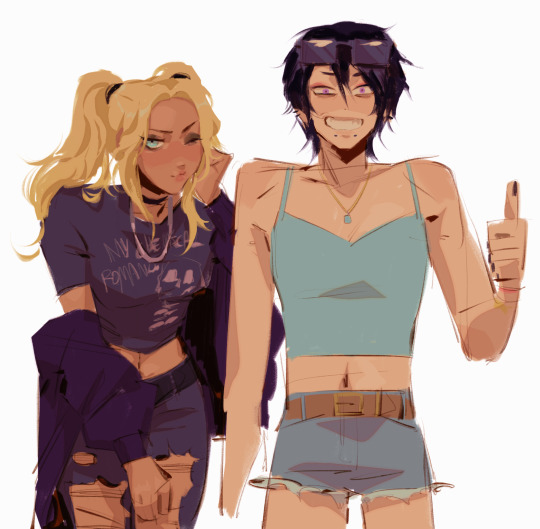
Squad
#p3 aigis#yukari takeba#mitsuru kirijo#hamuko arisato#minako arisato#p3p femc#persona 3 portable#P3P#persona 3#drawing the girlies again because I MISS THEM#I promised my sister I’d try to play elden ring again using some tutorials and builds she sent me#so it’s gonna be a hot second before I can play P3P again#sobs#I call them my sapphic strike team#nevermind that two of my four party members are weak to Zio skills it’s fine#(it’s not fine)#BUT I POWERED THROUGH#running around Tartarus and kicking God’s ass with a pack of wild lesbians#what mischief will they make#mine#my art
917 notes
·
View notes
Last Seen Blogs
misterioarcano
Misterio Arcano

peachcoloring
© peachcoloring
payasolorito
Lorito El Payaso
everlasting517
Untitled

coolmariadelgado
Dinero Urgente