#Canva Designing Tips
Text
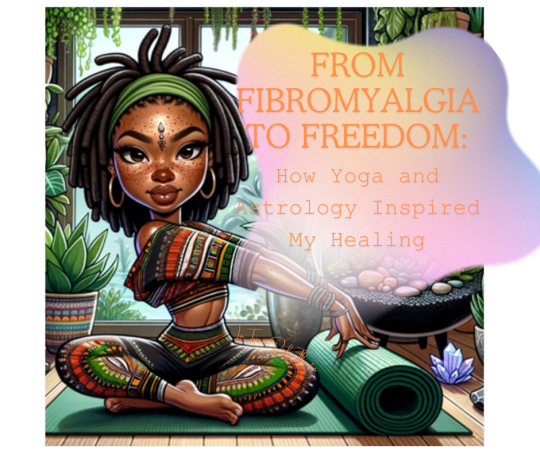
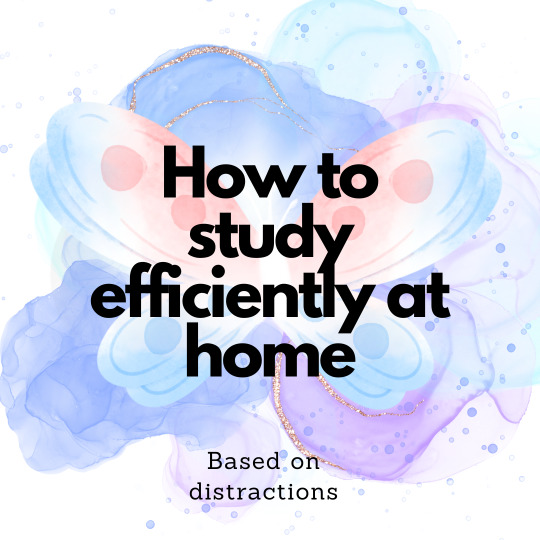
From Fibromyalgia to Freedom: How Yoga and Astrology Inspired My Healing
My 30-day transformational yoga journey amid the Aquarius-Pluto alignment demonstrates the powerful synergy between physical practices and cosmic influences.
By La Trecia Doyle-Thaxton
Just recently I completed 30 days of yoga during the 31 days of January. I missed only one day and felt like it was the worst day ever because nothing went well for me and I am glad I experienced that because it was motivation to keep going and to not miss another day for the rest of the month.
I wanted to stick to the commitment to the challenge I had placed on…
View On WordPress
#Afro-Boho Lifestyle#Ankh Earring Collection#Aries Sun Characteristics#Astrology and Wellness#Black Family Empowerment#Breaking Generational Curses#Canva Designing Tips#Capricorn Rising Insights#Chakra Balancing#Chronic Pain Management#Crafting for Mindfulness#DIY Home Office Décor#Domestic Violence Recovery#Empath Empowerment#Energy Healing Techniques#Fibromyalgia Healing#Financial Literacy for Families#Holistic Yoga Benefits#Homeschooling Tips#Libra Moon Emotions#Mindfulness Practices#Moon Phase Manifesting#Multiple streams of income#Plant-Based Healing#Positive Change Strategies#Reiki for Fibromyalgia#Self-Care for Introverts#Stock Options for Beginners#Teen Mom Support
1 note
·
View note
Video
youtube
How to edit freepik template in canva | Canva tutorial for Freepik lovers
#youtube#Canva#Canva design#canva tutorial#Canva designer#Canva tips and tricks#Freepik#Freepik template#Canva design tips#tutorial#graphic design#Canva freepik#Canva templates#How to#Canva tutorial for beginner
2 notes
·
View notes
Note
wrestling with canva like i’m crocodile dundee... this probably won’t end up being anything like a real UI because i don’t think a lot of it is Possible jsfdbgs
It looks amazing, how did you do that? 👀👀👀👀👀
hi, thank you for the compliment! i took a bit to answer this because i'm not really... equipped to be making Design tutorials haha. graphic design is my passion neither ironically nor unironically and i'm absolutely rubbish at art - however, canva has enough tools to help me feel like i'm building something visually interesting despite my. abject lack of talent XD i'll put a cut here and some like. explanation and tips underneath.
i have premium for my non-IF-related work, but the free version is what i started out on and it's honestly surprisingly good and has a generous licensing agreement. the biggest drawback for the free version for me is the inability to save files with a transparent background or resize files mid-edit, but for most people making banners or concept art you're not going to Need transparent files - that's more of a thing for actually creating assets.
the biggest ADVANTAGE of the free canva license is that you are licensed to use anything you make using the free assets in commercial products if you want/need (including games or promo for them). many similar design products only allow personal use for free licensing. (however, i'm not trying to sell canva to you; rather i'm pointing out that sticking with the free version is actually very convenient and the premium features are probably things you won't need lol)
basically canva allows you to search for graphic design elements by keyword and drag and drop them onto a design piece, mix them around, change their colours and sizes etc. and combine them together to make something. i'll talk a little bit about the UI design you're mentioning (the one i showed off here for anyone curious) not to brag about my Skillz(TM) but just to show how easy canva makes it for a total newb to make something that looks really neat!
there's about 30 different elements in that particular UI design - the "console-y" looking frame itself is half a dozen on its own: the basic frame (those cyberpunky lines at the top and bottom of the screen); a semi-transparent box i added to make it look like a holo-screen; the panel on the side, which was originally square until i cropped it down to make it look like a panel and colour-shifted to match the main box; the little connector between the side panel and the screen, which is actually two of the same asset with one upside-down and cropped; and then the various text assets, not to mention all the logos, which are also all separate (and also the little 2 unread messages symbol is another 2 separate design elements i put together lmfao).
canva will probably seem overwhelming once you first start using it because it has So Many tools, but most of these are for companies and you'll probably find you don't need to even look at the vast majority of them. for example, it'll probably ask you to choose a template to start a design, and there are like. 100s. that it'll want you to sort through. but you very probably won't ever use more than one or two. i think i've used three Ever for IF stuff - tumblr banner (for banners, obviously), social media banner, for the RO banners you can see on the ROs page, and 16:9 Blank Presentation, which is what i use for UI designs because it's just. a big blank page size. you can Literally ignore all the others unless you need something specific!
you can either use the pre-generated aspects of the template and simply replace their designs with ones you prefer, or do what i do and delete it all and put your own stuff in lmfao. the templates can help if you don't have much of an idea of what you want your design to look like but obviously for me with UI design it's a bit. Pointless because canva doesn't have a template for that XD
anyway once you have your blank canvas, you can search for "elements" in the search panel and look through them for ones you want to use. the pro version assets are labelled pretty clearly so you probably won't mistakenly pick something that requires paying to use and the search filters themselves are pretty hefty - i rarely run up against a search term that brings back nothing unless it's HIGHLY specific lol
here are just a couple of tips that help me get basically closer to what i want out of the whole thing:
when you're changing the size of an element, canva only increases or decreases its size by the exact ratio of its original dimensions - you can't Only make an image wider, for example, it will also automatically increase the height to match. that's why the "frame" asset in my Gone Dark UI design is centred in the page instead of taking up more of it - i couldn't make it wider without it getting taller and the top and bottom bars disappearing off the page. you can get around this by using elements that are mostly plain - i could have, for example, made the semitransparent screen box as wide as i wanted, because it's uniform in design and there'll be no visible difference in where i draw its boundaries as it all just looks like plain rectangle.
combining photo images and less realistic graphics can look jarring but there are handy image editing tools (found by clicking "edit image" in the top toolbar with the image selected, and then "show all" in the lefthand sidebar to show all of the filters) that you can use to make photos look Less Photolike - lowered blur and heightened clarity especially can make it easier to make photos fit better with other graphics.
some of the text effects (found by clicking "Effects" in the top toolbar with the textbox selected) can make it way easier for text to be visible against certain backgrounds - this is not much use if you're designing something for another medium like a UI, because you can't replicate them in other software, but if you're just producing an image like a banner they add a lot of neat flair.
when you have a lot of elements working together they often look a little better with at least a slightly lower transparency to hide that their borders/edges aren't uniform - 85-90% is usually opaque enough to not notice it's slightly transparent but soften the edges.
it can be hard to figure out the exact size (in pixels) of an element while you're In a design - there are rulers that can be applied through the settings menu, but the maths often fucks me up, so i find it's easier to resize the image by dragging the expand handles by like a single pixel and then putting it back to normal - while specifically holding the expand handles (until you let go of the mouse and "drop" it in the desired size) it will give you an exact reading of the height and width in pixels along the bottom toolbar that you can read easily.
this one is pretty specific but when you're making boxes to put behind text they often look better with a slight blur filter on them as well as transparency - for Gone Dark in particular the blur gives it a nice fuzz that makes it look even more like a projected screen. if you look closely you can see a slight difference between the text screen and the side panel screen background - that's because i forgot to blur the side panel lmfao.
aaaand that's probably all the advice i can offer. i'm far from an expert, but i do feel like i have fun with it XD i'm glad so many people have thought it looked cool! sorry this got so long but. it's hard to explain without actually Getting Into It haha
#what does the chaos mirror see#anon#long post.#time flows differently in the queue#canva tips#i'm sure people who use canva more than me or people who can actually do Art will be laughing at me for this lmfao#i am but a humble poker of things i am not. Good XD#honest to god the Hardest part of that UI design? the little 2 in the neon pink circle#i COULD NOT get any elements to cooperate and canva doesn't like you. changing things a lot#but hopefully that shows how much easier the rest of it was lmfao
23 notes
·
View notes
Text
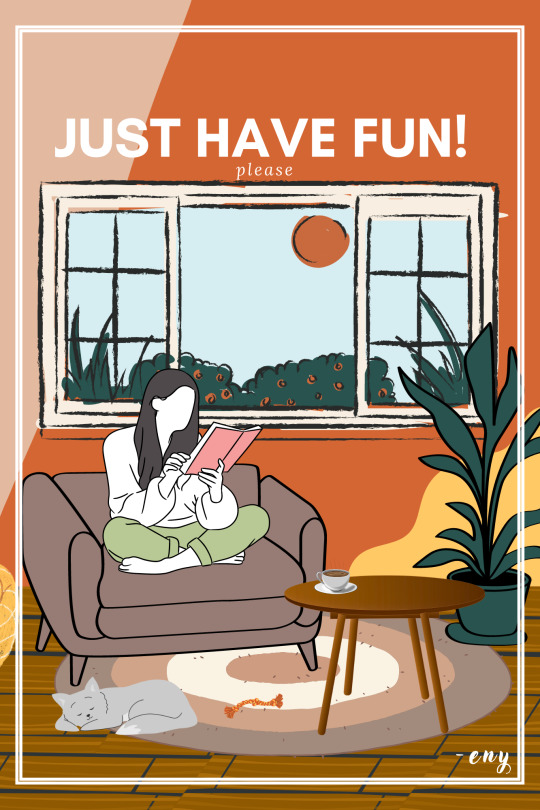
just have fun :)
-eny
#eny#graphic art#illustration#art#design#digital art#my art#poster#canva design#made with canva#canva tips#canva tutorial#artists on tumblr
3 notes
·
View notes
Text
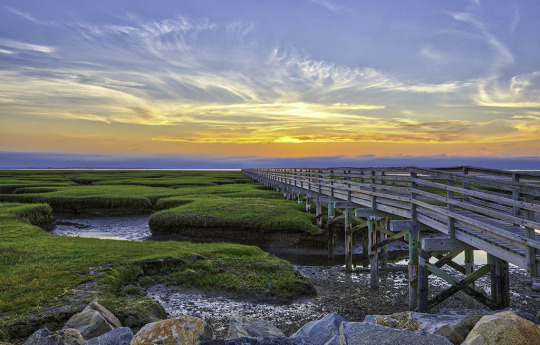
Gray's Beach and Cape Cod Bay Sunset Photography
Gray’s Beach on Cape Cod is a picturesque location that offers a breathtaking view of the Cape Cod Bay at sunset. One of the best ways to capture this stunning moment is through photography, and the wooden boardwalk at Gray’s Beach serves as an excellent vantage point for capturing the sunset’s beauty.
The wooden boardwalk at Gray’s Beach is a unique and rustic feature that adds to the area’s…
View On WordPress
#acryllic#artwork#beautiful#boardwalk#canvas#cape cod#Cape Cod Bay Sunset Photography#cape cod sunset photography#dusk#endless#fine art photography#Fine art Prints#Gray&039;s Beach#interior design#massachusetts#New England#peaceful#photo blog#photo prints#photo tips#photography#picturesque#quiet#summer house#wall art
3 notes
·
View notes
Text
Notice a Book By Its Cover
You know the age-old saying, “Don’t judge a book by its cover”? That statement is a great lesson to follow, as what is inside is the most important and more rewarding thing to see. However, that does not mean one cannot or should not strive to look their best or make their work stand out. Thus, creating a cover for a story is one essential step toward calling attention to a book.
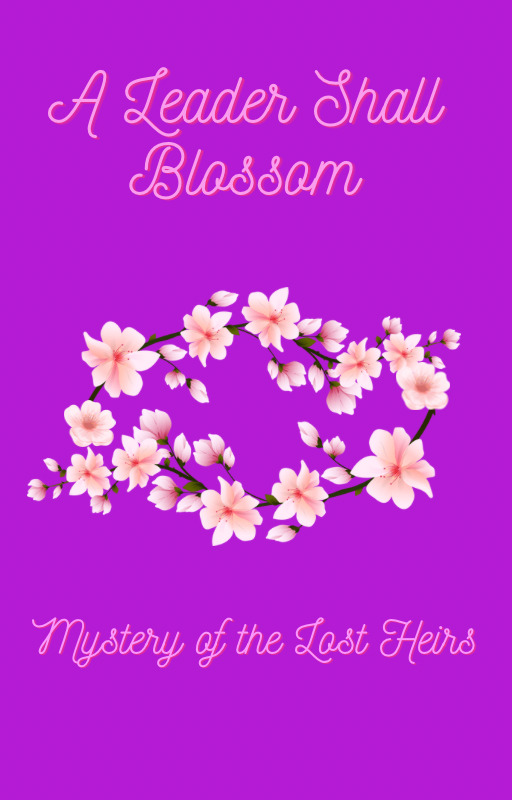
For example, take a look at the picture above. Take a minute or two to take in what you see. What do you think of when you look at it? How does it make you feel?
That cover is for a fictional story I have been working on for a while. It tells the story of a young girl who must overcome a speech barrier of hers and personal fears not only to prove she can be a leader, but to solve a mystery behind a fire that took the lives of the kingdom’s preceding heirs.
How and why did I create this cover, you may ask?
The setting of the story is a kingdom that is inspired by a combination of four Asian cultures (China, Japan, Korea, and India), so using what I can find from books and Internet research, I try to find symbolic things for various things in each culture.
In Chinese culture, for instance, the color purple is a symbol of immortality and divinity, and in many other cultures, it symbolizes power, which is fitting with this being a princess story.
The blossoms, on the other hand, not only act as a Chinese symbol of female empowerment, beauty, and/or mystique, but they also serve as a symbol of growth, blooming into one’s true self, coming out more beautiful than ever after blooming a little later than the rest of the crowd.
When creating a cover…
1. Reflect on every aspect of the story
- what is the plot of the story?
-what genre is your story?
- who is the main protagonist of the story?
- what is your motivation behind this story? Is it meant to teach a particular moral? Is it for expressing feelings towards a certain cause or real-life scenario?
- How do you want people to feel/ What do you want people to think when they read your story?
2. Look for images/colors/shapes that connect with the meanings of your story. Or, you can simply picture it in your head and jot it down on a notepad or as a drawing
-Find something symbolic (Ex. A red rose could be used as a symbol of romance, passion, and/or beauty)
- It can be something symbolic to a particular culture, or something that feels symbolic to you personally, which your story can help readers understand.
3. Figure out what design method works for you
- I used Canva to create the image above, but you can use any design platform you like.
-You can even draw your vision for a cover. Sketch, paint, even make a collage, and then make a digital copy of it, and you can use it for your book whether you print it or post it as an ebook.
All these aspects are important things to consider when designing a cover, but the most important thing is that it should say something about you and who you are as a writer. Let the cover capture your essence in a way that gets the point of your story across without revealing the whole story; that way, readers will go beyond the covers to see what twists and secrets hide within. Every writer is unique, and each has a certain purpose they wish to fulfill, even some they might not have realized yet. No matter what you choose to write, the cover is only one piece of the puzzle; the crown jewel that holds the symbol of your work’s completion.
#writerscommunity#writer things#writersofinstagram#writersociety#creative writing#creative design#book cover#cover design#writing advice#writing inspiration#writing inspo#canva tips#canva#canva app#writers#women writers#writing
2 notes
·
View notes
Text
This post really for you all and today i have started practicing physics lets see how much practice i can do.......


#study#study tips#studyblr#study aesthetic#stud#art study#study notes#study hard#study blog#study space#peachblossomstudy#pretty#canvapro#canva design#collage#university#manchester united#motivation
1 note
·
View note
Text
Can't afford art school?
After seeing post like this 👇

And this gem 👇
As well as countless of others from the AI generator community. Just talking about how "inaccessible art" is, I decided why not show how wrong these guys are while also helping anyone who actually wants to learn.
Here is the first one ART TEACHERS! There are plenty online and in places like youtube.
📺Here is my list:
Proko (Free, mostly teaches anatomy and how to draw people. But does have art talks and teaches the basics.)
Marc Brunet (Free but he does have other classes for a cheap price. Use to work for Blizzard and teaches you everything)
Aaron Rutten (free, tips about art, talks about art programs and the best products for digital art)
BoroCG (free, teaches a verity of art mediums from 3D modeling to digital painting. As well as some tips that can be used across styles)
Jesse J. Jones (free, talks about animating)
Jesus Conde (free, teaches digital painting and has classes in Spanish)
Mohammed Agbadi (free, he gives some advice in some videos and talks about art)
Ross Draws (free, he does have other classes for a good price. Mostly teaching character designs and simple backgrounds.)
SamDoesArts (free, gives good advice and critiques)
Drawfee Show (free, they do give some good advice and great inspiration)
The Art of Aaron Blaise ( useful tips for digital art and animation. Was an animator for Disney. Mostly nature art)
Bobby Chiu ( useful tips and interviews with artist who are in the industry or making a living as artist)
Sinix Design (has some tips on drawing people)
Winged canvas (art school for free on a verity of mediums)
Bob Ross (just a good time, learn how to paint, as well as how too relax when doing art. "there are no mistakes only happy accidents", this channel also provides tips from another artist)
Scott Christian Sava (Inspiration and provides tips and advice)
Pikat (art advice and critiques)
Drawbox (a suggested cheap online art school, made of a community of artist)
Skillshare (A cheap learning site that has art classes ranging from traditional to digital. As well as Animation and tutorials on art programs. All under one price, in the USA it's around $34 a month)
Human anatomy for artist (not a video or teacher but the site is full of awesome refs to practice and get better at anatomy)
Second part BOOKS, I have collected some books that have helped me and might help others.
📚Here is my list:
The "how to draw manga" series produced by Graphic-sha. These are for manga artist but they give great advice and information.
"Creating characters with personality" by Tom Bancroft. A great book that can help not just people who draw cartoons but also realistic ones. As it helps you with facial ques and how to make a character interesting.
"Albinus on anatomy" by Robert Beverly Hale and Terence Coyle. Great book to help someone learn basic anatomy.
"Artistic Anatomy" by Dr. Paul Richer and Robert Beverly Hale. A good book if you want to go further in-depth with anatomy.
"Directing the story" by Francis Glebas. A good book if you want to Story board or make comics.
"Animal Anatomy for Artists" by Eliot Goldfinger. A good book for if you want to draw animals or creatures.
"Constructive Anatomy: with almost 500 illustrations" by George B. Bridgman. A great book to help you block out shadows in your figures and see them in a more 3 diamantine way.
"Dynamic Anatomy: Revised and expand" by Burne Hogarth. A book that shows how to block out shapes and easily understand what you are looking out. When it comes to human subjects.
"An Atlas of animal anatomy for artist" by W. Ellenberger and H. Dittrich and H. Baum. This is another good one for people who want to draw animals or creatures.
Etherington Brothers, they make books and have a free blog with art tips.
📝As for Supplies, I recommend starting out cheap, buying Pencils and art paper at dollar tree or 5 below. If you want to go fancy Michaels is always a good place for traditional supplies. They also get in some good sales and discounts. For digital art, I recommend not starting with a screen art drawing tablet as they are usually more expensive.
For the Best art Tablet I recommend either Xp-pen, Bamboo or Huion. Some can range from about 40$ to the thousands.
💻As for art programs here is a list of Free to pay.
Clip Studio paint ( you can choose to pay once or sub and get updates. Galaxy, Windows, macOS, iPad, iPhone, Android, or Chromebook device. )
Procreate ( pay once for $9.99 usd, IPAD & IPHONE ONLY)
Blender (for 3D modules/sculpting, animation and more. Free)
PaintTool SAI (pay but has a 31 day free trail)
Krita (Free)
mypaint (free)
FireAlpaca (free)
Aseprite ($19.99 usd but has a free trail, for pixel art Windows & macOS)
Drawpile (free and for if you want to draw with others)
IbisPaint (free, phone app ONLY)
Medibang (free, IPAD, Android and PC)
NOTE: Some of these can work on almost any computer like Clip and Sai but others will require a bit stronger computer like Blender. Please check their sites for if your computer is compatible.
So do with this information as you will but as you can tell there are ways to learn how to become an artist, without breaking the bank. The only thing that might be stopping YOU from using any of these things, is YOU.
I have made time to learn to draw and many artist have too. Either in-between working two jobs or taking care of your family and a job or regular school and chores. YOU just have to take the time or use some time management, it really doesn't take long to practice for like an hour or less. YOU also don't have to do it every day, just once or three times a week is fine.
Hope this was helpful and have a great day.
"also apologies for any spelling or grammar errors, I have Dyslexia and it makes my brain go XP when it comes to speech or writing"
42K notes
·
View notes
Text
How To Make THE BEST Thumbnails On YouTube (CANVA) Easy Steps
Canva has become an indispensable tool in my creative arsenal, especially when it comes to designing captivating animations and eye-catching thumbnails. This powerful yet user-friendly platform offers a wealth of features and resources that streamline the design process, allowing me to bring my visions to life with ease. In this comprehensive guide, I'll walk you through my step-by-step approach to creating stunning animations and thumbnails using Canva.
#YouTubeThumbnails #CanvaThumbnails #ThumbnailDesign #VideoThumbnails #VisualsForYouTube #YouTubeGraphics #CanvaDesign #CanvaCreative #EasyThumbnails #ThumbnailTips #ThumbnailTricks #BetterThumbnails #ClickworthyThumbnails #ThumbnailMakeover #YoutubeCreators #CreatorTips #YouTubeGrowth #GrowOnYouTube #YouTubeStrategy #CanvaTutorial #CanvaForBeginners #CanvaHacks #designwithcanva
Hope you like this video. Please like, share, and subscribe to our channel.
youtube
#canva design#canva thumbnails#youtube thumbnail#creator tips#video thumbnails#canva creative#Youtube
0 notes
Text
Canva AI দিয়ে পোস্টার এবং ব্যানার ডিজাইন করুন
নজরকাড়া গ্রাফিক্স থেকে পেশাদার লেআউট পর্যন্ত, অনায়াসে অত্যাশ্চর্য ভিজ্যুয়াল তৈরি করতে ক্যানভা এআই-এর সম্পূর্ণ সম্ভাবনাকে কীভাবে কাজে লাগাতে হয় তা শিখুন। আপনি একজন শিক্ষানবিস বা পাকা ডিজাইনার হোন না কেন, এই টিউটোরিয়ালটিতে প্রত্যেকের জন্য কিছু না কিছু আছে! এখনই দেখুন এবং ক্যানভা এআই-এর সাথে মনোমুগ্ধকর ডিজাইনের রহস্য৷
youtube
1 note
·
View note
Video
youtube
Animated Text Tricks in Canva: Canva Tip to create text animation
#youtube#Canva#canva design#Canva tutorial#Canva tips#Canva design tutorial#Canva design tips#animation#text animation#Canva new feature#Canva update#tutorial#Canva hacks#Canva text animation#canva aniamtion#youtube video
3 notes
·
View notes
Text
3D WALL ART TUTORIAL: Diy Wall Art #homedecor #diywallart
youtube
#3D WALL ART TUTORIAL: Diy Wall Art#homedecor#diywallart#diy wall art#diy wall decor#diy wall art ideas#home decor#large wall art#diy3dart#3d wall art tutorial#3D WALL DECOR CANVAS ART#HOW DO I DESIGN MY OWN WALL ART THAT'S MIND-BLOWING LUX FOR LESS#interior design#interior design ideas#interior design tips#luxury decor ideas#valentines day decor#canvas wall art#balenciaga decor#valentines day decorate with me#home decor styling tips#Youtube
1 note
·
View note
Text
1 note
·
View note
Text
What are some free blog writing tools that i use? What are the features that i like about them?
Here are a few of my favorites:
Hemingway App: The Hemingway App is a simple but powerful tool that helps you improve the clarity and conciseness of your writing. It highlights complex sentences, adverbs, and passive voice, and suggests more concise alternatives.
Grammarly: Grammarly is a comprehensive grammar checker and plagiarism detector. It can help you identify and correct errors in your spelling, grammar, punctuation, and style. Grammarly also offers suggestions for improving the clarity and readability of your writing.
Canva: Canva is a graphic design platform that allows you to create professional-looking images and graphics for your blog posts. Canva offers a wide range of templates and tools, even for users with no design experience.
HubSpot Blog Ideas Generator: The HubSpot Blog Ideas Generator is a free tool that helps you generate blog post ideas on any topic. Simply enter a keyword or topic, and the generator will provide you with a list of ideas.
Simplified AI Blog Writer: The Simplified AI Blog Writer is a free tool that helps you write blog posts using artificial intelligence. Simply input a topic and a few keywords, and the AI writer will generate a blog post outline for you. You can then edit and expand on the outline to create your own unique blog post.
Here are some additional free blog writing tools that you may find useful:
Google Docs: Google Docs is a free word processing program that you can use to write and edit your blog posts. Google Docs also offers a variety of features that can be helpful for blog writers, such as collaboration tools, real-time spell checking, and grammar checking.
Evernote: Evernote is a free note-taking app that can be used to collect and organize your blog post ideas, research, and other resources. Evernote also offers a variety of features that can be helpful for blog writers, such as tagging, search, and collaboration tools.
Yoast SEO: Yoast SEO is a free WordPress plugin that can help you optimize your blog posts for search engines. Yoast SEO provides a variety of features, such as keyword analysis, title and description optimization, and readability analysis.
I hope this list of free blog writing tools is helpful. Good luck with your blogging!
0 notes
Text
Canva Design For A Client
1 note
·
View note
Text
Facebook Cover Photo Design in Canva
youtube
#canva#canva app#canva design#canva template#canva tips#canva tutorial#canvapro#graphic#graphic design#Youtube
0 notes
Last Seen Blogs

hrgdn5t5tf
Handyman Harry
the-aleator
what heavy gold of tales untold
gspinoy-blog
GS Pinoy
shakkala
Untitled
jiraya
GODSPEED