#I need a tag for all my drawings I really do
Text
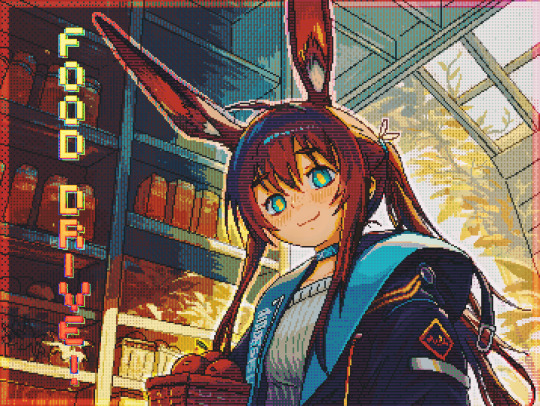
Food Bank Fundraiser
Hi everyone!
First of all, I want to say thanks to everyone who's been leaving such nice tags/comments on stuff I've posted! It's been really encouraging (o^▽^o)
Anyway, I think we all know it's very dark days on the economic front for many of us. So as such, I'd like to help raise some funds for Food Banks Canada! In exchange for you making a donation to the food bank, I will draw a character suggestion!
I know this is not really the sort of thing I normally do or post here but... many folks are struggling to put food on the table right now, and the food bank is a source of support for many and provides an absolute necessity. I've seen many people struggling in my own city, and food security has become an even bigger issue than it already was in the last couple of years with the food bank struggling to keep up with demand. Of course, food security is an issue across the whole country that's putting a huge strain on food banks, with nearly 5% of the entire population making use of food banks monthly, and 23% of the population reporting food insecurity (CBC, 2024; Global News, 2024). Unsurprisingly, those who are already most disadvantaged suffer the effects of food scarcity even more (Statistics Canada, 2023). To make matters more desperate, Canada's food bank system is on the brink of collapse (CTV News, 2024).
I know this isn't going to something big enough to change the world or anything, but being able to make even a small impact for individual people is important too!
✨Incentives✨
Of course, I'm sure people aren't just in it for a reward, but rewards make things all the sweeter, right?
For those who want to contribute, I'll take a character suggestion and add it to a poll (depending on the number of contributors, it may be split up into multiple polls), and then I'll draw as many as I can from top to bottom ranking! If you contribute, please send me a DM with your donation receipt and your character idea! They won't necessarily all be drawn in the same style, and they'll be done according to how much time I've got. (I know that commissions are probably the biggest incentive, but realistically, I struggle to get them done quickly and they're probably not that affordable to everyone)
If you prefer SFW or NSFW, you can let me know (But NSFW will be posted to Cohost). If you make a bigger contribution, I'll reach out to you and ask if you wanna see more specifics/details in your piece. How's that for sweetening the pie? :3
For those who can't make a donation (which is completely understandable), simply spreading the post is also helpful, and I appreciate that greatly as well!
Don't forget that giving a donation allows you to get a tax break based on the amount donated as well!
Alternatives?
If you'd rather donate to your own local food bank, that's great too! You can DM me and send me a pic of your receipt and I'll still add your suggestion to the poll.
If you REALLY want a commission, you can also DM me and I'll do my best to fulfil it! I won't be taking commissions for this till/if there's at least a couple of items on the poll though. The proceeds will go to my own local food bank. The commission will be done later though, and may take some time to fulfil. I take payment only after starting.
When do we start??
I guess once there's a good number of poll options? I have no idea how long that will be, but rest assured I'll keep you updated!
Where do we contribute?
You can make your donation to Food Banks Canada! They really need it!
Alternatively, you can make a donation to your local food bank or equivalent charity.
Other Questions?
Feel free to send me a message or an ask! I'll get back to you ASAP. If I need to include more details or clarify something, let me know! It's my first time doing this!
TL;DR
I want to help raise money for food banks! Anyone who contributes to Food Banks Canada (or donates to their own local food bank or equivalent charity) can DM me with their receipt and give a character to add to the poll. Poll characters will be drawn in order of their ranking, as many as I can manage, over as long a period of time as I can manage!
No pressure to donate of course, I just figured this would be a fun way of raising a bit of money to help out, and allow us to donate more than what I personally can
Current Contributor Count: 8
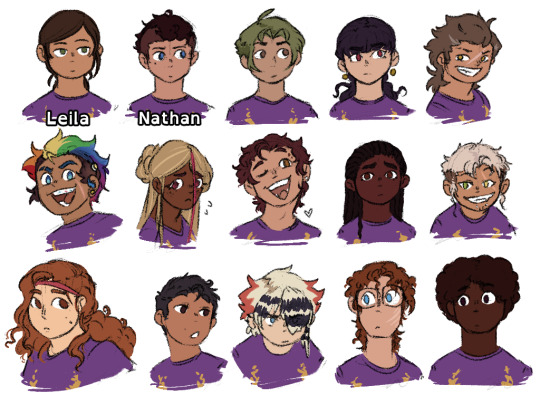
Suggested Characters:
Imagine your beloved, obscure or popular character here on this poll list! Oooooooh, how lucrative :3
Total funds raised:
453.02$!!
#I bet Amiya would encourage donations to the food bank too right??#I know it's unorthodox to run it like this!#But boy is it dire days#food bank#donation#Art#fundraising#Arknights#Amiya#pixel art#pixel#art#poll#digital art#artists on tumblr
195 notes
·
View notes
Text
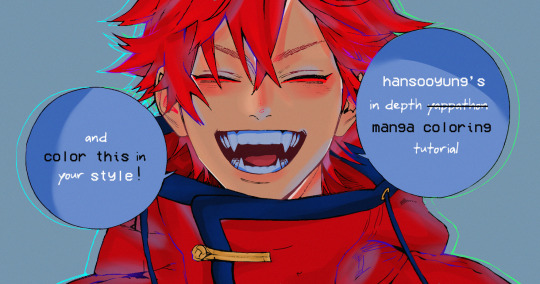
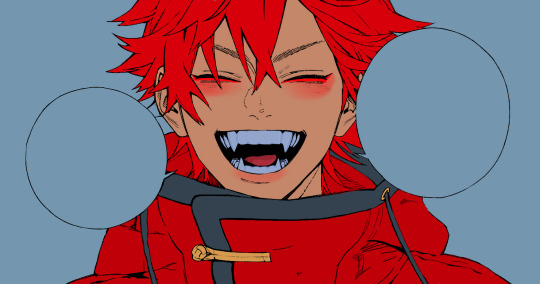
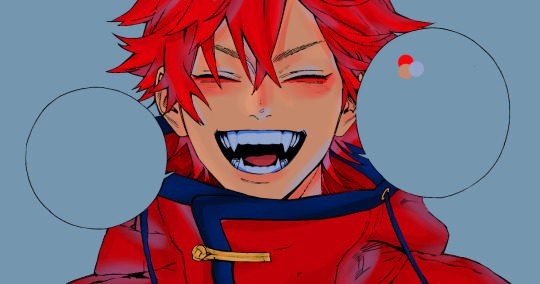
hansooyung's coloring tutorial & ctiys: alma time! 🍒
hello everyone! though i've been meaning to for a while, i've finally gotten around to making my first manga coloring tutorial! i'll be going over cleaning panels and screentones, choosing base colors, and finally shading and lighting.
this will also be a color this in your style challenge, so if you're willing, feel free to post your colored panel and tag me in it!! i'd love to see all the results :)
find details under the cut! 🦋
DISCLAIMERS:
this is just how i personally color! i know for a fact that some of my other friends follow other methods and have such beautiful colorings <33
for colors specifically, i play around a LOT. if you don't like your color scheme for the time being, mess around with it! i don't use psds since i like to mess around by hand with color palettes, but maybe i'll look into it for the future.
i explain a lot just bear with me gang 🙏
TECHNICAL STUFF:
software: ibis paint x (on iphone). i use ibis since it is FREE for all phones and it worked on my chromebook as well.
while this tutorial is made for ibis paint x, everything works on other softwares except the brushes, which i've provided alternatives for below.
brushes: i will be using dip pen (hard) which is automatically included with ibis, and two other brushes i made myself which you can find here and here. for more brushes, @/bkdkdh was incredibly helpful and posted her awesome set here!
for other softwares, you can use similar brushes. dip pen (hard) can just be the default brush, while wet edges is just the default brush on lowered opacity (and more of a rectangle/marker shape?). watercolor pencil is a watercolor brush in the rectangle/marker shape as well. if you can't get the shape, you can always smudge your lines into shape as well, so don't fret too much! a bunch of people only use one brush for coloring everything (which is insane to me, personally, they are so talented!)
fun fact: the first brush listed that i made was originally called "aki tao watercolor smooth" 👍
ok here we go guys!!
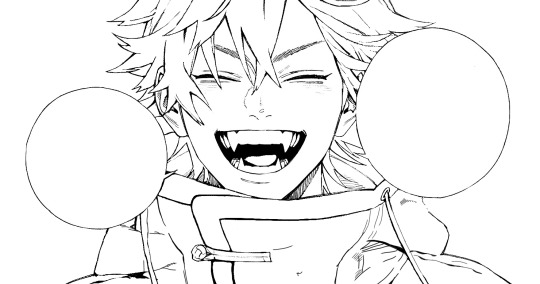
STEP ONE: CLEANING THE PANEL
i think of this part as setting up the panel for coloring! usually it's pretty exhausting cuz it's all b&w but it's all worth it i swear. the panel i'll be coloring is this beautiful one of alma from chapter 2:
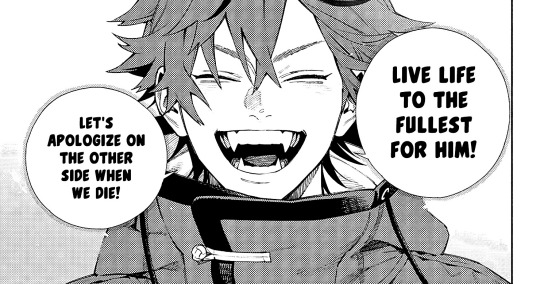
imgur link here (x)
a lot of people redraw their lines to avoid screentones, which is extremely helpful. however, i work on a phone and my fingers are not steady even with the stabilizer turned all the way up T~T. i do it this way, but a different (possibly easier) way may work for you!!!
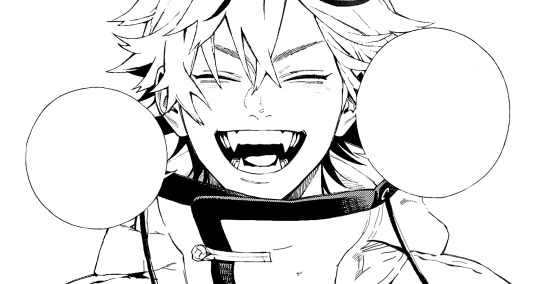
your first step will be to remove all the white, giving us a transparent background to work with. THIS IS THE NUMBER ONE REASON WHY I USE IBIS PAINT X.
when you upload the image to ibis, a popup comes asking if you would like to "extract line drawing". this creates a lineart of your image. click yes, and your work is like 90% done.
if you're not on ibis, you can redraw your panel, put lineart layer on screen, etc. or you can just extract line drawing from ibis and upload to software of your choice
for those of you not on ibis, i've included the line drawing here (x) if it looks black, don't worry and set your background to white.
omg i was not kidding when i said i explained a lot. ok now onto the three main steps of cleaning the panel:
cleaning background
removing screentones
repainting black lines
for cleaning the background, we're going to clear off all the extraneous stuff. this includes the text in the speech bubble, the gradient screentones behind alma, and the panel line on the left side. just use your eraser tool and go crazy! (i forgot to save the panel at this point of the coloring OTL)
for removing screentones, we're going to remove all those "dots" that mangakas use for shading. these are used to show value for b&w art, but since we're coloring we don't need them—a lot of people have really cool ways of incorporating screentones in their colorings though, and it looks amazing! i used it on nana's hand in my bnha coloring.
remove the screentones from alma's hair and jacket with your eraser tool. this will take time, but it's worth it in the end!
for portions with a bunch of lines, you can create A NEW LAYER and redraw some of the lines. that way, you can erase indiscriminately from the original layer but the lines you drew are still there. again, like i said, my hand is really shaky so i don't do it a lot, but it's extremely helpful for smaller parts where i have control! i used this on alma's jacket, and here's a screenshot of the process:

(i made his jacket purple so i could distinguish between layers easily).
it should look like this when you're done:
for the final step of cleaning, i like to erase all the things colored black (the collar and strings of the jacket, along with the back part of his hair). that way, i can color them in with dark colors and it adds to the whole look of the coloring.
i've circled the parts i'm going to erase below:

and it should look like this when you're done!
ok everyone cheer we're ready to color now!!!!
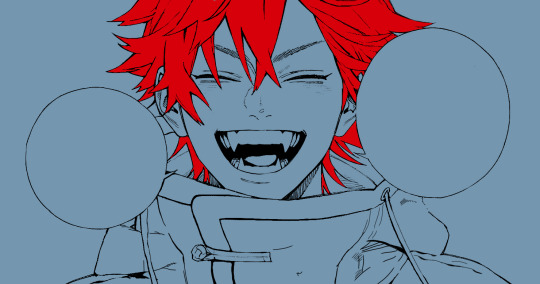
STEP TWO: BASE COLORS
CROWD CHEERS ok lets go!
this part is the most important to me, because it sets the tone for the whole coloring. i like to use three-four main colors in my colorings, and it's usually background, skintone, hair, and the secret fourth color. the secret fourth color is usually whatever color fits the character's vibe, or if the character's color is the bg, it'll be an accent color.
for example, with my nagi coloring, i used white for the hair, i had my skintone, i had blue as the main coloring vibe (as nagi's color), and black as the accent color.
for alma, i chose his main color to be red! it's the color of his hair and his jacket, so i wanted it to be vibrant and stand out. since blue contrasts red, i went for a greyish-blue shade for the background. (i went for grey rather than solely blue because then it would clash rather than complement).
disclaimer please please please take your device off night mode warm mode f.lux whatever you have. this has screwed me over more times than you may think :(
i like to make my vibrant colors closer to the right end of the color square. for alma's hair, i chose this color:

i dragged it down from the corner a bit but kept the saturation since his hair is kind of dark. we can use vibrant colors to shade it though, so don't worry!
here's his hair and the background together:
now from here, play around with skintones until you find one that matches the hair!
i usually drag around the wheel to the orange-red intersection, and have it on the lighter, more saturated side. here's the color i chose for alma's skintone.
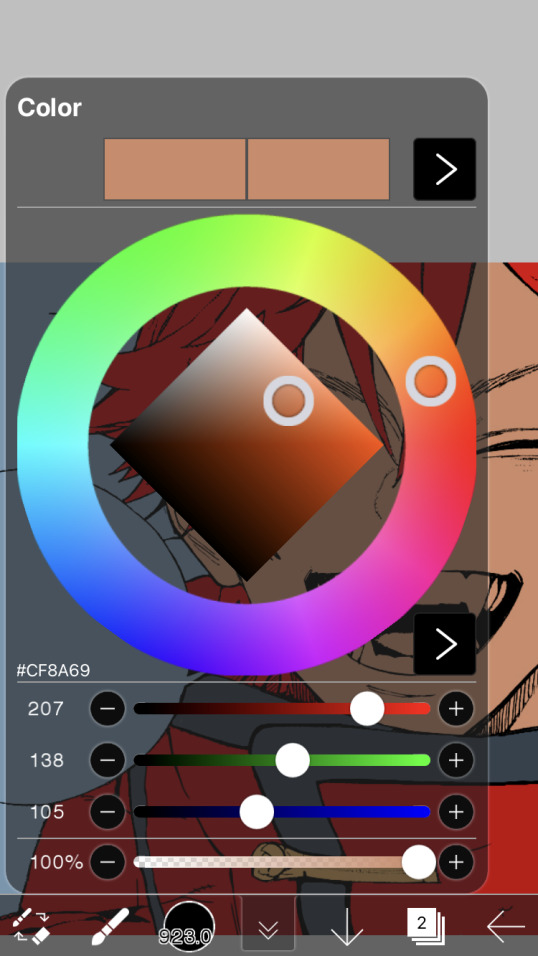
i thought his original skintone looked a bit too orange, so i pulled the saturation back a little bit (moved closer to the left side of the square).
after that, color in his jacket with a bit darker red than hair, choose a gold color for the accents on his jacket, and color in the black parts with a grey-ish color (we will change that later).
here's the base colors!
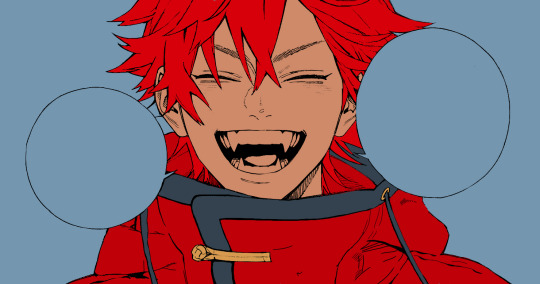
if it looks a bit bright, don't worry! we can change that with shading. or you might just have to. accept the light.
STEP THREE: SHADING AND LIGHTING
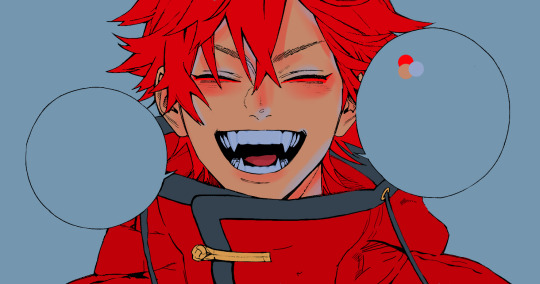
wooo we made it!!!!!!! ok now i lied, we have a bit more of base colors to go. on a layer above the skin, color in your teeth and tongue. for pieces that have a more red feel (like this one), i like to make the teeth and the shading a more vibrant blue color. (for blue pieces, i make it a purple!).
IMPORTANT NOTE: ALL SHADING AND ALL COLORS SHOULD BE DONE ON NEW, CLIPPED LAYER.

i'll then go in and do some light shading with my wet edges brush. i'll use a darker color for hard shadows and then a lighter, more vibrant color to accentuate it.
next up we have blush! a lot of people do this in very different ways but i like to do it directly under the eyes, in a vibrant red shade. make a new layer above the skin and clip it on. color pick alma's hair and drag it to the most saturated shade (red corner). then using the watercolor pencil brush, lower the opacity of the brush and drag a line under the eyes on both sides.
make sure to erase the portion of blush that goes above the eyeline. i also added some lips for alma as you can see, and then added a red line under the eyes! this was back to the regular dip pen (hard) brush on 100% opacity. it may take a few tries to get your blush to the way you want it, so don't worry too much.
now we can start our actual shading!
i break this part up into three steps: skin shading, blue shading, and light shading (highlights?)
for all of them, think about where the light is falling and how it will look on alma.
quick interlude about brushes: i use the watercolor pencil brush for softer, bouncy looks (like blush and noses) and i use the wet edges brush for more hard lines in shading.
again, make a new layer above the skin and clip it on. (i like to have it below the blush, so it doesn't cover it). for skin shading, i take the vibrant red and lower the opacity of the wet edges brush by a significant amount (specifics don't really matter, as long as you're happy with it). i'll trace his neck, from the shadow of his face, shadows of his hair falling on his face, ears, and nose. (for the nose i used the watercolor pencil brush for a softer look).

this is what i have once i'm done!
next we have skin shading part two, where we basically make a new layer on top of our first shading, lower the opacity further, and trace outside whatever we just did to blend it in more.

i used the watercolor pencil brush since it's more softer shading meant for blending! i also added it around the eyebrows for depth.
next up we have our blue shading! this is a technique that i learned from @/bkdkdh's colorings, but adding blue as a shadow really adds to the whole coloring. using the watercolor pencil brush, select a light-ish blue shade (a bit more saturated than background color) and use it to shadow a few more areas than your skin shading. i always make sure to hit the underside of the nose, cuz i think it adds depth!
finally, to wrap up our skin shading we have our lights. i use an orange-ish yellow color, which i set pretty light to not blend into the skin. using the watercolor pencil brush, i'll basically highlight any areas opposite to where the blue was, and highlight different parts. i always highlight one side of the nose as well.
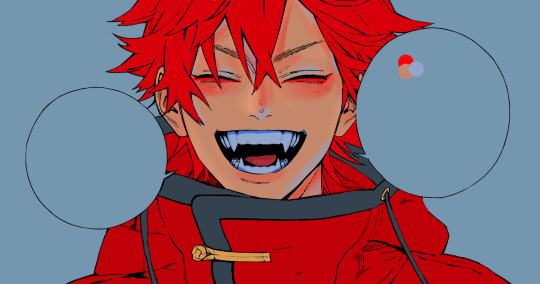
i erased the line around the nose since we now have shading there, and added a darker shade to the teeth since i felt it wasn't shaded enough.
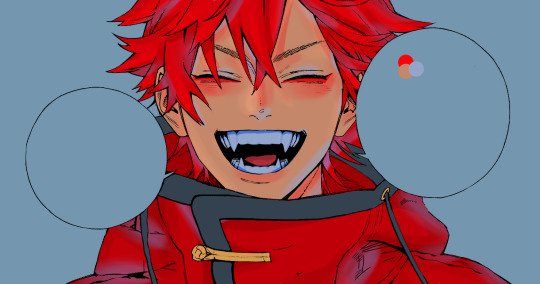
now onto the hair!!! (guys we're almost done bear with me, skin and hair are the two main things and then you can half-ass the clothes)
color pick alma's hair color, then drag the red a bit further down to get a darker yet still saturated color. here's mine:

then, using the wet edges brush, draw lines of shadow wherever clumps of his hair fall or overlap with each other. you can have the opacity set to whatever level you want, i just went with around 90. just try to follow the natural lines and patterns of the original line drawing, and everything should work out fine.

here's how mine looks! then, just like we did for skin shading, place a layer on top and lower the opacity to around 50%. place some more shading to blend it in. you can also shade more parts with this shade for some softer shading. i actually forgot to take a screenshot of this step but you'll see it in the next one!
for our (almost) last part of hair shading, take a layer and place it below both of your shading layers. this is going to be our highlight layer! you can see it below, labeled 49%.

remember how we set alma's hair a bit darker from the corner color? now select that corner color and draw highlights in the center of each hair clump.

lightly visible but it's there!
now here i skipped around a bit bc i was having fun and forgot i was doing a tutorial, but repeat the shading (not highlighting) steps with darker colors for alma's jacket. you should have your base layer, a dark shading, and a softer shading for blending.
we're almost there guys!!!
for the pretty much final step of shading, select a light blue color and do some blue shading with the watercolor pencil brush opposite to wherever your darker shading falls (just like we did on the face). make sure to do it to both your hair and your jacket! here's mine:
now for the black portions, we're going to color the whole thing in a dark blue color. just alpha lock your layer and make a big stroke of dark blue, almost black. for our black shading, we're actually going to go lighter.
select a lighter (but still dark) color and place highlights on the base layer, then take an even more vibrant, lighter blue and place it on the very outside for highlights. a better example of this would be nagi's legs in his blue lock uniform here. then, choose a shade to apply shading to the gold accents on alma's jacket and we're done!
CROWD CHEERS!!!!!
STEP FOUR: FINISHING TOUCHES
we made it guys!!!! for finishing touches, i'll usually do background effects or text or that kind of stuff.
step one is coloring your lines. you can add a new layer and clip it to your lineart, or simply alpha lock your lineart and color directly on top. for hair i like to add vibrant blue/purple lines, along with a few red ones. for skin lines i try to do dark brownish purples, but leaving some black is good too bc it adds flavor!
i colored in the text boxes and added shadows using the wet edge feature, then added some text. for the glitch effect, i duplicated the lineart, dragged the layer below all of my colors (including speech bubbles) and then used the glitch effect with height full from ibis. if you don't have ibis, you can look into features on your software, or you can also just drag your lineart layer a bit to either side and color it in. i also applied just the tiniest bit of noise on top of everything
and there we go!!!!! we made it to the end :)
if you've read all the way til here, thank you so much! if you decide to color this panel of alma (or any other panels!) don't be afraid to post them and tag me for a color this in your style type of thing! (you can also put it in my tracked tag, #user.roy) i'd love to see everyone's works :)
here's the full timelapse: (it stalls for a bit at some times but hey we can't have everything)
#roy colors#tutorials#manga coloring tutorial#useraki#usergojoana#usermica#usernikiforova#tagging some friends <3#alma#gokurakugai
52 notes
·
View notes
Text
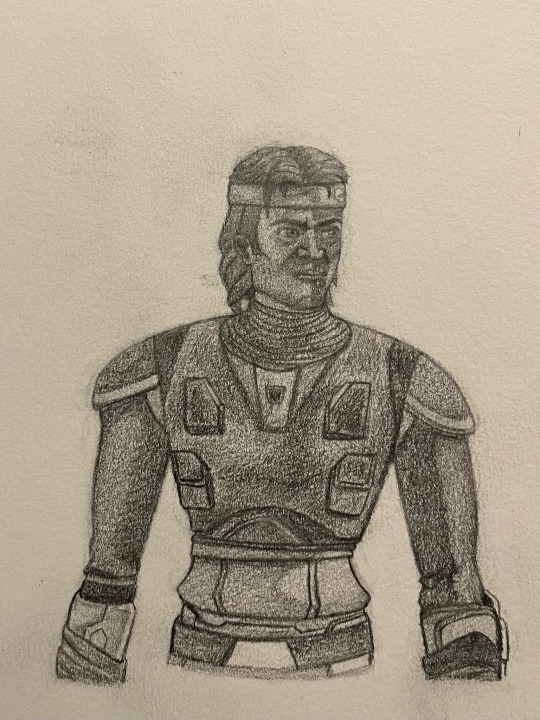
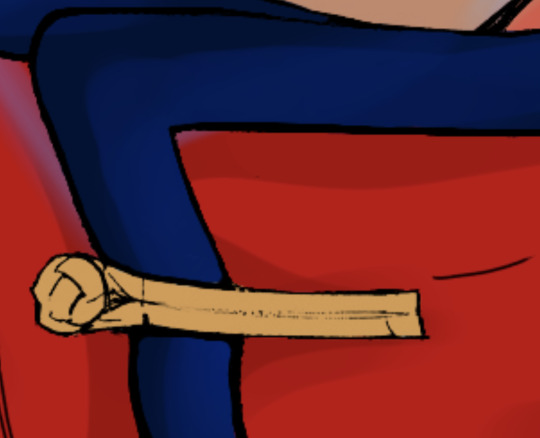
the man, the myth, the legend (mister hunter bad batch)
#the bad batch#hunter bad batch#tbb hunter#tbb#I need a tag for all my drawings I really do#ok ok#favorite things#his armor????#the itty bitty waist#this was actually my fastest drawing I think#echo’s took me over four hours at least#same with jesse#and ahsoka#and that techphee one took days#this took me three hours#not counting the time I spent away from it#also his hair I really really like it#the first sketch was so rough#I gave him such a big head#also V’s right he’s pulling a face like he smelled something stinky#but that’s life#he learned from echo in my world#also yes he’s got no guns in this drawing on purpose#they were too hard and I accepted defeat
22 notes
·
View notes
Text
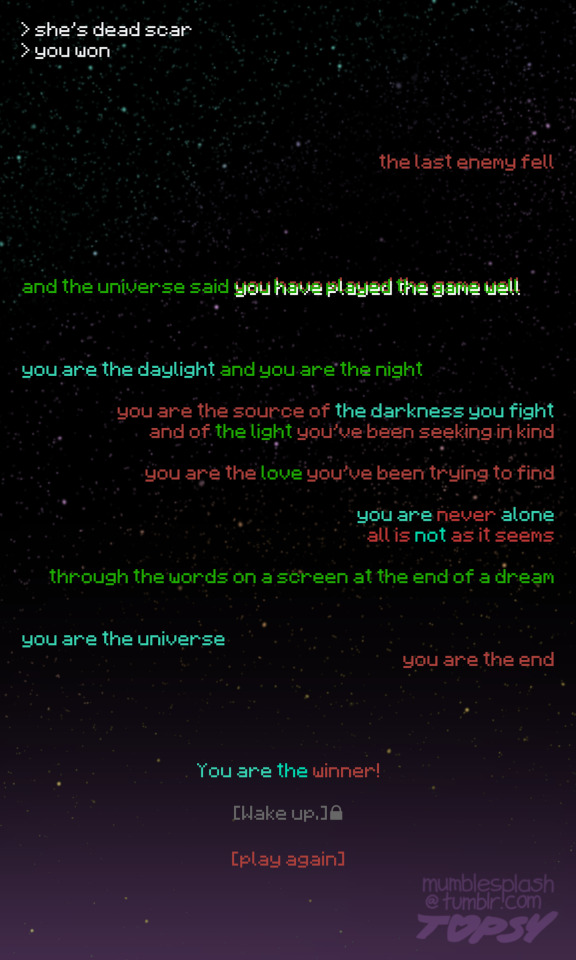
in honor of last season’s poem being called “”end poem”” (all quotes mandatory) this season i made one out of pieces of the actual end poem
#letting me just download the minecraft font? for free? a mistake#if you or a loved one have been suffering from RED TEXT you may be entitled to compensation#my art#god at this point i really do need a writing tag don’t i#<- will continue not addressing this#secret life#goodtimeswithscar#grian#secret life spoilers#sorry tumblr user livvi3love for not making one with all the deaths again#if you (or anyone) did want to illustrate this one as well you’re more than welcome to but i am not expecting anything#i can do an explainer thing again like i did last time but that is for tomorrow#right now i am just. very tired#but for now i will confirm yes the colors Matter#i literally made this on accident against my will#i was trying to DRAW
5K notes
·
View notes
Text
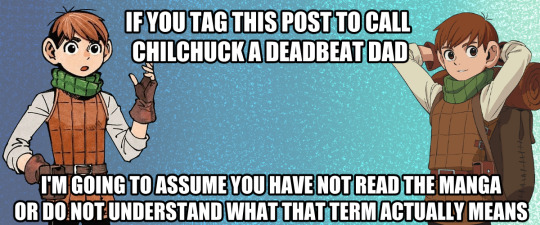
"chilchuck isn't a twink, he's a DILF!" now i get why you're saying that but i feel like you've maybe forgotten what chilchuck tims canonically looks like
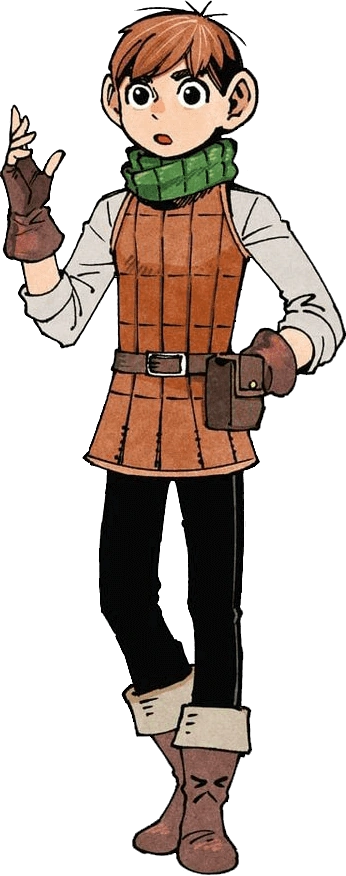
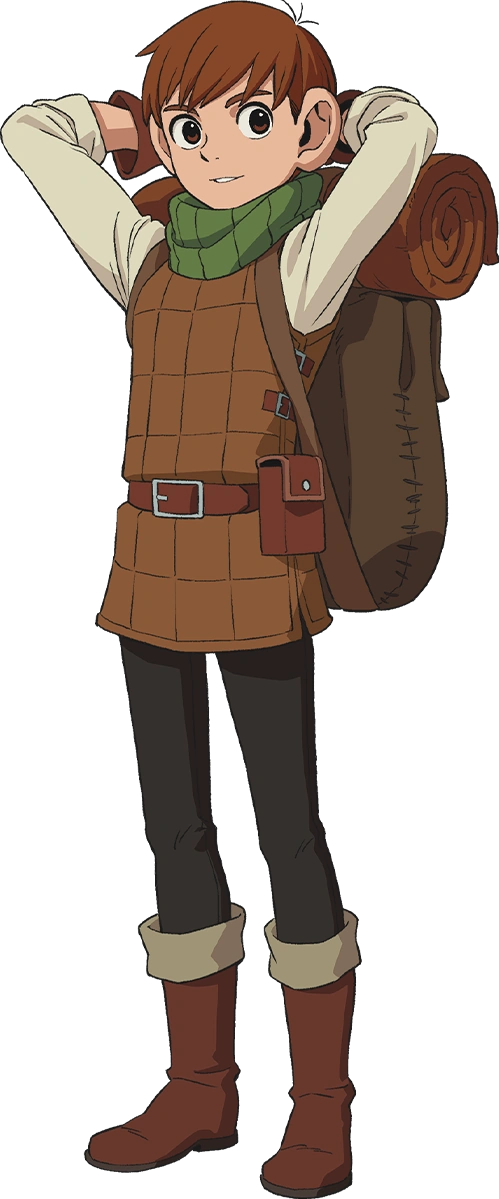
i'm sorry but this man is a twink. also DILF isn't a body type it's a status (and technically, an opinion) so he can be both
"but he's middle-aged!" look at him. look with your eyeballs. his age has nothing to do with the fact that he Looks Like That. he's a twink. the sooner you accept this the less angry his fandom will make you
edit bc this post has become the bane of my existence:
FAQ
Q: wtf do you mean he's a dad? he looks like a kid.
A: he is 29 years old, and a half-foot. half-foots are dungeon meshi's halflings, or hobbits, or whatever you want to call them.
Q: wait, if he's 29, why the fuck are you calling him middle-aged?
A: half-foots have an average lifespan of 50 years. chilchuck was originally drawn with grey hairs (you can see that in the manga fullbody) but the mangaka gave up on that over time. he's middle-aged for his race.
Q: hey, doesn't that look like a little angry face on his boot in the manga drawing?
A: yea kinda
#as a proud member of the chilfucker fandom i think we should all accept his canon appearance even if we draw him way different#if you can only love him if he looks like a hobbit do you really love him at all?#by all means draw and think of him however sparks joy for you. but this is who he is in the manga and anime and you need to accept that#i love all chilchucks but i just love him in general. ideal man#chilchuck tims#tox.txt#edits made because the tags on this post are my villain origin story#i have now muted notifs!
2K notes
·
View notes
Text
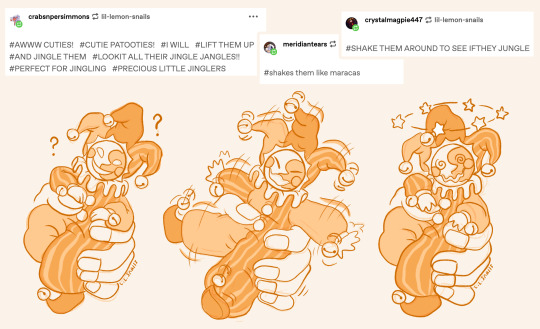

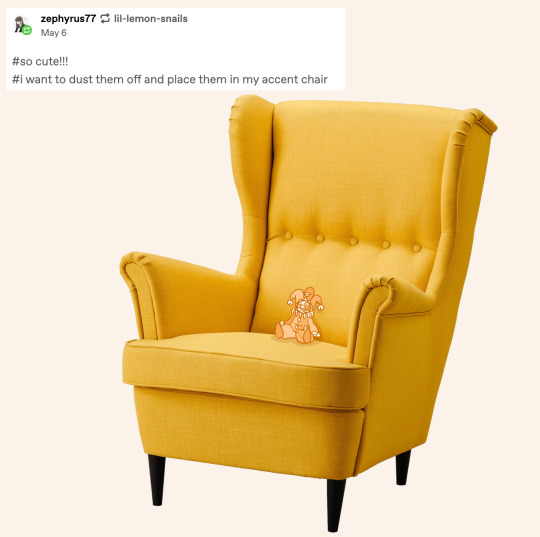
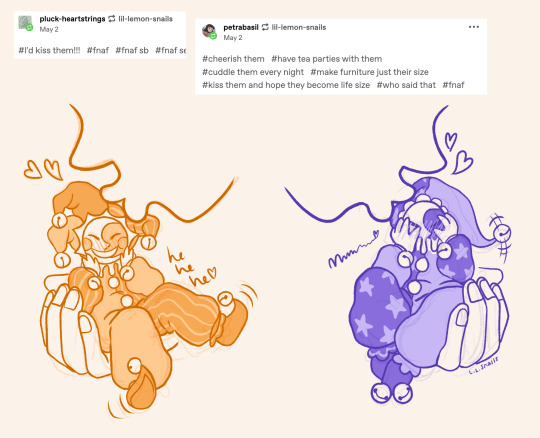
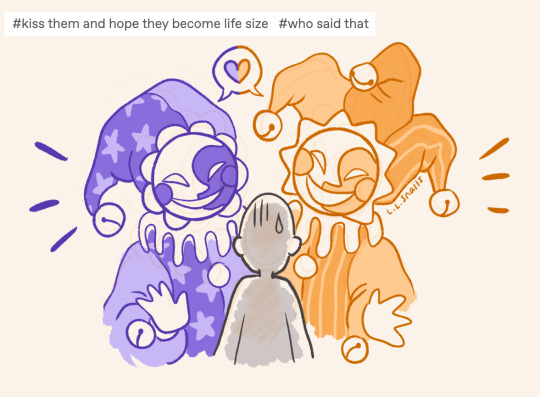
decided to draw some of your guys' tags from my harlequin sun and moon post!!! These guys are so much fun and you're all so funny >w<
#there were so many i wanted to draw!!! I might have to go back and do a part two hehe#also too scared to spam everyone by tagging accounts but i need you guys to know i love you all sm!! sending u all so many little kisses!!!#fnaf#fnaf fan art#fnaf security breach#fnaf daycare attendant#fnaf dca#dca fandom#dca au#fnaf sun moon#digital art#artist on tumblr#harlequin#clowns#answered asks#<- this doesn't really count but because i am drawing other people's tags i'm putting it here!#folks commenting on my art really motivate me to keep drawing ;w; you are all so insanely sweet and absolutely make my day every time!!! <3#just over here crying akjsfhsf thank you all so mucchhhhhhh ;;w;;
847 notes
·
View notes
Text
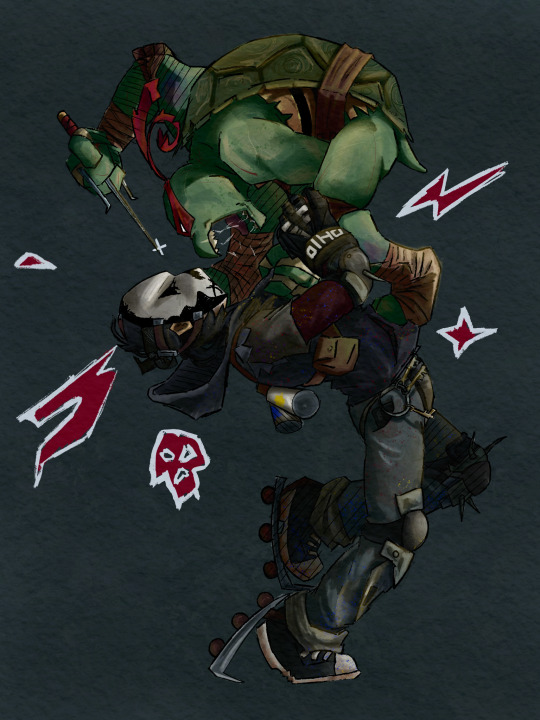
“Ain’t turtles supposed to be endangered?”
“Only the ones who can’t do this!”
#TMNT 2012#raphael hamato#casey jones 2012#is your bestie really your bestie if the first time you laid eyes on them it wasn’t immediately on sight#rasey#it’s not ship art but also I want it in my rasey tag so#I am having so much fun drawing in the canon style I am but god did I need to do something in my own style again#it’s like when you get made to wear a fitted dress and everyone tells you you look nice and it’s perfect#but you feel self conscious and constricted and it’s not something you’d ever wear#I love learning from studying the different styles but I also miss just editing the designs and going off model#altering the brushes and colours to suit a vibe#this is messy gritty wrong and imperfect but that’s what made it fun and easy and I’m so happy with this you can all bite me#also this is the return of flat ass Casey#Lou jitsu’s moral enemy and opposite lmao#I am so normal about Raph and Casey honest#I don’t constantly think about the way he slams Jones on the car bonnet#just a normal short chunky dude with his lanky toll bestie that happens to have the worlds flattest ass
730 notes
·
View notes
Text
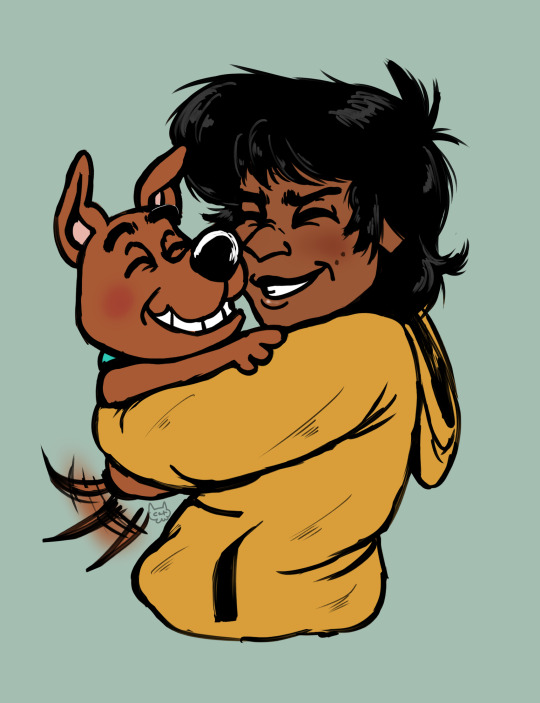
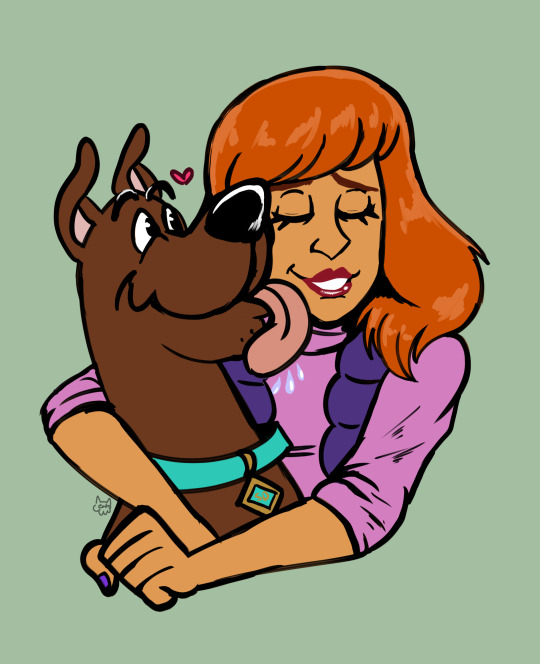
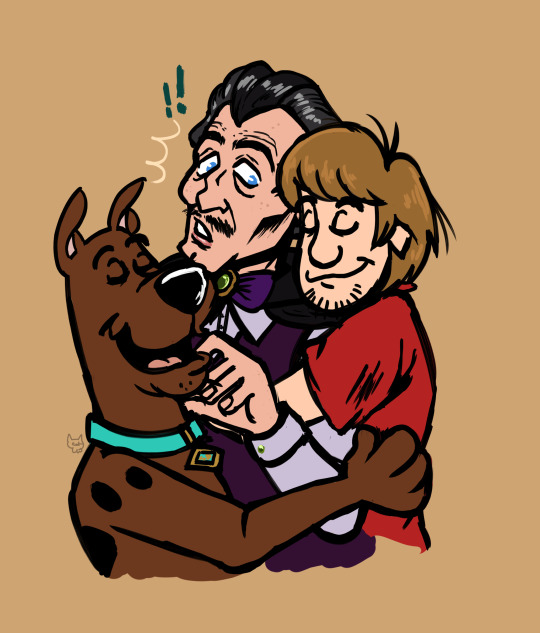
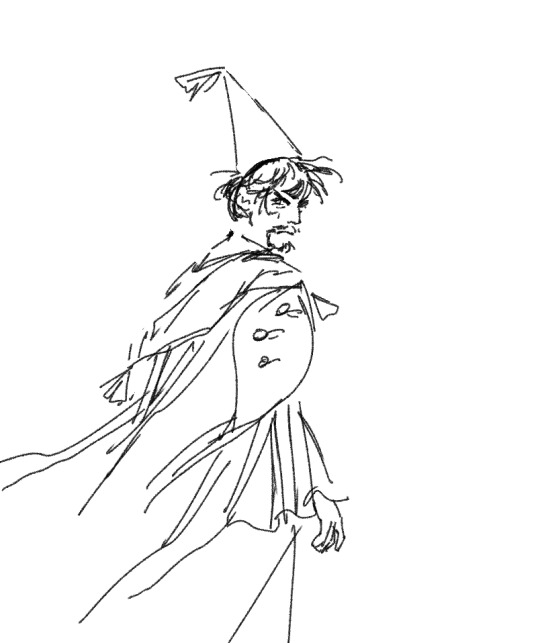
Cleaned up some sketches cause I need to post and also I miss them terribly 13 ghosts come home pleaseeeeee!!!
There were Shaphne ones too but they took up their own page so I'll clean them up later.
#my art#scooby doo#daphne blake#shaggy rogers#scooby doo fanart#flim flam#scrappy doo#vincent van ghoul#the 13 ghosts of scooby doo#scooby doo and the curse of the 13th ghost#posting these before bed so if I spell anything badly its because im sleepy#defaulted to my vincent design for a fancomic I was gonna do and still might idk i havent decided yet who knows#Daphne's outfits in 13 ghosts are so good I may have to draw them all#Scooby being the hardest to draw continues to hold true I NEED to do studies soon I need to be able to draw him accurately#I literally miss 13 ghosts so bad you don't get it#All I do is yap in these tags I'm so sorry I really should just start posting posts but I always forget#scoodles
194 notes
·
View notes
Text

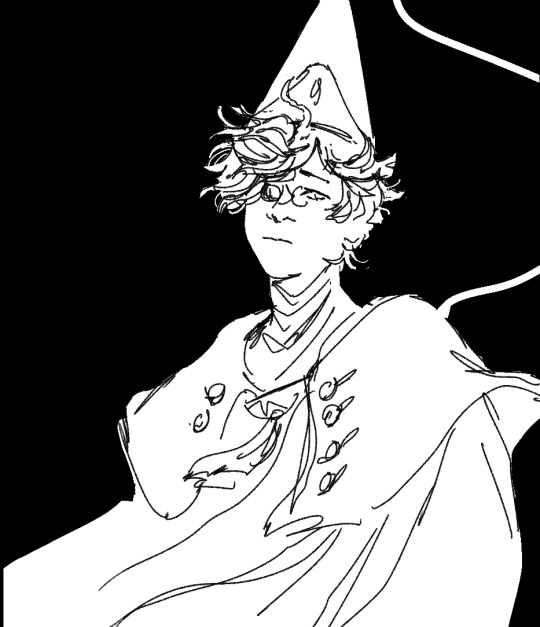
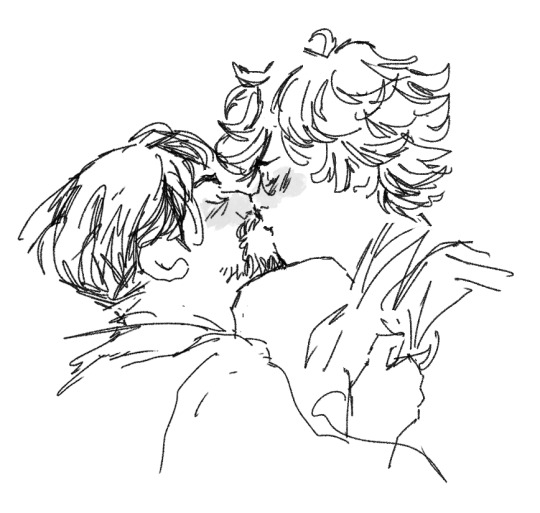
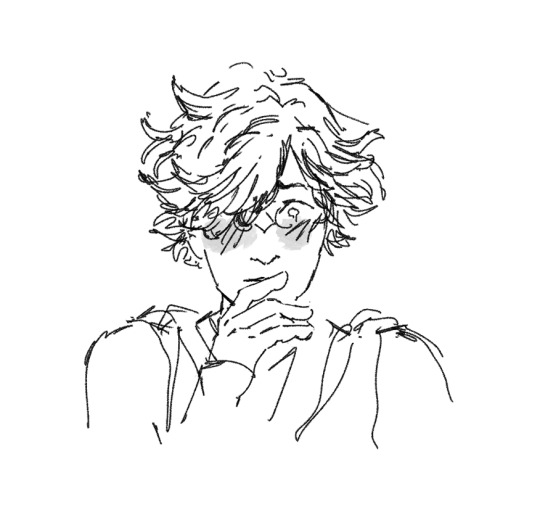
if i just told you i love you would this world change
#witch hat tag#orufrey#these kinda suck lol i feel like i cant draw right now *irritated sigh* BUT I FEEL EMOTIONS !!!!!!!!!!!!!!!!!!#if you are gay go watch good omens season 2 right now. NO YOU DONT KNOW THO!!!!!!!!!#i know being this affected by good omens is probably cringe. I dont care any more. the last 1 minute of good omens season 2 was#some of the most affecting acting i've ever seen in my life. sometimes someone acts with the force as if their entire career led to that#like during the credits part the very end im not even talking about before that. holy god#aziraphale i know everything about you. i know what you are feeling right now. i can see everything on your face. we're going to make it#ER.... NOT THAT THIS HAS ANYTHING TO DO WITH THIS POST. IT'S NOT SPOILERS !!!!!!!!!!!!!#I JUST FEEL THOROUGHLY CHANGED !!!!!!!!!!! SHIT GETS REAL FROM NOW ON.. LIKE IN GENERAL! IN MY LIFE!#tormented gay love tormented gay love TORMENTED GAY LOVE TORMENTED GAY LOVE !!!!!!!!!!!!!!!!!!!!!!!!!!!!#btw the first 3 images were drawn earlier with an entirely different feeling and an entirely different mood.#Why do you keep pulling away from me?#It is because i love you that i do this#the lyrics from one of my japanese orufrey songs (A SONG THAT THE CREATOR LISTENS TO!!!!) led to feelings#“あなたが知らない私を残さず見ててほしいの” but i'm not translating it cause it just sounds weird. if with his eyes oru's asking “WHY don't you want#to let me in? to see all of you?“ those lyrics are like ”I actually want you to see every last bit of the parts of me you don't know“#oru you have no idea how much i want to lay bare my whole soul for you#maybe it's an alternate version of chapter 40. to me#i need to draw something really fucking good or i'm not going to forgive myself. i will not rest in this life#until i have made the orufrey that fully satisfies me nor until i have seen what the manga is leading to#NO STORY MEANS ANYTHING WITHOUT TORMENTED GAY LOVE AT THE HEART OF IT. THATS THE HEART OF THIS WORLD!!!!!#........... so Hi im normal :) haha *goes and finally makes breakfast*
553 notes
·
View notes
Note
Odile patting Molly Epithet Erased on the head, you know why
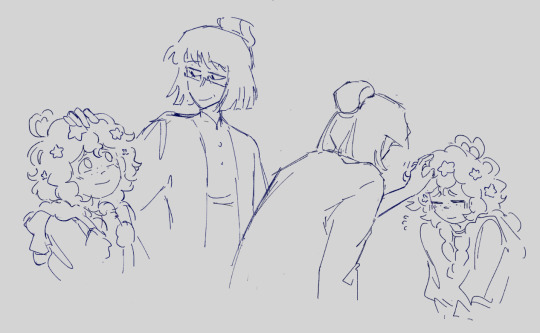
have two bc i care them
#in stars and time#isat#epithet erased#molly blyndeff#isat odile#I've been trying to draw this for like... 5 days straight....#Thank you for making me obligated to draw this. honestly might not've if it wasnt an ask#anyways ya'll so hear me out. odile mother/grandma figure to molly#Honestly after thinking about it a little more Odile is actually quite different to Calliope based on descriptions alone? but#I think having a Dependable Trustworthy Adult in her life is. She needs it#We don't know a lot about Calliope and idk what parallels odile has with her; but I hope she reminds Molly of her mom at least a little bit#And for Odile's pov? I think she'd really really like Molly#She's more mature than most for her age and she's extremely observant and intelligent. Those are things Odile respect#Cue a dead mom joke though and odile very quickly goes to ''ok there's something wrong with this child''#I don't think I have the idea fleshed out enough in my head to say anything for sure? But Odile and Molly having a Talk about her home life#would be Extremely interesting#Oops! Rambled in tags again! Teehee!#also do you think odile will ask molly for her full name only for molly to hit her with the#''molly wolly doodle all the day blyndeff'' and odile instantly regrets it#validation for bonnie#edit: rearranged tags just in case#day 19#crossover
275 notes
·
View notes
Text

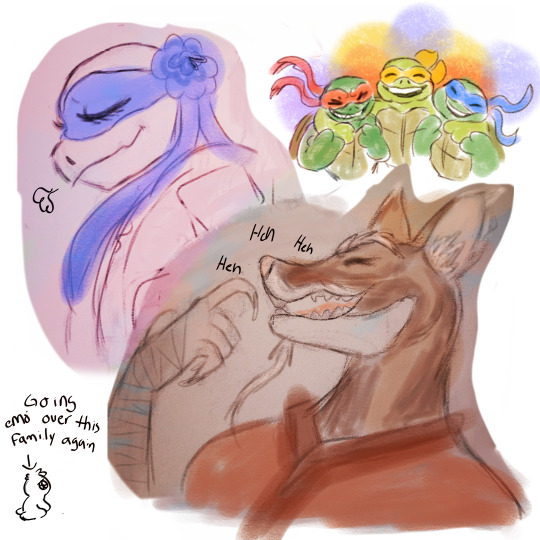
I wish they could've laughed for a little while longer
#they are invading my brain again but this time with more autism#like im really bad at expressing myself but im gonna have to do something or else I'm gonna explode with all these thoughts#tmnt 2012#tmnt#teenage mutant ninja turtles#this lil family is so wierd and tragic i need yhem to be happy#bteam and the others are a still scribbles atm dont think i forgot them#1st time drawing splinter ever and it turned out great!!#splatter scribbles#phone art#2012 raph#2012 karai#2012 leo#2012 splinter#2012 tmnt#that's all im tagging sorry😔
156 notes
·
View notes
Text
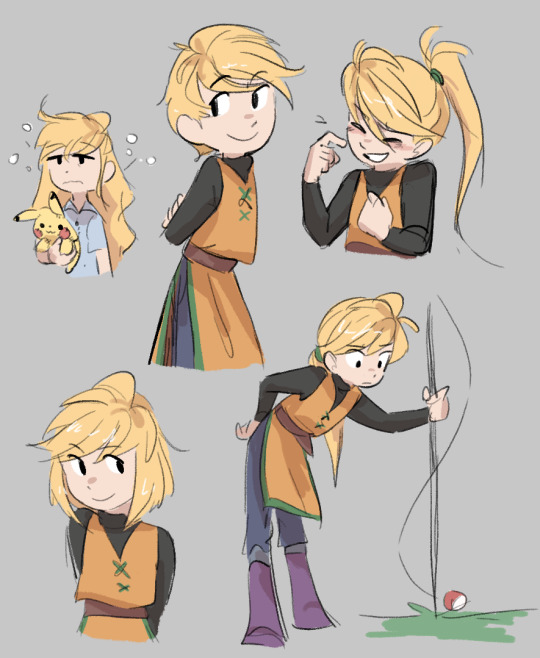
Yeahlow
#art tag#pokemon#pokespe yellow#pokespe#pokemon special#i wish i had the first ever drawing i did of yellow i think thatd be a fun comparison#i think i do sctually….. shes been w me through so much#when i was 9 i would draw eyelashes onto yellow after the ponytail reveal in gsc but now youll NEVER see me drawing her w eyelashes#i also like pause before i decide what pronouns i should use for her#so i think thats some sort of character development for me#once i bought the last gsc volume onto my school bus and showed it to a friend of mine and she like#pointed to green oak and went why does the boy have eyelashes 😐#n i was like i dont CARE i need to tell you why red x yellow is canon#more character development from me i dont really ship them anymore. same w blue and green. as a pokespe fan ive changed so much#i need to reread dpp i miss the trio so muuuhc…….. i iwhs they couldve returned int he manga and get why not but. i miss the#is swsh nearly over im not up to date at all. i know the dlcs happening but thats it#i wanna see what the scvi protags will be like. and which ones scarlet and which ones violet#and how they handle to version diffs ooo….. two schools? double dead argen parents?#ARVEN sorry. but yea. exciting#WHAT school will each rival be in what about clavel and the teachers ??!!???!??!!?!??!? anyway#thats enougb rambling for one post. goot bye
906 notes
·
View notes
Text
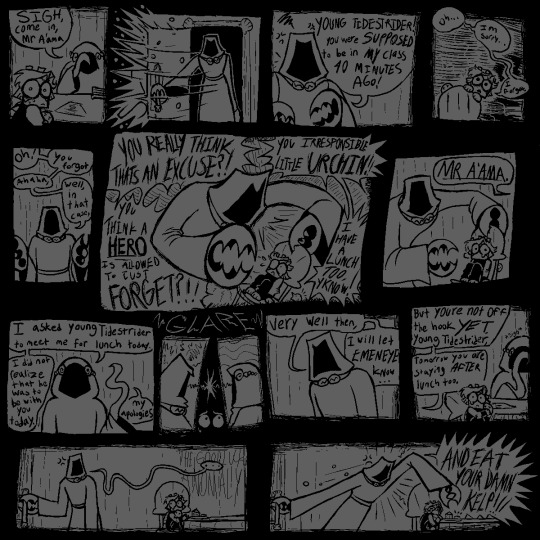
[<==PREV PAGES] [NEXT PAGE==>(not out yet.wait a year.or maybe more.imagine.]
saw alot of comments on prev pages; saying 'i HATE that mean teacher! im gonna FIGHT HIM!!' & i LOVE the energy!! it WOULD be nice. to have that catharsis. but the story of young tidestrider is Not one of catharsis. it is a story of being so small and so special and sucking so bad.
#jrwi fanart#jrwi show#jrwi riptide#gillion tidestrider#GONNA START FORMATTING MY COMICS BETTER. W THE PROPER 'PREV' 'NEXT' LINKS#REALLY DIDNT EXPECT TO CONTINUE THIS SERIES BUT AAAUUUHH MY BRRAAAIN MY BRAIN IS SO IDEASSS. I HAVE 3 OTHER PAGES SKETCHED OUT#NO PROMISES ILL FINISH EM ANY TIME SOON OR EVER. MY WHIMS ARE THEIR OWN BEAST AND I ONLY DRAW ON MY WHIMS#THAT BEING SAID IF U COMMISSIONED ME ILL GEEETT TO YOUUU IM SORRYYYY. ART IS AN EMOTIONAL RELEASE FOR ME N BABY I HAVE EMOTIONS.#ESPECIALLY ABOUT GILLION TIDESTRIDER CHAMPION OF THE UNDERSEA HERO OF THE DEEP.for the desc here i put smth that i typed up in the tags of#another thing i made. i gotta make a proper Baby Gillion tag or smth. eventually.. eventually...I LOVE DRAWIN THIS LIL BABY GUY..#i also LOVE depicting the teachers as just being so fuckin mean. ofc theres variation in that. just like in all things.like the teacher her#idk if itll be mentioned but the octo lady is named Ms Octburn.an octopus pun based off the name of an actual councilor i had#when i was in elementary school i got bullied alot but teachers never did anything. i hated adults and didnt trust them.#but this councilor o mine was so genuinely sweet. i remember spending alot of time w her. she doesnt work there anymore.#but that one school adult that actually earns ur trust and is there for you when they can be.its SO important for a child i think#i hope she knows how much she helped me.youll see in the next page that ms octburn isnt perfect either.but she tries. they all try.somehow.#ALL these comics are gonna be inspired by somesorta experience o mine in the school system. school is so fucked up u ever thing abt that#AND GILLIOOOOONNN IN THE MOST FUCKED UP LITTLE SCHOOL OF ALL. MAINTAINED BY A CULT. CENTERED AROUND HIM. OUR CHOSEN ONE#I IMAGINE ALOT BANKS ON HIS SUCCESS. THIS IS THE WORLD. THE WHOLE WORLD. THE PROPHECY IS GOING TO COME TRUE N UR TELLIN ME#THAT ITS THIS LITTLE IDIOT THATS GONNA BE SAVING US? WHAT IF HE FAILS. IF HE CANT GET THIS RIGHT THEN HE WILL FAIL AND WE WILL DIE#WE NEED TO TRAIN HIM. WE NEED HIM TO LEARN. AND TO SUCCEED. OR ELSE WE'RE DEAD. WE'RE ALL FUCKING DEAD. I IMAGINE THAT MUST BE STRESSFUL#in other news i hope ppl actually giggle when they read these. they ARE intended to be comical. dark humor or whatever. like its also sad#this is intended to be a sad comic series. but a funny one too. does that make sense? god i hope so.saw some1 say they had flashbacks-#-reading this. like YES!! THE INTENDED EFFECT!! YOU GET ME!! i love seeing ppl get upset on this lil baby boys behalf. i LOVE seeing ppl-#-wail n weep n cry in the comments. i LOOOVE seeing ppl RELATE to baby gillion. and i love letting u all know that this wont be a happycomi#gillion gets his happiness arc in the actual show. this series is one of unfortunate events. teehehehe. do u guys remember that show#i keep listening to the lil songs from A Series of Unfortunate Events for inspiration. GOOD STUFF!!#anyway uuhh uhh thats all i got in my brain. for now. feed me ur comments give me ur input i NNEEEEEDD THHEEEMMMM
133 notes
·
View notes
Text

granby + iskierka + keynes
#em draws stuff#em is posting about temeraire#temeraire#iskierka#john granby#doctor keynes#<- I do not know if keynes ever gets a first name so This Shall Do for tagging purposes for the present moment#speaking of which. my logic here is that granby is always getting whopped upside the head and stabbed and shot and dropped from high places#and therefore I think he should maybe cultivate his relationship with his crew's surgeon. because he is going to Need to.#keynes now. My Friend Keynes. I reallyreally would like to know More About Him and how exactly someone ends up as an aerial corps SURGEON#what is UP with this man I would like to KNOW about him#I would like to write fic even maybe. Hello Sir. Your Backstory?#designwise he ended up looking like patrick gallagher who you may be aware of for his role as awkward davies masterandcommander#which was not entirely intentional but I did end up leaning into it as I went on with the drawing.#he looks a lot like many people's version of tharkay here... I should make an effort for distinguishing them by drawing More Tharkays.#either way. keynes and gong su my favorite tem characters I don't really see anyone drawing. my underappreciated blorbos...#(this is maybe because I'm only on book 3 but) keynes is certainly on page a deal more than certain fellows I could name#anyWay. we are slowly creeping up to drawing BigLarge Iskierka but not all the way there yet. Stay Tuned.
144 notes
·
View notes
Text

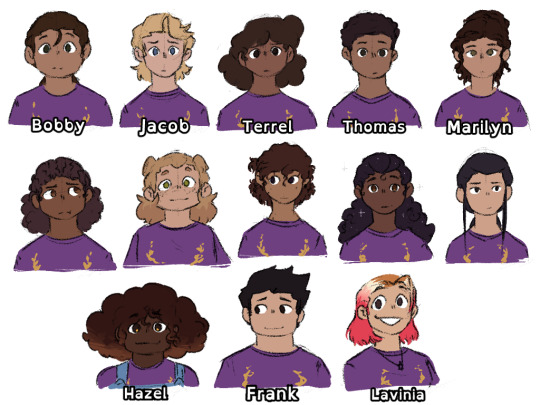


figured i'd share my WIP - yknow how I keep talking about "finding the limit of how many PJO ocs one person can have" and coming up with names/divine ancestors/etc? haha. yeah. behold my romans.
This is my project to create & make references for every Roman in the legion, including filling in blanks in the cohorts. For askblog purposes, because I like consistency. And I think it's fun and makes it more interesting. Yes there is a CHB counterpart to this that is done.
I still need to make more refs - all of the labeled chars here are canon. The rest I made up. This is 5th cohort (purposefully smaller than the other cohorts) through half of 3rd (both are about 30 each since the max per cohort is 40). I also have some misc romans not included here and still need to make references for the rest of the legion & messengers/healers which I have decided is a separate category.
These all will eventually be going on my wiki for my askblog, including the other cohorts once I finish those. Yes you may ask about any of these chars, they do all have names/divine ancestors/lore/etc. I'm having fun I promise.
#pjo#riordanverse#camp jupiter#pjo ocs#oc#ocs#deadangelos#< refs are for deadangelos#my art#not gonna tag all the chars cause. that's a lot#the note about ''design from cjc'' is cause im trying to use some semi-canon designs where i can#even if they dont have an associated character#so like janice claudia and blaise are also all just one-for-one to their illustrated counterparts#you can really tell when theyre all together which designs i get lots of ideas for#you can also see me get more experimental with outfits#after awhile i started doing designs based on whatever song came on my playlist#i need to finish this mostly cause i want to get to 2nd cohort cause i really like drawing Ida
167 notes
·
View notes
Text

I'm personally blaming @starbiology and everyone who has reblogged or commented the other piece for this.
Bonus comic featuring my grundo:

#every minute i keep working on this i take psychological damage#neotag#neopets#vin memes#you'reall to blame for this monstruosity#i literally just searched “babygirl” pose and went “I... i can do that”#i didn't stop to think if i should though#Star i was gonna respond 2 the reblog with the first image only but decided it needed its own post for quarantining this... thing#again if youre seeing this with no context#you dont need context#i... i don't think there's any for that matter#just picture me writing all this tags while losing health in posion damage every turn#i am working on neo oc images i just need to render them but i.... i needed the world to see this before#my blog's already tainted anyway LMFAOO#yeah uh im dead in neo canon i drew this and inmediately got taken back by yours trully and never came back#also i'll try making a ref as well for my sona so i can draw them more im just really indecisive in what color to make him#split it is for now#i don't want to look at this anymore end me#i am making more drawings to kinda cover this thing from the light but at this point it just keeps reappearing like a mold#thats it im done see u all in kreludorian therapy#kreludorian health insurance in a farse
70 notes
·
View notes
Last Seen Blogs
ricardofurryclop
Riri_VT

marenmackenna
Southern Butter Pecan

elnegorante-blog
Sin título

androgynouschildbasement
Untitled
crowsunodorks
KageHina