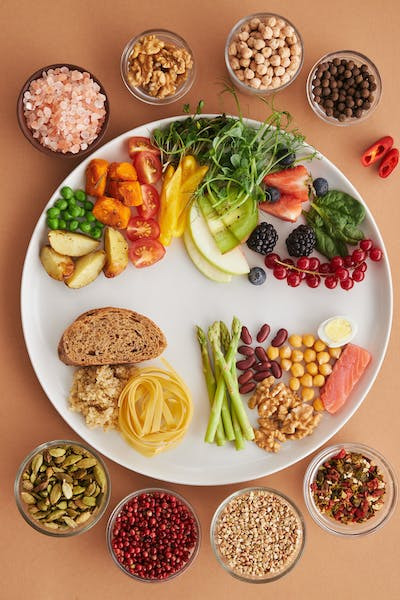
#how to prepare curd easily
Text
Brain Curd #35
Brain Curds are lightly edited flash fiction - practically first drafts - posted daily and sometimes written with the express intention of being terrible… but, you know, in an endearing way. Please enjoy.
Murtain (which was pronounced like “mountain,” but with an ‘r’ sound instead of an ‘n’ in the first syllable) sat waiting in the Earth Immigration Office. Xey were nervous - xeir underarm cloacas emitted a noxious odor and a cloud of spores that xey were immensely grateful humans could neither smell nor see, since their noses were not evolved to detect it and their eyes were blind to its ultraviolet color.
However, another Folkik being at the other side of the room seemed irritated by the sensory assault. Xey showed green in xeir pupils, a universal sign of annoyance - at least, in Folkik culture it was. Humans, bizarrely, never seemed to change the color of their eyes from moment to moment and mostly stuck with the color they happened to have when ejected from the birth canal. At first, Murtain found this somewhat rude, but it was an aspect of biology and therefore difficult to change. It could be simulated only with an assortment of colored contact lenses, which was certainly not practical.
Xey knew this and more about humans and their behavior because it was a requirement of the citizenship test that xey were here to take. Xey’d been studying for over one Earth-year, which was much longer than the years back home. It was exhausting, in a way, but Murtain loved the varied biomes and cultures of Earth, unlike any other planet in the galaxy. This was worth all the trouble.
The door to the smaller office swung open and a Folkik wearing feminine human clothing exited, swinging xeir leg interface junction back and forth, like a human woman would with her hips. Humans had a construct they called, “gender,” which this Folkik had seemed to embrace. Murtain looked down at xeir articles and became self-conscious. It was xeir military uniform from back home - still the nicest clothing xey owned, but maybe not “Earth” enough to impress the human immigration officer. Murtain’s eyes went magenta with worry.
A human walked out, holding a clipboard, with the color of contempt in his eyes - icy blue. “Murtain?” he said, pronouncing it as if it rhymed with ‘curtain.’
Murtain was used to this happening, so stood up from the chair and followed him into the room to sit on yet another chair. It was human custom to use several rooms for rituals which could easily take place in one.
The human smiled, and Murtain smiled back, which to Folkik was a sign of worry and discomfort. A perfect expression for how xey felt inside at this moment. Xey reminded xemself that xey had spent long hours preparing for this. Xey could do this.
#NSC Original#brain curd#brain curds#writing#creative writing#writeblr#flash fiction#author#writer things#writers#writers on tumblr#writers of tumblr#writerscommunity#women writers#female writers#queer writers#Moving Murtain#worldbuilding#sci-fi#extraterrestrial#scifi#science fiction#aliens
3 notes
·
View notes
Text

Strawberry Lemonade Bunny Hugs 🍓🍋🐰
Easter always makes me think of the bunny shaped cupcakes my mom used to make. To decorate them she would use angel hair pasta broken into little pieces to look like whiskers. We never really did much Easter egg decorating, but I really loved hunting for chocolate eggs. I got these special bunny cookie cutters recently and just had to use them this Easter.
I'm calling these cookies "bunny hugs" cos they're two lil bunnies sandwiched together, with a sweet strawberry jam filling alongside a tart homemade lemon curd. The cookies are buttery and bright, marbled with strawberry powder made from grinding up freeze dried strawberries, and topped with a chocolate egg that they're holding onto with all the strength that their lil bunny arms have!
The candy coating on the eggs crack in the oven and it looks so cool to me, like the bunnies are cracking them open, eager to get into their milk chocolate insides.
If the Easter Bunny hasn't visited this year and you have no chocolate eggs, then nuts, dried fruit, or a different candy more to your liking can be used.
The homemade lemon curd is super easy, it only takes one egg and one lemon, instead of having to do a bunch of separating of egg yolks that then need tempering over a double boiler. It's all done in a shallow bowl in the microwave and only takes a couple of minutes.
The bowl needs to have low sides so that you can see the curd thickening. Any time you see it steam or rise, take it out and stir it to prevent it from boiling, which would cause it to curdle.
The jam filling is reduced down to make it thick so the cookies don't get soggy, as well as intensifying the flavour.
I was thinking that these cookies could easily be made vegan if you leave out the curd and just use the jam for the filling. In that case I'd start off with 1/3 cup of jam instead of just 1/4.
There's no egg in the cookie dough, so all that would need replacing is the butter.
Overall these cookies are quick to make, as the fillings can be completely prepared while the dough chills in the fridge. The only time consuming step in fiddling with the bunny arms, but that's due to the type of cookie cutter I chose, but you could use any! This recipe is easily doubled, especially when choosing a larger cookie cutter size.
I love messing around in the kitchen and baking my own things, but I've never written out a recipe I've created for other people to read, lol. If it seems complicated with a lot of steps, it's just bcos I wanted to be as clear as possible. Thank you to my mom for giving this a proof read and for her suggestions. Oh, and for teaching me how to bake in the first place 💗

Strawberry Lemonade Bunny Hugs 🍓🍋🐰
Yield: approximately twenty small sandwich cookies
🍪Cookie dough
•2 tablespoons (30 mL/32 grams) granulated sugar
•zest of half a large lemon (or one small lemon)
•1/2 teaspoon of honey (or corn/maple syrup)
•1/4 cup (62 mL/56 grams) softened unsalted butter
•1/8 teaspoon of table salt
•1/2 cup plus one tablespoon of all purpose flour (140 mL/82 grams)
•yellow food colouring (optional)
•1 tablespoon of freeze dried strawberry powder (or red/pink food colouring)
•Candy coated chocolate eggs, nuts, dried fruit or other candies
In the bowl of an electric mixer, blend the sugar, lemon zest and honey together using the paddle attachment. Add the yellow food colouring, if using. The other half of the lemon zest will be used in the lemon curd.
Add the softened butter to the bowl and cream together with the lemon sugar for one minute on medium speed until smooth, but not fluffy.
Add the flour with the salt into the butter and sugar and mix for thirty seconds.
Form dough into two pucks, wrap in plastic and let chill in the fridge for thirty minutes. While it is chilling make the lemon curd.
🍋Lemon curd
Yield: 3/4 of a cup (175mL)
•1 large egg (50 grams) at room temperature
•3 tablespoons (45mL/37 grams) of granulated sugar
•Zest of the other half of the large lemon or the zest of one whole small lemon
•3 tablespoons (45 mL/45 grams) of lemon juice (one large lemon or the 2 small lemons)
•Very small pinch of table salt
•1 1/2 tablespoons (21 grams) of room temperature unsalted butter
Crack the egg into a low sided microwave safe bowl. Scoop about 1/4 teaspoon of the egg white into a very small dish, such as an egg cup or bottle cap. Cover and place in the fridge. This will be used to attach the chocolate eggs to the cookies later.
Zest the lemon(s) into a jar and set aside. Juice the lemon.
Whisk the sugar and salt thoroughly into the egg, making it as smooth as possible.
Add the lemon juice and stir this in with a rubber spatula. Add one tablespoon of butter in pieces on top.
Microwave the mixture on high at thirty second intervals, stirring with spatula throughout. Do not let it boil.
When the curd reaches the desired consistency, strain it through a fine mesh sieve into the jar with the reserved lemon zest. Add the half tablespoon of butter and mix. It will thicken further as it cools. Place the sealed jar in the fridge and remove the cookie dough.
Break each dough puck in half and sprinkle the broken edges with strawberry powder or red food colouring.
Press halves back together and break apart again in the opposite direction, adding more strawberry powder. Knead the dough lightly with your hands to create a marble effect but don't overwork it.
Roll out the dough between two sheets of parchment paper to a 1/2 centimetre (1/4 inch) thickness.
Cut out shapes and place cookies on a parchment paper lined cookie sheet.
Gather up scraps, apply more strawberry powder and reroll the dough, cutting out more cookies.


The bottom half of the bunny cookie sandwich don't need arms, so either cut or pinch those off and add them to the scrap dough to be rerolled.
Cut out an even number of top and bottom bunnies.
There will be a small amount of dough not big enough to roll and cut out, so save that for repairing the arms of the top half of the cookie sandwiches, if they need it.
Using a chopstick or small brush, apply a small amount of the reserved egg white on the arms and tummies of the top bunny cookies.
Place the chocolate eggs/nuts onto the top bunnies and carefully press their arms onto the eggs. If their arm tears, use a little crumb of the scrap dough to patch it up.

Chill the cookies on the cookie sheet in the fridge for thirty minutes.
🍓Strawberry filling
•1/4 cup (50mL) of jam or jelly
Pour jam onto a microwave safe plate and microwave on high for one to two minutes, depending on how viscous the jam was to start. It will thicken as it cools on the plate. Set aside.
Preheat the oven to 325°F. When it reaches temperature, bake the cookies for 12-15 minutes. They should be set and no longer shiny on top, but not browned. Let cool completely on a rack.
Assemble the cookies by spreading a thin jam layer on all of the bottom bunnies. One by one, apply lemon curd to a top bunny and sandwich together with a bottom bunny. You could also choose to have just curd or just jam as the filling, or even blend the two fillings together.


Store for one week in an air tight container in the fridge.
Happy Easter!🐰

2 notes
·
View notes
Text
with love
I saw my Grandma for the last time on Sunday morning. The 26th of March to be precise.
She is 93 year old. I am yet to hear once she has passed, but it will be soon. Probably in the next couple of days or so.
I said my goodbyes to her in the rest home. She looked cozy underneath all those layers of wool. Blankets I recognised easily from my childhood, come out of storage to provide warmth again to her dying form.
I hope she is comfortable. The doctors assured us that the drugs they are administering into her will allow her to pass as if she is falling asleep. I hope she is warm. I hope she feels better. I hope she falls into rest peacefully.
A few tears escaped by accident. I thought I was ready. I was. But I must have had some extra things to process before she was gone for good.
Crazy how with just a little touch and a circumstance can cause such old memorise to resurface at lightning speed. It was time for us to go; my sisters, my mum and dad, me. I caressed her thin grey strands and her forehead with the back of my hand. I rubbed and soothed her tired arms, ever so delicately. I didn’t hold her hand even when Dad told me to. She looked too comfortable and her hands were curled together under the blankets. I made a note not to disturb them.
Suddenly I was transported back to the house up the hill in Redwood Avenue. Grandma and I always had a special bond. We liked the same things. The colour blue, our favourite, although trivial and meaningless. It meant a lot to me. We both had a thing for sweets, but lemon curd was our weakness, and lucky for us Grandma always had a full little jar of it in the fridge whenever we came to visit! We’d eat it by the spoon straight out of the container. She had the best (authentic) recipes for shortbread, and unsurprisingly, lemon cake. Grandma was a keen cook too and never failed to produce a good and proper roast. I remember the smell of their old house where we would spend Christmas as a family. They had a brilliant large old fashioned Grandfather clock which took pride of place in the living room. It’s been there since my sisters and I were tiny tots. Most likely before we could crawl. We spent hours in that house playing Ludo and Old Maid. Grandma always hated Old Maid because she would lose the most out of us all. But even when she lost, she’d bubble with laughter, and it was so epically contagious that we’d all double over in fits of giggles. Me and my sisters LOVE to laugh. I think we got that from our lovely Grandma who was never afraid to laugh at herself every once in a while.
I felt calm in the rest home. The tears were falling but I was content. I knew she lived a full life and all the way Grandad was with her too. He’s doing very well currently, but I understand he must be struggling right now. We are all effectively playing the waiting game at this point. But just like Grandma, Grandad is strong and still smiling with our company.
We left Grandma’s room and took Grandad with us for coffee at the rest home cafe. He is doing the best he can and so are the rest of us. We are well, and thankfully, we all know what to expect and I suppose that is all we can ask for when things like this arise. The saying ‘all good things must come to an end’ has been attached to my thoughts since. I’m taking it as a positive, for you can’t fully appreciate something until it is well and truly gone.
We said we would be back to see Grandad again soon and made our way back to the car. All of us sat there for a bit listening to the radio. The song ‘You’ve Got A Friend’ by Carole King was playing. Mum started singing along. So did I.
Keep your head together
And call my name out loud,
Soon, you’ll hear me knocking at your door
You just call out my name
And you know wherever I am
I’ll come running, running
To see you again
I wanted to write this because I have been preparing for her passing for a while now. Her name is Doreen, and she has had a long, beautiful and fulfilling life. I am grateful I got to spend so much time with her and cherish every single memory we have together.
#grandma#memories#love#family#writing#ramblings#diary#you've got a friend#carole king#eulogy#emotions#personal#thoughtful#sharing#tribute#loss
3 notes
·
View notes
Text
From Rushed to Relaxed: How Readymade Parathas Can Transform Your Dinners
Tired of rushing dinner preparations after a long day? Say goodbye to stress and hello to relaxation with ready-made parathas! Hello paratha lovers, I am happy to welcome you all to this blog and in this blog post, we will explore how adding Readymade Paratha Madurai to your diet can transform your dinner from rushed to relaxed.
The dilemma of dinner
After a busy day, the thought of spending hours in the kitchen preparing dinner can be daunting. However, skipping meals or choosing unhealthy foods is not the best solution. That’s where ready-made parathas come to the rescue!
Its great convenience
Ready-made parathas offer unparalleled convenience. In just a few minutes in the oven or microwave, you can have warm, fluffy parathas ready to serve. No need to worry about kneading the dough or rolling out perfect circles — it’s all done for you!
Versatility on your plate
Another advantage of ready-made parathas is their versatility. Whether you like plain parathas, stuffed parathas or the spicy variety, there is something for everyone. Pair them with your favorite curries, chutneys or curds for a delicious and satisfying meal.
Quality and taste guaranteed
Contrary to popular belief, ready-made parathas do not lack in quality or taste. Made with premium ingredients and authentic recipes, they taste just like homemade parathas. Plus, they come in a variety of flavors to suit every taste.
In conclusion, readymade parathas are a game changer for busy individuals and families. With their convenience, versatility, quality and taste, they offer a stress-free solution to weeknight meals. So, why not embrace the simplicity of Readymade Paratha Madurai and take your dinner out of the rush and leisurely?
Frequently Asked Questions
1. Are ready-made parathas healthy?
Yes, readymade parathas can be part of a healthy diet when consumed in moderation. Look for options with whole wheat flour and minimal added ingredients for a nutritious choice.
2. How long does ready-made paratha last?
Ready-made parathas usually have a shelf life of several weeks when stored in the freezer. Check the packaging for specific storage instructions and expiration dates.
3. Can readymade parathas be customized with additional filling?
Absolutely! Build your paratha fillings by adding ingredients like paneer, potatoes, vegetables or cheese for extra flavor and texture.
4. Can readymade paratha be reheated?
Yes, ready-made parathas can be easily reheated in a pan, toaster oven or microwave. Heat them until piping hot and enjoy!
5. Where can I buy ready-made parathas?
Ready-made parathas are available in most grocery stores supermarkets and specialty Indian food stores. Look for them in the freezer section along with other Indian breads and ready-to-eat meals.
#InstantChapatiMadurai #InstantPooriMadurai #InstantParathaMadurai #WholeWheatParathaMadurai #IdlyDosaMavunearmemadurai #idli dosa maavu in madurai #Readymade Poori Madurai #Readymade Paratha Madurai #Readymade Whole Wheat Paratha Madurai #Readymade Idly Dosa Mavu near me madurai #Readymade idli dosa maavu in madurai #Readymade Chapati Madurai #InstantChapati #ReadyToCookChapati #SemiCookedChapati #ReadymadeChapati #ReadyMadePoori #InstantPoori #ReadyMadePuri #SemiCookedPoori #ReadyToCookPoori #ReadyToCookPuri #SemiCookedPuri #InstantParatha #ReadyToCookParatha #SemiCookedParatha #ReadymadeParatha #ReadyToCookParota #SemiCookedParota #ReadymadeParota #WholeWheatParatha #ReadyMadeWheatParatha #SemiCookedWheatParatha #IdlyDosaMavu #IdlyDosaBatter #Curd #Thirunagar3rdstop #Thirunagar6thstop #Vedarpuliyankulam #Thirunagar4thstop #Thanakankulammainroad #Thirunagar4thstop #SRVnagarharveypatti #Thirunagar #Mahaboobpalayam #Sscolony #Vanamamalinagar #Nehrunagar #Karimedu #Nearmathitheatre #Melaponnagaram #Neardinamalarofficechockalinganagar #Athikulammainroad #Bankcolony #Iyerbungalowmainroad #EBcolonystreet #Nearkarthiktheatre #survivorcolony #Pudurbusstop #Pudur #Mahatmagandhinagar #Valluvarcolony #Vishwanathapuram #Umatchikulam #Thirupalai #TVSnagar #Jeevanagar #Villapuramhousingboard #Agriniapartment #Avaniyapuram #Subramaniyapurammarket #Palanganatham #Annanagar #Gomathipuram #Karupayurani #KKnagar #Othakadai #Koodalnagar #Sikkandarchavadi #Anaiyur #Basingapuram #Alankulam #Alankulam #Panagadi
0 notes
Text
youtube
Prepare to have your mind blown with pure, unadulterated facts, as we explore why cheddar cheese is hailed as practically lactose-free.
Cheddar cheese, with its rich flavor and creamy texture, has won the hearts of cheese connoisseurs worldwide. But what sets it apart from other cheeses? What makes it a go-to option for those with lactose intolerance? Join us as we uncover the science behind this phenomenon.
Firstly, let's address the elephant in the room – lactose intolerance. Many individuals around the globe struggle with lactose intolerance, a condition characterized by the body's inability to fully digest lactose, the sugar found in milk and dairy products. Symptoms range from bloating and gas to stomach cramps and diarrhea, making dairy consumption a challenge for those affected.
Enter cheddar cheese, the lactose-intolerant's knight in shining armor. Despite being derived from milk, cheddar cheese boasts remarkably low levels of lactose, making it a suitable option for many lactose-intolerant individuals. But how does cheddar cheese achieve this feat? The answer lies in its production process. To understand why cheddar cheese is practically lactose-free, we must first comprehend the cheese-making process.
Cheddar cheese production begins with milk, which serves as the primary ingredient. During cheese-making, milk undergoes a series of intricate steps, including pasteurization, coagulation, cutting, and curd formation. One crucial step in the cheddar cheese-making process is the addition of starter cultures. These cultures, typically composed of bacteria such as Lactococcus lactis and Lactococcus cremoris, play a pivotal role in cheese production. They help ferment lactose present in milk, converting it into lactic acid. As the starter cultures ferment lactose, they initiate the curdling process, transforming liquid milk into solid curds.
These curds serve as the foundation of cheddar cheese, lending it its distinctive texture and flavor. However, the fermentation process doesn't end there. During cheese aging, another critical phase in cheddar cheese production, residual lactose continues to diminish. As cheddar cheese matures, enzymes present in the cheese break down lactose molecules, further reducing their concentration. This prolonged aging process contributes to cheddar cheese's remarkably low lactose content, rendering it easily digestible for many individuals with lactose intolerance. But the magic doesn't stop there. Cheddar cheese also undergoes a process known as cheddaring, which further enhances its flavor and texture while minimizing lactose content.
Cheddaring involves stacking, flipping, and pressing cheese curds to expel excess whey and consolidate the curds into a cohesive mass. This process not only expels residual lactose but also contributes to cheddar cheese's characteristic firmness and sharp flavor profile. Furthermore, cheddar cheese undergoes aging in controlled environments, where temperature and humidity levels are meticulously regulated.
This controlled aging process allows cheddar cheese to develop its complex flavor profile while simultaneously reducing lactose content to negligible levels. It's important to note that while cheddar cheese is considered practically lactose-free, individual tolerance levels may vary. Some individuals with severe lactose intolerance may still experience discomfort after consuming cheddar cheese, albeit to a lesser extent compared to other dairy products. In addition to its low lactose content, cheddar cheese offers a plethora of nutritional benefits.
Rich in protein, calcium, and essential vitamins, cheddar cheese serves as a wholesome addition to any diet. Its versatility makes it a favorite ingredient in various culinary creations, ranging from sandwiches and salads to pasta dishes and savory snacks. But cheddar cheese isn't just nutritious – it's downright delicious. Its bold flavor profile and creamy texture make it a staple in households and restaurants alike. Whether melted atop a juicy burger or paired with a crisp apple slice, cheddar cheese never fails to tantalize the taste buds.
#cheese lover#lactose free#dairy#health and wellness#foodie#cooking#cooking channel#nutrition#diet#lactose intolerance#Youtube
0 notes
Text
"Unlocking Weight Loss Wonders: Your Ultimate Guide to Keto Success with Essential Ingredients"
Presentation:
The ketogenic diet, prestigious for its weight reduction benefits, relies on a well-organized storage space. In this thorough aide, we'll dive into the staple fixings that make keto an eating routine as well as a way of life. click here to get a snack recipe book on the keto diet.
I. The Establishment: Fats
Solid fats are the bedrock of the keto diet. Avocado oil, olive oil, and coconut oil give a different scope of supplements. Jump into the universe of creature fats with bacon fat, chicken fat, and fat, raising your keto experience.
II. The Force of Protein
Quality matters with regards to protein on keto. Investigate grass-took care of hamburger, poultry, and fish as lean, fundamental sources. For assortment, consolidate tofu, tempeh, and plant-based protein powder into your feast plans.
III. Low-Carb Veggies: The Fiber Lift
Salad greens like spinach and kale structure the establishment, while cruciferous vegetables, for example, broccoli and cauliflower add supplements. Remember the assortment - zucchini, asparagus, and that's only the tip of the iceberg - to keep your dinners energizing.
IV. Keto-Accommodating Flours and Covers
Almond flour and coconut flour become the dominant focal point, giving a low-carb option in contrast to customary flours. Improve surface and fiber with psyllium husk and flaxseed feast, and excel at restricting with thickener and guar gum.
V. Sugars Without the Culpability
Explore the universe of keto-accommodating sugars with stevia, erythritol, and priest organic product sugar. Figure out how to distinguish and stay away from stowed away sugars in pre-bundled items, guaranteeing your treats line up with your keto objectives.
VI. Exploring Dairy on Keto
Full-fat cheeses, Greek yogurt, and curds can be keto-accommodating with some restraint. Find how weighty endlessly cream cheddar add to both flavor and satiety in your ketogenic venture.
VII. Spices and Flavors: Hoisting Flavor, Not Carbs
Change your keto dinners with spices and flavors. From basil and oregano to cumin and turmeric, these flavor enhancers mix it up without undermining your carb count.
VIII. Hydration and Electrolytes
Keeping up with legitimate hydration is urgent on keto. Investigate the meaning of electrolyte-rich food varieties and enhancements, and find recipes for custom made electrolyte beverages to keep you invigorated.
IX. Dinner Arranging Tips for Weight reduction Achievement
Adjusting macros is vital to progress. Investigate test dinner plans for seven days, accentuating assortment to keep your keto venture invigorating and reasonable.
X. End
Recap the fundamental keto fixings talked about. Empower perusers on their keto venture, advising them that this isn't simply an eating regimen yet a pathway to a better, more energetic way of life.
Even you who are on keto diet can have snacks. I present to you a book with keto snack recipes that are perfect for the diet plan.. It has more than 100 recipes that can be easily prepared to suit any occasion. You can get it by going here and knowing all the details about the book...I am sure you will definitely like it..
#ketodiet#fat loss tips#keto#ketogenic#fat loss#ketolife#keto diet plan#waightloss#waight losstips#waightlosssupplements#instafitness#cetosis#training#dieta#diet#fitness#gymlife#workout
0 notes
Text
Easy Sun Tan Removal Home Remedies
A very simple and synthetic free skin lightener made from ingredients easily available at home Easy Sun Tan Removal Home Remedies. There are a huge number of artificially suggested options available in the search, yet not one of them comes up among the regular other options.
Solar energy from the sun is important for our digestion, including providing vitamin-D. However, this can cause unnecessary problems with the skin including dull spots, which can be considered less attractive by most of us. Getting rid of those discolored spots without practically no treatment can be challenging.
As I was referencing earlier, there are hundreds or even bigger numbers of tan removal creams and liquids. I approve of the feasibility of these options. In any case, I have a clear doubt about the confusion or secondary effects that it may present on our skin and possibly on the various organs of our body. Some of these secondary effects are not immediate and may occur after a specific time and may be delayed or prolonged. Keeping these in mind, I would regularly check for tan removal treatments. Amazingly better when these are more pliable than compound rich creams. Here, I have shown the most popular vegetables, natural products or essential ingredients and can therefore be prepared by everyone. Do try these and I am sure you will love them.
Likewise, some additional tips, ideas and options for home remedies for tan removal. Right from the start, here, I have shown 10 simple ways to fade away sun tan, but that doesn't mean you have to try these to fade away tan. It is better to follow one or two options from this post and apply them consistently for best results. Also, the best of these Easy Sun Tan Removal Home Remedies 10 alternatives is a mixture of lemon and honey that contains regular dye and fades away tan faster. However, do not keep or apply it for a long time as it can damage your skin. Lastly, a mixture of milk and saffron is my undisputed top choice for lightening dark spots on the face. It is very simple and easy to prepare, but apart from getting rid of tan, it also nourishes and softens the skin.
How to make a tomato mask?
To make a tomato mask, you will need the following ingredients:
Material:-
a large tomato
two spoons of honey
2 tbsp curd
one teaspoon lemon juice
Make tomato mask-
. Firstly, wash the tomatoes thoroughly and pat them dry with a cloth.
. Now cut the tomato from the middle and cut it into two pieces and squeeze out its juice.
. Put the tomato pieces in a side bowl.
. Now add two spoons of honey, two spoons of curd and one spoon of lemon juice in tomato juice.
. Mix all the ingredients well, so that a homogenous mixture is formed.
. After the tomato mixture is ready, you can apply it for your face. Make sure your face is clean.
. Apply the mixture on your face and keep it topically for 15-20 minutes.
. Now with the pieces of tomato you have, you have to rub the face with the same tomato for 5 minutes.
. Finally, take lukewarm water and wash your face, which will remove the rest of the mask left on your face.
This tomato mask can help in moisturizing your face and brightening the skin. Note that this mask is natural and may increase allergy risk regarding individual reaction, so it would be a good idea to test on a small area for a while first.
How to make a honey mask?
To make a honey mask, you need to follow the following steps:
Material:-
Honey (100 grams)
Water (1 tbsp)
Make honey mask-
. Put honey in a cup and heat it slightly. Note that do not overheat honey, as this may destroy some of its nutritional properties.
. Add one tablespoon of water to the warm honey and mix them. The water will help the honey set the mask and protect it from bumps.
. Now you have ready honey mixture. Apply it on your face. Note that the mask should be applied with utmost care and with healthy hands.
. Now carefully apply the honey mask on your face and let it dry for 15-20 minutes. Honey will gradually dry and exfoliate your skin.
. After 15-20 minutes, remove the mask from your face. You can wash it with warm water or wipe it with a soft cloth with plain water.
That's your honey mask is ready! Despite the partial water in honey, it retains its natural properties and moisturizes the skin. You can apply it once or twice every week according to your skin nature.
How to make gram flour mask?
You can follow the following steps to make gram flour face mask at home:
Material:-
2 tbsp gram flour
½ tsp turmeric powder
½ tsp lemon juice
a little milk or yogurt (if needed)
Make gram flour mask-
. Mix gram flour, turmeric and lemon juice in a bowl.
. Add milk or curd gradually and mix the mixture well to form a thick paste. After slowly adding milk or curd add more milk or curd to make the property of the mask to apply on the face.
. Gram flour mask is ready. Now apply it on your face. You can keep the mask for 15-20 minutes for your radiant face.
. After drying the mask, remove it carefully and then wash your face with warm water. You can finally apply a natural moisturizer or lemon juice on the face.
Gram flour mask can help to make your face clear and glowing. It can help reduce oiliness of the skin, reduce acne and blemishes, and brighten the skin.
How to make potato mask?
You can make potato mask at home. To make a potato mask, you will need the following ingredients:
Material:-
a large potato
a spoonful of honey
2 tbsp curd
half teaspoon lemon juice
Make potato mask-
.Firstly, wash the potatoes and boil them till they become soft.
.Strain or grate the boiled potatoes to make them shiny.
.Now take boiled potatoes in a bowl and add honey, curd and lemon juice to it.
.Mix all the ingredients well, so that you get a smooth paste-like mixture.
.Now, wash your face and let it dry.
.Apply the potato mixture in a thin layer on the face, keeping an appropriate distance so as not to get the mixture in your eyes, mouth and nose.
.Keep the mask on the face for 15-20 minutes and then wash it with lukewarm water.
.Wash your face as you normally would and continue with your daily skincare routine to moisturize.
You can use this mask several times a week, it will help to refine and brighten your skin. However, please note that this is a home remedy and any skin allergies or irritations may occur, so do a test patch first.
How to make Multani Mitti mask?
Multani Mitti, which is called Fuller's Earth in English, is a natural remedy used for facial beauty and health. Using Multani Mitti as a mask adds freshness and glow to the skin, helps reduce acne and maintains optimum skin nutrition. Here I am telling you a simple way to make Multani Mitti mask:
Material:-
2 tbsp Multani mitti powder
Rose water or water, sufficient to use
half teaspoon turmeric
half teaspoon lemon juice
Half teaspoon Aloe Vera Gel
Make a mask of Multani Mitti-
.Take Multani Mitti powder in a small bowl.
.Make a thick paste of multani mitti by gradually adding rose water (or water).
.Add turmeric and lemon juice and mix well.
.If you wish, you can also add a small amount of Aloe Vera gel.
.Your multani mitti mask is ready.
.Apply this mask on an empty spot on your face and let it dry for 15-20 minutes.
.Then take a towel moistened with rose water and gently wash your face with warm water. You can do this two to three times a week.
This mask will help to make your face beautiful, healthy and radiant. However, in case of already having any skin problems or allergies, be sure to consult a medical expert about the dreaded marks.
How to make oats mask?
To make an oats mask, you will need the following ingredients:
Material:-
2 tbsp oats powder
1 tbsp curd
1 tbsp honey
a teaspoon lemon juice
a small piece of potato (crushed)
Make oats mask-
.Mix oats powder, curd, honey and lemon juice in a small bowl.
.Now add mashed potatoes to it and mix all the ingredients well.
.Apply the mixture on your face and neck.
.After applying the mask, leave it on your skin for 15-20 minutes.
.Wash your face with boiled water and rub fennel water on your face with a thread. This will moisturise your skin and keep it healthy.
This mask can help to hydrate the skin, reduce skin blemishes and maintain healthy skin
How to make a cucumber mask?
To make the cucumber mask, you will need the following ingredients:
Material:-
1 cucumber
Knife
water to wash
dry clothing (such as a T-shirt or handkerchief)
timer or clock
Make a cucumber mask-
.Firstly, wash and dry the cucumber in the sun.
.Cut off the top and bottom of a cucumber, leaving a slice wide enough to fit the shape of your face.
.Wash and dry the cloth.
.Now, with the help of a knife, cut the cloth in the shape you want to use for your face.
.The size of the cloth should be slightly larger than the size of the cucumber slice, so that you have enough closure to tie the mask.
.Now place your cucumber on the face and see that your cloth is covering it completely and touching your nose and mouth comfortably.
.Tie a cloth to a timer or clock to keep the cucumber securely in place. This will keep the cucumber stable and help you use the mask to cover your face.
.Secure the mask to your face and be sure to cover your nose and mouth.
Please note that this mask is only made temporary and should only be used when you need it. This will not be fully sufficient for hygiene and protection, so if you need a proper mask on a regular basis, you should get one from a proper medical store.
How to make sandalwood mask?
You can follow the following steps to make a sandalwood mask:
Material:-
1 tsp sandalwood powder
2 teaspoons rose water
1 teaspoon honey (you can skip it if you have oily skin)
juice of half a lemon
Make sandalwood mask-
.Mix sandalwood powder and rose water in a bowl. You can also add honey, if your skin is not oily.
.Mix well the sandalwood powder, rose water and honey, so that all the ingredients are well mixed.
.Add lemon juice and again mix the mixture well.
.Add water gradually, stirring continuously, so that a smooth mask is formed.
.When you get a fine paste, apply it on your face and neck.
.Let the mask dry for about 15-20 minutes and then remove it with warm water. You can remove the mask using your hands or use a soft washcloth or sponge.
This mask can help to cool, refresh and make your skin soft and glowing. Note that these suggestions may vary depending on your personal preferences and skin nature.
How to make a coffee mask?
To make the coffee mask you will need the following ingredients:
Material:-
2 teaspoons coffee (powder or ground)
2 teaspoons honey
1 teaspoon curd (yogurt)
1 teaspoon lemon juice
Make coffee mask-
.Put coffee powder in a bowl.
.Add honey and mix well, so that both the ingredients are well mixed.
.Now add curd and mix again.
.Finally, add lemon juice and mix all the ingredients well to make a smooth and thick mixture.
.Your coffee mask is ready.
.After this you can apply this mixture on your face.
.Spread it on the face with light hands and let it dry for 15-20 minutes.
.After that wash your face with cold water and use a damp rub or toner.
.This mask can help to provide freshness to your skin and enhance the glow of the skin.
Please note that if your skin is allergic to any of the ingredients, do not use this mask. Test on a small area first and see if your skin can tolerate it.
How to make a baking soda mask?
Baking soda has always been a commonly used product that is also used to cook food. It can also be used to make a mask for facial skin. Baking soda mask can be helpful to make your skin clear and glowing. Here's a simple way to make a baking soda mask:
Material:-
1 teaspoon baking soda
2 teaspoons honey (if you have oily skin, you can skip it)
1 teaspoon lemon juice (for skin lightening)
2 tbsp condensed milk (to make the skin soft and smooth)
Make baking soda mask-
.Combine baking soda and honey in a small bowl.
.Now add lemon juice and mix it well.
.Next, add condensed milk to the mask and mix all three until an everlasting mattress mixture is prepared.
.Now wash and dry the skin thoroughly.
.Apply this mask on your face and neck with light hands.
.After applying it, let it dry for 10-15 minutes.
.After the time is up, gently massage the mask with cool water and then wash it off.
.Lastly, use this mask regularly for a refreshed skin.
This mask can help to make your skin beautiful, soft, and clean. However, note that everyone's skin is different, so if you experience any kind of skin irritation, stinging or itching, test it on a sore spot before use and if there is any indication Do not use.
For more information visit the link: https://cookingkhajana.in/easy-sun-tan-removal-home-remedies/
0 notes
Text
How to Make Soy Tofu at Home

Tofu preparation is similar to homemade or local cheese. Soybeans are first soaked in water and then ground, boiled and filtered to make soy milk. After that, calcium or magnesium salt is added to coagulate the milk and it is coagulated and pressed. The tofu obtained in this way may be silky or soft, firm or very firm, each of which is used in cooking in a different way.
Tofu (vegetable tofu cheese or soy cheese) Tofu is a cholesterol-free and low-calorie food with high protein, which is a good source of calcium and manganese for strengthening bones. In addition, tofu is able to help people lose weight by keeping people full for a longer period of time than meat. Tofu vegetable cheese has been ranked among the best healthy food sources by reducing the risk of heart disease, diabetes, menopausal symptoms and some hormonal cancers, including breast and prostate cancer. However, since tofu is such a versatile food and takes on any flavor it's cooked with, it's a simple and delicious way to lose weight and support overall health.
Necessary ingredients for making tofu
Tofu is usually very easy to prepare.
The following materials and equipment are needed to prepare tofu.
Water: as much as needed
Dry soybeans: 3 cups
Epsom salt: 2 tablespoons; As an alternative to Epsom salt, you can use 75 ml of lemon juice. Alternatively, you can find Epsom salt at the drugstore.
Food processor or blender
big pot
Colander
strainer
A mesh bag or soft fabric, such as muslin
How to prepare tofu and soy milk:
Soy milk:
To prepare 1 liter of soy milk, about 125 grams of soybeans are needed. To prepare soy milk, we proceed as follows:
Soaking and peeling soybeans:
Clean the soybeans and soak them in water for 10 to 16 hours. If desired, you can peel the soybeans.
Taking the skin of soybeans makes the process of making milk from soybeans better.
Another method is to split the soybeans slightly before soaking. In this case, the skins are easily loosened and separated from soybeans by washing.
If you split soybeans, it takes 6 to 8 hours to soak.
2- Heating soybeans:
Heat the soybeans to destroy the enzymes that produce the flavor of the beans. For this purpose, you can put the soaked soybeans in the microwave for 2 minutes or put them in the oven.
3- Grinding soybeans:
Pour the soaked soybeans into the blender along with 1 liter of water and mix, or you can completely grind the soaked soybeans and mix with 1 liter of water.
Then drain the mixed liquid.
4- Boiling soy milk:
The liquid that passed through the phloem is called soy milk. Boil soy milk for 5 to 10 minutes. After cooling, soy milk is ready to use and you can keep it in the refrigerator for up to 3 days.
5- Flavoring soy milk:
To improve the taste of soy milk, you can add some salt to it, because cow's milk also contains a lot of salt. Chocolate, vanilla or fruit flavors are also suitable.
(* In my opinion, just add a pinch of salt and then eat it with sugar. It will be very delicious. * You can drink it cold or hot!!)
How to prepare tofu:
To prepare 400 grams of soy cheese, about 2 liters of soy milk and two teaspoons of natural calcium sulfate are needed.
To prepare soy cheese, we proceed as follows:
Pour soy milk in a container and boil slowly for 5 to 10 minutes. Then cool it until the temperature of the milk reaches 70 degrees Celsius.
Calcium sulfate is a coagulant and is actually "cheese curd". Dissolve two teaspoons of natural calcium sulfate in a glass of warm water.
The lower the amount of calcium sulfate, the softer the tofu, and the higher the amount of calcium sulfate, the harder the tofu is.
Pour the calcium sulfate solution slowly into the hot soy milk and stir it.
If after adding the calcium sulfate solution, some of the milk still remains in a loose state, add another amount of calcium sulfate.
If all the soy milk is coagulated (curdled) and a yellow liquid is seen on it, place a clean white cloth in a colander and pour the coagulated milk on the cloth.
Turn the edges of the cloth over the cheese. Then place a wide melamine plate on the cloth containing the cheese and place a one-kilogram weight on the plate for 20 minutes until the yellow juice of the cheese is separated from it.
After this period, the cheese is ready. Cut it and put it in a bowl of cold water. Then keep the container in the refrigerator and change the water every day.
Nutritional value of soy milk:
Soy milk is a rich source of high quality protein, B vitamins and isoflavones. It does not contain lactose (milk sugar), so it is a good alternative for those who have the problem of "lactose intolerance" and also for people who are allergic to cow's milk and cannot drink milk.
In other countries, when preparing soy milk in the factory, flavoring materials (vanilla, cocoa) and a lot of calcium or vitamins are added to it.
Nutritional value of tofu:
* Soy cheese, like soy milk, is a rich source of protein and B vitamins. which can replace meat in a vegetarian diet.
Unlike soy milk, tofu contains a lot of calcium, which is useful for preventing osteoporosis.
* Soybean cheese (tofu) is very easy to digest, because the fiber in soybeans is separated from it during factory operations.
0 notes
Text
Easy Sun Tan Removal Home Remedies
A very simple and synthetic free skin lightener made from ingredients easily available at home Easy Sun Tan Removal Home Remedies. There are a huge number of artificially suggested options available in the search, yet not one of them comes up among the regular other options.
Solar energy from the sun is important for our digestion, including providing vitamin-D. However, this can cause unnecessary problems with the skin including dull spots, which can be considered less attractive by most of us. Getting rid of those discolored spots without practically no treatment can be challenging.
As I was referencing earlier, there are hundreds or even bigger numbers of tan removal creams and liquids. I approve of the feasibility of these options. In any case, I have a clear doubt about the confusion or secondary effects that it may present on our skin and possibly on the various organs of our body. Some of these secondary effects are not immediate and may occur after a specific time and may be delayed or prolonged. Keeping these in mind, I would regularly check for tan removal treatments. Amazingly better when these are more pliable than compound rich creams. Here, I have shown the most popular vegetables, natural products or essential ingredients and can therefore be prepared by everyone. Do try these and I am sure you will love them.
Likewise, some additional tips, ideas and options for home remedies for tan removal. Right from the start, here, I have shown 10 simple ways to fade away sun tan, but that doesn't mean you have to try these to fade away tan. It is better to follow one or two options from this post and apply them consistently for best results. Also, the best of these Easy Sun Tan Removal Home Remedies 10 alternatives is a mixture of lemon and honey that contains regular dye and fades away tan faster. However, do not keep or apply it for a long time as it can damage your skin. Lastly, a mixture of milk and saffron is my undisputed top choice for lightening dark spots on the face. It is very simple and easy to prepare, but apart from getting rid of tan, it also nourishes and softens the skin.
How to make a tomato mask?
To make a tomato mask, you will need the following ingredients:
Material:-
a large tomato
two spoons of honey
2 tbsp curd
one teaspoon lemon juice
Make tomato mask-
. Firstly, wash the tomatoes thoroughly and pat them dry with a cloth.
. Now cut the tomato from the middle and cut it into two pieces and squeeze out its juice.
. Put the tomato pieces in a side bowl.
. Now add two spoons of honey, two spoons of curd and one spoon of lemon juice in tomato juice.
. Mix all the ingredients well, so that a homogenous mixture is formed.
. After the tomato mixture is ready, you can apply it for your face. Make sure your face is clean.
. Apply the mixture on your face and keep it topically for 15-20 minutes.
. Now with the pieces of tomato you have, you have to rub the face with the same tomato for 5 minutes.
. Finally, take lukewarm water and wash your face, which will remove the rest of the mask left on your face.
This tomato mask can help in moisturizing your face and brightening the skin. Note that this mask is natural and may increase allergy risk regarding individual reaction, so it would be a good idea to test on a small area for a while first.
How to make a honey mask?
To make a honey mask, you need to follow the following steps:
Material:-
Honey (100 grams)
Water (1 tbsp)
Make honey mask-
. Put honey in a cup and heat it slightly. Note that do not overheat honey, as this may destroy some of its nutritional properties.
. Add one tablespoon of water to the warm honey and mix them. The water will help the honey set the mask and protect it from bumps.
. Now you have ready honey mixture. Apply it on your face. Note that the mask should be applied with utmost care and with healthy hands.
. Now carefully apply the honey mask on your face and let it dry for 15-20 minutes. Honey will gradually dry and exfoliate your skin.
. After 15-20 minutes, remove the mask from your face. You can wash it with warm water or wipe it with a soft cloth with plain water.
That's your honey mask is ready! Despite the partial water in honey, it retains its natural properties and moisturizes the skin. You can apply it once or twice every week according to your skin nature.
How to make gram flour mask?
You can follow the following steps to make gram flour face mask at home:
Material:-
2 tbsp gram flour
½ tsp turmeric powder
½ tsp lemon juice
a little milk or yogurt (if needed)
Make gram flour mask-
. Mix gram flour, turmeric and lemon juice in a bowl.
. Add milk or curd gradually and mix the mixture well to form a thick paste. After slowly adding milk or curd add more milk or curd to make the property of the mask to apply on the face.
. Gram flour mask is ready. Now apply it on your face. You can keep the mask for 15-20 minutes for your radiant face.
. After drying the mask, remove it carefully and then wash your face with warm water. You can finally apply a natural moisturizer or lemon juice on the face.
Gram flour mask can help to make your face clear and glowing. It can help reduce oiliness of the skin, reduce acne and blemishes, and brighten the skin.
How to make potato mask?
You can make potato mask at home. To make a potato mask, you will need the following ingredients:
Material:-
a large potato
a spoonful of honey
2 tbsp curd
half teaspoon lemon juice
Make potato mask-
.Firstly, wash the potatoes and boil them till they become soft.
.Strain or grate the boiled potatoes to make them shiny.
.Now take boiled potatoes in a bowl and add honey, curd and lemon juice to it.
.Mix all the ingredients well, so that you get a smooth paste-like mixture.
.Now, wash your face and let it dry.
.Apply the potato mixture in a thin layer on the face, keeping an appropriate distance so as not to get the mixture in your eyes, mouth and nose.
.Keep the mask on the face for 15-20 minutes and then wash it with lukewarm water.
.Wash your face as you normally would and continue with your daily skincare routine to moisturize.
You can use this mask several times a week, it will help to refine and brighten your skin. However, please note that this is a home remedy and any skin allergies or irritations may occur, so do a test patch first.
How to make Multani Mitti mask?
Multani Mitti, which is called Fuller's Earth in English, is a natural remedy used for facial beauty and health. Using Multani Mitti as a mask adds freshness and glow to the skin, helps reduce acne and maintains optimum skin nutrition. Here I am telling you a simple way to make Multani Mitti mask:
Material:-
2 tbsp Multani mitti powder
Rose water or water, sufficient to use
half teaspoon turmeric
half teaspoon lemon juice
Half teaspoon Aloe Vera Gel
Make a mask of Multani Mitti-
.Take Multani Mitti powder in a small bowl.
.Make a thick paste of multani mitti by gradually adding rose water (or water).
.Add turmeric and lemon juice and mix well.
.If you wish, you can also add a small amount of Aloe Vera gel.
.Your multani mitti mask is ready.
.Apply this mask on an empty spot on your face and let it dry for 15-20 minutes.
.Then take a towel moistened with rose water and gently wash your face with warm water. You can do this two to three times a week.
This mask will help to make your face beautiful, healthy and radiant. However, in case of already having any skin problems or allergies, be sure to consult a medical expert about the dreaded marks.
How to make oats mask?
To make an oats mask, you will need the following ingredients:
Material:-
2 tbsp oats powder
1 tbsp curd
1 tbsp honey
a teaspoon lemon juice
a small piece of potato (crushed)
Make oats mask-
.Mix oats powder, curd, honey and lemon juice in a small bowl.
.Now add mashed potatoes to it and mix all the ingredients well.
.Apply the mixture on your face and neck.
.After applying the mask, leave it on your skin for 15-20 minutes.
.Wash your face with boiled water and rub fennel water on your face with a thread. This will moisturise your skin and keep it healthy.
This mask can help to hydrate the skin, reduce skin blemishes and maintain healthy skin
How to make a cucumber mask?
To make the cucumber mask, you will need the following ingredients:
Material:-
1 cucumber
Knife
water to wash
dry clothing (such as a T-shirt or handkerchief)
timer or clock
Make a cucumber mask-
.Firstly, wash and dry the cucumber in the sun.
.Cut off the top and bottom of a cucumber, leaving a slice wide enough to fit the shape of your face.
.Wash and dry the cloth.
.Now, with the help of a knife, cut the cloth in the shape you want to use for your face.
.The size of the cloth should be slightly larger than the size of the cucumber slice, so that you have enough closure to tie the mask.
.Now place your cucumber on the face and see that your cloth is covering it completely and touching your nose and mouth comfortably.
.Tie a cloth to a timer or clock to keep the cucumber securely in place. This will keep the cucumber stable and help you use the mask to cover your face.
.Secure the mask to your face and be sure to cover your nose and mouth.
Please note that this mask is only made temporary and should only be used when you need it. This will not be fully sufficient for hygiene and protection, so if you need a proper mask on a regular basis, you should get one from a proper medical store.
How to make sandalwood mask?
You can follow the following steps to make a sandalwood mask:
Material:-
1 tsp sandalwood powder
2 teaspoons rose water
1 teaspoon honey (you can skip it if you have oily skin)
juice of half a lemon
Make sandalwood mask-
.Mix sandalwood powder and rose water in a bowl. You can also add honey, if your skin is not oily.
.Mix well the sandalwood powder, rose water and honey, so that all the ingredients are well mixed.
.Add lemon juice and again mix the mixture well.
.Add water gradually, stirring continuously, so that a smooth mask is formed.
.When you get a fine paste, apply it on your face and neck.
.Let the mask dry for about 15-20 minutes and then remove it with warm water. You can remove the mask using your hands or use a soft washcloth or sponge.
This mask can help to cool, refresh and make your skin soft and glowing. Note that these suggestions may vary depending on your personal preferences and skin nature.
How to make a coffee mask?
To make the coffee mask you will need the following ingredients:
Material:-
2 teaspoons coffee (powder or ground)
2 teaspoons honey
1 teaspoon curd (yogurt)
1 teaspoon lemon juice
Make coffee mask-
.Put coffee powder in a bowl.
.Add honey and mix well, so that both the ingredients are well mixed.
.Now add curd and mix again.
.Finally, add lemon juice and mix all the ingredients well to make a smooth and thick mixture.
.Your coffee mask is ready.
.After this you can apply this mixture on your face.
.Spread it on the face with light hands and let it dry for 15-20 minutes.
.After that wash your face with cold water and use a damp rub or toner.
.This mask can help to provide freshness to your skin and enhance the glow of the skin.
Please note that if your skin is allergic to any of the ingredients, do not use this mask. Test on a small area first and see if your skin can tolerate it.
How to make a baking soda mask?
Baking soda has always been a commonly used product that is also used to cook food. It can also be used to make a mask for facial skin. Baking soda mask can be helpful to make your skin clear and glowing. Here's a simple way to make a baking soda mask:
Material:-
1 teaspoon baking soda
2 teaspoons honey (if you have oily skin, you can skip it)
1 teaspoon lemon juice (for skin lightening)
2 tbsp condensed milk (to make the skin soft and smooth)
Make baking soda mask-
.Combine baking soda and honey in a small bowl.
.Now add lemon juice and mix it well.
.Next, add condensed milk to the mask and mix all three until an everlasting mattress mixture is prepared.
.Now wash and dry the skin thoroughly.
.Apply this mask on your face and neck with light hands.
.After applying it, let it dry for 10-15 minutes.
.After the time is up, gently massage the mask with cool water and then wash it off.
.Lastly, use this mask regularly for a refreshed skin.
This mask can help to make your skin beautiful, soft, and clean. However, note that everyone's skin is different, so if you experience any kind of skin irritation, stinging or itching, test it on a sore spot before use and if there is any indication Do not use.
For more information visit the link: https://cookingkhajana.in/easy-sun-tan-removal-home-remedies/
0 notes
Text
How Can Indian Dahi in Australia Help Your Digestive System
Indian cuisine is renowned for its diverse and flavourful dishes, but one of its most beneficial and versatile components is dahi or yoghurt. A staple in Indian households for centuries, dahi has now gained popularity across the globe due to its numerous health benefits.
If you're living in Australia, incorporating Indian dahi into your diet can do wonders for your digestive system and overall well-being. Here are some of the digestive benefits of consuming curd in Australia and why you should look to incorporate it in your daily meals.
Rich in Probiotics
One of the primary reasons why Indian yoghurt is highly regarded for digestive health is its abundant probiotic content. Probiotics are live microorganisms that provide a range of health benefits, particularly for gut health. They help maintain a healthy balance of beneficial bacteria in the digestive tract, which can aid in digestion and reduce digestive issues such as bloating, gas, and constipation. Consuming Indian dahi regularly can help replenish and maintain a diverse and healthy gut microbiome, promoting better digestion and overall gut health.
Lactose Digestion
For individuals with lactose intolerance, consuming dairy products can be a challenge. However, Indian curd can be more easily digestible for lactose-intolerant individuals due to the fermentation process involved in its preparation. During fermentation, the lactose in the milk is broken down into simpler forms, making it easier for the body to digest. As a result, many people with lactose intolerance can enjoy the benefits of dahi without experiencing the discomfort commonly associated with other dairy products.
Soothing Effect on the Stomach
The cooling and soothing properties of Indian dahi make it an ideal remedy for digestive issues like acidity and heartburn. When consumed, dahi forms a protective layer in the stomach, which can help alleviate irritation caused by excess stomach acid. This natural remedy has been used in traditional Indian medicine to relieve indigestion and acid reflux, promoting comfort and better digestion.
Nutrient-rich and Easily Absorbable
Indian dahi is a rich source of essential nutrients like calcium, protein, vitamins, and minerals. Calcium is crucial for maintaining strong bones and teeth, while protein supports muscle health and tissue repair. Additionally, the nutrients in dahi are easily absorbable by the body due to the fermentation process, making it an excellent option for those with weak digestion or nutrient absorption issues.
Enhances Digestion of Other Foods
Including Indian dahi in your meals can enhance the digestion of other foods on your plate. The presence of probiotics and digestive enzymes in dahi aids in breaking down complex carbohydrates and proteins, facilitating the absorption of nutrients from the entire meal. It can act as a natural digestive aid, especially when consumed before or after heavy meals.
The Bottom Line
The benefits of Indian dahi for digestive health are well-established, making it a valuable addition to any diet, even for those living in Australia. Its probiotic-rich composition makes it an excellent choice for promoting a healthy gut and improving overall digestive well-being. If you are looking for the best quality Indian dahi in Australia, you cannot go wrong with Sharma’s Kitchen Indian Yoghurt. The quality is outstanding, and the curd retains the authentic taste and flavours of India.
0 notes
Text
How to make Kesar Lassi at home?
Kesar Lassi is a delicious and healthy drink. This lip-smacking drink can be easily prepared at home with using yogurt and saffron.
Ingredients Required:
1 cup yogurt (curd).
1 teaspoon sugar.
1 teaspoon pistachios.
2 cup water.
1 teaspoon almonds.
5 strand saffron.
0 notes
Link
0 notes
Link
0 notes
Text
Spice Up Your Summer Strategy: Cool Down with Refreshing Fresh Curd

In the scorching heat of summer, amidst the relentless rays of the earth-kissing sun, there is a secret oasis of freshness — fresh curd. Oh, how it stimulates the taste buds and soothes the soul! Hello everyone, I am glad to welcome you all to this blog. Join me as I embark on a journey to discover the cool wonders of fresh curd in madurai and how it can spice up your summer recipe with its creamy goodness.
Embrace the cold -
In the scorching summer sun, it is necessary to seek solace in simple pleasures. What better way to beat the heat than with a bowl of fresh curd? With its creamy texture and tangy taste, fresh curd offers a burst of coolness that refreshes the spirit and refreshes the senses. So embrace the chill and take some time to enjoy the simple joys of summer.
A versatile delight –
But fresh curd isn’t just a refreshing treat — it’s also a versatile delight that can be enjoyed in countless ways. Spread it on toast for a light and creamy breakfast, mix it with fruit for a refreshing snack, or use it as a base for creamy dips and dressings. The possibilities are endless, the only limit is your imagination.
Nourishment for the Soul -
Beyond its cooling properties, fresh curd also provides nutritional benefits that nourish the body and soul. Rich in protein, calcium and probiotics, fresh curd supports digestion, strengthens bones and boosts immunity. So indulge in this creamy delight guilt-free, knowing you’re nourishing your body from the inside out.
Connecting with tradition –
In a world of fast-paced life and ever-changing trends, fresh curd is a reminder of simpler times and age-old traditions. Passed down from generation to generation, the art of making fresh curd requires love, patience, care and attention to detail. So, with every spoonful of fresh curd, you’re not just enjoying a delicious treat — you’re connecting with a rich tradition that spans centuries.
In conclusion, fresh curd in madurai is not just a cold treat — it is a symphony of taste, nutrition and tradition that enriches summer and soothes the soul. So spice up your summer recipe with the creamy goodness of fresh curd and savor every moment of this sun-kissed season.
Frequently Asked Questions
1. Can I make fresh curd at home?
Yes, fresh curd can be easily made at home with just two ingredients milk and curd or lemon juice. Heat the milk, add the starter culture and let it ferment until it thickens.
2. Is fresh curd suitable for lactose-intolerant individuals?
Yes, fresh curd is often well tolerated by lactose-intolerant people because the fermentation process breaks down most of the lactose in the milk. However, if you have specific dietary concerns, it is always best to consult with a healthcare professional.
3. How can I incorporate fresh curd into my diet?
Fresh curd can be used in a variety of sweet and savory dishes. Try it as a topping for fruit salads or smoothie bowls, mix it into meat or salad dressings, or use it for creamy desserts and dips.
4. What is the difference between fresh curd and curd?
Both fresh curd and curd are made by fermenting milk with bacterial cultures and differ in texture and flavor. Fresh curd is thicker and creamier than curd and has a richer flavor profile.
5. How should I store fresh curd?
Fresh curd should be stored in an airtight container in the refrigerator to prevent contamination and maintain freshness. Best within a few days of preparation for optimal flavor and texture.
Find us inside Subiksha Foods at No 110 A, Bypass Road, Bethaniyapuram, Opp Babu Sharkar Marriage Mahal, Madurai — 625016, or call us at +91 80567 44906. You will be able to browse our website at https://subikshafoods.in/ for details.
#idlydosamavunearmemadurai#wholewheatparathamadurai#instantpoorimadurai#instantchapatimadurai#instantparathamadurai#idli dosa maavu in madurai
0 notes
Text
youtube
Easy Beetroot Salad Recipe for Weight Loss: Inspired by Alia Bhatt
An amazing Beetroot Salad Recipe that is not only delicious but also packed with health benefits. In this step-by-step tutorial, inspired by Alia Bhatt's love for healthy eating, we will show you how to make the best Beetroot Salad that will surely impress your taste buds and contribute to your weight loss journey.
Beetroot salad is known for its numerous health benefits, including aiding in weight loss and promoting glowing skin. By incorporating this salad into your diet, you can enjoy its nutritional advantages while relishing its vibrant flavors.
In this recipe, we will guide you on how to prepare a Beetroot Salad that is perfect for those following a satvic lifestyle. Inspired by the renowned actress Alia Bhatt, this salad recipe is a favorite of hers and has gained popularity in the Indian community.
To make this Beetroot Salad, we will be using simple and easily accessible ingredients. The star of the recipe is, of course, the beetroot. We will combine it with refreshing yogurt and curd, adding a creamy texture and tangy flavor to the salad. This combination not only enhances the taste but also boosts the overall nutritional value of the dish.
As you follow along with the video, you will learn the step-by-step process of making this easy and quick Beetroot Salad. We will provide clear instructions to ensure you can recreate this recipe effortlessly in your own kitchen.
Not only is this Beetroot Salad recipe delicious and satvic, but it is also suitable for those aiming for weight loss. The salad is low in calories, high in fiber, and packed with essential nutrients that will support your weight management goals.
Join us on this culinary journey and discover the benefits of incorporating Beetroot Salad into your daily routine. You'll be amazed at how simple and rewarding it can be to prepare this nutritious and flavorful salad. Whether you're a fan of Alia Bhatt or simply looking for a healthy and tasty salad recipe, this Beetroot Salad is a must-try!
So, without further ado, let's dive into the world of Beetroot Salad and learn how to make this delectable dish step by step. Don't forget to subscribe to our channel for more exciting recipes and culinary inspiration. Get ready to enjoy the best Beetroot Salad you've ever tasted!
This beetroot salad recipe is:
Easy to make: This recipe only requires a few simple ingredients and can be made in just a few minutes.
Healthy: Beets are a nutrient-rich vegetable that are packed with vitamins, minerals, and antioxidants. They are also a good source of fiber, which can help you feel full and satisfied after eating.
Delicious: This beetroot salad is both healthy and delicious. The combination of beets and yogurt is refreshing and satisfying. The dressing is also light and flavorful, making it the perfect complement to the salad.
🕒 Easy to make: This recipe only requires a few simple ingredients and can be made in just a few minutes. ⏱️👩🍳
🥦 Healthy: Beets are a nutrient-rich vegetable that are packed with vitamins, minerals, and antioxidants. They are also a good source of fiber, which can help you feel full and satisfied after eating. 🌿🌟
😋 Delicious: This beetroot salad is both healthy and delicious. The combination of beets and yogurt is refreshing and satisfying. The dressing is also light and flavorful, making it the perfect complement to the salad. 🥗👌
0 notes
Last Seen Blogs

luckykevs
Lucky Kevs

apple-pie-in-lov
CINNAMON APPLE.

minhieu-art
art and things

dayulejia
Sun

rinmiko
old people, am i right