#vegan pasta bake
Text

Baked Ziti
#dinner#lunch#pasta bake#pasta#italian#ziti#baked ziti#savoury#cheese#vegan#vegetarian#food#recipe#recipes#ricotta#cashew#cashews
170 notes
·
View notes
Text
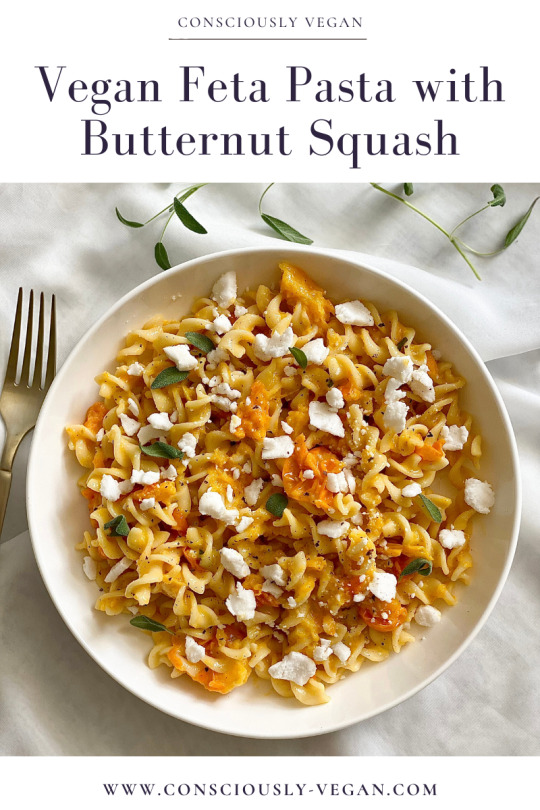
Creamy, dreamy, and oh-so-satisfying - Vegan Feta Pasta with roasted butternut squash is a must-try!
#vegan#veganfood#veganfoodshare#plantbased#veganism#veganrecipes#plantbaseddiet#vegan recipes#plantbasedrecipes#vegan food#vegan pasta#plant based pasta#vegan pasta recipe#plant based#vegan baked feta
54 notes
·
View notes
Text

Creamy Vegan Baked Feta Pasta
#vegan#dinner#tiktok#pasta#baked feta pasta#veganized#tomatoes#bell peppers#zucchini#vegan feta#tofu#cashews#miso#lemon#basil
59 notes
·
View notes
Text
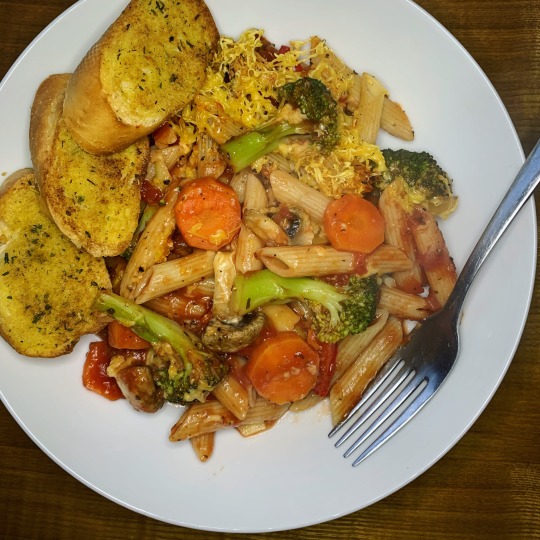
Vegetable cheesy vegan pasta bake and vegan garlic bread 🥖
#vegan#food#food pics#plant based#meat free#pastalover#pasta bake#pasta#vegano#vegancommunity#vegandiet#what vegans eat#traditional food#foodblogger
39 notes
·
View notes
Text
VEGAN CHICKEN ALFREDO, CHEESE, MUSHROOM & SPINACH PASTA BAKE YAAASSS
2 notes
·
View notes
Photo
Vegan Rasta Pasta
#vegan#gif#recipe#cooking#baking#gifrecipe#vegangif#veggie#plantbased#food#foodporn#yum#veganfood#crueltyfree#healthyfood#govegan#veganlife#whatveganseat#veganism#Vegan Rasta Pasta
2 notes
·
View notes
Text
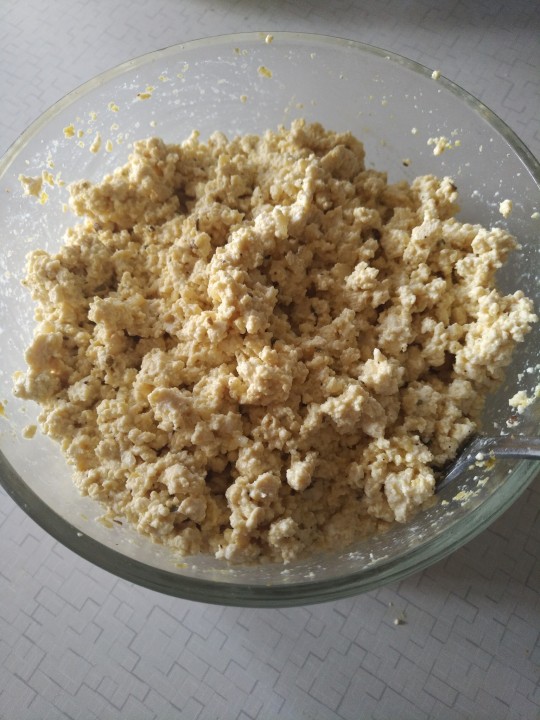
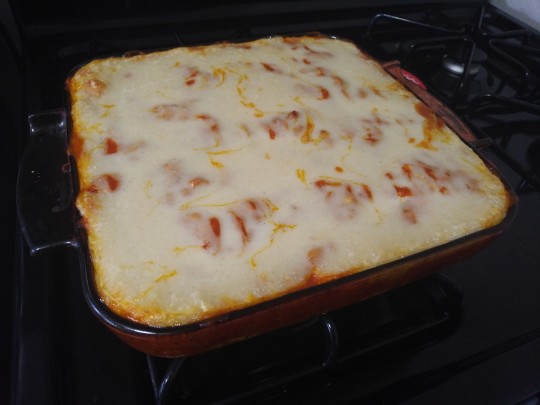
Baked Ziti Ricotta
Probably should've used a bigger pan! Learn from my mistakes.

1 box of penne
1 batch of my ricotta recipe
1 jar of pasta sauce
1/2 of a bottle of Miyoko's liquid mozzarella (feel free to use less)
Optional: fresh herbs like oregano or rosemary, crushed red pepper, mushrooms, Italian sausage
Cook your pasta according to instructions on the box. In the meantime, make a batch of ricotta. In a baking dish, go ahead and pour about half of the pasta sauce into it. Once the noodles are cooked, strain and pour into the baking dish. Layer with your ricotta and then the rest of the pasta sauce. Pour the liquid cheese on top and bake in the oven at 500 degrees for 10-20 minutes (this depends on how much cheese you use- just a little bit, then 10 minutes should be fine; half of the bottle like I used, then closer to 20 minutes). Will be extremely hot so let cool before enjoying!
#vegan#food blog#vegan food#vegetarian#tasty#yummy#veggies#vegan recipe#homecooking#plant based#comfort food#pasta#baked ziti#ricotta#vegan pasta#vegan ricotta#vegan cheese#cheesy#mozzarella
3 notes
·
View notes
Text
#food#pasta#twitter#meme#memes#tweets#tweet#funny#lol#humor#gyoza#dumplings#vegan#writers on tumblr#baking#writeblr#success#dessert#dumpings
1 note
·
View note
Text
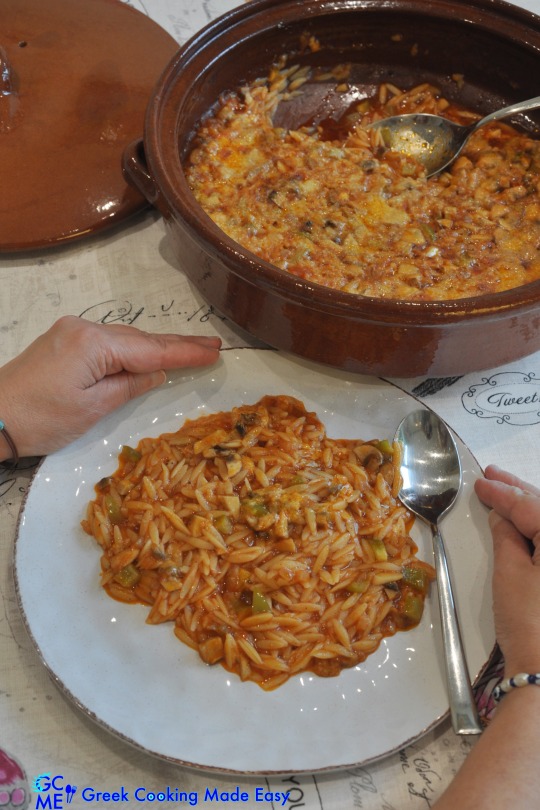
Oven Baked Greek Orzo Aka Kritharaki In Clay Pot
🥘

Oven Baked Greek Orzo aka Kritharaki in clay Pot - Kritharaki Fournou sti Yastra
BY: Greek Cooking Made Easy
SUBSCRIBE TO MY YOUTUBE CHANNEL: https://www.youtube.com/greekcookingmadeeasy
Check My YouTube Video: HERE
Κοιτάξτε Επίσης Την Συνταγή Μου Σε YouTube Βίντεο, Το Λίνκ Είναι: ΕΔΩ
youtube
SERVES 🍴⃒ PREP. TIME 🕔⃒
3-4 persons 5-10 min.
COOK. TIME ♨ DIFFIC. LEVEL 👩🍳⃒
50 min. Easy
I must confess that as a small child, I enjoyed eating all kinds of meats, chicken or seafood. So whenever my Mom would serve me a pasta, rice or vegetables' dish without meat, I used to search in my plate to see if she made a prank, and meat was hidden somewhere.
Little did I know, that those "non-meat" dishes are much healthier than the ones with meat.
As I grew older, I started appreciating much more vegetarian (and sometimes vegan) dishes.
For example, this amazingly easy orzo pasta dish is literally prepared in 5', before it goes in a clay pot (if possible-for best result) and into the oven, that does all the work.
Allow me to show you how to prepare this humble but so delicious meal.
Suitable for vegans and fasting if using vegan substitute for grated cheese.
Other recipes-ideas with Orzo? See all my Recipes HERE
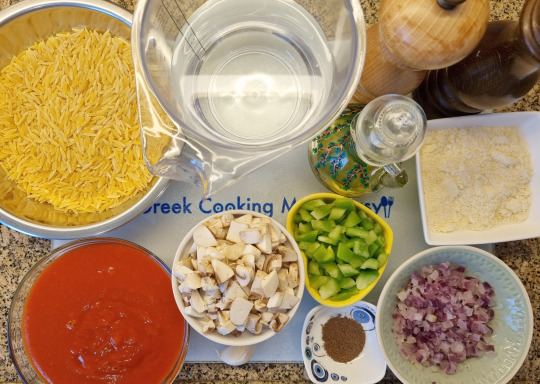
INGREDIENTS:
· Almost 1.5 cups / 250 gr. / 9 oz Village Orzo Pasta (kritharaki)
· 60 ml / 4 tbsp. Olive Oil
· 350 gr. / 12 oz / 330 ml Tomato Sauce (passata)
· 1 large Onion or 2 medium ones, finely chopped
· 1-2 Garlic Cloves, finely chopped
· 3/4 of Green Pepper (capsicum), cubed
· 150 gr. / 5.5 oz Mushrooms, finely sliced
· 3/4 tsp. All-Spice (bahari in Greek)
· 680 ml / 2.7 cups Water
· About 1/2 cup / 60 gr. / 2.1 oz Kefalotyri or Parmesan Cheese, grated (or vegan substitute)
· Ground Salt and Pepper
METHOD:
A. Prepare the Orzo for baking:
1. Use a clay pot of 28 cm / 11 in. or a round oven dish of same diameter.
2. Spread the orzo in the pot.
3. Pour the Olive oil on top and toss orzo around to oil it very well. That helps it stay grainy, “al dente” and not mushy when baked in the oven!
4. Next add the chopped onion and garlic. Blend them in.
5. Now add the cubed peppers and mushroom slices, stirring to mix them with the orzo.
6. Pour the tomato sauce in the pot.
7. Add about 680 ml water in the sauce. Water needs to be about 2 cm / 0.8 in. on top of Orzo.
8. Stir to blend all ingredients.
9. Season with the All-spice and ground Salt and Pepper, to taste, blending them in.
10. That's it, ready for the oven, wasn't that easy?!
B. Baking instructions:
11. Place clay pot with Orzo on the bottom shelf of a preheated Oven, top and bottom heating Elements on = @170℃ / 340℉ and bake for about 50' (depends on the oven).
12. TIP-1: DO NOT USE FAN because it results on drying out the Orzo!
13. TIP-2: Don't overcook Orzo! Keep in mind that it continues getting cooked even after you remove the dish from the oven!
14. After 30', open the oven and stir orzo. Return in the oven.
15. The last 10' before Orzo is ready, open the oven and sprinkle the grated cheese on top.
16. After a total of 50', Orzo should be ready. Turn off the oven. Wow, look at it bubbling!!

17. Remove pot from the oven and place it on a rack or kitchen bench for 10' to set, before serving.

C. Serving Suggestion:
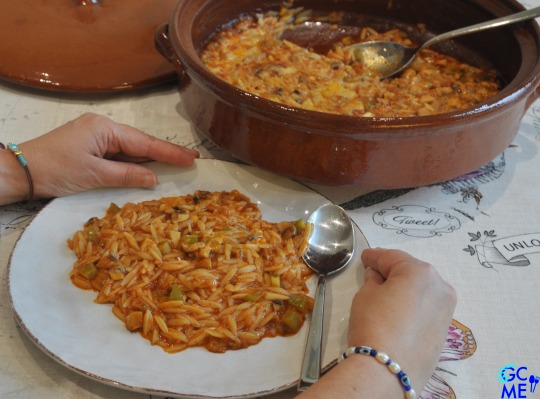
Serve baked Orzo while still very warm.
On my plate now, ready to be devoured!!
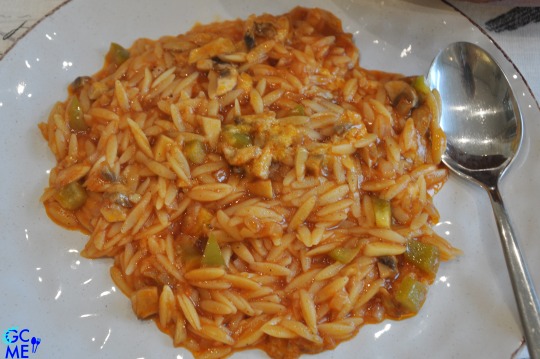
This beyond delicious baked Orzo is truly a whole meal. Quite nutritious and healthy, it can be served for lunch or dinner. You could even place it in a small container for work lunch.
Have a look at this beautiful, grainy Orzo!! Its taste is so good, as it has not only absorbed the pepper and mushroom flavors but also the earthy undertones of the clay pot.
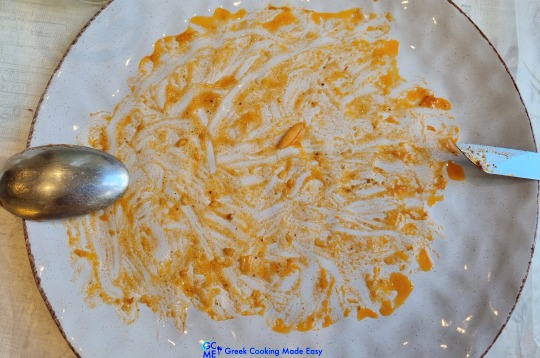
Proof: my empty plate! A real treat!!
D. Storage info:
Baked Orzo can be stored (when cool) in an airtight container, in the fridge, for up to 1 week or in the freezer for 1 month.
Check my YouTube Video: HERE
Κριθαράκι Φούρνου στη Γάστρα
BY: Greek Cooking Made Easy
SUBSCRIBE TO MY YOUTUBE CHANNEL: https://www.youtube.com/greekcookingmadeeasy
ΜΕΡΙΔΕΣ🍴⃒ ΠΡΟΕΤΟΙΜΑΣΙΑ 🕔⃒
3-4 5-10 min.
ΜΑΓΕΙΡΕΜΑ ♨ ΒΑΘΜ. ΔΥΣΚΟΛΙΑΣ 👩🍳⃒
50 min. Εύκολο
Πρέπει να ομολογήσω ότι σα μικρό παιδί μου άρεσε να τρώω κάθε λογής κρέας, κοτόπουλο ή θαλασσινά. Έτσι, όποτε η μαμά μου σέρβιρε ένα πιάτο με ζυμαρικά, ρύζι ή λαχανικά χωρίς κρέας, έψαχνα στο πιάτο μου για να δω μήπως μου έκανε φάρσα και κάπου ήταν κρυμμένο το κρέας.
Δεν ήξερα ότι τα πιάτα "χωρίς κρέας" είναι πολύ πιο υγιεινά από αυτά με κρέας.
Καθώς μεγάλωσα, άρχισα να εκτιμώ πολύ περισσότερο τα χορτοφαγικά (και μερικές φορές βίγκαν) πιάτα.
Για παράδειγμα, αυτό το εκπληκτικά εύκολο φαγάκι με κριθαράκι ετοιμάζεται κυριολεκτικά σε 5', πριν μπει σε πήλινο-γάστρα (αν δυνατόν-για καλύτερο αποτέλεσμα) και στον φούρνο, που κάνει όλη τη δουλειά.
Επιτρέψτε μου να σας δείξω πώς να ετοιμάσετε αυτό το ταπεινό αλλά τόσο νόστιμο γεύμα.
Κατάλληλο για βίγκαν και νηστεία με βίγκαν υποκατάστατο τριμμένου τυριού.
Άλλες ιδέες για πιάτα με Κριθαράκι? Δείτε όλες τις συνταγές μου ΕΔΩ
ΥΛΙΚΑ:
• Σχεδόν 1,5 φλ. / 250 γρ. / 9 oz Χωριάτικο Κριθαράκι
• 60 ml / 4 κ.σ. Ελαιόλαδο
• 350 γρ. / 12 oz / 330 ml σάλτσα Ντομάτας (πασάτα)
• 1 μεγάλο Κρεμμύδι ή 2 μέτρια, ψιλοκομμένα
• 1-2 Σκελίδες Σκόρδο, ψιλοκομμένες
• 3/4 πράσινης Πιπεριάς, σε καρεδάκια
• 150 γρ. / 5,5 oz Μανιτάρια, κομμένα σε λεπτές φέτες
• 3/4 κ.γ. Μπαχάρι
• 680 ml / 2,7 φλ. Νερό
• Περίπου 1/2 φλ. / 60 γρ. / 2,1 oz Κεφαλοτύρι ή Παρμεζάνα, τριμμένο
• Φρεσκοαλεσμένο αλάτι και πιπέρι
ΜΕΘΟΔΟΣ:
Α. Ετοιμάστε το Κριθαράκι για ψήσιμο:
1. Χρησιμοποιήστε ένα πήλινο σκεύος (γάστρα) των 28 εκ. / 11 in. ή ένα στρογγυλό ταψί φούρνου ίδιας διαμέτρου.
2. Απλώστε το Κριθαράκι στο ταψί.
3. Περιχύστε από πάνω το ελαιόλαδο και ανακατέψτε το Κριθαράκι μέχρι να λαδωθεί πολύ καλά. Αυτό το βοηθά να παραμένει σπυρωτό ή "al dente", να μη παραμαλακώσει και να μη λασπώσει όταν ψηθεί στο φούρνο!
4. Στη συνέχεια προσθέστε το ψιλοκομμένο κρεμμύδι και το σκόρδο. Ανακατέψτε τα.
5. Προσθέστε τώρα τα καρεδάκια πιπεριάς και τις φέτες μανιταριών, ανακατεύοντας να ενωθούν με το Κριθαράκι.
6. Ρίξτε τη σάλτσα ντομάτας στο ταψί.
7. Προσθέστε περίπου 680 ml νερό στη σάλτσα. Το νερό πρέπει να είναι περίπου 2 cm / 0,8 in. πάνω από το Κριθαράκι.
8. Ανακατέψτε να ενωθούν όλα τα υλικά.
9. Καρυκεύστε με το μπαχάρι και φρεσκοαλεσμένο αλάτι και πιπέρι, κατά βούληση, ανακατεύοντάς ξανά.
10. Αυτό ήταν, έτοιμο για το φούρνο, δεν ήταν τόσο εύκολο;!
Β. Οδηγίες ψησίματος:
11. Βάλτε το πήλινο με το Κριθαράκι στη κάτω σχάρα ενός προθερμασμένου φούρνου, στις πάνω και κάτω αντιστάσεις @170℃ / 340℉ και ψήστε για περίπου 50' (εξαρτάται από τον φούρνο).
12. ΣΥΜΒΟΥΛΗ-1: ΜΗ ΧΡΗΣΙΜΟΠΟΙΕΙΤΕ ΤΟΝ ΑΕΡΑ γιατί έχει ως αποτέλεσμα να στεγνώσει και να ξεραθεί το Κριθαράκι!
13. ΣΥΜΒΟΥΛΗ-2: Μην παραψήσετε το Κριθαράκι! Λάβετε υπόψη ότι συνεχίζει να ψήνεται ακόμα και αφού βγάλετε το ταψί από το φούρνο!
14. Μετά από 30', ανοίξτε το φούρνο και ανακατέψτε το Κριθαράκι. Επιστρέψτε το ταψί στο φούρνο.
15. Τα τελευταία 10' πριν να είναι έτοιμο το Κριθαράκι, ανοίξτε το φούρνο και πασπαλίστε από πάνω το τριμμένο τυρί.
16. Μετά από συνολικά 50' το Κριθαράκι θα πρέπει να είναι έτοιμο. Σβήστε το φούρνο. Ουάου, κοιτάξτε τις φουσκάλες του!!
17. Βγάλτε την γάστρα (ή ταψί) από το φούρνο και τοποθετήστε τη σε σχάρα ή πάγκο κουζίνας για 10' να δέσει το φαΐ, πριν σερβίρετε.
Γ. Πρόταση σερβιρίσματος:
Σερβίρετε το ψημένο Κριθαράκι όσο είναι ακόμα καυτό.
Στο πιάτο μου τώρα, έτοιμο να καταβροχθιστεί!!
Αυτό το πεντανόστιμο ψητό Κριθαράκι είναι πραγματικά ένα πλήρες γεύμα. Τόσο θρεπτικό και υγιεινό, μπορεί να σερβιριστεί για μεσημεριανό ή βραδινό. Θα μπορούσατε ακόμη και να το βάλετε σε ταπεράκι για μεσημεριανό γεύμα στη δουλειά.
Ρίξτε μια ματιά στο τόσο όμορφο, σπυρωτό Κριθαράκι!! Η γεύση του είναι τόσο καλή, μιας και δεν έχει απορροφήσει μόνο τις γεύσεις από τη πιπεριά και τα μανιτάρια αλλά και τους γήινους τόνους του πήλινου.
Απόδειξη: το άδειο πιάτο μου! Πραγματική απόλαυση!
Δ. Πληροφορίες φύλαξης:
Το Κριθαράκι στο φούρνο μπορεί να φυλαχτεί (όταν κρυώσει) σε αεροστεγές δοχείο, στο ψυγείο, έως και 1 εβδομάδα ή στην κατάψυξη για 1 μήνα.
Κοιτάξτε επίσης την συνταγή μου σε YouTube βίντεο, το λίνκ είναι: ΕΔΩ
#lunch#dinner#maincourse#pasta#vegetables#vegetarian#vegan#fasting#diet#lowcost#children#lactose#baked greek orzo#oven baked greek orzo#orzo#kritharaki#greek kritharaki#Κριθαράκι Φούρνου στη Γάστρα#Κριθαράκι Φούρνου#Κριθαρακι φουρνου#κριθαρακι
1 note
·
View note
Text
my POV when baking ^_^
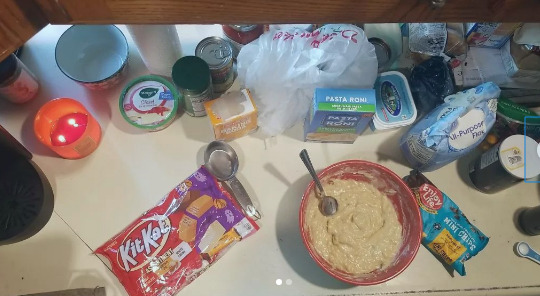
#my photo#mine#baking#my baking#banana bread#vegan#candle#bath and body works#kitkats#pasta roni#flour#salt#keuirg#happy fall#autumn
0 notes
Text

Vegan Baked Ziti
#italian#savoury#food#recipe#recipes#ziti#pasta#dinner#vegan#veganism#vegetarian#plantbased#plant based#dietitiandebbie#pasta bake#baked ziti
120 notes
·
View notes
Text
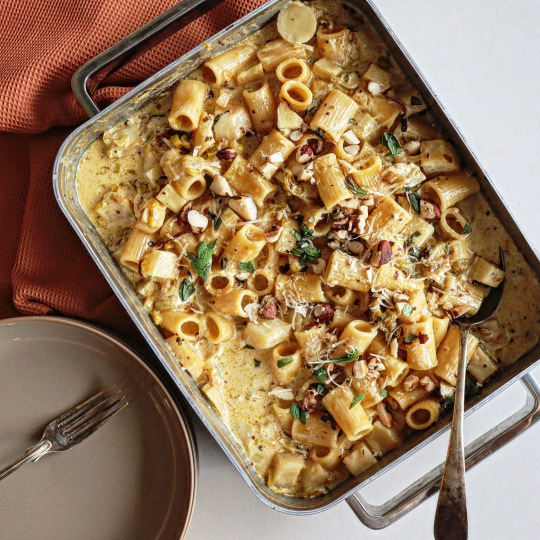
Parsnip and Celeriac Pasta Bake (Vegan)
#vegan#lunch#dinner#bake#pasta#parsnips#celeriac#leeks#sage#miso#vegan butter#mustard#vegan cream#lemon#nutritional yeast#fennel seeds#vegan parmesan#Brazil nuts
19 notes
·
View notes
Text
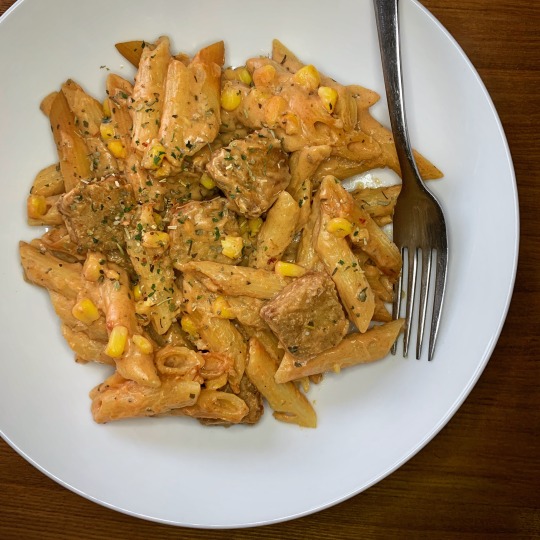
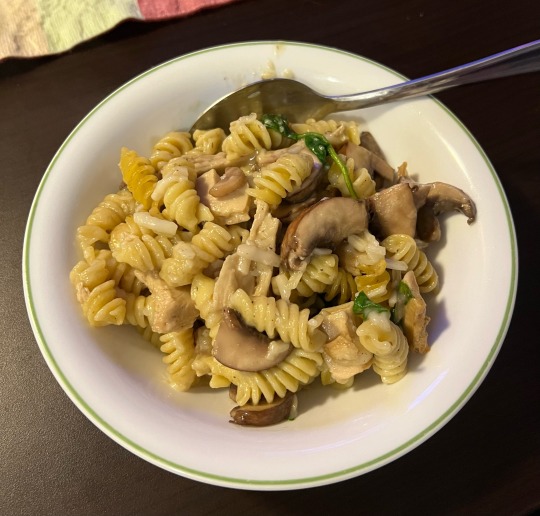
Creamy plant based chicken pasta bake 🌱
#vegan#food#food pics#plant based#meat free#pastalover#pasta bake#pasta#vegano#veganism#vegansofig#what vegans eat#what vegans cook
7 notes
·
View notes
Note
do you have some favourite go-to recipes? i would love any of your recommendations!! xx
we eat the same few things on rotation in our house, as I do all the cooking, and I like a) one-pot meals, and b) pasta, preferably. most of these are fairly low effort but you get a lot of bang for your buck flavour-wise, and they're endlessly customisable!
also, listen, I don't do measurements. follow your heart and taste as you go.
the tiktok viral baked feta pasta from like 4 years ago
ingredients: plum or cherry tomatoes, a block of feta (or boursin if you're feeling flush), garlic, pasta
optional extras: spinach, cannellini beans, chili crisp
recipe: whack your tomatoes, sliced garlic, and olive oil in a big dish. nestle your feta in there. I like to add a tin of drained cannellini beans at this point to bulk it out/cut down on the pasta/make the texture confusing, but you don't have to. stick it in the oven at like 180-200C for half an hour ish. after half an hour boil your pasta. retrieve your oven dish, stir everything up to desired consistency (I'm a chunk girl). you can add spinach while you do this for extra greenery, or a massive spoonful of chili crisp for heat and crunch, but it's good on its own. add the pasta and some pasta water if you need. voila. you simply cannot go wrong.
gochujang and hummus pasta
ingredients: gochujang (this keeps forever in the fridge so it's a good kitchen investment), a tub of hummus, garlic, white onion, parm
optional extras: parsley
recipe: chop onion and garlic, sling them in a pan with butter and a splash of EVOO. when the onion is sufficiently sweaty and nice, add a dollop of gochujang (the bigger the dollop the spicier the end result) and stir it all in, followed by the whole tub of hummus. boil the pasta. add the cooked pasta to the pan, along with some pasta water, a shit load of grated parm, and garnish with parsley. my friend sent me a vegan version of this recipe about a year ago and I've made the non-vegan version roughly once a week since. it is so fucking delicious.
butter bean thing
ingredients: butter beans, garlic, red onion, tomato paste, cream/double cream/greek yog, lemon, sourdough/nice crusty bread
optional extras: parsley
recipe: throw chopped garlic and onion in a pan with butter and EVOO and really let them sweat it out. add tinned butter beans WITH THE JUICE. yes, I know. add in a few good squirty piles of tomato paste and stir, then let it all heat through. at this point start toasting your crusty bread of choice because I ALWAYS forget until the end and then I'm rushed. I recommend splurging for the good bread, slathered with melty butter. add whatever creamy thing you have to hand (the og recipe I saw said double cream, but I usually have greek yoghurt in and that does the job) to the beans, along with some lemon juice, garnish with parsley if you like and serve. use the bread as a giant spoon. you are welcome.
sausage soup/stew? casserole??
ingredients: celery, white onion, carrot, sausage/s, cherry tomatoes, tinned tomatoes, chicken broth, parm
optional extras: creamy thing of your choice, spinach, orzo
recipe: dice the celery, carrot and onion (mirepoix!), and throw it in a big big big pot with some EVOO. now: I get a pack of nice sausages and either mash or chop them depending on how much energy I have, but if you live somewhere with a butcher or whatever you can save your mashing arm and just get ground sausage. throw in the ground, mashed, or chopped sausage and cook for a bit. follow with a tin of chopped tomatoes and chicken broth. I usually put in about a litre. chop the cherry toms and toss them in. follow with a load of grated parm. if you have any parm rinds, throw em in and leave it to bubble away. this doesn't sound like much but it is so good. the longer you leave it the more flavourful it will be! towards the end I like to add in whatever creamy thing is in the fridge (double cream, greek yog, milk), along with lots of chopped spinach and a cup of orzo to really bulk it up. we can happily live on this for DAYS, especially if we have leftover fancy crusty bread from the gochujang pasta. oh and remember to take out the parm rind.
thai chicken curryish
ingredients: chicken (thigh/breast), garlic, ginger, yellow peppers, spring onion, cashew nuts, rice, coconut milk, chicken broth
optional extras: sriracha, coriander
recipe: I love this one cos it is SO quick and SOOOO easy. cut chicken into chunks and brown it in the pot. whip it back out and throw in the chopped garlic and ginger (I have a tube of ginger paste in the fridge cos WHO has the time?) with a big glug of EVOO, then a cup of rice. jasmine works, but I've also used risotto rice. toss in the chopped peppers, spring onion and cashew nuts (if I have the energy I'll chop the nuts, but you can put em in as-is), then add coconut milk (a tin's amount, be that an actual tin or some of the melted stuff that costs 1/4 of the price - thanks Asian supermarket!) and chicken broth. put the browned chicken back in, give it all a stir, cover it, and stick it in the oven for like 25ish mins. here’s the NYT recipe if you need liquid measurements/an actionable recipe that isn’t me riffing. (as always, 12ft.io/ in front of the address to bypass the paywall.) serve it with sriracha squirted all over it (HIGHLY RECOMMEND) and coriander if you like it.
delicious little rice waffle
ingredients: leftover jasmine rice, chili crisp, an egg, kewpie mayonnaise, sesame oil, spring onion, A WAFFLE MAKER
optional extras: furikake
recipe: full disclosure, you need a little waffle maker for this. mix the rice with chili crisp, a little sesame oil, and egg yolk. dollop it into the waffle maker and cook. garnish with kewpie mayo, sliced spring onion and some furikake if you have it, or just toasted sesame seeds if you have those, or neither! delicious little spicy umami snack, my beloved.
tuna melt of dreams
ingredients: you know what's in a tuna melt
recipe: swap the butter on the outside of the bread for kewpie mayonnaise and thank me later.
ADDENDUM: this goes without saying for me but sadly I know it does not for everybody: SEASON YOUR FOOD WITH SALT. IT WON'T MAKE YOUR FOOD SALTY IT WILL MAKE IT DELICIOUS. COOK YOUR PASTA IN SALT. WHEN IN DOUBT, ADD SOME SALT. THANK YOU.
#these are our staples#every so often I will come home with a bunch of new recipes and try them all and add some to rotation#Bon Appetit's dan dan pappardelle was a fixture last year cos it is SO FUCKIN TASTY but also a bit of a faff to make#SEND ME ALL YOUR EASY BREEZY ONE POT RECIPES!!!#THANKS!!!#answered#this was fun thanks
105 notes
·
View notes
Photo
Vegan Sausage Peppers And Onions Pasta
#vegan#gif#recipe#cooking#baking#gifrecipe#vegangif#veggie#plantbased#food#foodporn#yum#veganfood#crueltyfree#healthyfood#govegan#veganlife#whatveganseat#veganism#Vegan Sausage Peppers And Onions Pasta
2 notes
·
View notes
Last Seen Blogs

charlespycraft
Untitled

heart-and-head-key
_heart_head_

bell2610
Bell2610

crimson--insanity-blog
Let's Go Crazy!~
sorry-its-just-amy
Just a Regular Emo