#glitter tutorial
Note
Hi! Do you have any tutorials for glitter/sparkles?
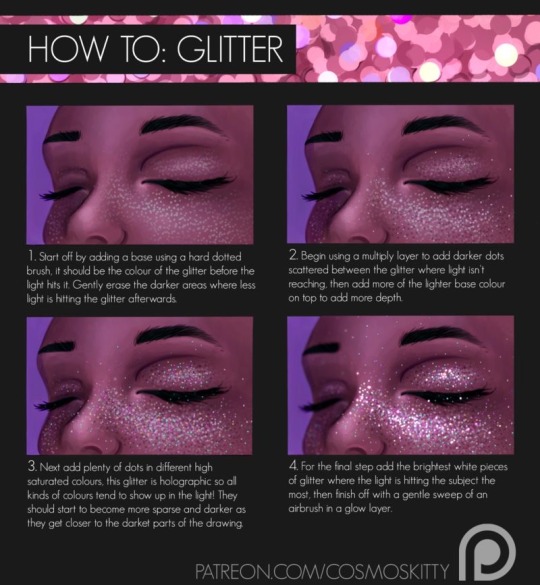
By Cosmos Kitty

by 23i2ko
#art#glitter tutorial#how to paint glitter#digital art#digital art tutorial#cosmoskitty#23i2ko#digital glitter tutorial#glitter effects#sparkle tutorial#digital sparkle tutorial
273 notes
·
View notes
Text

i was asked for a glitter tutorial a couple of times so here it is <3 (i work in krita btw)
if i had to break it down step-by-step:
apply regular shading
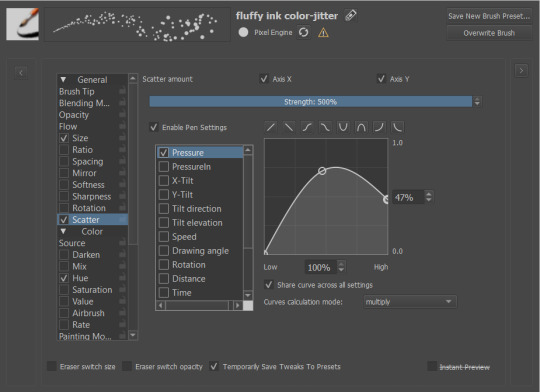
add the glitter texture. i do it by turning the scatter feature on
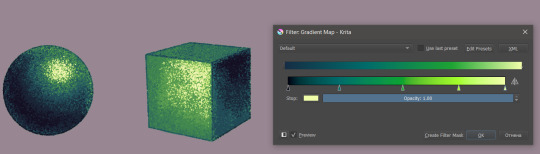
3. add color with a gradient map
4. add reflected light. i usually go with blue because it's a good fit for my over-all very pink palettes
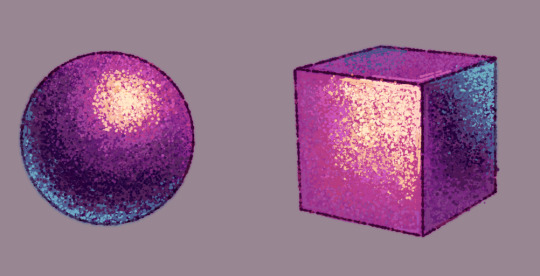
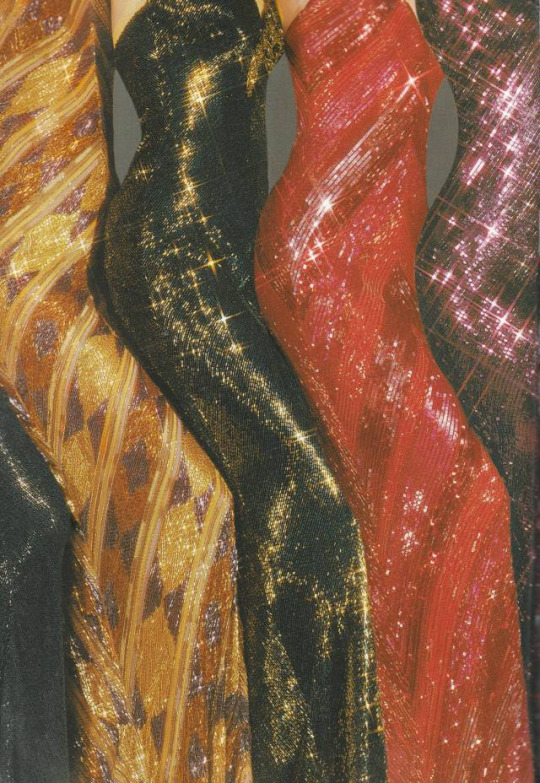
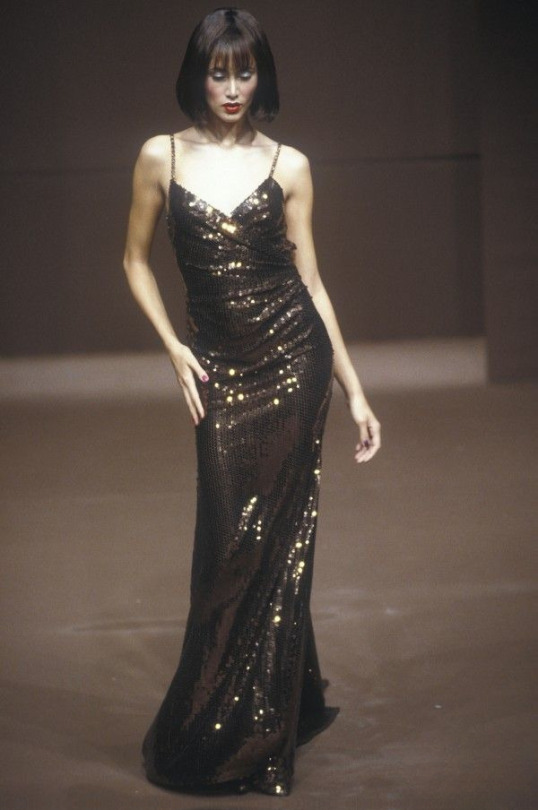
5. and in general: look at reference. glitter looks and feels very unreal and magical but it all exists irl and has been documented in all shapes, materials and lighting


1 2 3 4
that's all thank u <33
#never made a tutorial before#hope that's good enough#let me know if i should elaborate some more on any part#my art#tutorial#glitter tutorial#krita#also if you have more reference pictures for glittery iridescent holographic materials send them my way#i love that shit it's my favorite thing in the world to look at
777 notes
·
View notes
Text
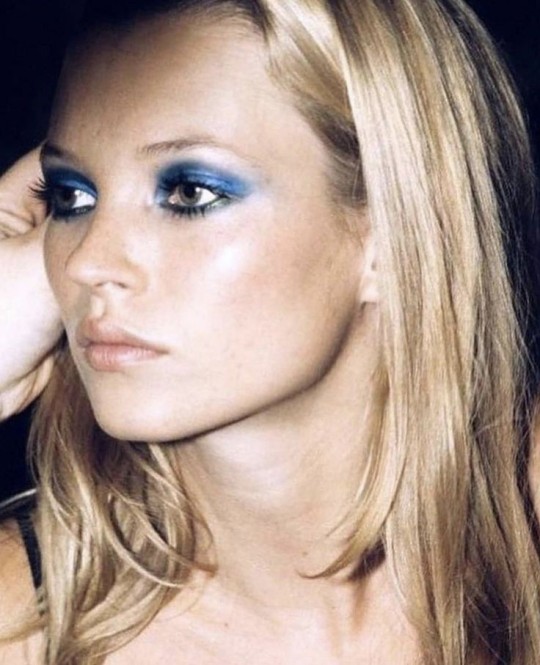
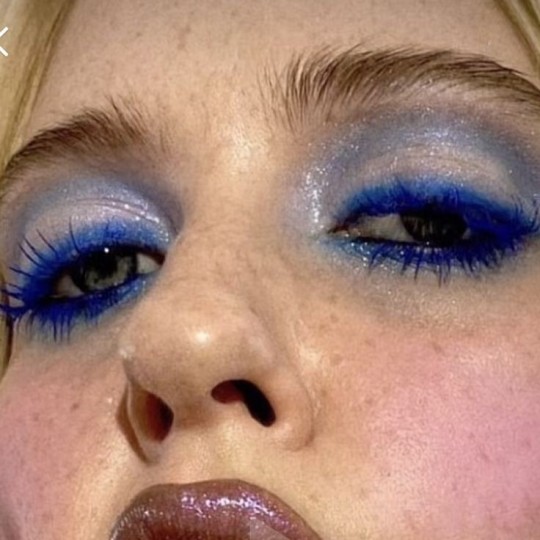
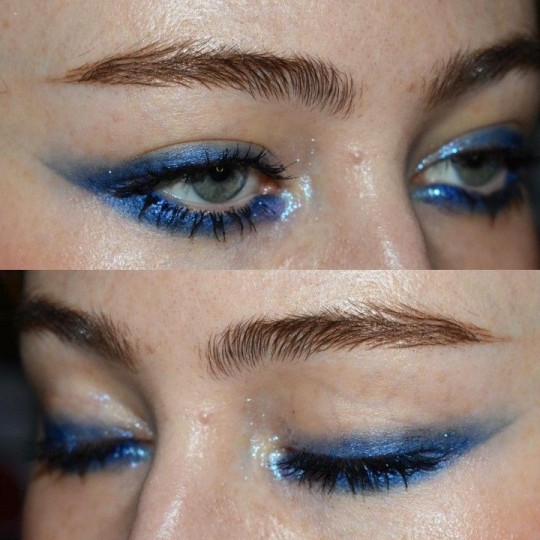
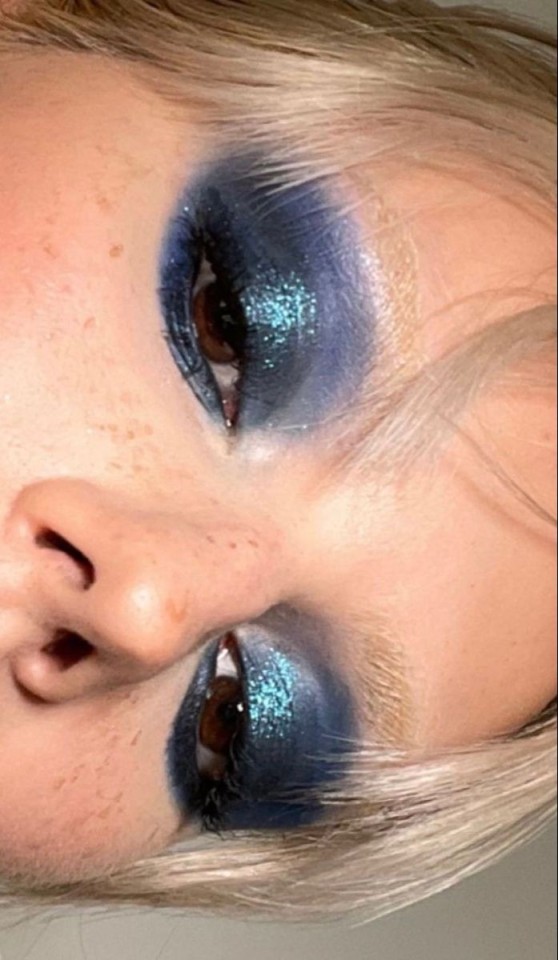

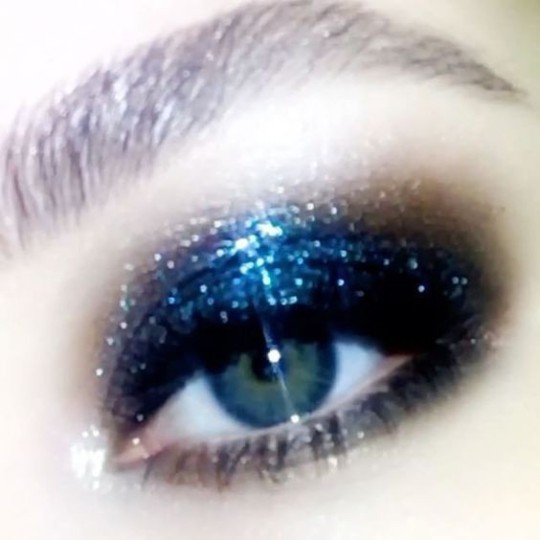

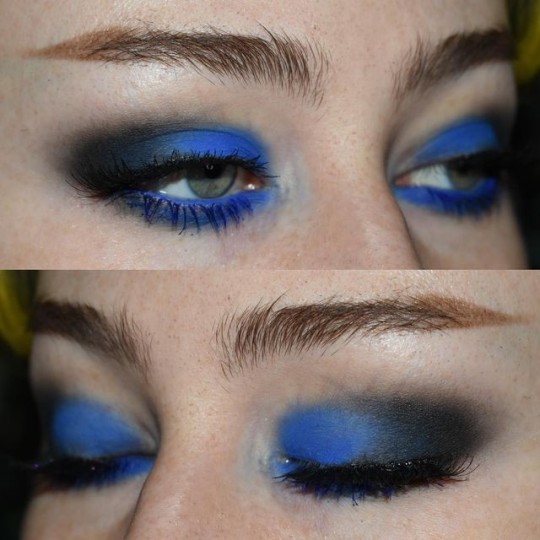
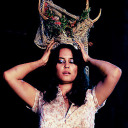
Blue Eyeshadow makeup inspo
#aesthetic#blue eyes#blue eyeshadow#glitter#eye makeup#eyeliner#blue#blue makeup#dark blue moodboard#glitter eyeshadow#makeup inspiration#makeup tutorial#makeup#inspo#ideas#inspiration#makeup inspo#makeup ideas#euphoria#so pretty#stargirl#kate moss#retro#mia goth#love witch#buffalo 66#effy stonem#maddy perez#cassie euphoria#it girl
1K notes
·
View notes
Text
had someone ask about my glitter GIFmaking process so i will give! i exclusively use web-based programs, so you don't need to download any software for this!
to preface, my process is a bit convoluted but it's so my images aren't compressed or made fuzzy. ALSO, these steps are for PC.
this is the final result, but you can make basically anything [and probably something prettier than this, i just made this image to demonstrate rotating & resizing pixel GIFs]
tutorial below!
the site i use for glitter backgrounds is online-image-editor.com
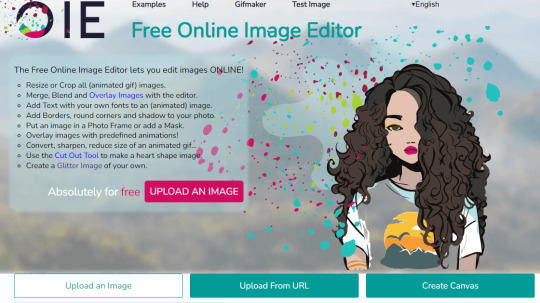
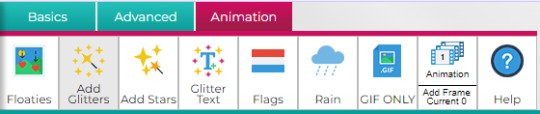
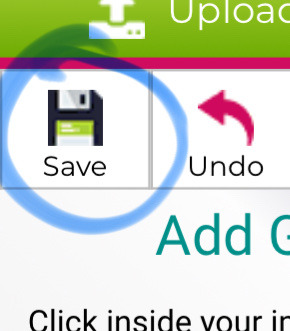
click "UPLOAD AN IMAGE" to get your picture in, then click the "Animation" tab. it'll take you to "Add Glitters". click that!
if your image is over 650x650 pixels, it WILL be rescaled. this is why i only upload images below that size, but it's up to personal preference and the compression isn't that bad unless you're using pixel art.
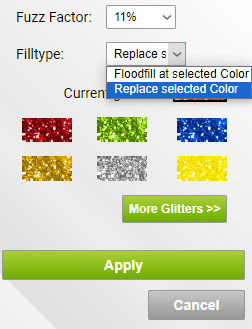
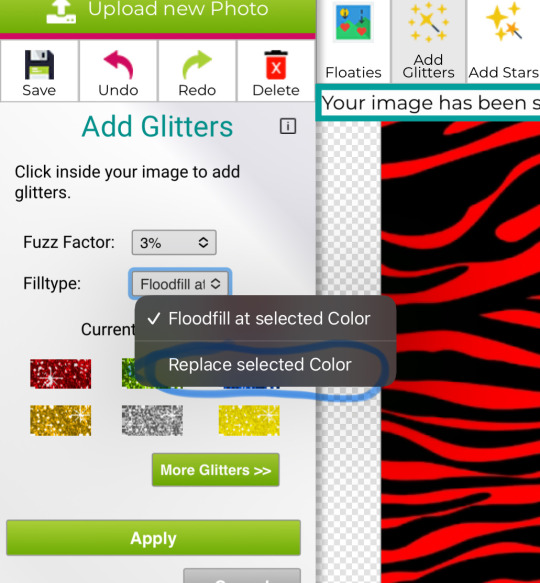
here are the settings i use when filling with glitter. i always change "Floodfill at selected Color" to "Replace selected Color" because it makes it faster, but it really depends on what you need to be filled. you just click the area on the image that you want to be filled on the preview and it'll be filled

kaoru jumpscare! here's my image so far! i just open the preview into a new tab to save it. it won't be PERFECT but it'll look presentable and that's all that matters.
NOW, for adding GIFs to this unsuspecting kaoru, i use photopea.com. i usually use GIFcities.org, glitter-graphics.com or tumblr to find GIFs. where the GIFs are from doesn't matter, just make sure you save them as GIFs onto your computer.
when you upload your GIF into photopea, you might realize that it's not moving anymore!
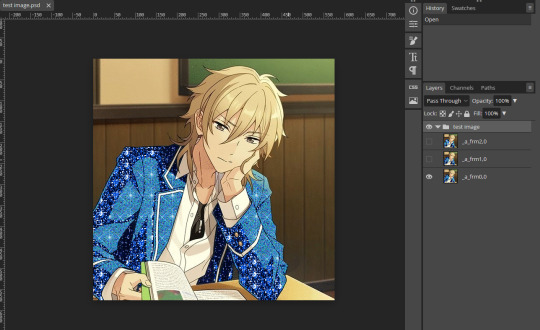
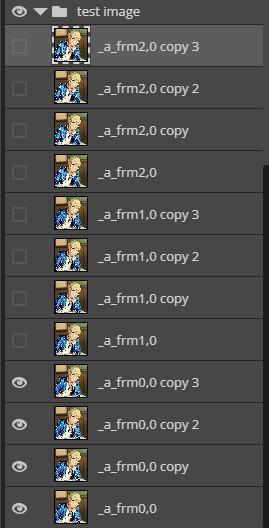
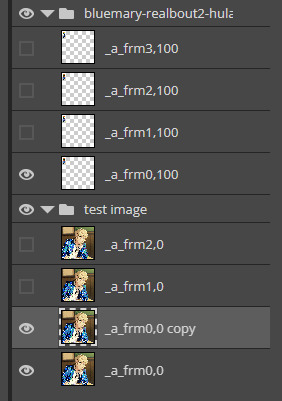
this is OK, it will be a GIF when you export it. if your image is not exported as a gif, make sure that all the frames of each single animation are in the same folder, and all begin with "_a_".
IMPORTANT because i didn't initially include this, but i recommend you duplicate every layer of your background image 1-3 times if you're inserting GIFs with a relatively higher count of frames so the glitter doesn't flash like crazy when you export. to duplicate layers, select a layer and "Ctrl+J". do this for every layer that doesn't have "copy" in its name first then repeat so you don't duplicate the wrong layers.
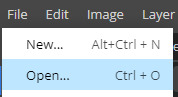
to open a new GIF or image, you go to "File", then "Open..." . note that you can do this with multiple images/GIFs in one go!
to add the GIF to the image you want edited, make sure you have selected the folder. go to "Layer" then "Duplicate Into ..." and make sure you duplicate to the image you are editing.

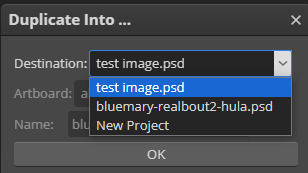
if you go to the image, it should contain a new folder containing all the layers from the image you duplicated from.
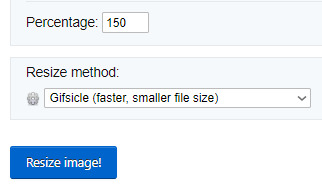
if you want to move the GIF, select the folder and use "Ctrl+Alt+T" to transform. if you only move the GIF it should not turn fuzzier, but if you want to resize the GIF i usually use ezgif.com/resize with the Gifsicle setting for "Resize method".
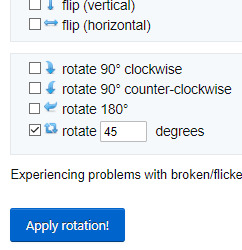
you can rotate GIFs by exact 90 degree increments if you hold the "Shift" key while rotating in photopea, however any other rotation WILL make your image fuzzier, and it's a bit harder to rotate the GIF but is possible!
i use ezgif.com/rotate for this, you can do any rotation you want but i did this one.
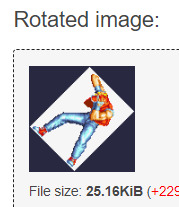
OK! it's rotated, but there's an annoying navy border so i'll show you how to get rid of that! DON'T bother saving the GIF you have just made, go from "Rotated image" and click "more tools", then "Remove background"
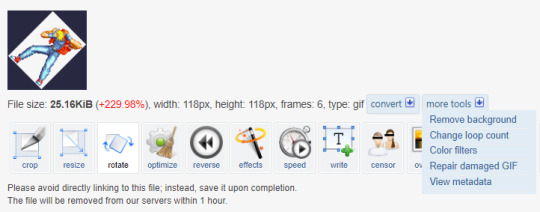
assuming you get the same navy as i do, the HEX code is #282840, but you can get you own hex code by converting the RGB to HEX [or getting a hex colour picker to work, didn't work for me. you can get the RGB by screenshotting and using MS paint]
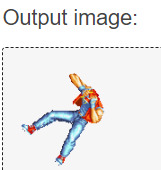
voila! it is now transparent!
after you've added all your images in and you're satisfied with your image, you should select all the layers by holding "Shift" and selecting the top and bottom folders
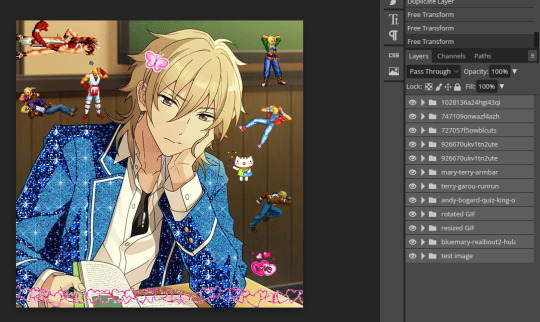
and then, you go to "Layer", "Animation" then "Merge". you can always undo this and make edits so do not freak out if you've realized you want to edit parts
now, your GIF is ready to be exported!

go to "File", "Export as" and select "GIF"!
it'll take a while for it to load in, and you might notice an immediate issue! the GIF is too fast! you can fix this by messing around with the speed dial. this is the most frustrating part of GIF making for me because my computer is slow and freezes a lot. just stay patient, and do NOT reload your browser or you'll lose all your hard work!
annnddd that's it! bye bye!
#tutorial#glitter gifs#glitter graphics#glittercore#GIF#gif tutorial#kaoru hakaze#ensemble stars#fatal fury#hope this is helpful
14 notes
·
View notes
Text
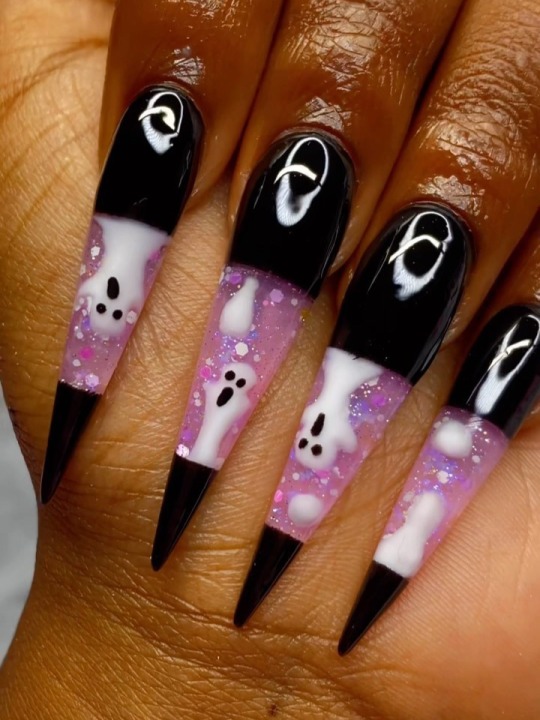
@cstutorialz_
#@cstutorialz_#uploads#halloween#lava lamp nails#encapsulated#black#purple#white#glitter#ghosts#nail tutorials#process#stiletto shape#nails
177 notes
·
View notes
Note
How do you make your glitter gifs :)
Thanks for the question anon!! I used to use glitterfy but the website was sold and no longer has the glitter gif function. However, I have found another website which does have the function which I will link here.
As for actually creating the gifs,
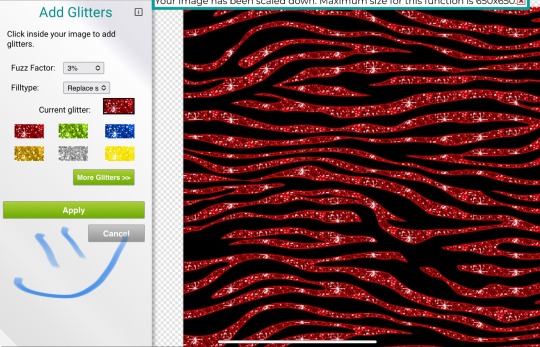
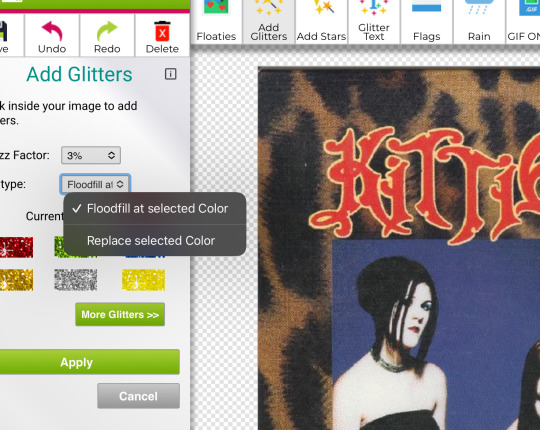
all you have to do is upload the image you’d like and click the animation button and then click the add glitter button. You can choose from many different glitters if you click the more glitters button!!
For images with simple colours such as cartoons, I use the replace selected colour option.
For images with complex colours such as pictures of people, depending on how well it turns out with trying the replace selected colour option, I use the flood fill colour option instead. But, it takes much longer.
It can be quite fiddly to use the site so I recommend using an Apple Pencil to accurately select the colour you want if you’re using an iPad / iPhone or just using a laptop / pc.
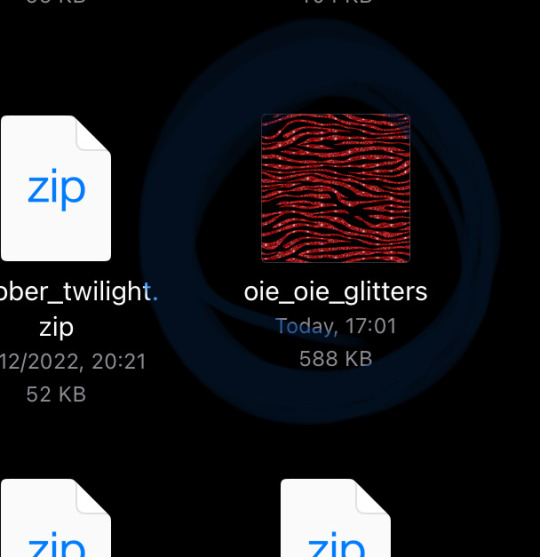
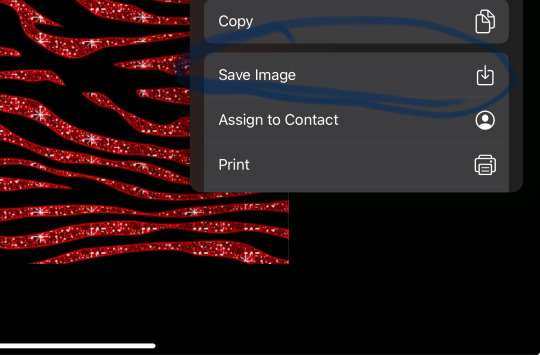
❗️please note that when saving them, you must save it to your image gallery before making another glitter gif as the site overwrites the save file ❗️
Screenshot tutorial:


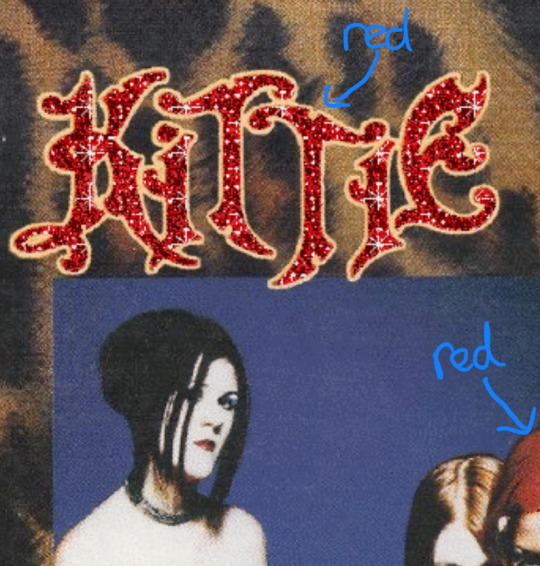
#90s mallgoth#90s goth#90s mall goth#2000s goth#mallgoth#Kittie#Kittie band#glitter gif#glitter#gif#tutorial#old web#kittie’s crypt#zebra print#red
7 notes
·
View notes
Text
stupid glittery freaklet 💥
#my art#ocs#artists on tumblr#original character#dexter#<- that's his name btw#I followed Jones' glitter tutorial! I like how this turned out tbh#just my silly little guy..#misc
14 notes
·
View notes
Text
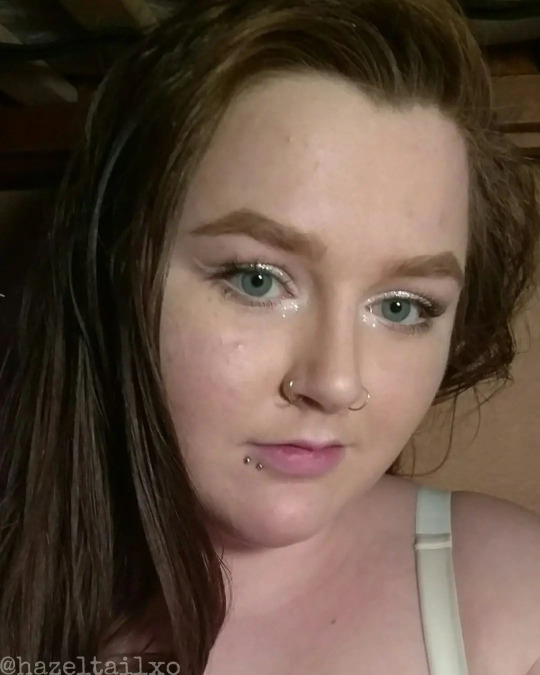
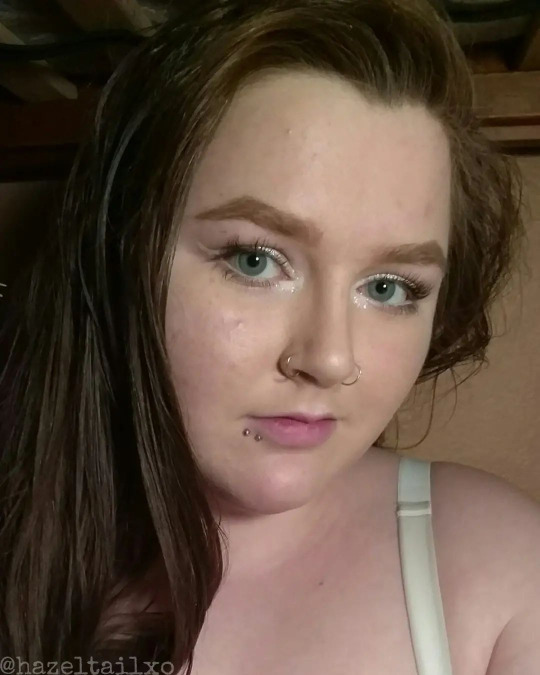

HALLOWEEN FLASHBACK
e.l.f. Aqua Primer Mist
It Cosmetics Your Skin But Better CC+ Color Correcting Cream in Fair
Tarte Shape Tape Contour Concealer in Light
e.l.f. High Definition Powder in Translucent
Laura Geller Baked Balance N Brighten Color Correcting Foundation in Porcelain
Nyx Powder Blush in Taupe
Urban Decay All Nighter Makeup Setting Spray
Eylure Brow Pencil in 30 Blonde
Anastasia Beverly Hills Clear Brow Gel
Milani Eyeshadow Primer in 01 Nude
Lorac Downtown Drama Eye Shadow Palette
Nyx Eye/Eyebrow Pencil in White
Wet N Wild MegaLiner Liquid Eyeliner in Trim With Lace
Silver Glitter Liquid Eyeliner
Nyx Jumbo Eye Pencil in Milk
KVD Beauty Alchemist Holographic Palette (Amethyst & Opal)
Lit Clearly Liquid Glitter Base
Wet N Wild Mega Sparkle Confetti in Lilac Frosting
CoverGirl Bombshell Curvaceous Mascara
Jack Black Intense Therapy Natural Mint & Shea Butter Lip Balm SPF 25
CoverGirl Katy Kat Matte Lipstick in Cosmo Kitty
Maybelline Color Sensational Lipstick in 750 Wickedly White
MAKEUP TUTORIAL BLOG POST
Angel Makeup Tutorial | 13 Days Of Halloween 2017
hazeltail on youtube / hazeltailofficial on tiktok / hazeltailofficial on ig / @hazeltailofficial / @hazeltail
#halloween#halloween makeup#white eyeliner#winged liner#winged eyeliner#glitter makeup#glitter#sparky#glittery#makeup tutorial#makeup tutorials#beauty youtuber#makeup of tumblr#makeup tumblr#beauty community#costume makeup#makeup#beauty#makeup blogger#beauty blog#beauty blogger#girls with piercings#girl with piercings#hazeltail#hazeltailxo#hazeltail official#hazeltailofficial
7 notes
·
View notes
Text
youtube
🧵- I've created a mini tutorial on how to create a cute (GIF) profile for your DeviantArt account! 💗
Here's the one I've made as an example! ✨ You make one as well just watching the tutorial, if you're interested of course. 😄
Have fun! ~🪡
#lydia morphmen#deviantart tutorial#deviantart#profile#2000s nostalgia#nostalgia#2000s#photo edit#glitter gif#my gif#gif#mini tutorial#blog gif#smiley animated gif#resize an animated gif#valentines day#heart#Youtube
2 notes
·
View notes
Text


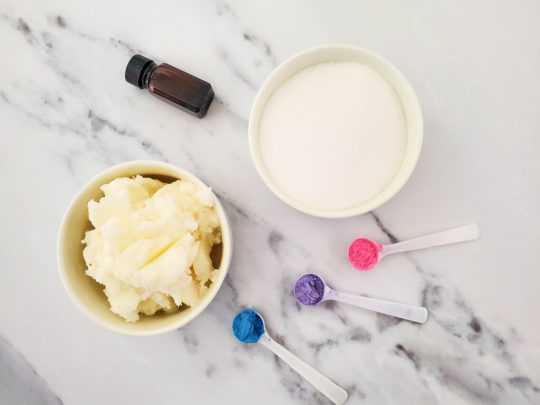

DIY Sugar Scrub
#diy#tutorial#recipe#how to#homemade#gift#sugar#scrub#sugar scrub#essential oils#mica powder#gold#glitter#fun
2 notes
·
View notes
Video
Another watercolors step by step video ! (less shaky I hope) ! Sketch by @scaahart (<< go check !!) made during our 2021 trektober collab’ ! :D
I looooooved using the gold pen in this one ✨🤩✨
59 notes
·
View notes
Text

An absolutely exquisite DIY cosplay skirt – not just the glittery leaf decorations, but fairy lights as well!! I could so see my teenage self going all gaga over this... How-to at Angela Clayton's Costumery & Creations. (Photoshoot of the Christmas Angel costume here.)
#cosplay#DIY#handmade#skirts#outfits#dresses#costumes#winter#white#gold#glitter#glittery#fairy lights#tutorials
2 notes
·
View notes
Text
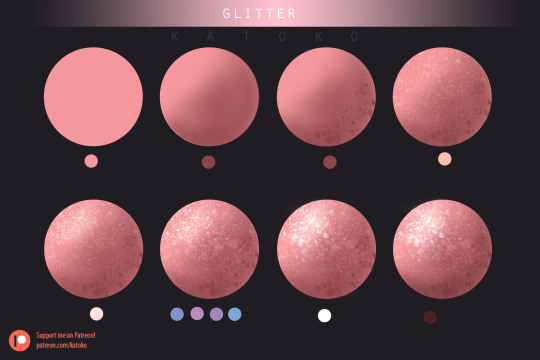
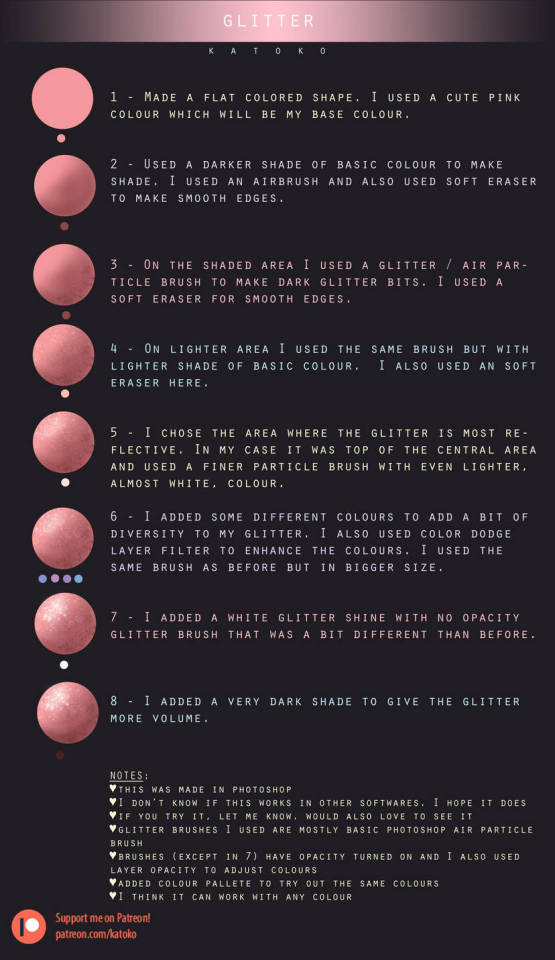
Made a glitter study. Enjoy!
Do you want to get bonus goodies too? Be my patron and receive each month :3
You can find me on:
PATREON: https://patreon.com/katoko
FACEBOOK: https://facebook.com/katokoart
INSTAGRAM: https://instagram.com/katokoart
DEVIANTART: https://deviantart.com/katokoart
NEWGROUNDS: https://katiesapphire.newgrounds.com
TWITTER: https://twitter.com/katokoart
ARTSTATION: https://artstation.com/katoko
REDBUBBLE: https://www.redbubble.com/people/Katoko
PIXIV: https://www.pixiv.net/en/users/51141049
TOYHOUSE: https://toyhou.se/katoko
#digitalart#digitalartwork#digitaldrawing#digitalillustration#digitalpainting#illustration#noai#digital2d#study#glitter#material#texture#tutorial#art tutorial#digital art tutorial
4 notes
·
View notes
Text

OOPS I never saw this comment!! welcome to my "glitter you art or you could use this on other images ig" tutorial
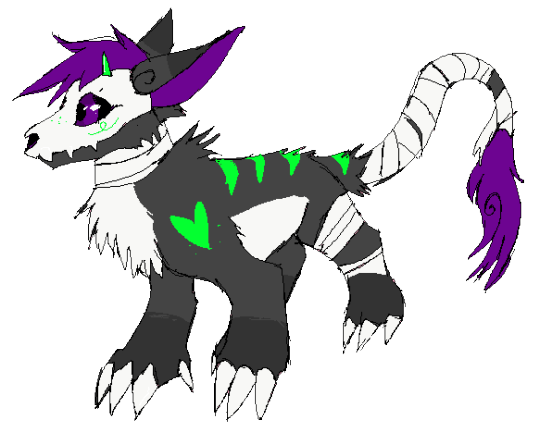
so you get ur picture you're going to glitter and then I open up the site glitterplaatjes.be which has a page called "blokjes" that has lots of these basic glitter gifs that are just little squares of glitter

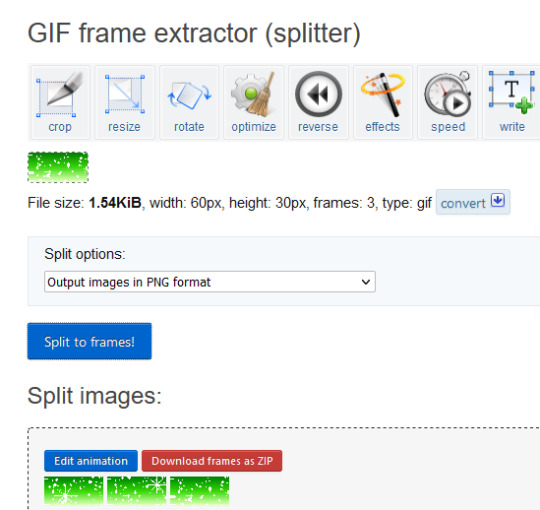
then I head over to ezgif.com and use their "split" tool to make the gif into individual frames and save them. if you're using clip studio make sure to select the option "output images in png format" !
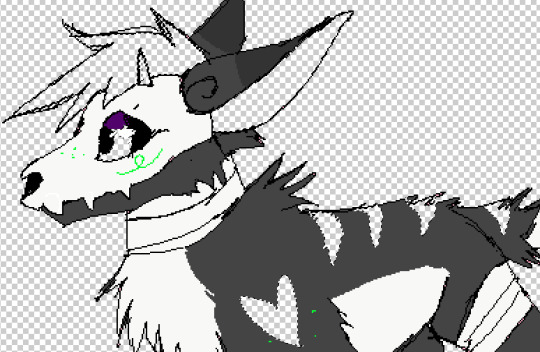
then you open up the image in a program that can handle transparency and erase any colors/sections you want to replace with glitter
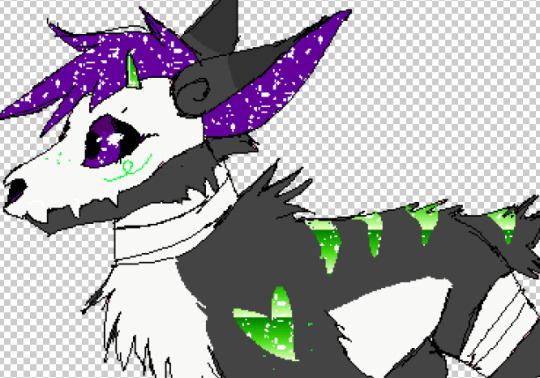
then you start importing the glitter frames. if using clip studio, you can do file>import>pattern from image and it will fill the whole canvas with each frame. if you have the areas you want glittered selected it will automatically crop the glitter to fill that area. you can do layer>rasterize if you need to erase anything!
if using another program you'll just have to copy and paste and fiddle with it until you get glitter where you want it, but it shouldn't be too hard; especially if you only want to cover small areas with glitter
after this you will want to export each frame as a png. basically show/hide each glitter layer. then go back to ezgif and open their gif maker. here you will make your final gif and even make it transparent too! (clip studio and photoshop do not export transparent gifs 😔)
there's lots of tools on this page so you can change the speed of the gif and more. have fun and enjoy glittering!

3 notes
·
View notes
Text
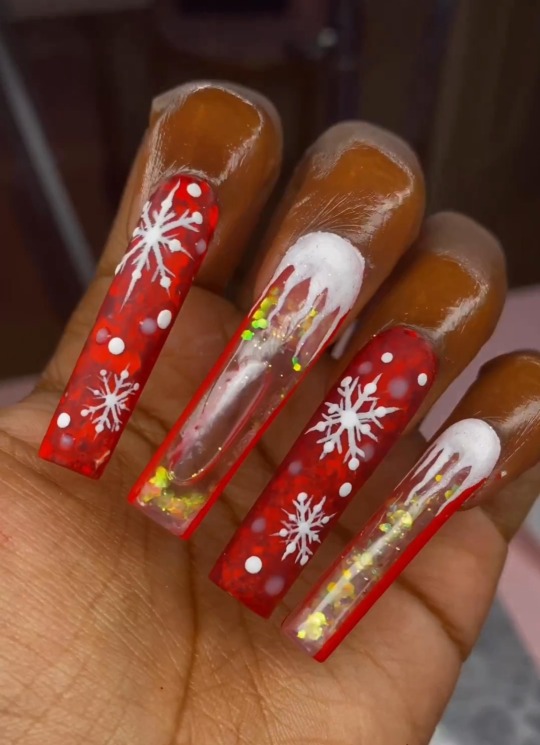

@cstutorialz_
#@cstutorialz_#uploads#christmas#aquarium nails#red#white#glitter#snowflakes#rectangle shape#nails#nail tutorial#process#nail art
41 notes
·
View notes
Photo
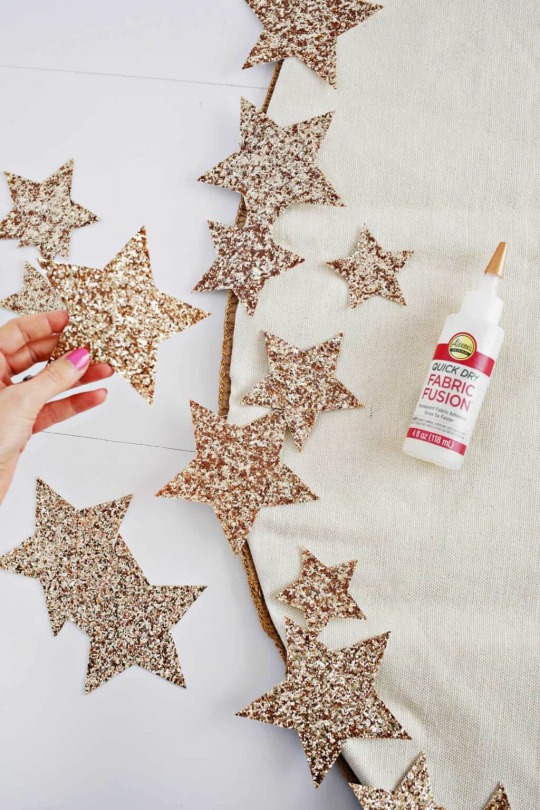
Glitter! Normally I don’t go for it, but in smaller details it can look just right. These bling-y DIY stars decorate a DIY tree skirt, but nothing's stopping you from embellishing a ready-made one, right? By Laura Gummerman at A Beautiful Mess.
#DIY#tree skirts#Christmas#Xmas#handmade#glitter#stars#embellishments#tutorials#white#natural white#offwhite#off-white
3 notes
·
View notes
Last Seen Blogs
lien-da
Mister Sister
bjimix
bjimix

lularoemarystahlman-blog
LuLaRoe Mary Stahlman
callmeantonio
Call me Antonio
smilelikeawolf
This Is A Torch Song