#javascript tips
Text
Last week Heroku announced that they’re discontinuing their free tier and add one. This lead many developers to find alternatives, as heroku’s free plan allowed developers to host a variety of small and demo projects.
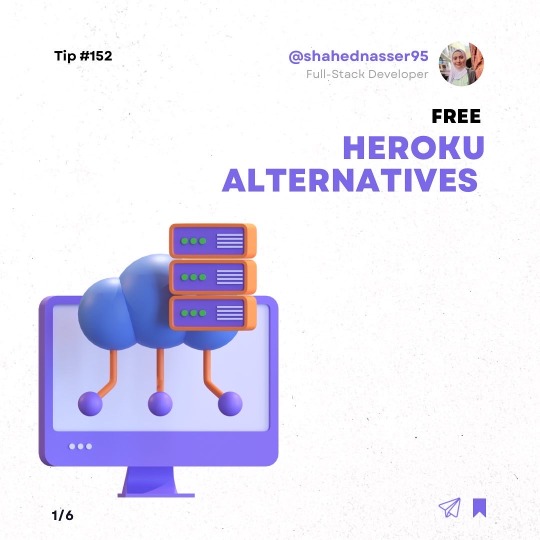
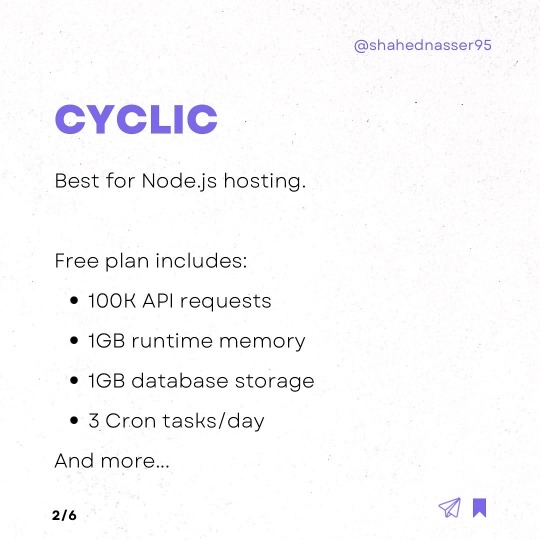

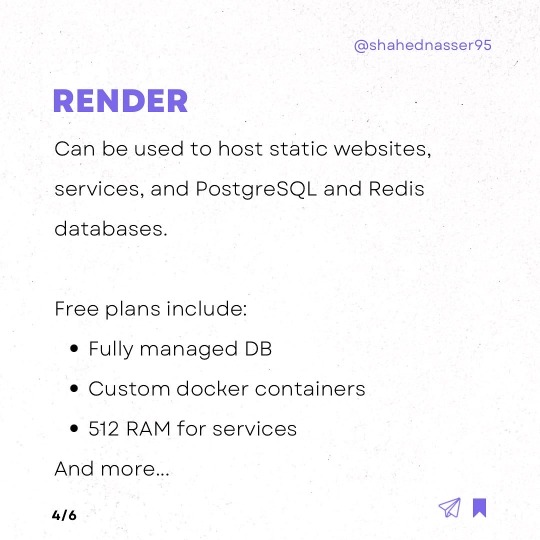
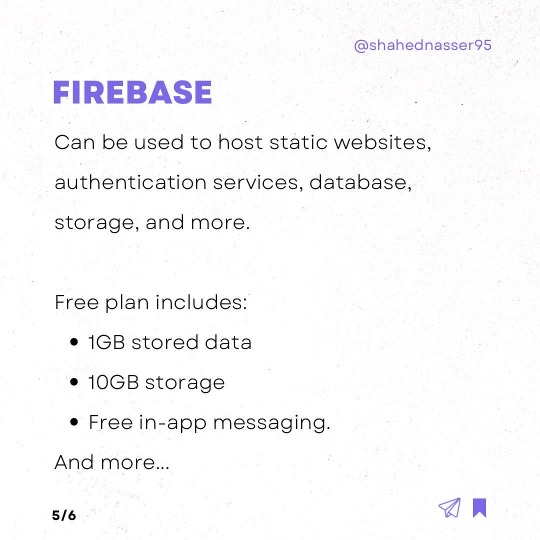

The 4 hosting providers listed here are some of the alternatives available for Heroku. The free plans can generally allow developers to host demos and small projects.
Do you use Heroku? And have you migrated to another hosting after this announcement?
#programming#programmer#coding#developer#software engineering#webdev#css#technology#html#new blog#javascript#javascript tips#linux tips#tips#blogging tips#study tips#life tips#web developers#web development#seo and web design#heroku
222 notes
·
View notes
Text
Convert HTML to Image: A Step-by-Step Guide ✨

Do you want to turn some HTML code you've made that's on your website and have a way to convert it into an image for you to save?
Well, look no further! I too wanted to do the same thing but funny enough, there weren't any straightforward tutorials out there that could show you how! After hours of searching, I finally discovered the solution~!
This is an old tutorial I made 🐼

💛 Set your environment
Before we dive into the conversion process, I'll assume you already have your HTML code ready. What you want to learn is how to turn it into an image file. You should have a good grasp of HTML and JavaScript. For this tutorial, we'll use the following HTML code example:

We won't include the CSS code, as it doesn't affect this tutorial. The JavaScript file (script.js) at the bottom of the body element is where we'll add the functionality for the conversion.
Your page should resemble the following:

As you can see, the "Click me" button will handle the conversion. We aim to convert everything within the div.info-div into an image.
💛 Using the html2canvas JavaScript Library
The html2canvas library allows you to take screenshots of webpages and target specific elements on a screen. Here are the steps to include the library in your project:
The steps to put the library in your project:
Visit the html2canvas website for more information.
Copy the CDN link from here

and include it in a script tag in your project's head tag in the HTML file:

That's it for including the library on the HTML side. Now, let's move on to the JavaScript code.
💛 JavaScript Functionality
Here's the JavaScript code to handle the conversion:

In this code, I want to turn the whole div.info-div into an image, I put it into a variable in const div = document.querySelector(".info-div");.
I also put the button into a variable in const button = document.querySelector("button");
I added a click event listener to the button so when the user clicks the button, it will follow the code inside of the event listener!
You can find similar code like this in the documentation of the html2canvas library:

What is happening here is:
We add the div (or what the element we want to take an image of) into the html2canvas([element]).then((canvas)
Added the image file type url to a variable = const imageDataURL = canvas.toDataURL("image/png"); - You can replace the png to other image file types such as jpg, jpeg etc
Created an anchor/link tag, added the href attribute to imageDataURL
The download attribute is where we will give the default name to the image file, I added "dog.png"
Perform the click() function to the anchor tag so it starts to download the image we created
And that's it!
💛 The End
And that's it! You've successfully learned how to turn your HTML into an image. It's a great way to save and share your web content in a unique format.

If you have any questions or need further clarification, please comfortable to ask. Enjoy converting your HTML into images! 💖🐼
#my resources#coding#codeblr#programming#progblr#studying#studyblr#programmer#html#html css#javascript#neocities#coding tips#html5 tutorial#html tutorial
86 notes
·
View notes
Text
Programming pro tip:
Set your IDE's font to Comic Sans to experience what it's like to use JS
89 notes
·
View notes
Text
Websites to practice Front-End
(22/02/2023)
Today I wanted to share websites to practice your frontend skills.
Front-end is complicated for my head (ask me to solve an algorithm with structure while but not to center a div HUEHHUE).
BUT at the same time I love a well done and coded design/ui. That's why today I want to share resources to help you train
1- Front-End Practice
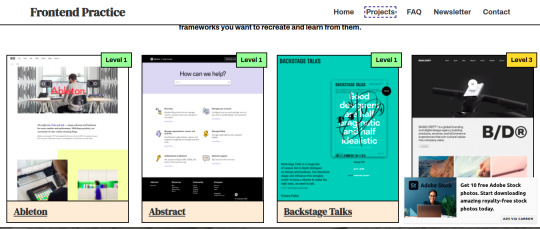
They have 3 levels, beginner, intermediate and advanced. There's no "answer" so you can't copy the code, it's just you trial and error until you get to the template (which really is a website that exists)

One thing I thought was really cool here was that it tells you what you're going to practice the most in the exercise, color palette and search features.
It's very interesting for a front-end not to be dependent on a tutorial, because from what I've seen in interviews, they ask you to make a layout and you won't be able to make one yourself if you don't learn to break down a single layout from the beginning and try and making mistakes until it's perfect.
2- DevChallenges
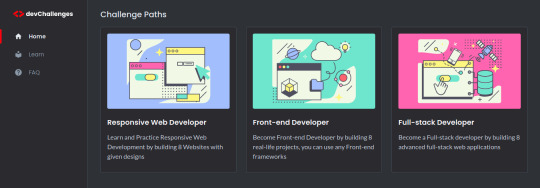
I find the projects not only beautiful visually but also interesting to practice. Here you already have the solutions that other people recommend, but again I think it's best for us to try and make mistakes until we get similar.And it also sorts the levels.
Here an example:
Cool huh? Well, I hope this helps someone who is looking for projects to practice with. We can invest a lot of time trying to make a layout, so having something ready I know helps a lot.
I wish you good studies and a great Wednesday, drink water.
#front end#frontenddevelopment#html css#html5#full stack developer#static website design tools#css3#javascript#reactjs#software engineer#practice#studyblr#studyblog#codeblr#resour#study tips
264 notes
·
View notes
Text
This shit is confusing as fuck
17 notes
·
View notes
Text
While still going through my JS review, I came across Truthy & Falsy, which lead me to short-circuit evaluation, and I was a bit confused at first, but after reading this article above, I understood it.
So. . . just posting this here for anyone that maybe interested. . . ^_^
8 notes
·
View notes
Text
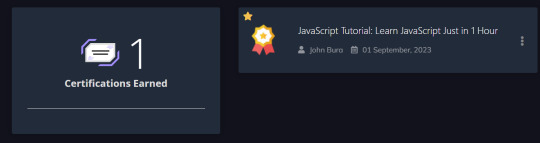
01.09.2023 : it was quite easy
#happy#certification#certificate attestation#javascript#studies#studywithme#study tips#studystudystudy#studyspiration#studygram#study notes#studyblr#study intro post#studyblr intro#student#college#study blog#psychology#psicologia#study aesthetic#study motivation#study#my stuff#study intro#study inspiration#study in Brazil#studies version
4 notes
·
View notes
Text

DID YOU KNOW? 🤔
#programming#webpages#email tips#programming humor#didyouknowthis#css#html tutorial#javascript#amazing facts#webdevelopment#training#placement#programmer
9 notes
·
View notes
Link
Thinking of learning some web development? Read this first!
Our newest blog at SoCraft briefly describes the basics 🌐
HTML, CSS, and JavaScript must be visualised to be understood.
Here, we describe a framework that will help you 🧐
#webdevelopment#web#webdesign#html#css#js#javascript#blog#tips#learn html#learn css#learn javascript#learning
4 notes
·
View notes
Text
the best part about online college courses is when they are somehow less functional than the emergency covid zoom courses your high school ran
#kbitycus talks#pro tip! dont try to learn javascript through an online class & especially not through canvas exclusively#fascinating. absolutely fascinating how every other introduction to (x) class im in has functional and well-made step-by-step tutorials and#this one just doesnt. despite objectively being the most weird shit i have to do this semester
5 notes
·
View notes
Text
#Web development guide#Beginner web development#Web development tutorial#Website creation tips#HTML CSS JavaScript#Learning web development#Step-by-step web development#Web development basics#Building websites#Frontend development#Backend development#Web development resources#Web development for beginners#DIY web development#Web development skills
0 notes
Text
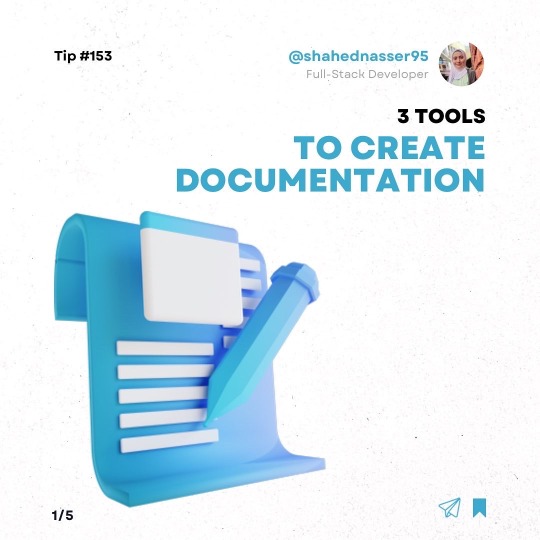
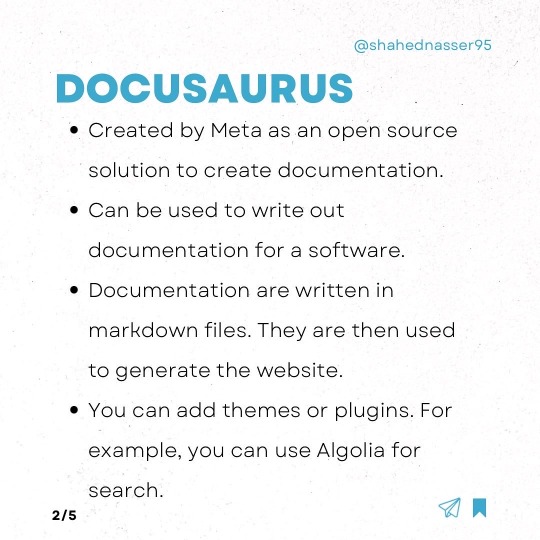
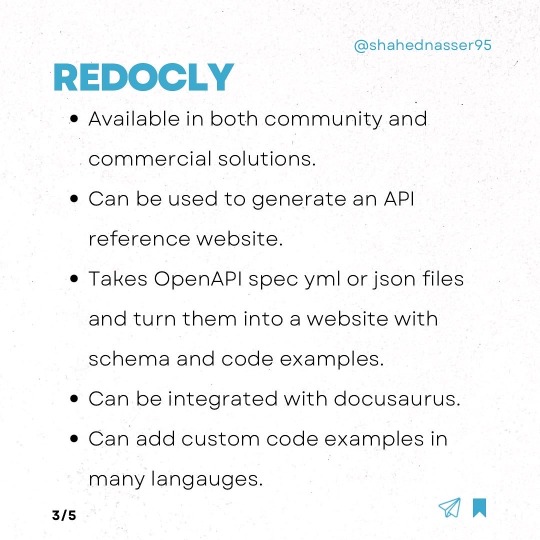
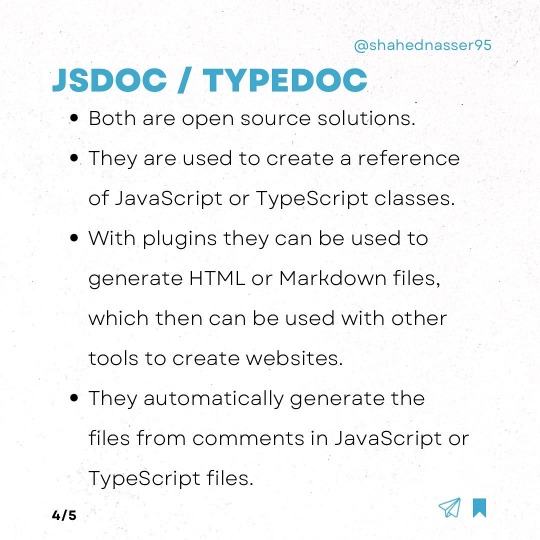
Documentation is an important asset for all developers. There are many tools that allow you to easily create a documentation website and even generate some of it from code. These 3 tools I’ve used personally to create documentation at my job, but there are other tools that you can find online to help you with your specific use case.
#programming#programmer#coding#developer#software engineering#webdev#css#technology#html#new blog#javascript#javascript tips#linux tips#tips#blogging tips#study tips#life tips#web developers#web development#seo and web design
174 notes
·
View notes
Text
Mini React.js Tips #1 | Resources ✨
I thought why not share my React.js (JavaScript library) notes I made when I was studying! I will start from the very beginning with the basics and random notes I made along the way~!
Up first is what you'll need to know to start any basic simple React (+ Vite) project~! 💻
What you'll need:
node.js installed >> click
coding editor - I love Visual Studio Code >> click
basic knowledge of how to use the Terminal

What does the default React project look like?
Step-by-Step Guide
[ 1 ] Create a New Folder: The new folder on your computer e.g. in Desktop, Documents, wherever that will serve as the home for your entire React project.
[ 2 ] Open in your coding editor (will be using VSCode here): Launch Visual Studio Code and navigate to the newly created folder. I normally 'right-click > show more options > Open with Code' on the folder in the File Explorer (Windows).
[ 3 ] Access the Terminal: Open the integrated terminal in your coding editor. On VSCode, it's at the very top, and click 'New Terminal' and it should pop up at the bottom of the editor.


[ 4 ] Create the actual React project: Type the following command to initialize a new React project using Vite, a powerful build tool:
npm create vite@latest
[ 5 ] Name Your Project: Provide a name for your project when prompted.

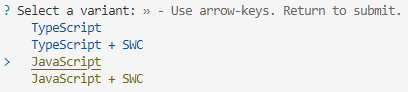
[ 6 ] Select 'React' as the Framework: Navigate through the options using the arrow keys on your keyboard and choose 'React'.

[ 7 ] Choose JavaScript Variant: Opt for the 'JavaScript' variant when prompted. This is the programming language you'll be using for your React application.
[ 8 ] Navigate to Project Folder: Move into the newly created project folder using the following command:
cd [your project name]
[ 9 ] Install Dependencies: Execute the command below to install the necessary dependencies for your React project (it might take a while):
npm install

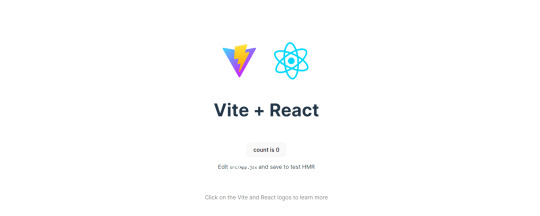
[ 10 ] Run the Development Server: Start your development server with the command (the 'Local' link):
npm run dev

[ 11 ] Preview Your Project: Open the link provided in your terminal in your web browser. You're now ready to witness your React project in action!
Congratulations! You've successfully created your first React default project! You can look around the project structure like the folders and files already created for you!
BroCode's 'React Full Course for Free' 2024 >> click
React Official Website >> click
Stay tuned for the other posts I will make on this series #mini react tips~!
#mini react tips#my resources#resources#codeblr#coding#progblr#programming#studyblr#studying#javascript#react.js#reactjs#coding tips#coding resources
95 notes
·
View notes
Text

Discover the Ultimate Web Development Experience! 💯✨ TechLogic Softwares brings you top-notch solutions to boost your marketing game. Check out our irresistible offers!
#website#marketing tips#online marketing#smm services#webdevelopment#seo#webdesign#development#software#php#c++#javascript#phpdevelopment#html#html css#social media marketing#seo services#digital marketing#html5#html5 css3#htmlcoding#frontend#code#css
0 notes
Text
tumblr what the fuck is a reblog graph
#why do i have that and not a response to the 20 sideblogs i asked for enabled javascript on#i will send additional requests tumbs ik u only have like 90 employees now but i'll do it#if i buy the lil icon thingies will u reply to me tumbs#bc i do want the ghost and the crab#i have mass amounts of guilt but i do not have shame so#i thought i somehow accidentally enabled tipping on posts and was like wait i gotta turn that off#no its a reblog graph?? WHAT IS THAT TUMBLR
1 note
·
View note
Last Seen Blogs

studie-s
do your best

markeve
here we go

artcontests
Art & Photo Calls

islandbartann-der-blog
From Scratch

k-20-legend-of-the-mask
怪人二十面相