#fox bakes
Text
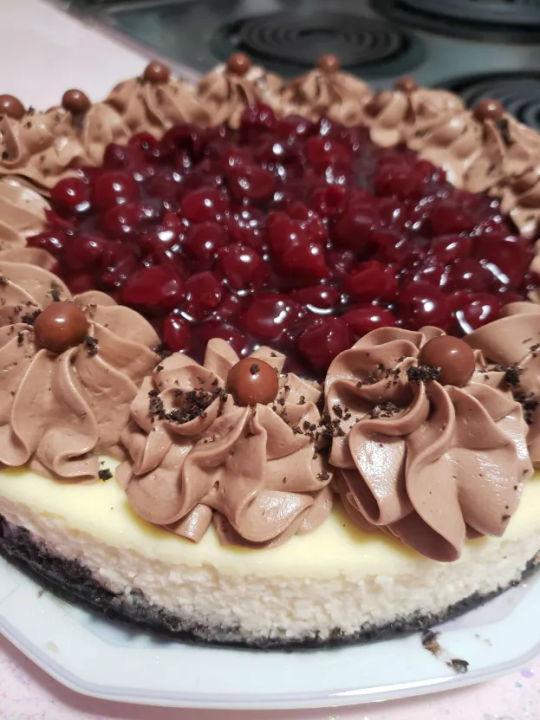
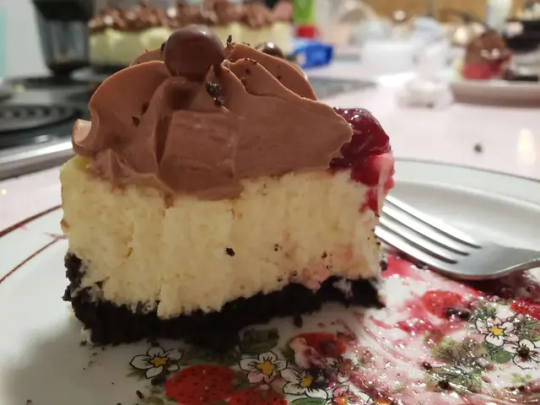
Rage Cheesecake with Oreo Crust, Whipped Chocolate Ganache Frosting, and Home-Grown Tart Cherry Topping
I took recipe-bits from all over and changed them into something that sounded more like what I wanted, so here's what I did today instead of committing a felony!
RECIPE BEHIND CUT
Oreo crust part:
* 25 Oreos
* 5 tablespoons of melted butter
* Pan--pie pan or springform, depending on how deep a cheesecake you want. This makes a nice, not-too-deep cheesecake in a nine-inch springform; it would be Too Much Filling in a pie pan, which would mean you have extra, and that's always fun too. An eight-inch springform is probably perfect.
1. Preheat oven to 350.
2. You may eat TWO OREOS. Crush the remainder. I have the best time with this when I use a food processor, but if you are *particularly* spirited today, this is a good place to take out some aggression. Just pulverize the things, filling and all, until they are all reduced to the consistency of sand.
3. Add melted butter and mix until it's like *wet* sand.
4. Put buttery chocolate sand into your chosen cooking dish. I use a little jar and push push push pat pat pat until it's all nice and level from the center of the dish to the edge and has no holes.
5. Bake for eight to twelve minutes. You want it to still look a little moist. Do not overcook!
6. Remove from oven and let cool. Don't move the pan around too much before it's cool or you risk fracturing the crust.
Cheesecake part:
* Two packages of cream cheese, room temperature unless you like cream cheese chunks in your cheesecake. No judgment, some people are into that.
* 2/3C white sugar
* 3 eggs
* 3 cups of sour cream (this is a very moist cheesecake!)
* Vanilla to taste
1. Preheat oven to 325F, that's 25 degrees LOWER than for the crust.
2. Cream sugar and cream cheese until smooth.
3. Add eggs, one at a time, mix until just blended.
4. Add all sour cream and vanilla, mix until just homogenous. Don't overmix or you get weird dry pillowy stuff instead of nice dense cheesecake.
5. Cook in prepared crust for approximately 50 minutes, until it's set at the edges but a little jiggly yet in the middle.
Note: Properly you'd do this in a bain marie, but I don't have one, so I wrap the bottom of my springform pan in aluminum foil and set the whole kit and kaboodle into a sturdy cookie sheet, put all that into the preheated oven, and pour water into the cookie sheet once it's safely on the oven rack. If the cheesecake starts to overcook on the top before the center is set, cover it with aluminum foil.
6. Remove from oven; let rest in bain marie/rigged pan for ten minutes before removing springform pan to clean towel. Let rest *there* until it's cool enough to put in the fridge. Cover and chill for two to four hours.
Cherry topping part:
* Sour cherries that have been frozen since last year, or a bag of cherries, or fresh cherries, whichever, approximately 4.5 cups which is too many for just this cheesecake but it's nice to have around anyway
* Granulated sugar to taste
* Corn starch
Or just pick up a can or two of cherry pie filling, in which case you can skip this whole step.
1. Defrost cherries. If you don't do this in a pot, there's a good chance that they will leak precious juice all over your clean counter. Don't be me; thaw that stuff in the pot you'll heat it in.
2. Once they're not a singular ice block but instead a bunch of big ice chunks, turn the temperature on low, maybe around a 2.
3. Once the cherries are separate from each other, add sugar to taste. This changes a lot depending on your cherries' tartness; I eventually used nearly two cups of sugar for around 4.5 cups of cherries. Usually I'd use a good bit less, but they're very tart this time.
4. Cook and cook and cook until the liquid is reduced by about a third.
5. Add corn starch. For those measurements I added about a tablespoon and a half. Remember to make it a slurry before pouring it into the pot; you can either do this with a little water, or you can spoon out some of the cherry syrup (don't burn yourself!), mix that into a little bowl along with the corn starch, and then pour it all into the pot. Bring back to a good bubble for four or five minutes, then remove from heat and allow to come to room temperature.
Whipped chocolate ganache part:
* 1 part heavy cream to 1 part chocolate (I just use Toll House. Everyone says not to do that. It's been fine).
1. Put the chocolate in a heatproof bowl.
2. Warm the cream on the stove until it's juuuust about to start bubbling. Stir frequently so it doesn't get a skin.
3. Remove from heat, pour into heatproof bowl over the chocolate.
4. WALK AWAY. I'm serious. Don't touch it. Don't poke at it. Do not, do NOT, attempt to stir it. Walk away.
5. After five minutes, come back and stir, stir, until it's all one thing. It should be like a very good, very thick chocolate syrup. You *can* just eat this, with a spoon. You can pour it over a cake, or dip strawberries in it. Chilled right as it is, it is a dessert on its own.
6. Let it cool to room temperature.
7. Come back and use your hand mixer or stand mixer to whip it up. This should get to a pipeable consistency; if it doesn't, you may need to incorporate powdered sugar. If you add butter and powdered sugar, you'll get a very stable buttercream.
Finishing part:
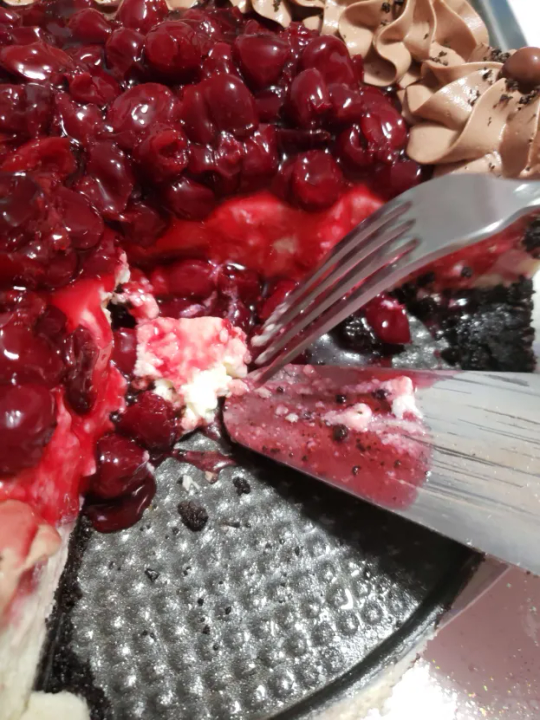
1. Remove springform edge from nice cold cheesecake.
2. Pipe or dollop whipped ganache in ring atop the cheesecake.
3. Fill the ring with cooled cherry filling.
4. Garnish further if you'd like. I used decorative Sixlets and some more crushed Oreo.
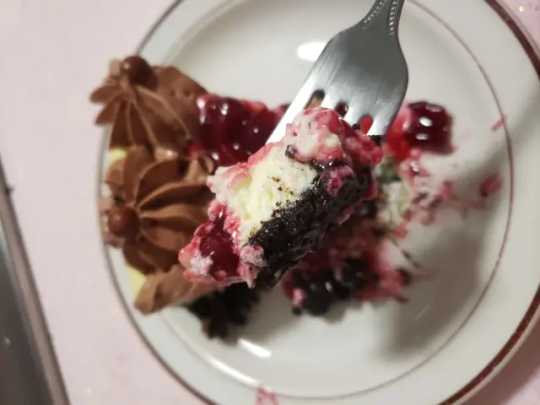
5. Finished!
#baking#fox bakes#dessert#cheesecake#so so angry still#this was not a sufficient amount of cooking#I may have to hunt someone specific for sport
71 notes
·
View notes
Note
If your taking requests, I liked to see your sonic and tails if they were closer to their actual animal size difference.
January 9 2024
Doodle Request #5!
You have no idea what you've done. This doodle request has made me spiral into making my own self indulgent au.


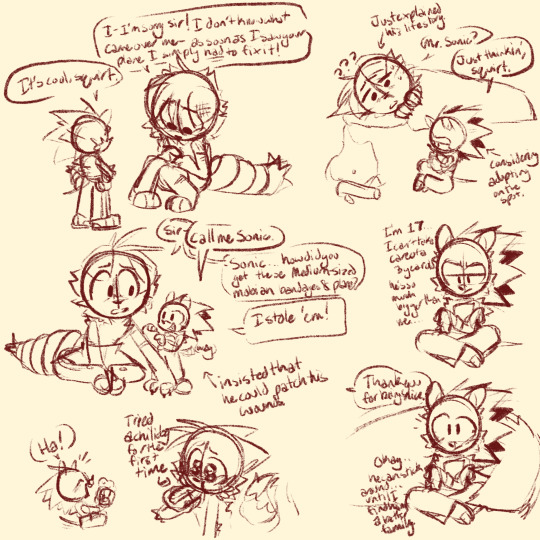
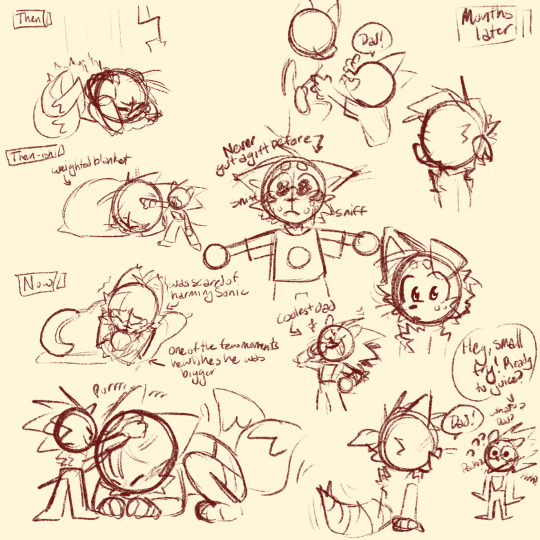
I've never more times in my life used 'cause I want to' as an excuse for something. This entire au is just self indulgent fluff. At first, I looked at the request and went 'oh, they probably don't realize how small hedgehogs are or how big baby foxes are.' and then I was like 'okay, but Mobian'. AND THEN I was like 'okay, but it'd be funny if Sonic was like- almost an adult in this drawing.' and it just spiraled into this. I want to make so many more doodles of this au FUCK.
So everything isn't set in stone yet, aside form their ages I think.
Amy is 19, she's studying to become a teacher. She works at a daycare.
Sonic is 22, he picks up odd jobs where ever he travels in his van.
Tails is 8, he also picks up odd jobs, but more mechanically centered ones (and way less jobs because Sonic will not allow the kit to overwork himself).
Knuckles is 23, he guards the Master Emerald still, but he also is a pro at arts and crafts (mostly pottery).
I know I wrote 'plane' in the doodles (if you can even read them, my handwriting is a nightmare there), but I was originally thinking van that Tails later modifies into a plane-van combo.
Do they have powers? Yes. Because I want them to. Are there magical gemstones? Yes. Because I want there to. Is Eggman trying to take over the world? Eh, I don't think so. I like chill vibes, plus how is Sonic gonna beat up a Motobug if he isn't even as tall as the tire? Why are they wearing clothes? Because I want them to! Why is everyone but Tails aged up? BECAUSE I WANT THEM TO (and it's funny to me).
Sonic and Tails live in a van (that he stole) and travel around. Sure, Sonic has super speed (he's not afraid of showing it off), but he just likes driving (he had to diy an entire system just so he could drive). Plus, it's fortunate that he stole that van, because carrying around supplies needed for a toddler already twice your size when you met them is definitely not light.
#sonic the hedgehog#dadnic#miles tails prower#tails the fox#amy rose#knuckles the echidna#sonic fanart#sonic au#doodle request#I wanna draw more of this so bad and continue baking with this idea. But it's so self indulgent I'm cringing.#Doodling all of these made me so giddy wtf??#I have no idea what to call this au.#I drew all of these while half asleep- I couldn't sleep until I got those down.#Roadtrip!Sonic AU
526 notes
·
View notes
Text

By muslisha
#cookies#baking#autumn#fall#cozy#cozy aesthetic#cozycore#cozy autumn#warm and cozy#hygge#leaves#autum colors#autum vibes#autumn aesthetic#fall aesthetic#fall season#fall vibes#autumncozy#autumn cozy#fox#macaroons#pumpkin
688 notes
·
View notes
Text
Holiday Preparations
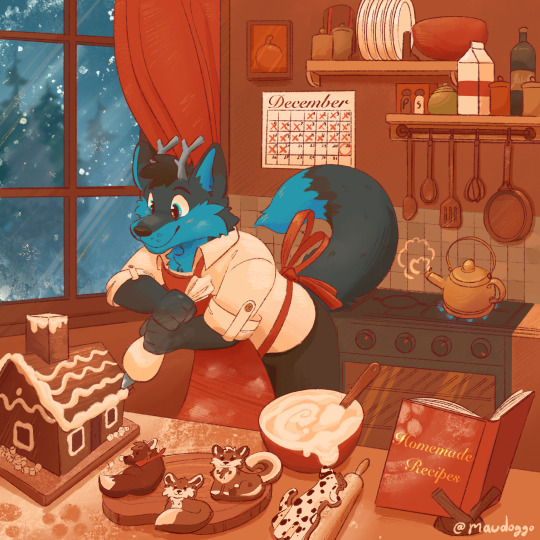
#ych commission#ych art#furrydrawing#furry art#gingerbread cookies#gingerbread house#animal cookies#holidays#winter#kitchen#baking#antlers#fox#december#homemade
491 notes
·
View notes
Text
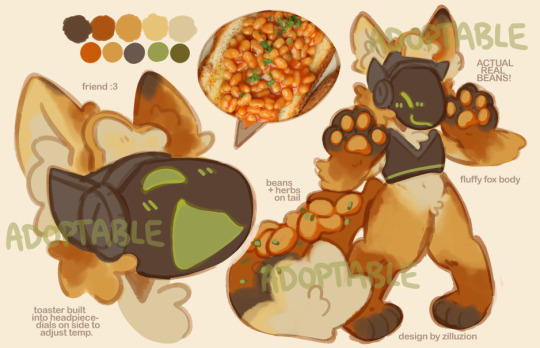
BAKED BEANS TOASTER
this guy is up for adoption on my kofi :3
#zilluart#furry#digital art#furry art#protogen#proot#toaster#protogen art#protogen adopt#adopt#adoptable#beans#baked beans#beans on toast#fox#fox furry#fox oc#oc#kofi adopt
454 notes
·
View notes
Note
i love how you draw steve rogers with all my heart aahh thank you so much for sharing your beautiful art with us 🥰
Thanks so much for saying so! I love drawing Stoben Von Slutcakes sfm. Such a versatile beef bourguignon 🐣
#fresh baked buns ready for spoiling#silver fox prepared to destroy#steve rogers#ask#captain america#my art
227 notes
·
View notes
Text
Buck's love is loud. It's acts of service that speak to the heart of the problem. It's rapt attention and unrelenting concern. It's trying to rip through forty feet of wet earth screaming your name. It's crawling across pavement into danger to drag you home safe. It's prodding at the issue until you let him help. It's breaking down doors to get to you.
Eddie's love is quieter. It's slowly letting walls down, easy trust, accepting help that feels for the first time like it's for instead of in spite of. It's complete faith that you'll keep his son safe. It's fast forgiveness and gentle pushing in the right direction. It's telling you how much you mean to him, not in the moment he doubts that you know, but after he's collected himself enough to say it calmly and clearly.
But then Buck gets quiet. So Eddie gets loud.
#this is the seeds of something but i 1) have never written and 2) do not have the time to start writing rn#so have my half baked non-lyrical thoughts#'talk to me' just really hit me#911 fox#buddie#911 spec#perhaps ?#bean brain
854 notes
·
View notes
Text
Chris, back from summer camp: Don't tell me you can cook now, Dad.
Eddie: Hey, I made a cake once!
Buck: It was very good.
Eddie: Really?
Buck: Don't make me lie twice, Eds.
#911 fox#buddie#911 buddie#quotes#incorrect quotes#incorrect buddie quotes#incorrect 911 quotes#911 incorrect buddie quotes#911 incorrect quotes#911#911 abc#evan buckley#eddie diaz#buck x eddie#meme humor#baking#i really do think eddie can bake#and cook#but this was too entertaining#christopher diaz is a national treasure#christopher diaz has two dads#christopher diaz
152 notes
·
View notes
Text
Sonic having unexpected bits of secondhand expertise that he gets from his friends:
His coding skills wouldn't last a single second against anyone actually competent but he can hack Shadow's Netflix password every time it changes.
He knows how to brew a perfect cup of tea and also how to bake exactly one (1) cake.
Around the specific latitudes that Angel island tends to float around in he goes looking for a particular kind of edible plant that a certain someone showed him how to identify. He likes to snack on it when he's bored.
He's able to estimate the value of a piece of jewelry based off the quality of the gem. Knows the difference between a 'karat' and a 'carat'.
He can look at bullet holes and have a decent guess at the caliber of the gun that shot them. He could also, in a pinch, fully disassemble a HK45 Tactical pistol and put it back together again.
Fishing. You get the idea.
#sonic#sonic the hedgehog#tails#tails the fox#amy the hedgehog#amy rose#rouge the bat#shadow the hedgehog#Big the cat#Sonic likes listening to people infodump :)#tails and rouge are pretty self-explanatory but all the rest of his friends do it too#amy either casually chats about baking or gives hellacious rants about current climate change politics#knuckles LOVES explaining his day-to-day food prep routines on angel island if given the chance. he loves his island and all its plants#and shadow explains how everything in his pistol functions as he disassembles it to clean it after a day at the range#please feel free to add more if you want!!
863 notes
·
View notes
Text
Andrew and Renee probably started baking together when they grew old instead of sparring and that worked up amazing, safe to say Neil is very happy to taste everything they make.
#i can imagine them sharing recipes on the phone when they can't see eachother#andrew bakes cakes for all the foxes and the kids birthdays#renee does a great potato bread#thanksgiving at renee's patch up the monsters a little#aftg#all for the game#aftg brainrot#nora sakavic#andrew minyard#neil josten#andreil#renee walker#andrew and renee's friendship >>>#they probably bake so much that they can bring the food to shelters and make a lot of people happy#specially kids
66 notes
·
View notes
Text
Gen's Soft Browned-Butter Rum Vanilla Chocolate Chip Cookies
This is really for everybody, but I'm putting it up at last 'cause @sounddesignerjeans requested the recipe. I have been making chocolate chip cookies for thirty years, I was making them when I was too young to have been allowed near an oven by sane parents, but it wasn't until fairly recently that I was really happy with the recipe. I want cookies that are soft and stay soft, but that are chewy and not cakey; that have a lot of flavor instead of just being overwhelmingly sweet; that aren't too much trouble to make in terms of tools, and that are entirely made up of stuff that the average American probably has in their kitchen cupboards.
Here's your classic flatlay of ingredients:

2C plus 2TBSP all-purpose flour
2 TBSP corn starch
1/2tsp baking soda
1tsp kosher salt OR 1/2 tsp fine table salt
1C brown sugar (light or dark)
1/2C white sugar
1C butter (two sticks/16 TBSP. Must be butter--I don't know anything about soy or nut spreads, but margarine absolutely will not work for this, unfortunately)
2 eggs, room temperature
Vanilla to taste (anywhere between 1tsp and 1TBSP is usually the sweet spot)
Chocolate chips to taste (Average is 1-2 cups, but live your dreams! I like my cookies a little less chocolatey personally, but this is absolutely up to you, anything under three cups shouldn't overwhelm the dough to the point that it doesn't cook right, though that would be Way Too Many for me. I'm usually at about a cup or under.)
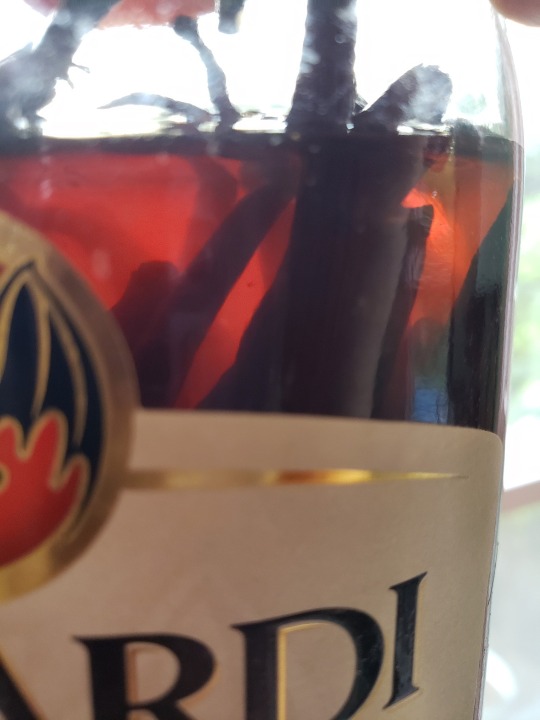
A couple of notes: this recipe really does work best if the eggs and chocolate chips are room temperature, but the butter can start from frozen if that's what you have. Take a half-cup measure and use that to scoop flour into your cup measure, and then scrape, don't compress, until the flour is level across the top of the cup. And lastly--ANY vanilla will do, but I am hugely privileged to be able to say that the Bacardi there has been transformed to vanilla extract by a particularly enterprising kendo student of mine, I'm not just pouring straight rum into the cookies (though that might be interesting)
Also, please allow me to introduce you to Fork!
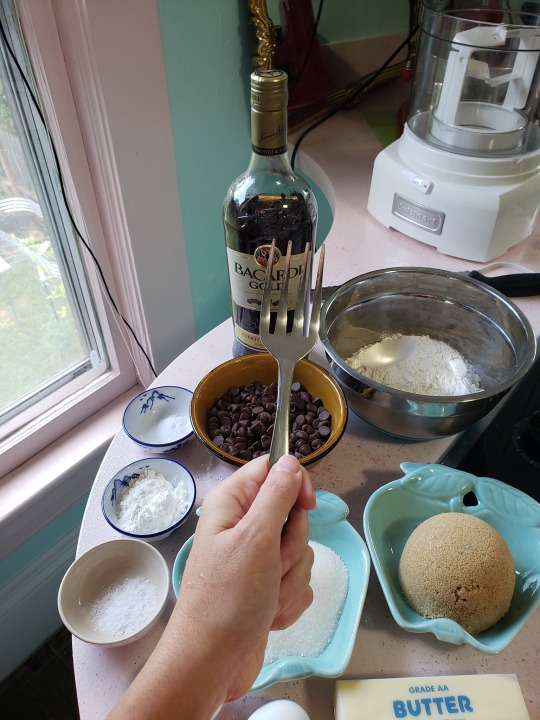
Fork is a stalwart friend. When I moved to be with the Magical Flying Husband, he was somewhat horrified by my Poverty Child, "This table fork and butterknife are all the tools I need for my day-to-day household existence" ways, and got me Fork as a present so that I would leave the silverware alone. Fork can handle a dense boiled potato and a silky buttercream with equal aplomb, not bending or transmitting too much heat up into my hand. I highly recommend Fork. But for this recipe, a hand mixer will also do, as will a table fork if that's what you have.
(The rest of Part 1 of this recipe under the cut:)
If you have two bowls, put the dry ingredients (flour, corn starch, baking soda, salt) into the smaller one, and both sugars into the larger one. If you only have one bowl, put the sugars into it and let the dry ingredients wait their turn.
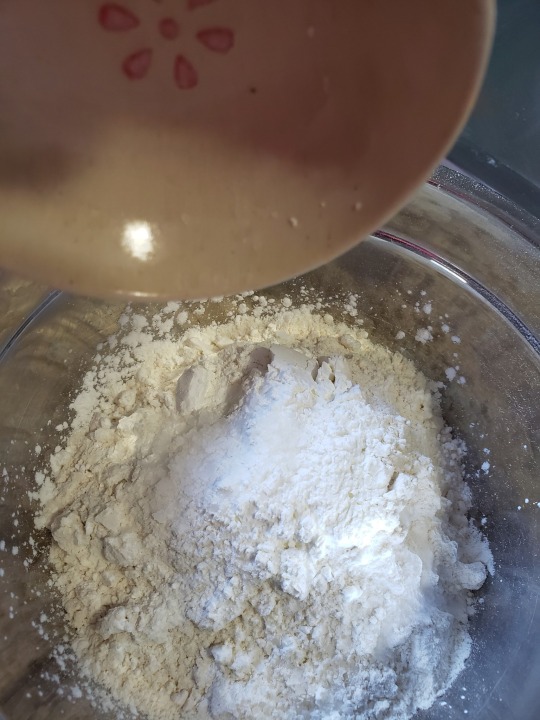
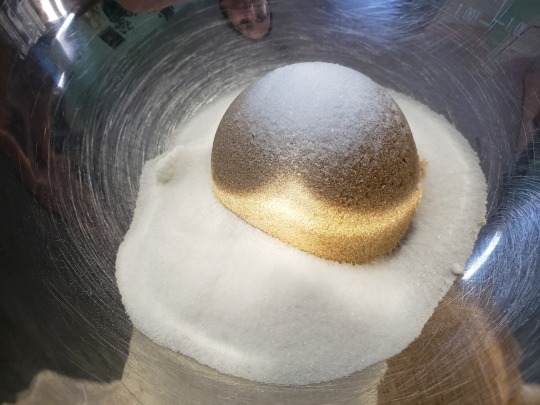
When I was a kid, I used to imagine that the brown sugar was a castle keep in deep winter, and the white sugar the snow that hemmed it in.

Get a little pan onto the stove, and pop both sticks of butter in it to melt.
The butter will start off bright, but it will pretty quickly separate into liquid and solid; you must not leave it alone at this point, this is the most eyes-on-it portion of the game here. Take Fork, or a fork, or a whisk, and stir, stir, every few seconds.

The milkfats will sink to the bottom of the pan. Stir, stir. The milkfats will get sticky; don't let them cling to the pan, keep them in motion.

Pretty soon the butter will start giving off a lovely chestnutty smell, and the milkfats at the bottom of the pan will turn a darker color. Take the pan off the heat and continue to stir for another thirty seconds or so. If you leave it on the heat and stir now, the fats can easily burn; if they burn, you need to start over, there's no salvaging it. So better safe than sorry.
Carefully pour the butter over your sugars, making sure you get all those delicious browned bits in there, and stir stir stir! Don't burn yourself--but it starts cooling off immediately as the sugars dissolve into cooling liquid. I use Fork for this, but you can use a strong whisk or a hand mixer.

Once the sugars are completely dissolved and mixed, it will look kind of like a grainy caramel. Let it sit until completely cool, somewhere around fifteen minutes. Maybe take this time to go put up a Tumblr post about your delicious cookies.

(Part 2 incoming shortly)
172 notes
·
View notes
Photo

Italian Wedding Cookies
#italian wedding cookies#snowballs#cookies#Fox#dessert#baking#recipe#almond flour#nuts#almond#owlbbaking
347 notes
·
View notes
Text
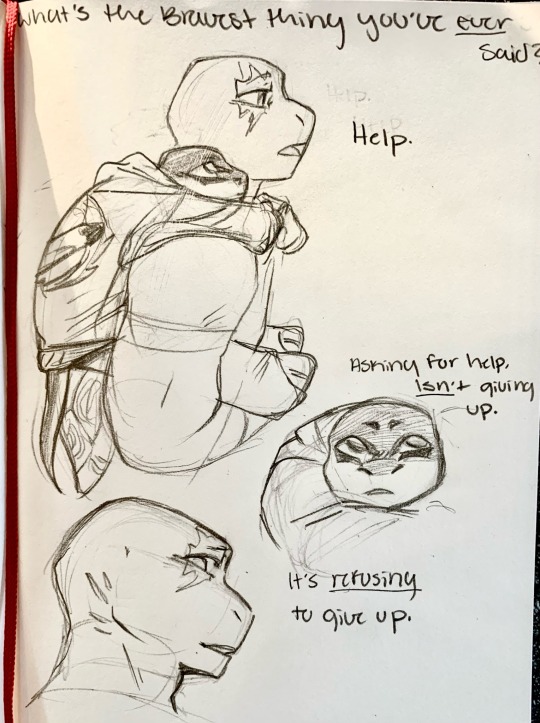
Shell Shocked au
Raphael has a lot of experience when it comes to asking for help. He’s come a long way from 15.
#shell shocked au#tmnt 2012#2012 tmnt#rottmnt#teenage mutant ninja turtles#rottmnt donnie#tmnt 2012 raph#THIS FUNKY MOVIE ABOUT A BOY A MOLE A FOX AND A HORSE IS KILLING ME#Raphael definitely speaks from experience#both from himself and his brothers#he wants Danny to know that it’s ok to ask for help#it’s doesn’t mean you’re weak because of it#Biscute baked#Biscute dough
443 notes
·
View notes
Note
(1/4) It's incredibly funny imagining the skin stealers son from John's twin's pov. Like... This incredibly shady guy shows up with the kings entourage and immediately seeks you out to deliver you an illegal letter supposedly from your brother. You poke around and find out that he IS a messenger, but he's also a member of the late wake and is on the kings own council. He wants to meet your mom. Massive amounts of shady.
There were five parts to this and I can't post the rest because SPOILERS but I need you to know how hard I laughed. A+ five-part John's Twin POV fanfic, I'm saving them in my inbox forever.
#If you feel inspired to do John's POV after the final chapter#I would be DELIGHTED#but no pressure#John's just having such a more relaxed and rewarding book than his twin#John's Twin is developing an Aaron-associated eye-twitch meanwhile John is whistling while he bakes#fox's tongue and kirin's bone
51 notes
·
View notes
Text
Thought for Valentine's day: what's more romantic than going out for dinner? Cooking that dinner yourself.
Neither Fox, Breha or Bail know how to cook.
#Bail maybe learned a little bit but he first grew up as a noble#and then he married the queen#and then started to work as the senator#he doesn't cook for himself#Breha? absolutely not#she can probably bake a little#Fox? Has never touched a kitchen knife#barely knows how to make caf for himself#90 percent of his food comes in a wrapper#these three on a deserted island would be DONE#sw#tcw#Breha Organa#Bail Organa#Commander Fox#bail/breha/fox
35 notes
·
View notes
Text
It's hilarious that Wymack took the time to prepare a speech to convince Andrew to split his family into two dorm rooms, but for the final championship match against the Ravens, he showed up with an unrehearsed speech that he came up with in an hour (that Abby literally forced him to write).


#seems he has priorities#this is hilarious#a=b and b=c so a=c#wymack essentially had more faith in the foxes beating the ravens without further encouragement than in andrew willingly splitting his fam#love that#aftg#all for the game#david wymack#coach wymack#andrew minyard#nora sakavic#his half baked pep talk was absolute fire thoguh#tbh i wanna hear the speech he prepared for andrew#the king's men
39 notes
·
View notes
Last Seen Blogs

huneykipp
⭐ HuneyKipp ⭐

kieralalala
Chasing the rockets.

gvftea
gvftea

tokucosplay
Tokusatsu Cosplay

mushfiqur
Untitled